This tutorial is based on the really useful wiki pages on the Espurna Firmaware Github repo. These notes are an abbreviated form to help connect to the CE-Lab infrastructure. More detail is over on the Espurna pages.
To complete this task you will need:
- sonoff pow r2
- USB to TTL cable (FT232)
- esptool for flashing the firmware
- MQTT broker running
- plug, cable, socket
Download binary from wiki page Download Espurna Binaries or directly from the releases page
Download esptool if you don't already have it Download esptool
The project itself was inspired by this DOESLiverpool talk
Connect the TTL cable to the Sonoff break out pins:
- GND-GND
- VCC-VDD
- TXD-ERX
- RXD-ETX
[photo of sonoff with cable attached would be handy here]
Open a terminal session and work out what port the USB device is on so that you can enter it into esptool.py script as per below. Then unplug the USB to remove power to the Sonoff.
Next, press and hold the central button on the Sonoff for 2-3 sec while powering up - this gets the device into flash mode. Then run the following from a terminal session to erase the flash.
esptool.py --port /dev/tty.usbserial-AD0JIOIN erase_flash
Once complete. Repeat the sequence to get it into flash mode again; press and hold button for 2-3 sec while powering up; and then run the following script using your appropriate paths to ports and downloads of binaries:
Once flashing is complete unplug and replug the USB to restart the device. You should now have a Sonoff device with ESPurna running. Next step will be to log into it and configure to push to CE-Lab.
The setup notes are based on the configuration on the Espurna wiki which shows how to initialise from the SoftAP that presents itself by default when ESPurna is powered up.
Open up your network setting and you should see a new device in you wifi list called "ESPURNA-XXXXXX" - connect to that network using "fibonacci" as passphrase.
Once connected browse to "http://192.168.4.1"
When asked for credentials, enter "admin" as username and "fibonacci" as password.
Once logged in change the password according to CE-Lab guidance.
You will then need to re-authenticate to continue the configuration.
First step is to configure Wifi - select the wifi option in the left menu, scan for networks and then click "Add Network" to enter SSID and password.
To configure the device first change the hostname in the General tab.
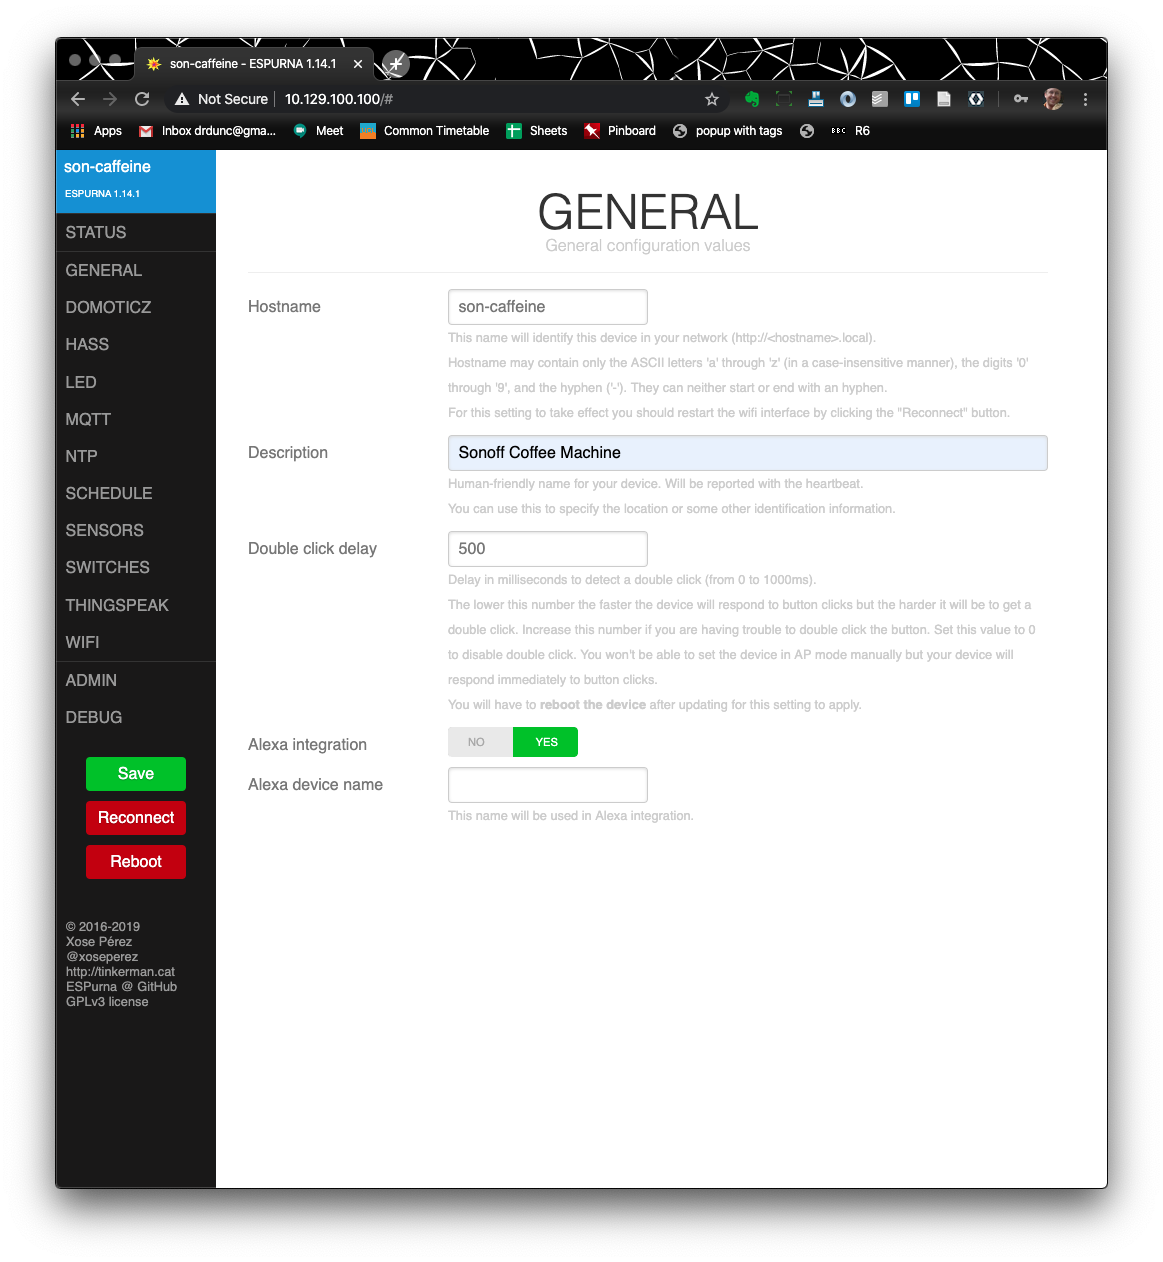
Next add the device to the CE-Hub wifi network (you will need to add in wifi password here).
If you are not connecting to CE-Hub and are not sure of the SSID to connect to then do a scan to see which AP's are available. Remember SSID's are case sensitive.
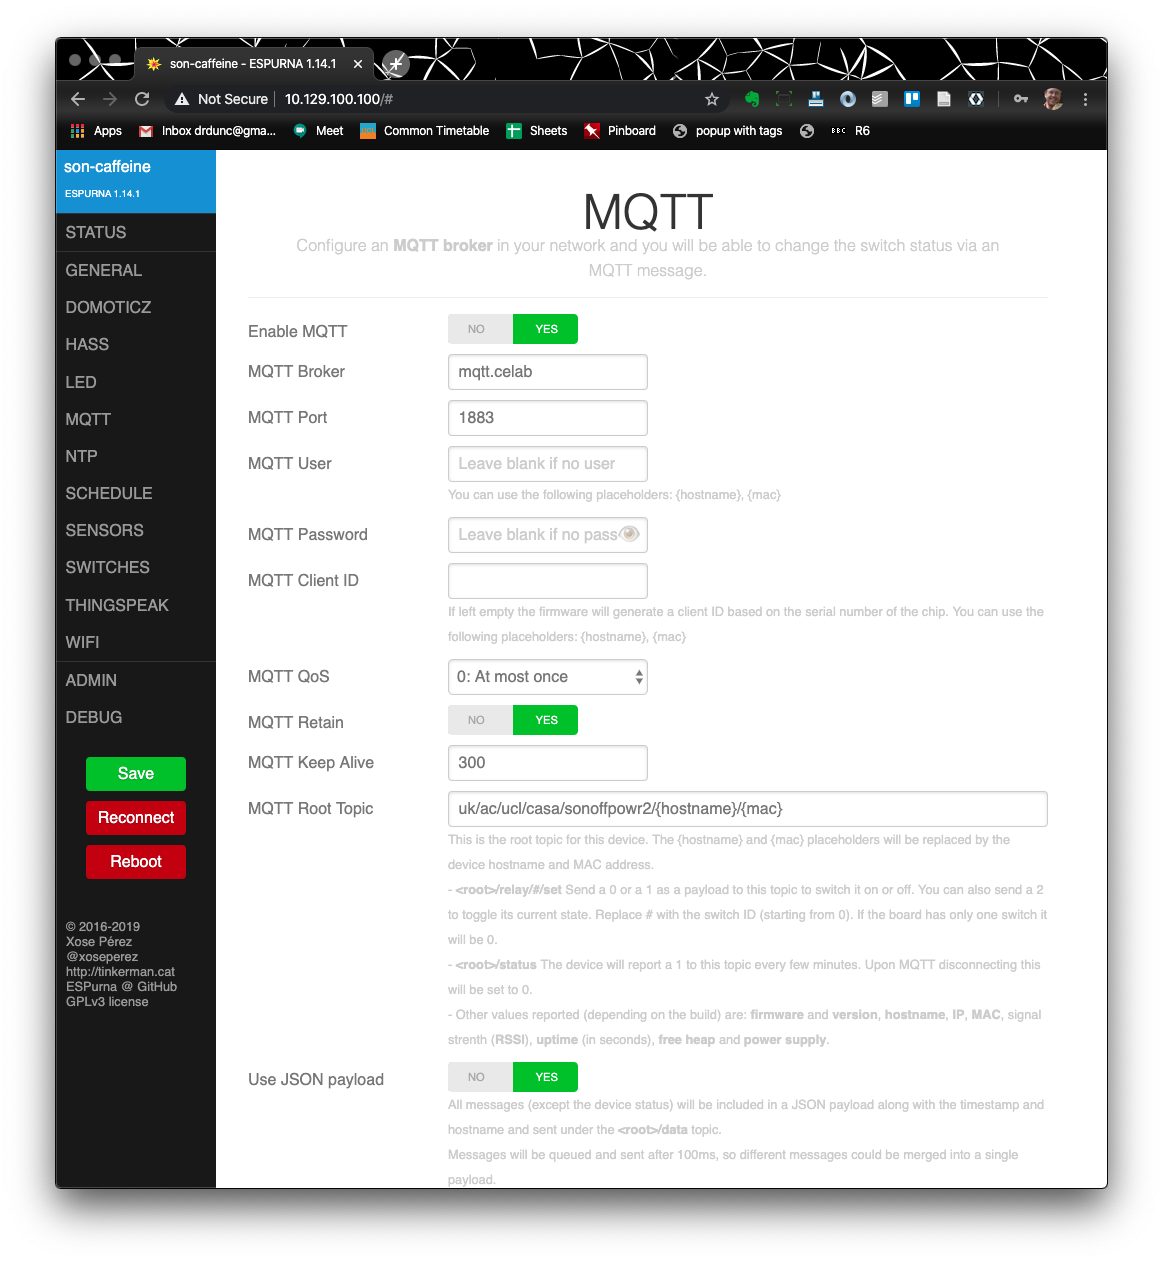
Next up configure the MQTT settings in order to send messages from the devide to the MQTT server. The following is needed. (note: leave all other fields as is).
- broker = mqtt.cetools.org
- port = 1884
- user = choose related to where to publish UCL topic or student topic or ...
- password = add according to topic
- root topic = chose related to where to publish
The latter is the root topic for this device. The {hostname} and {mac} placeholders will be replaced by the device hostname and MAC address. e.g. hostname = caffeine and mac = A4CF12B82143
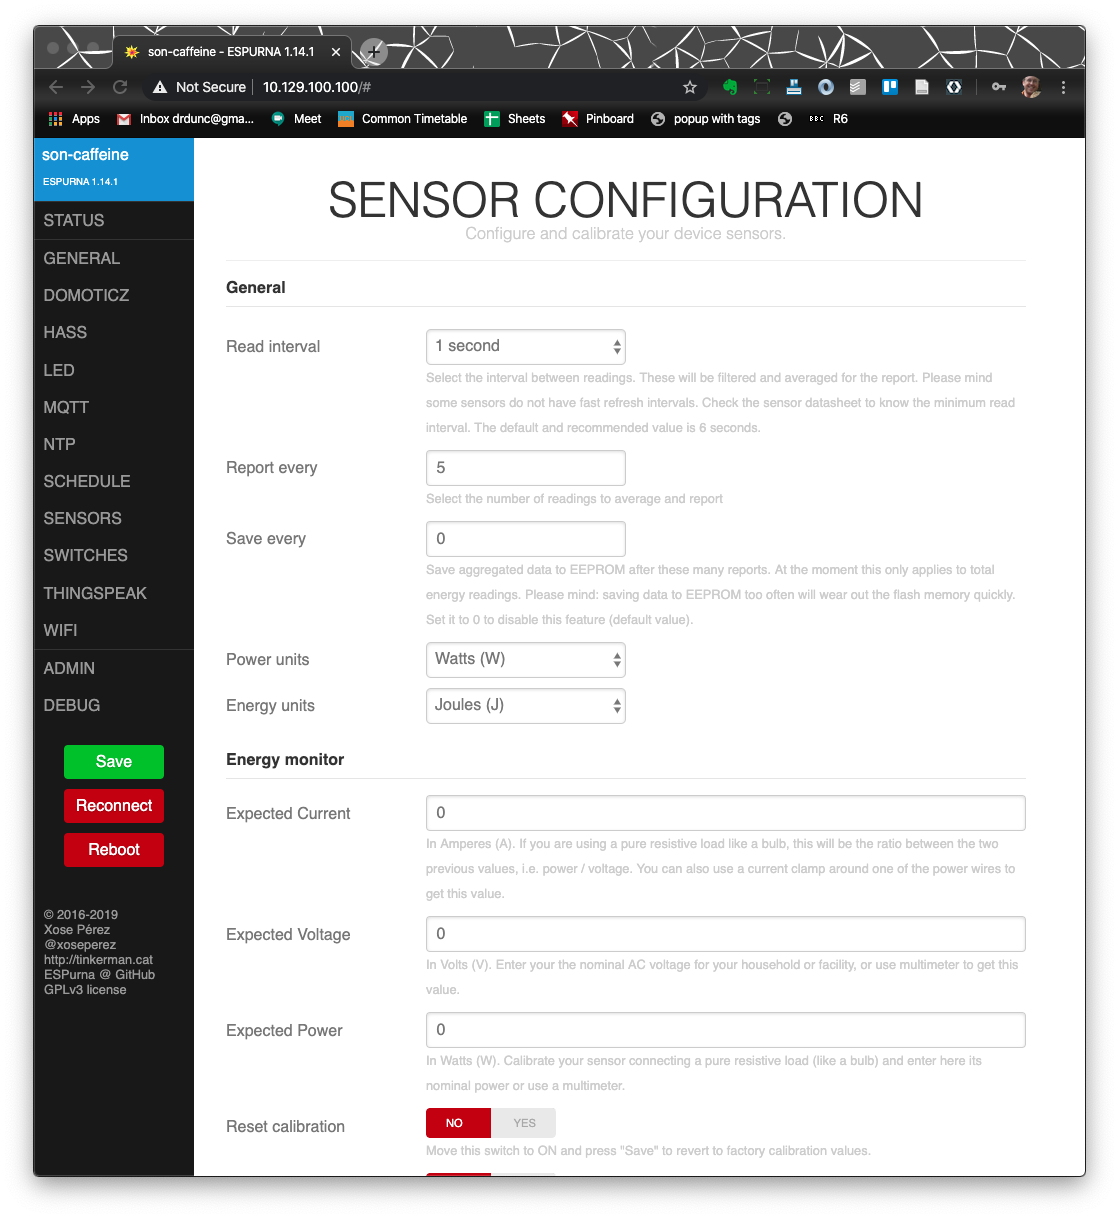
Update the sensor setting to reflect the settings below.
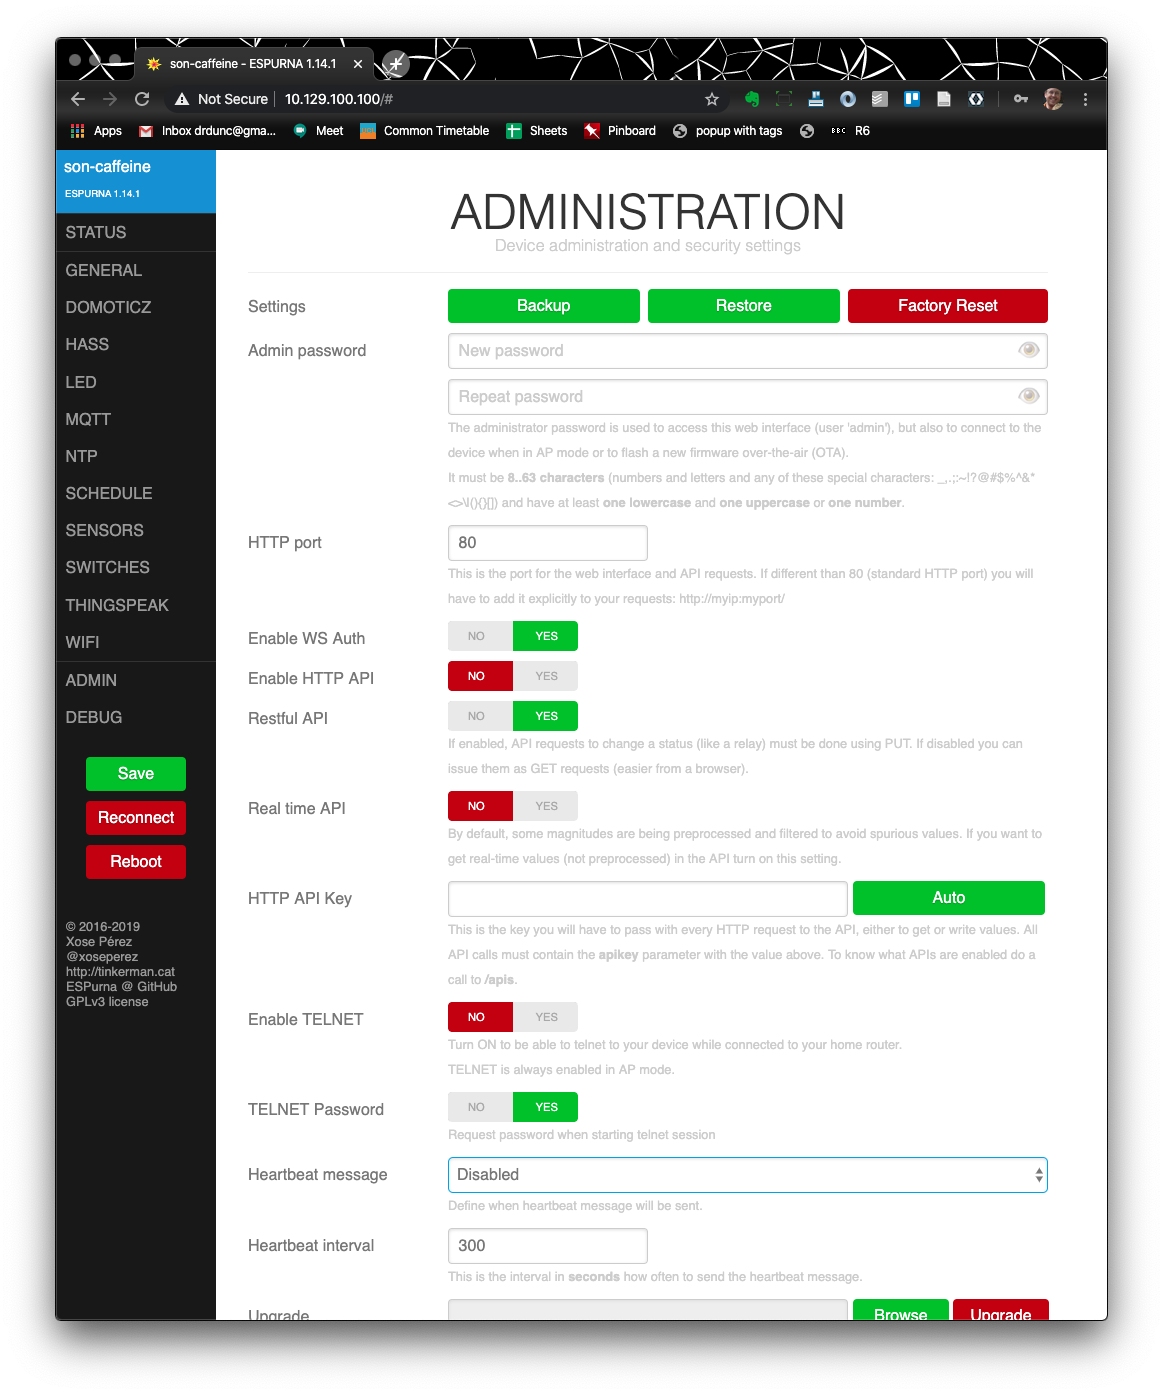
Make sure the heartbeat message is set to disabled
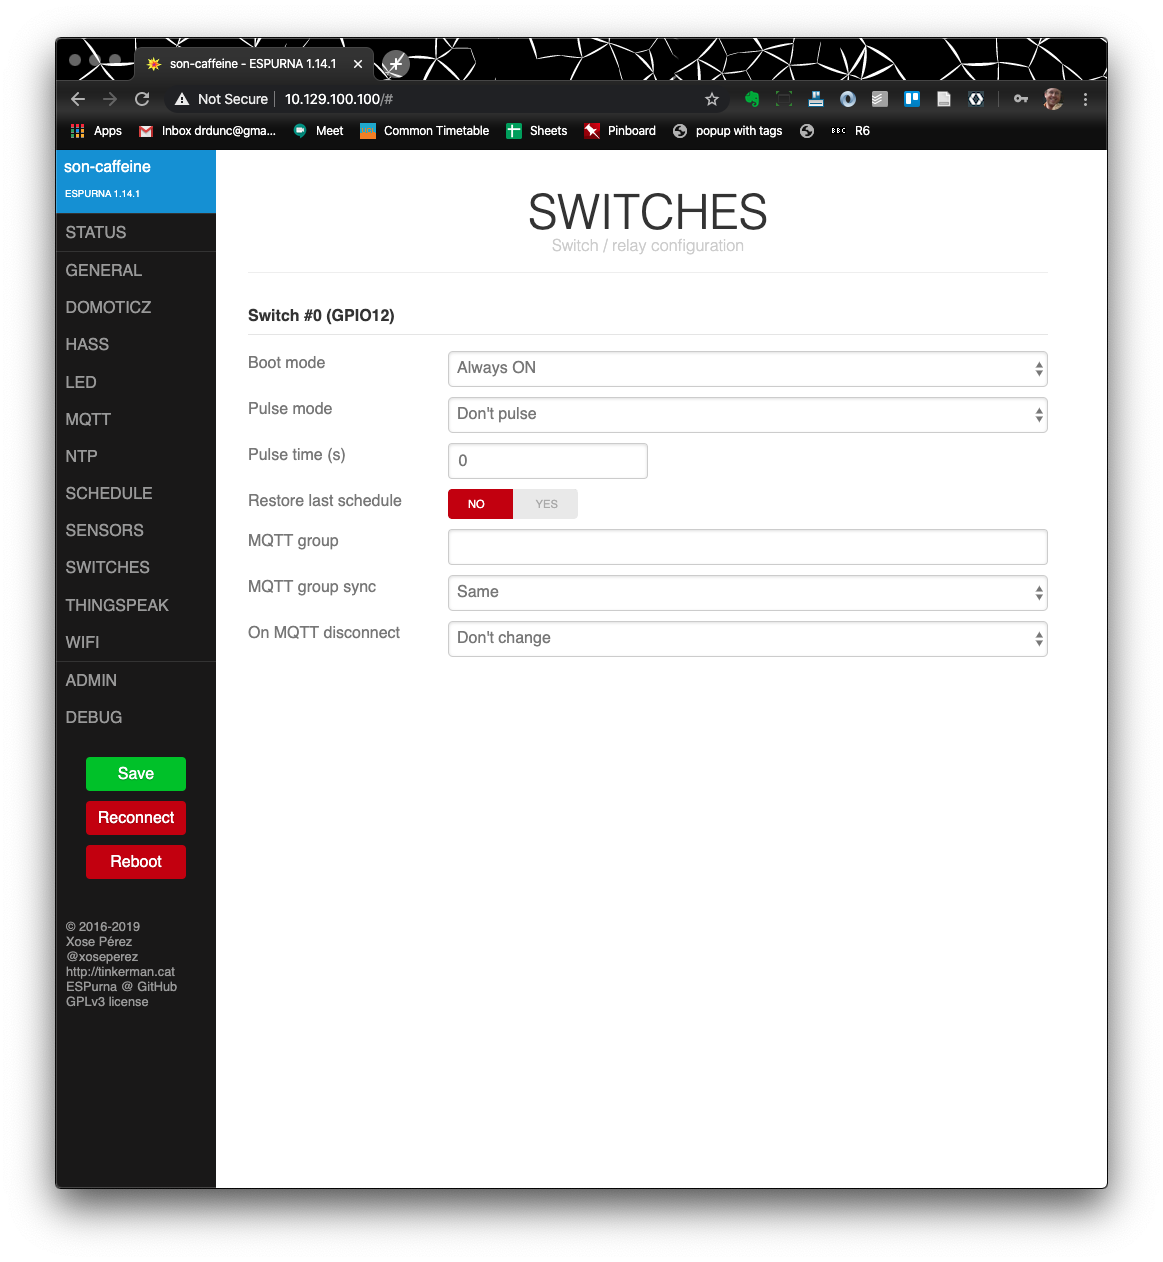
Make sure switch is set to always on at boot up otherwise the device will power off at any restart.
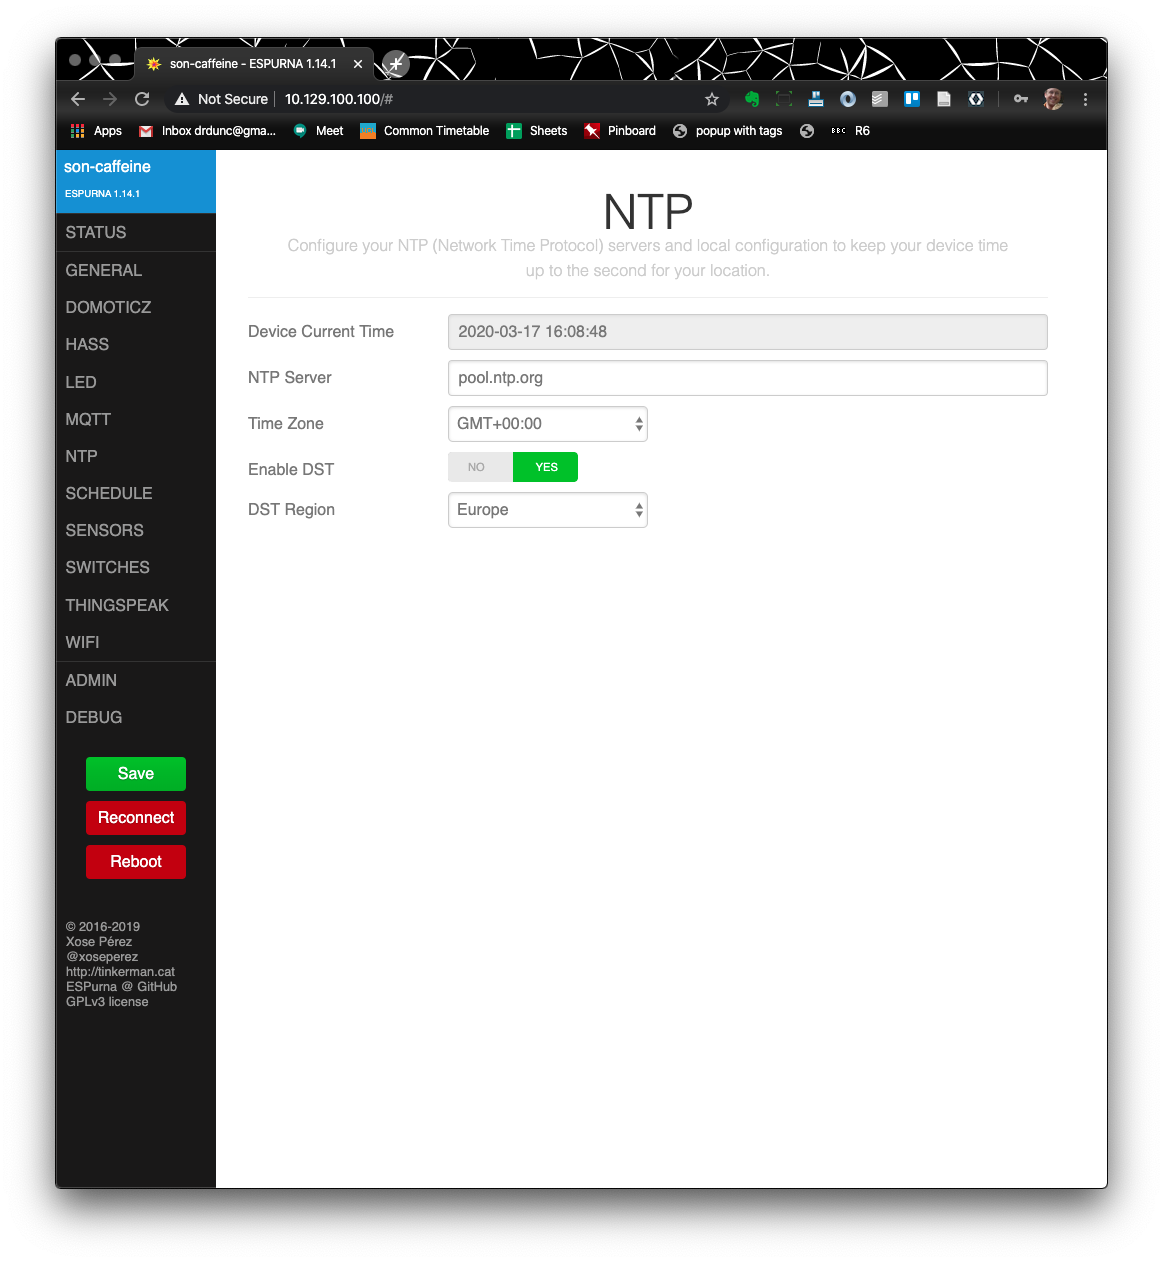
Finally check NTP settings look ok - if connected via wifi to internet you should see valid time here. This is a quick check to see if device is connecting to wifi ok.
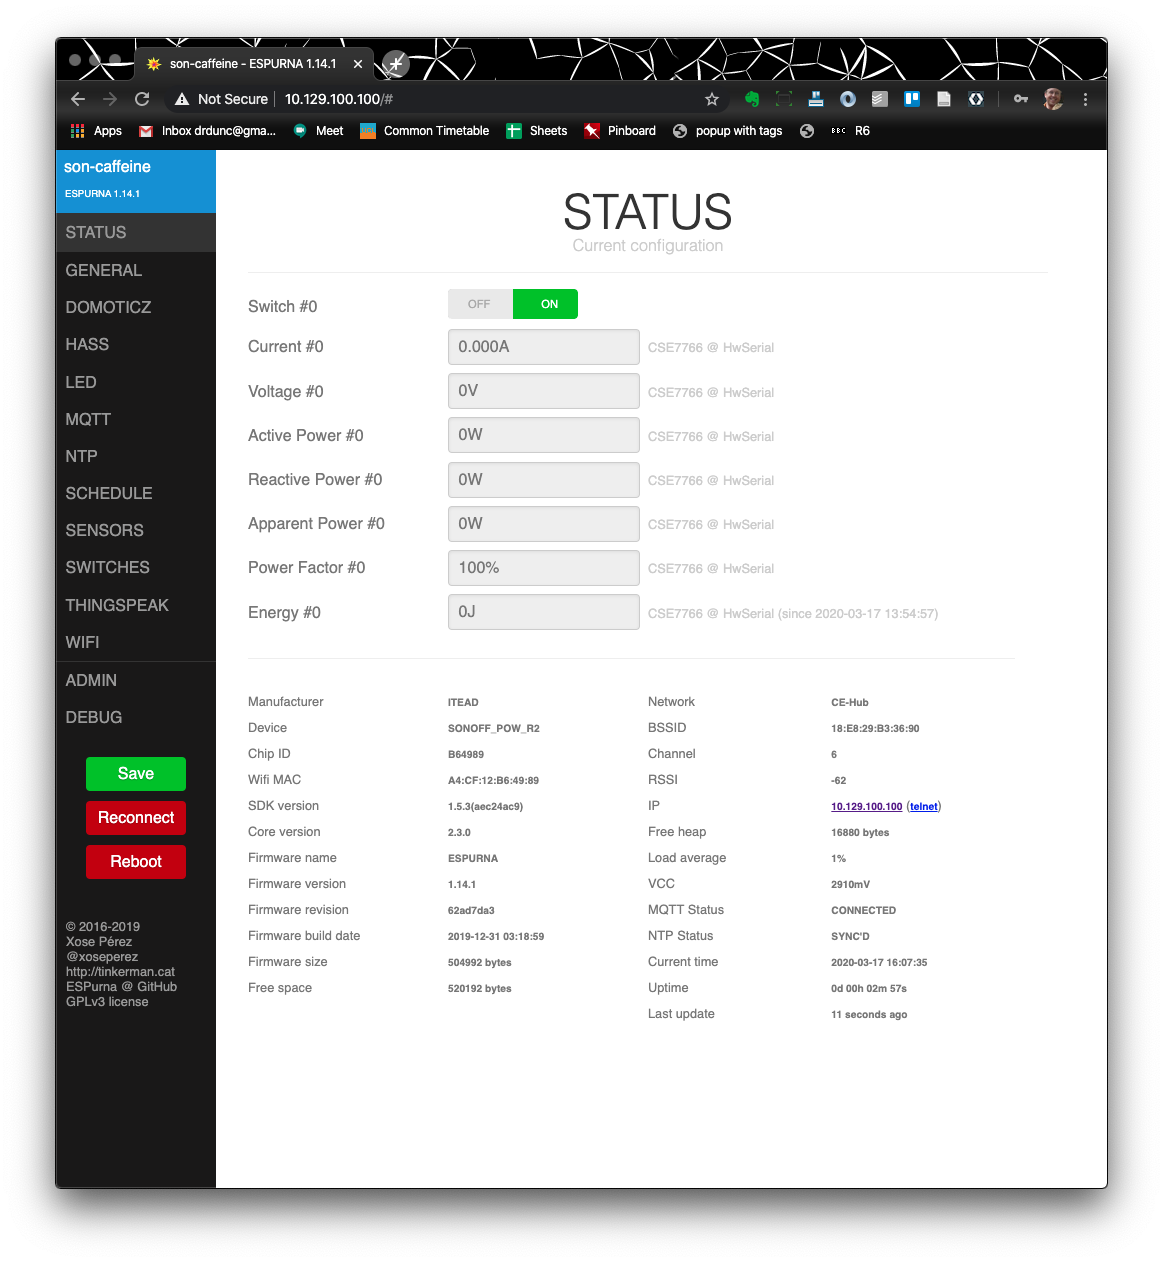
Finally check all looks ok on the status page.
This MQTT connectivity makes it really simple to read or send data to the devices. For example, if you send a 0 or a 1 as a payload to this topic "{root topic}/relay/#/set" you can switch the device on or off. You can also send a 2 to toggle its current state. Replace # with the switch ID (starting from 0). If the board has only one switch it will be 0. Hence, an example command to toggle the relay on the device would be:
- MQTT Topic to Publish:
uk/ac/ucl/casa/sonoffpowr2/caffeine/A4CF12B82143/relay/0/set - With a payload of:
2
Another useful function is status. The device will report a 1 to this topic every few minutes. Upon MQTT disconnecting this will be set to 0. Hence, subscribing to the following topic would give you the current status of the device:
uk/ac/ucl/casa/sonoffpowr2/caffeine/A4CF12B82143/status
Other values reported (depending on the build) are: firmware and version, hostname, IP, MAC, signal strenth (RSSI), uptime (in seconds), free heap and power supply.
Other examples are:
Set the state of the relay (1=on 0=off)
uk/ac/ucl/casa/sonoffpowr2/caffeine/A4CF12B82143/relay/0
Check how long the device has been connected
uk/ac/ucl/casa/sonoffpowr2/caffeine/A4CF12B82143/uptime