This workshop will show you how to:
- Use the Unity AR Template and AR Foundation
- Import your Blender Model into Unity
- Touch Controls to your model
- Add Shadows and Texture Features
- Control the model via an MQTT data stream
- Load an Animation in Augmented Reality
- Create and deploy to a mobile device (ios/android)
To complete this workshop you will need:
- Unity 2020.3.9f1 or above
- VS Code
- 3D model in FBX file format with embedded animation (e.g. LINK TO SKETCHFAB To add)
- MQTT Broker
- iOS or Android Mobile Device
- for iOS deployment, XCode and Apple Developer Account
Languages used:
- C#
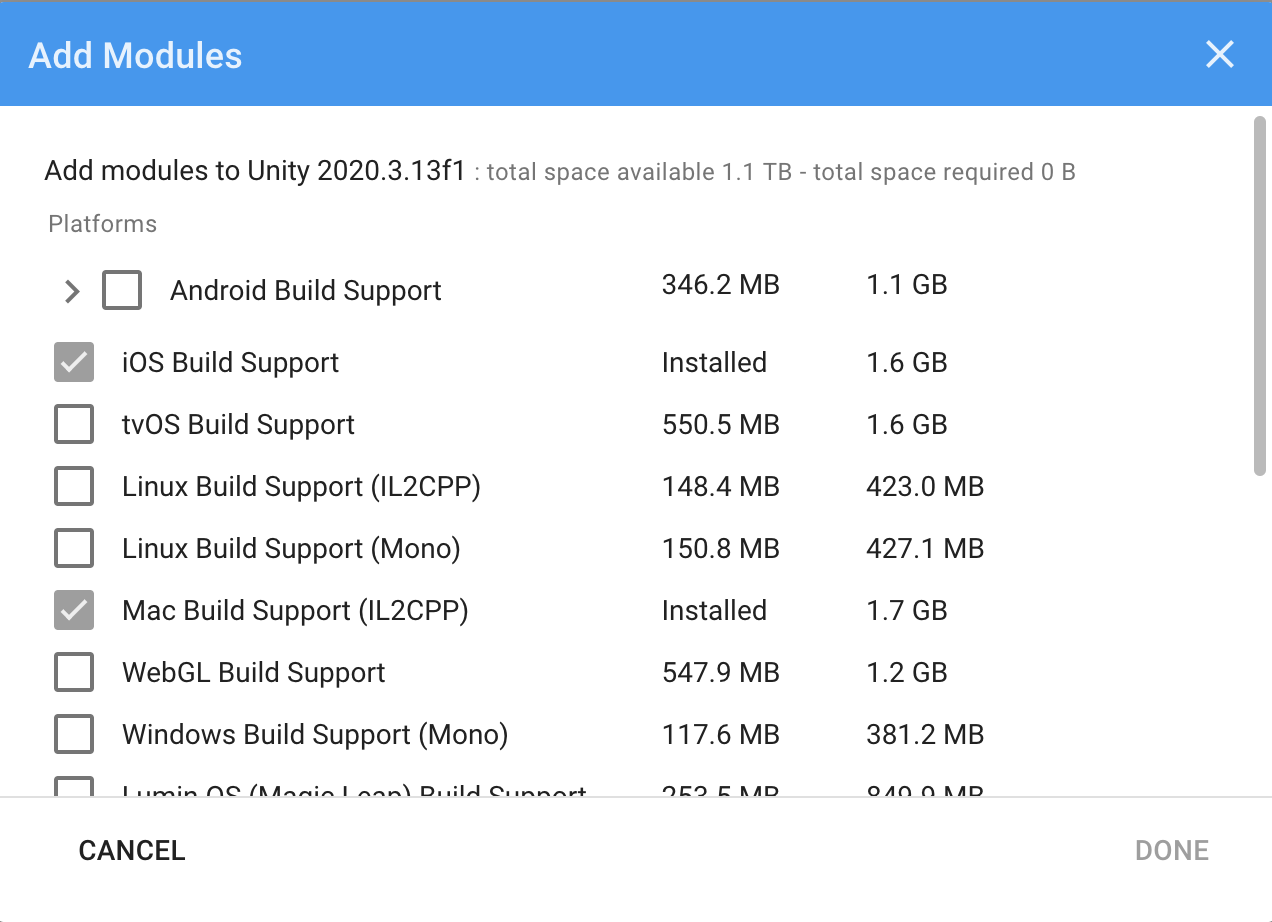
Ensure you have the required modules installed into your Unity setup - iOS and android are required depending on your platform of choice.
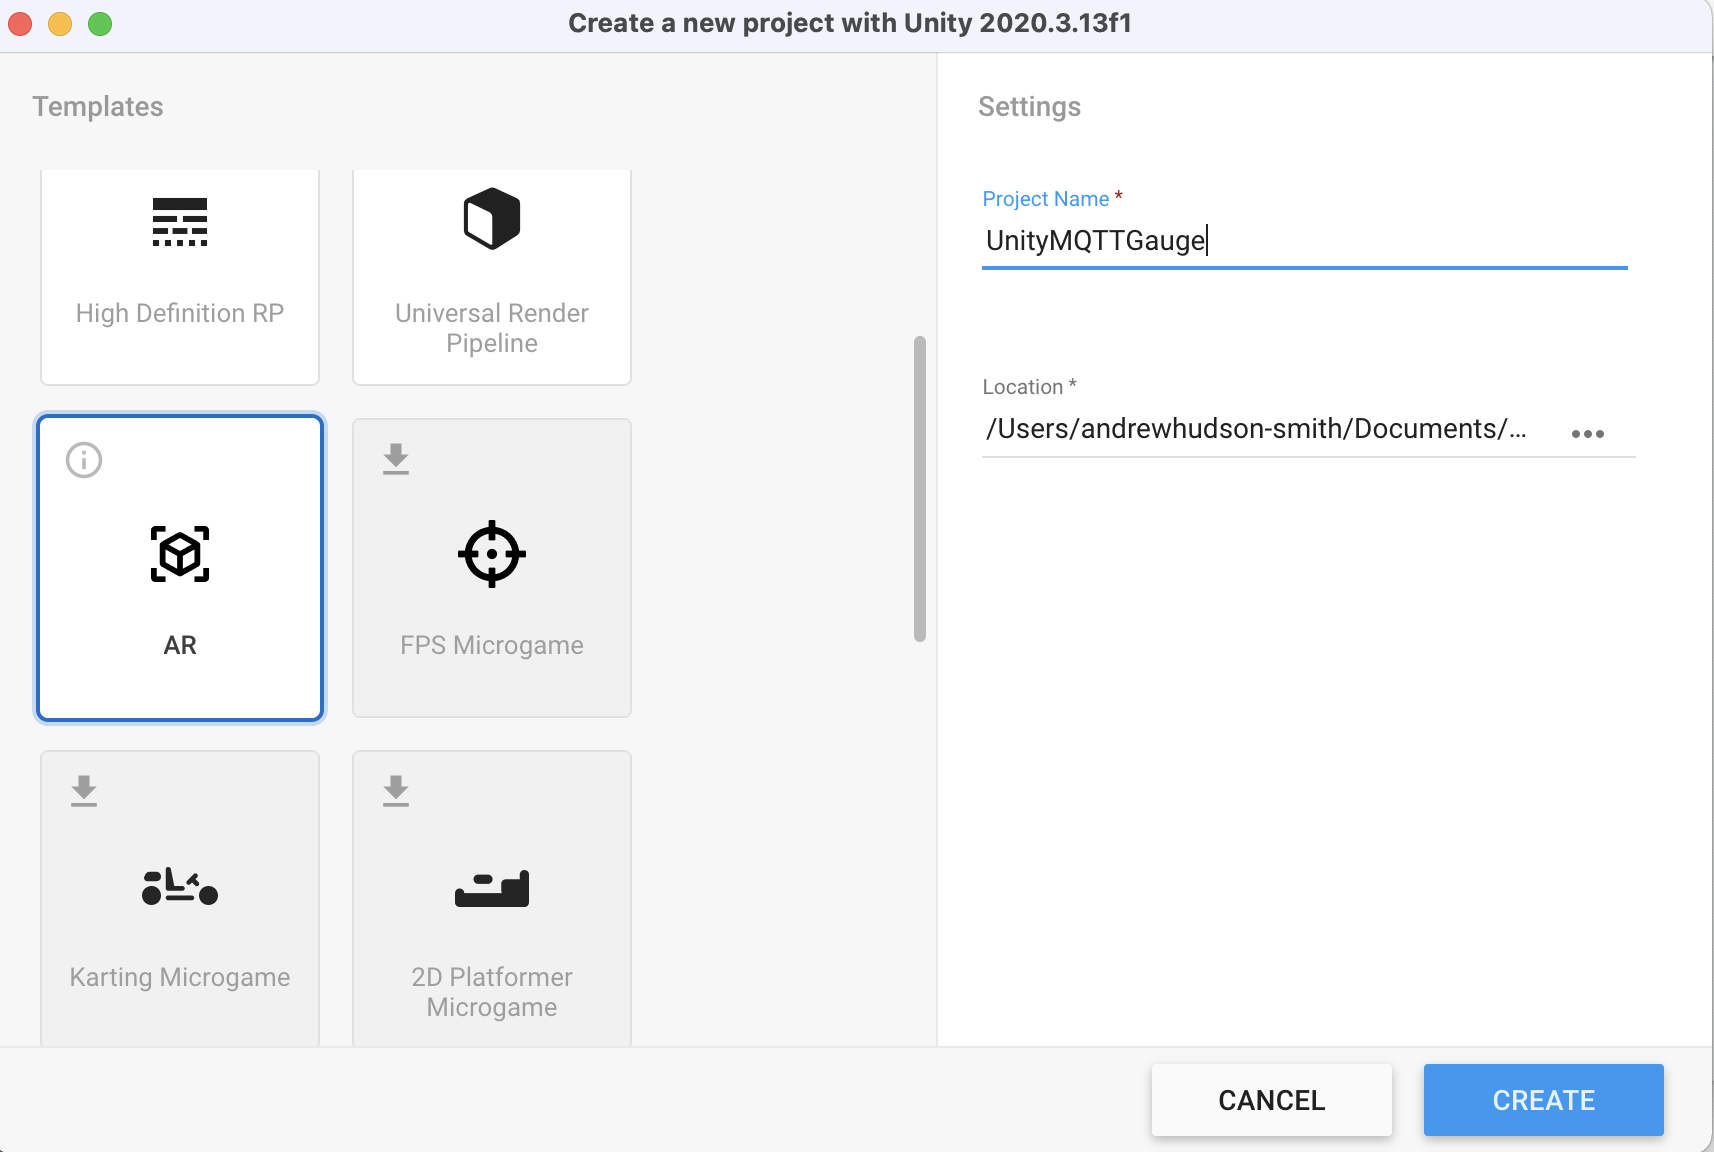
In Unity Hub create a new project select the AR template and give it a logical name - ie UnityMQTTGauge. The template is new within in Unity, creating the basics of an Augmented Reality Scene with inter-changeable Android/ios components.
On your first load a pop up will appear
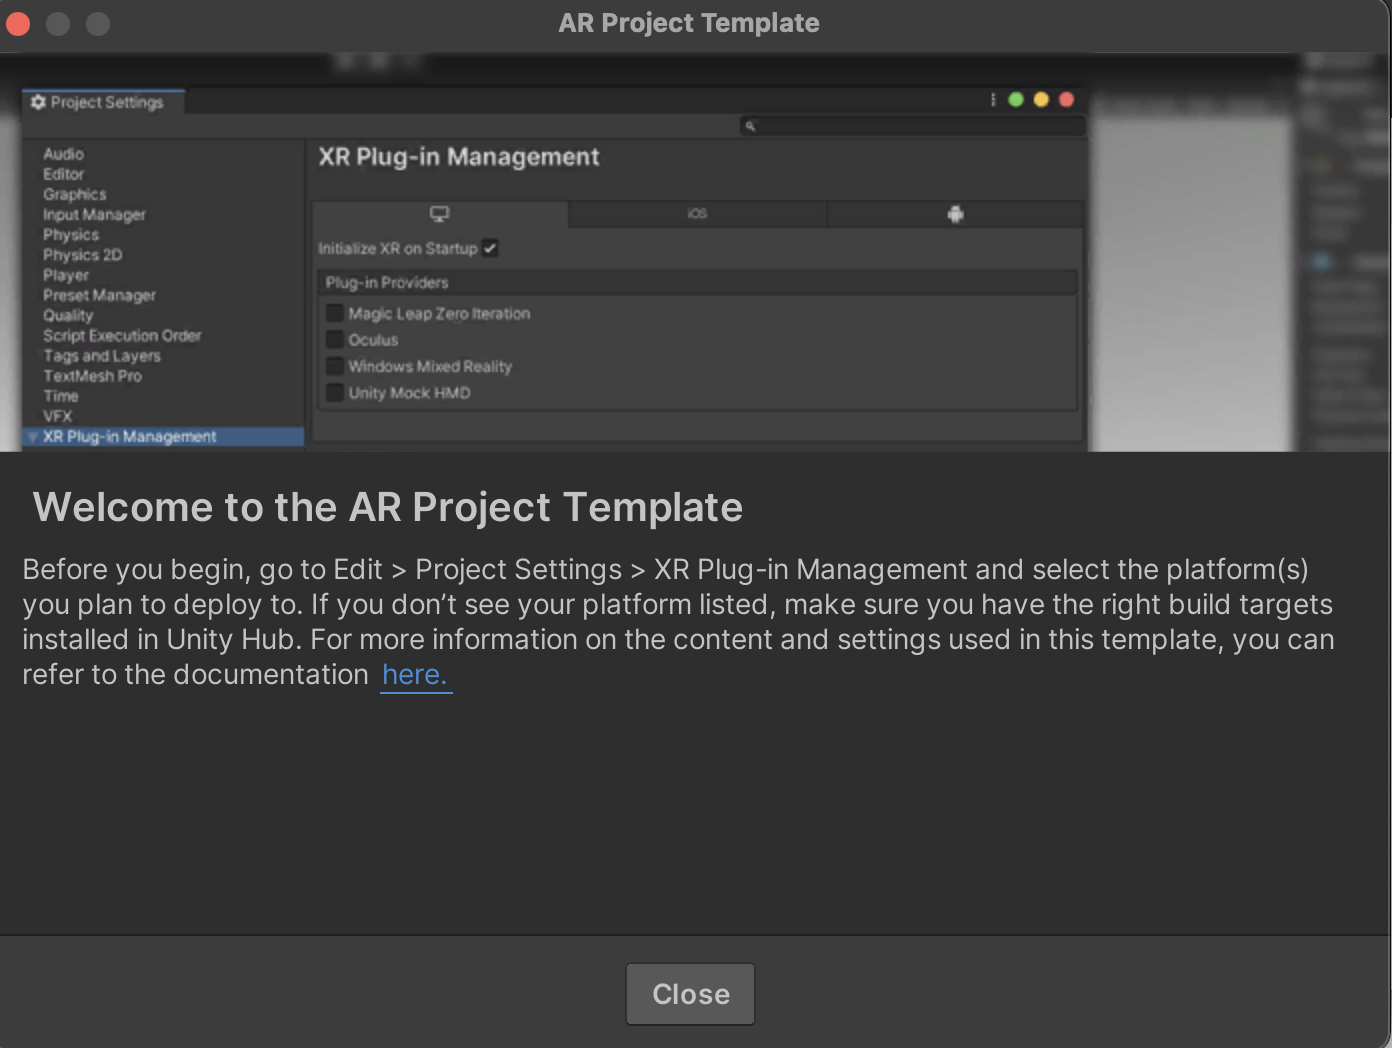
The settings for the AR module need to be changed according to the mobile operating system it will be deployed to. It also needs be to changed in main build settings of Unity, which can take a little time as Unity recompiles its assets accordingly. This can be carried out at any time but it makes sense to do it at the start of the project.
Android
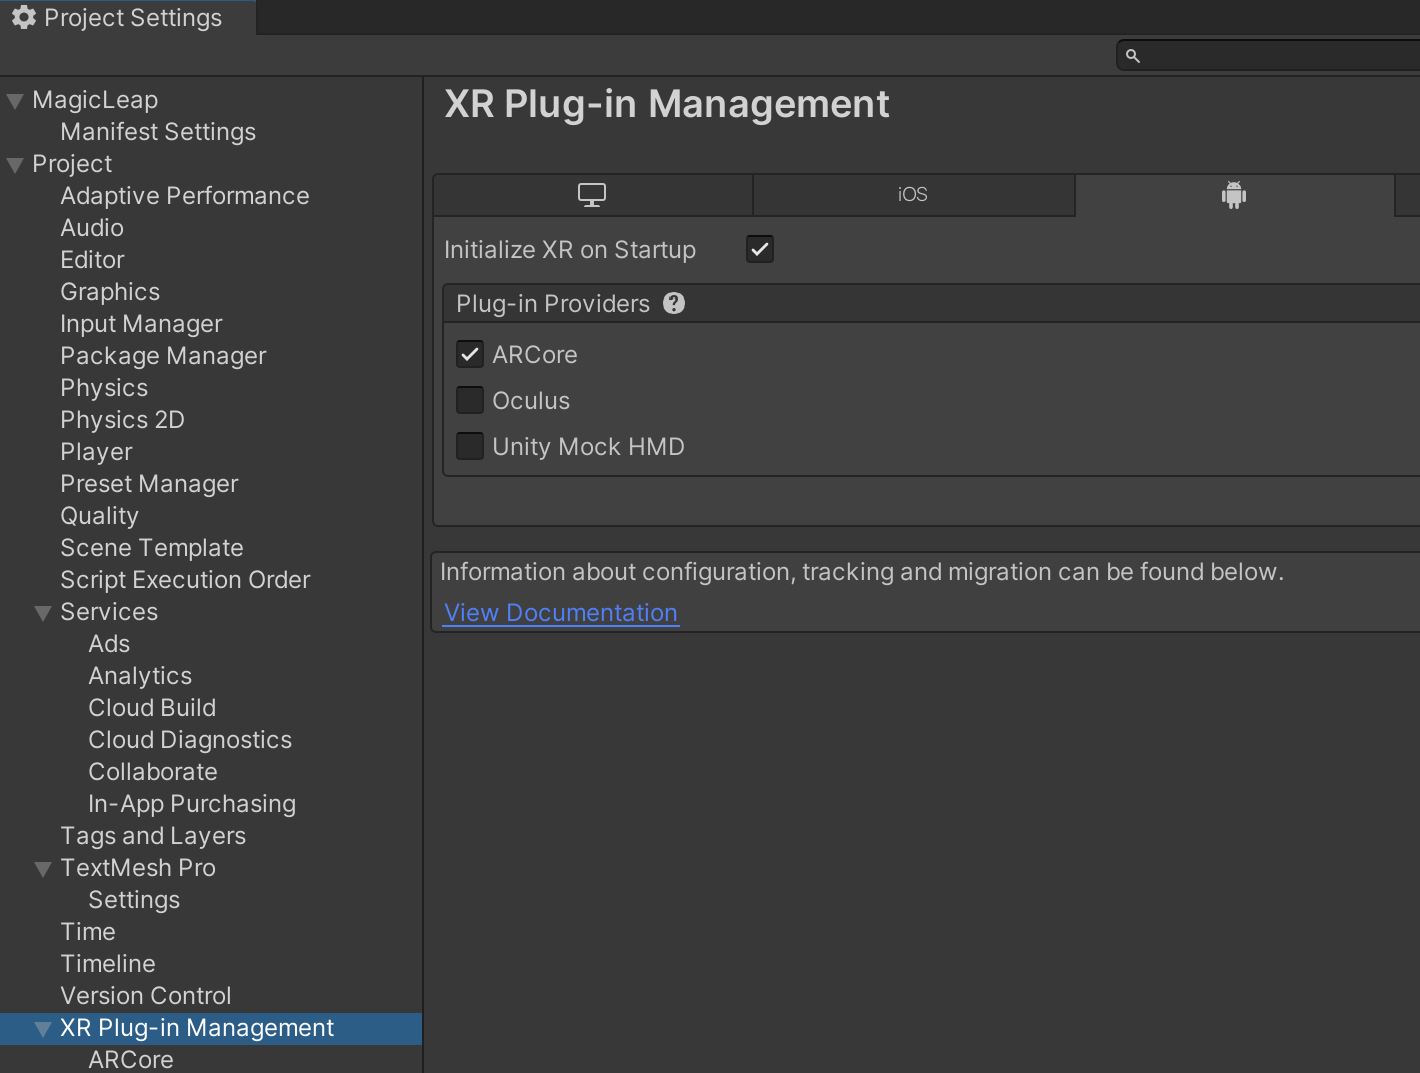
For Android go to Edit > Project Settings > XR Plug-in > Android and select ARCore - this is Android AR system.
We now need to change the build settings - this is the same for any time you want to build a unity application for Android.
Head to File > Build Settings and on Platform select Android and then at the bottom select Switch Platforms.
Unity will whir for a while and then you are ready to change the final settings before setting up a scene.
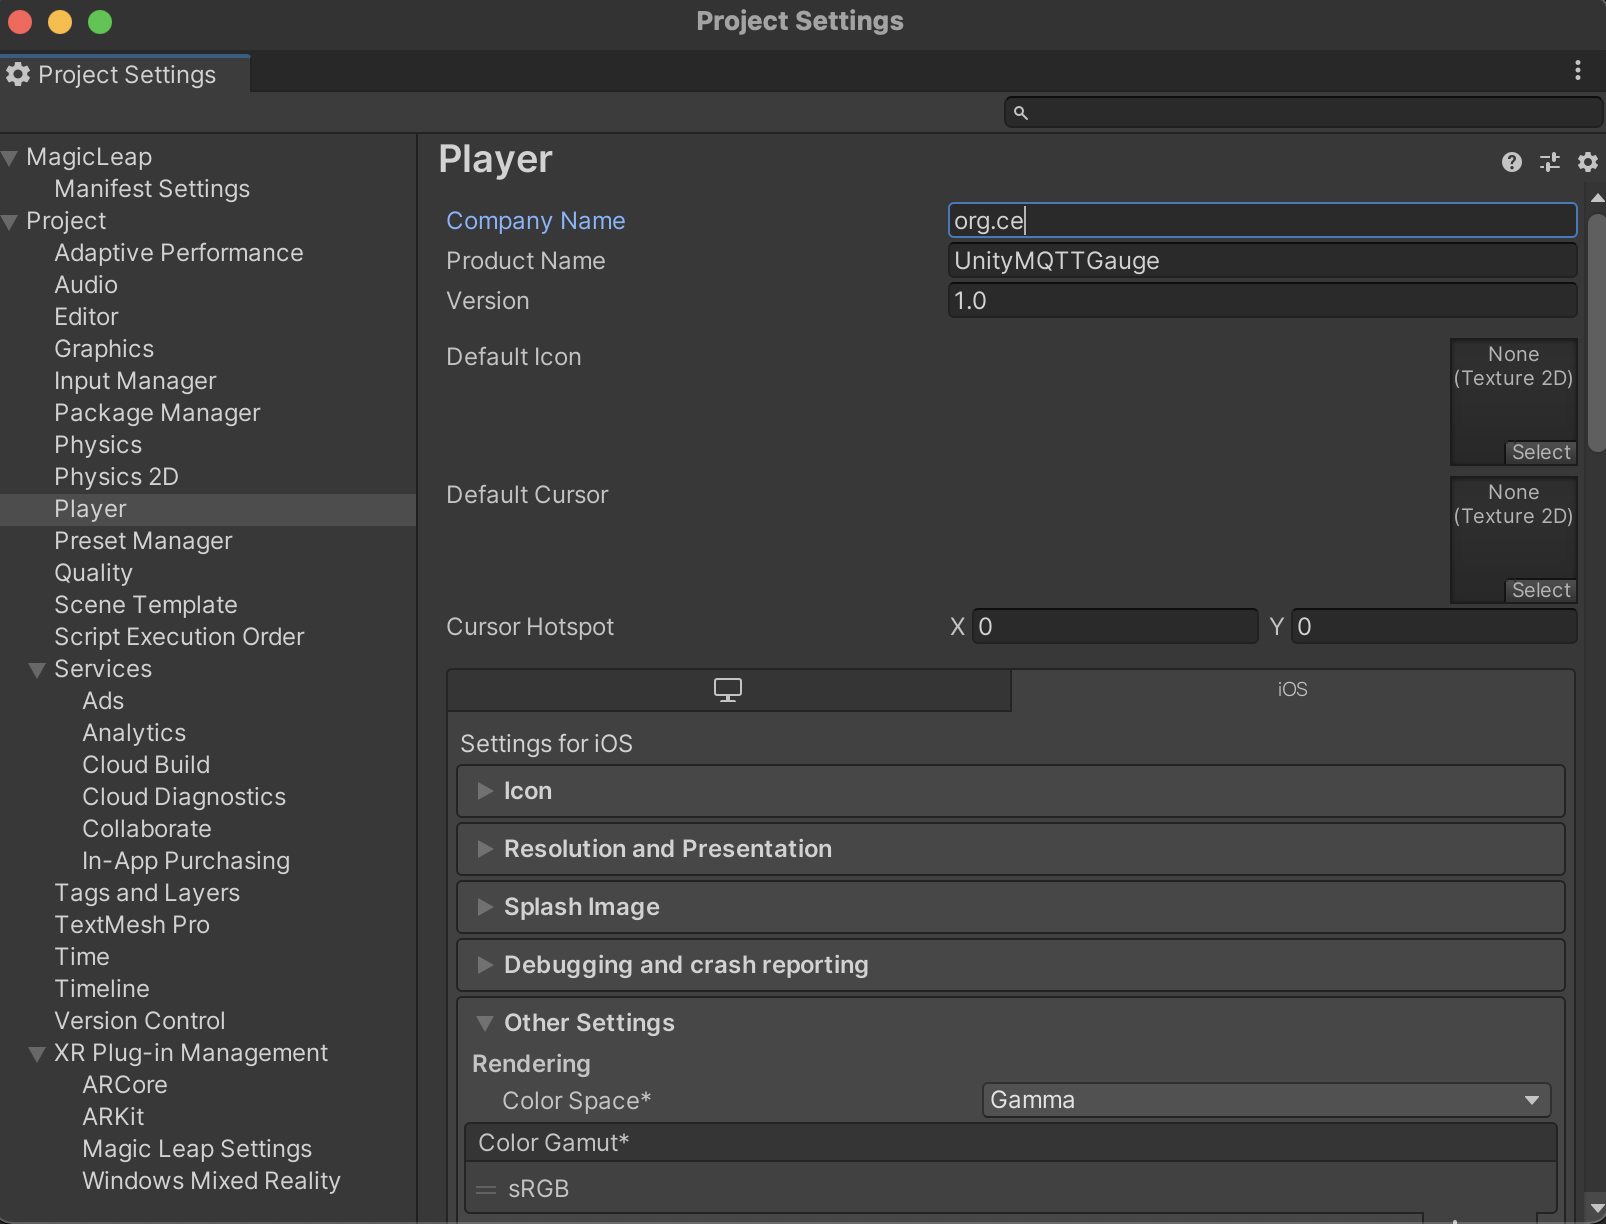
In Project Settings -> Player provide the following information:
- Company name
- Product name
iOS
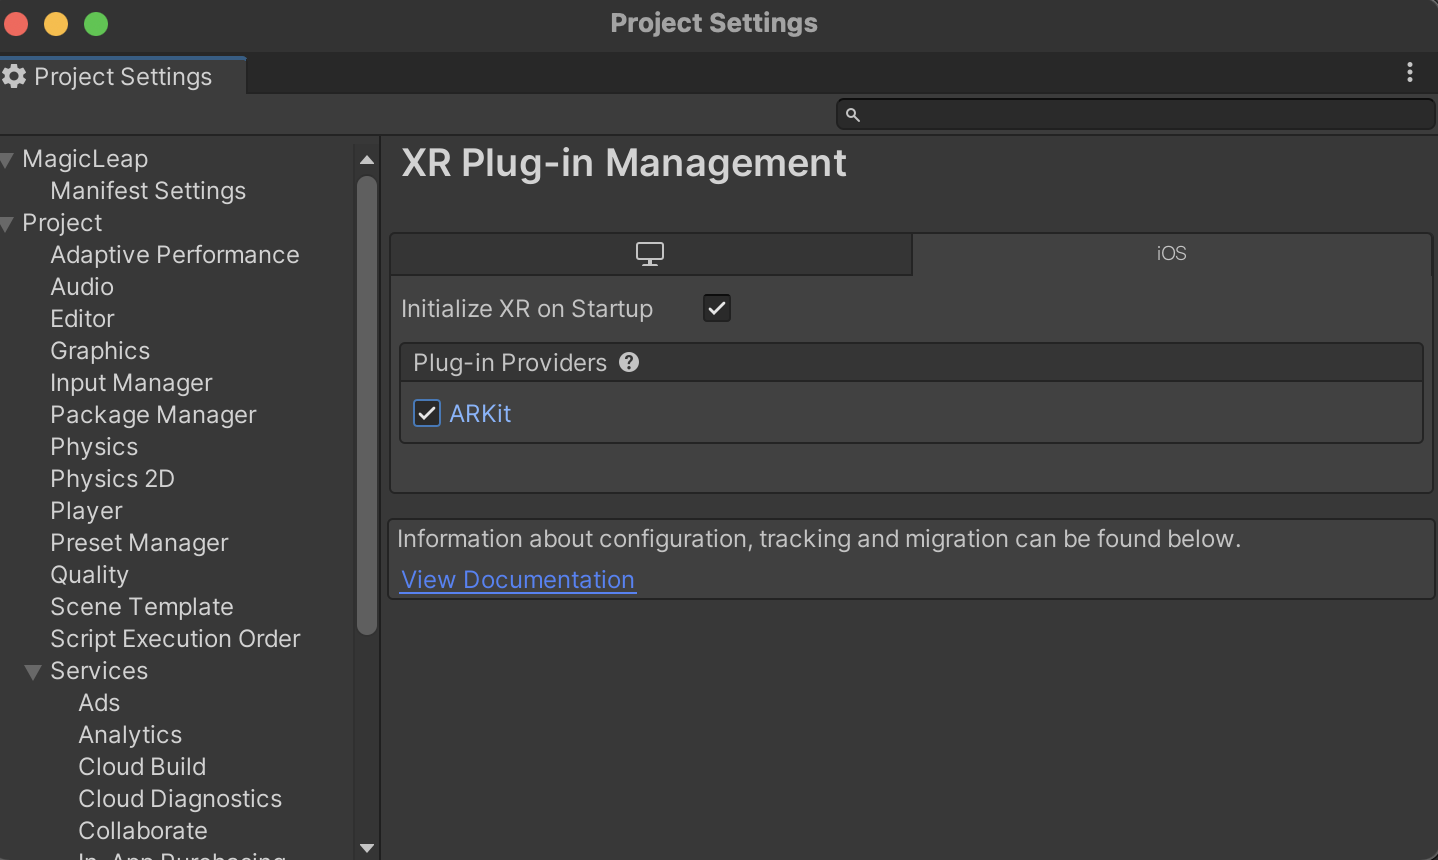
For ios go to Edit > Project Settings > XR Plug-in > ios and select ARKit - this is Apples AR system.
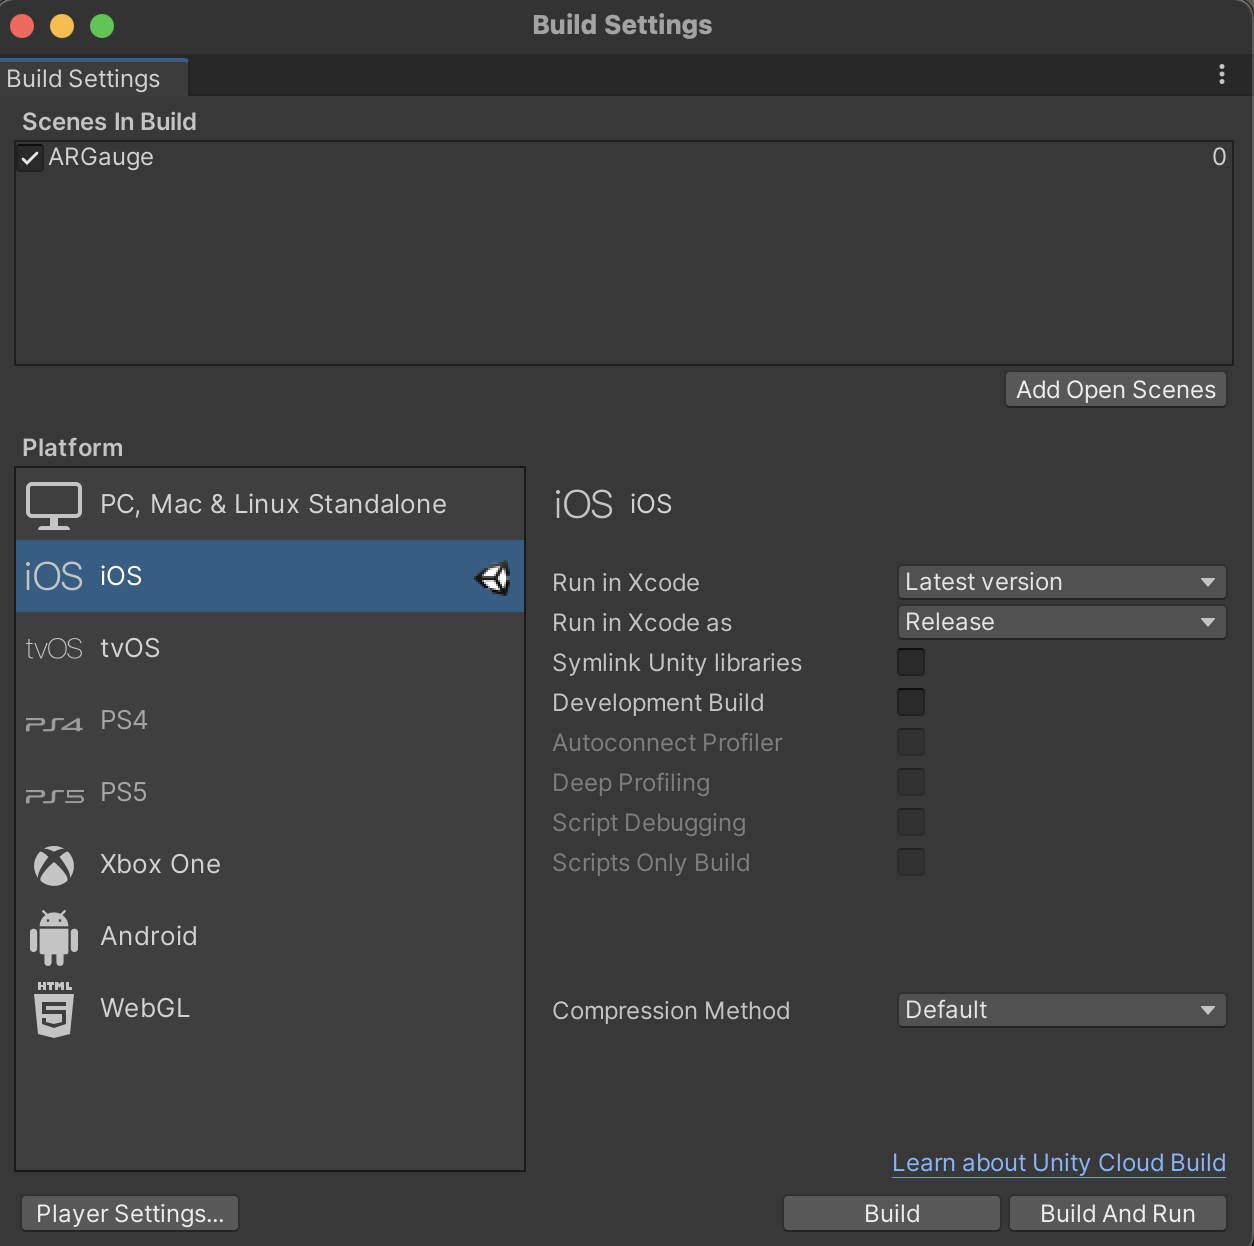
We now need to change the build settings - this is the same for any time you want to build a unity application for ios.
Head to File > Build Settings and on Platform select ios and then at the bottom select Switch Platforms.
Unity will whir for a while and then you are ready to change the final settings before setting up a scene.
In the same dialog box select Player Settings.
A domain is used - so here we used org.ce and then the application name of your choice.
We are now ready to start developing the application in Unity.
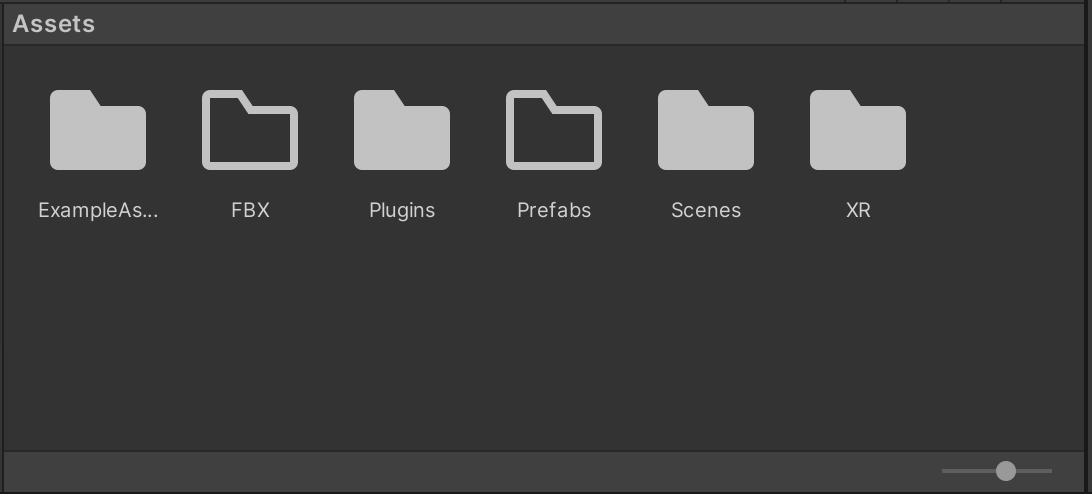
If you close all the windows from the set up you will see that Unity has created a Sample Scene with a series of folders containing examples and the main components required for an Augmented Reality application.
Organising
We are going to setup an empty GameObject in the scene and save it as a Prefab this allows it to act as a holder for any object we want to appear in Augmented Reality.
To keep things organised the first thing to do is to right click in the Assets folder and create a Prefab and a FBX folder.
Importing
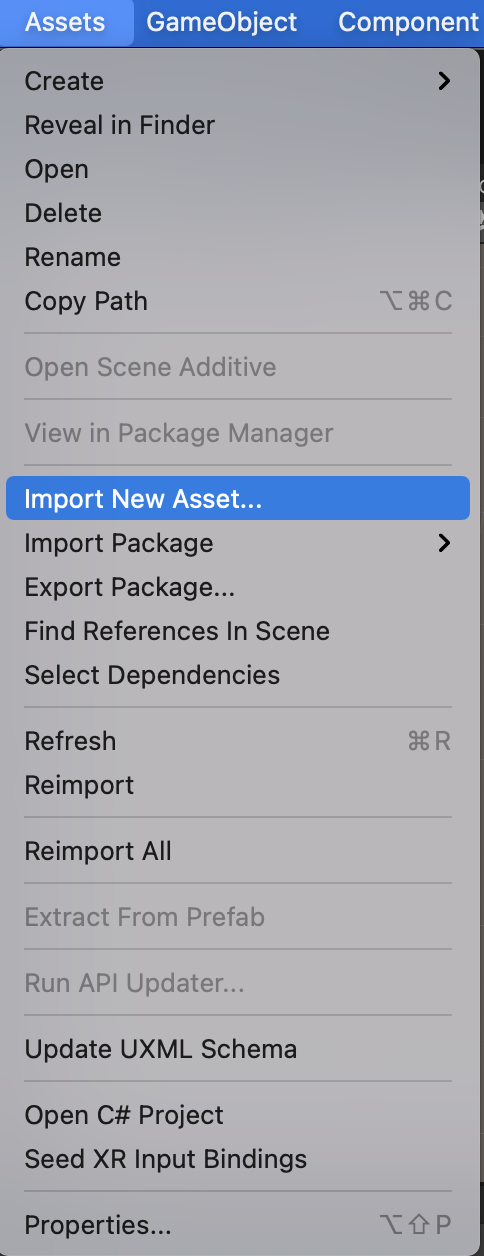
There are two ways to import - click and drag your FBX file into the FBX folder or head to Assets -> import assets
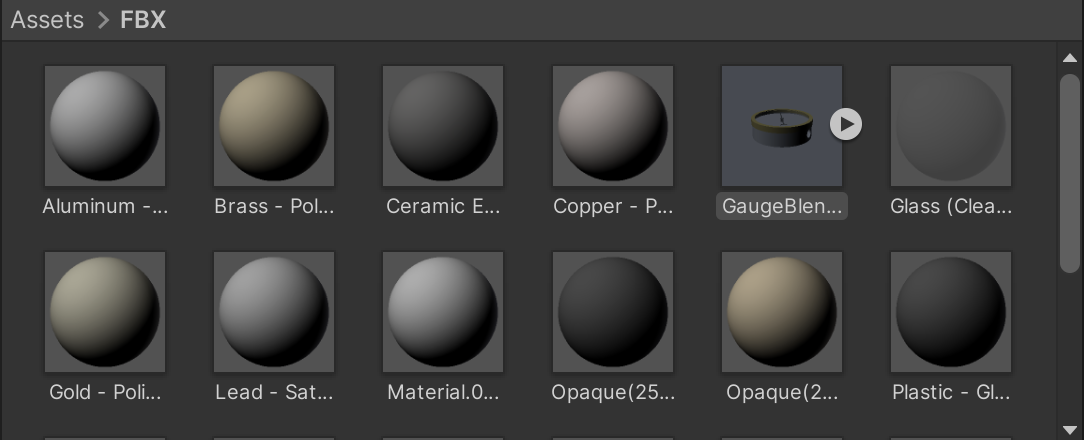
Your FBX file will import, complete with animation. To be able to edit the materials we need to extract them from the FBX file. in the Inspector window,under materials, select extract materials to a folder of your choice, we are using the parent folder for this import.
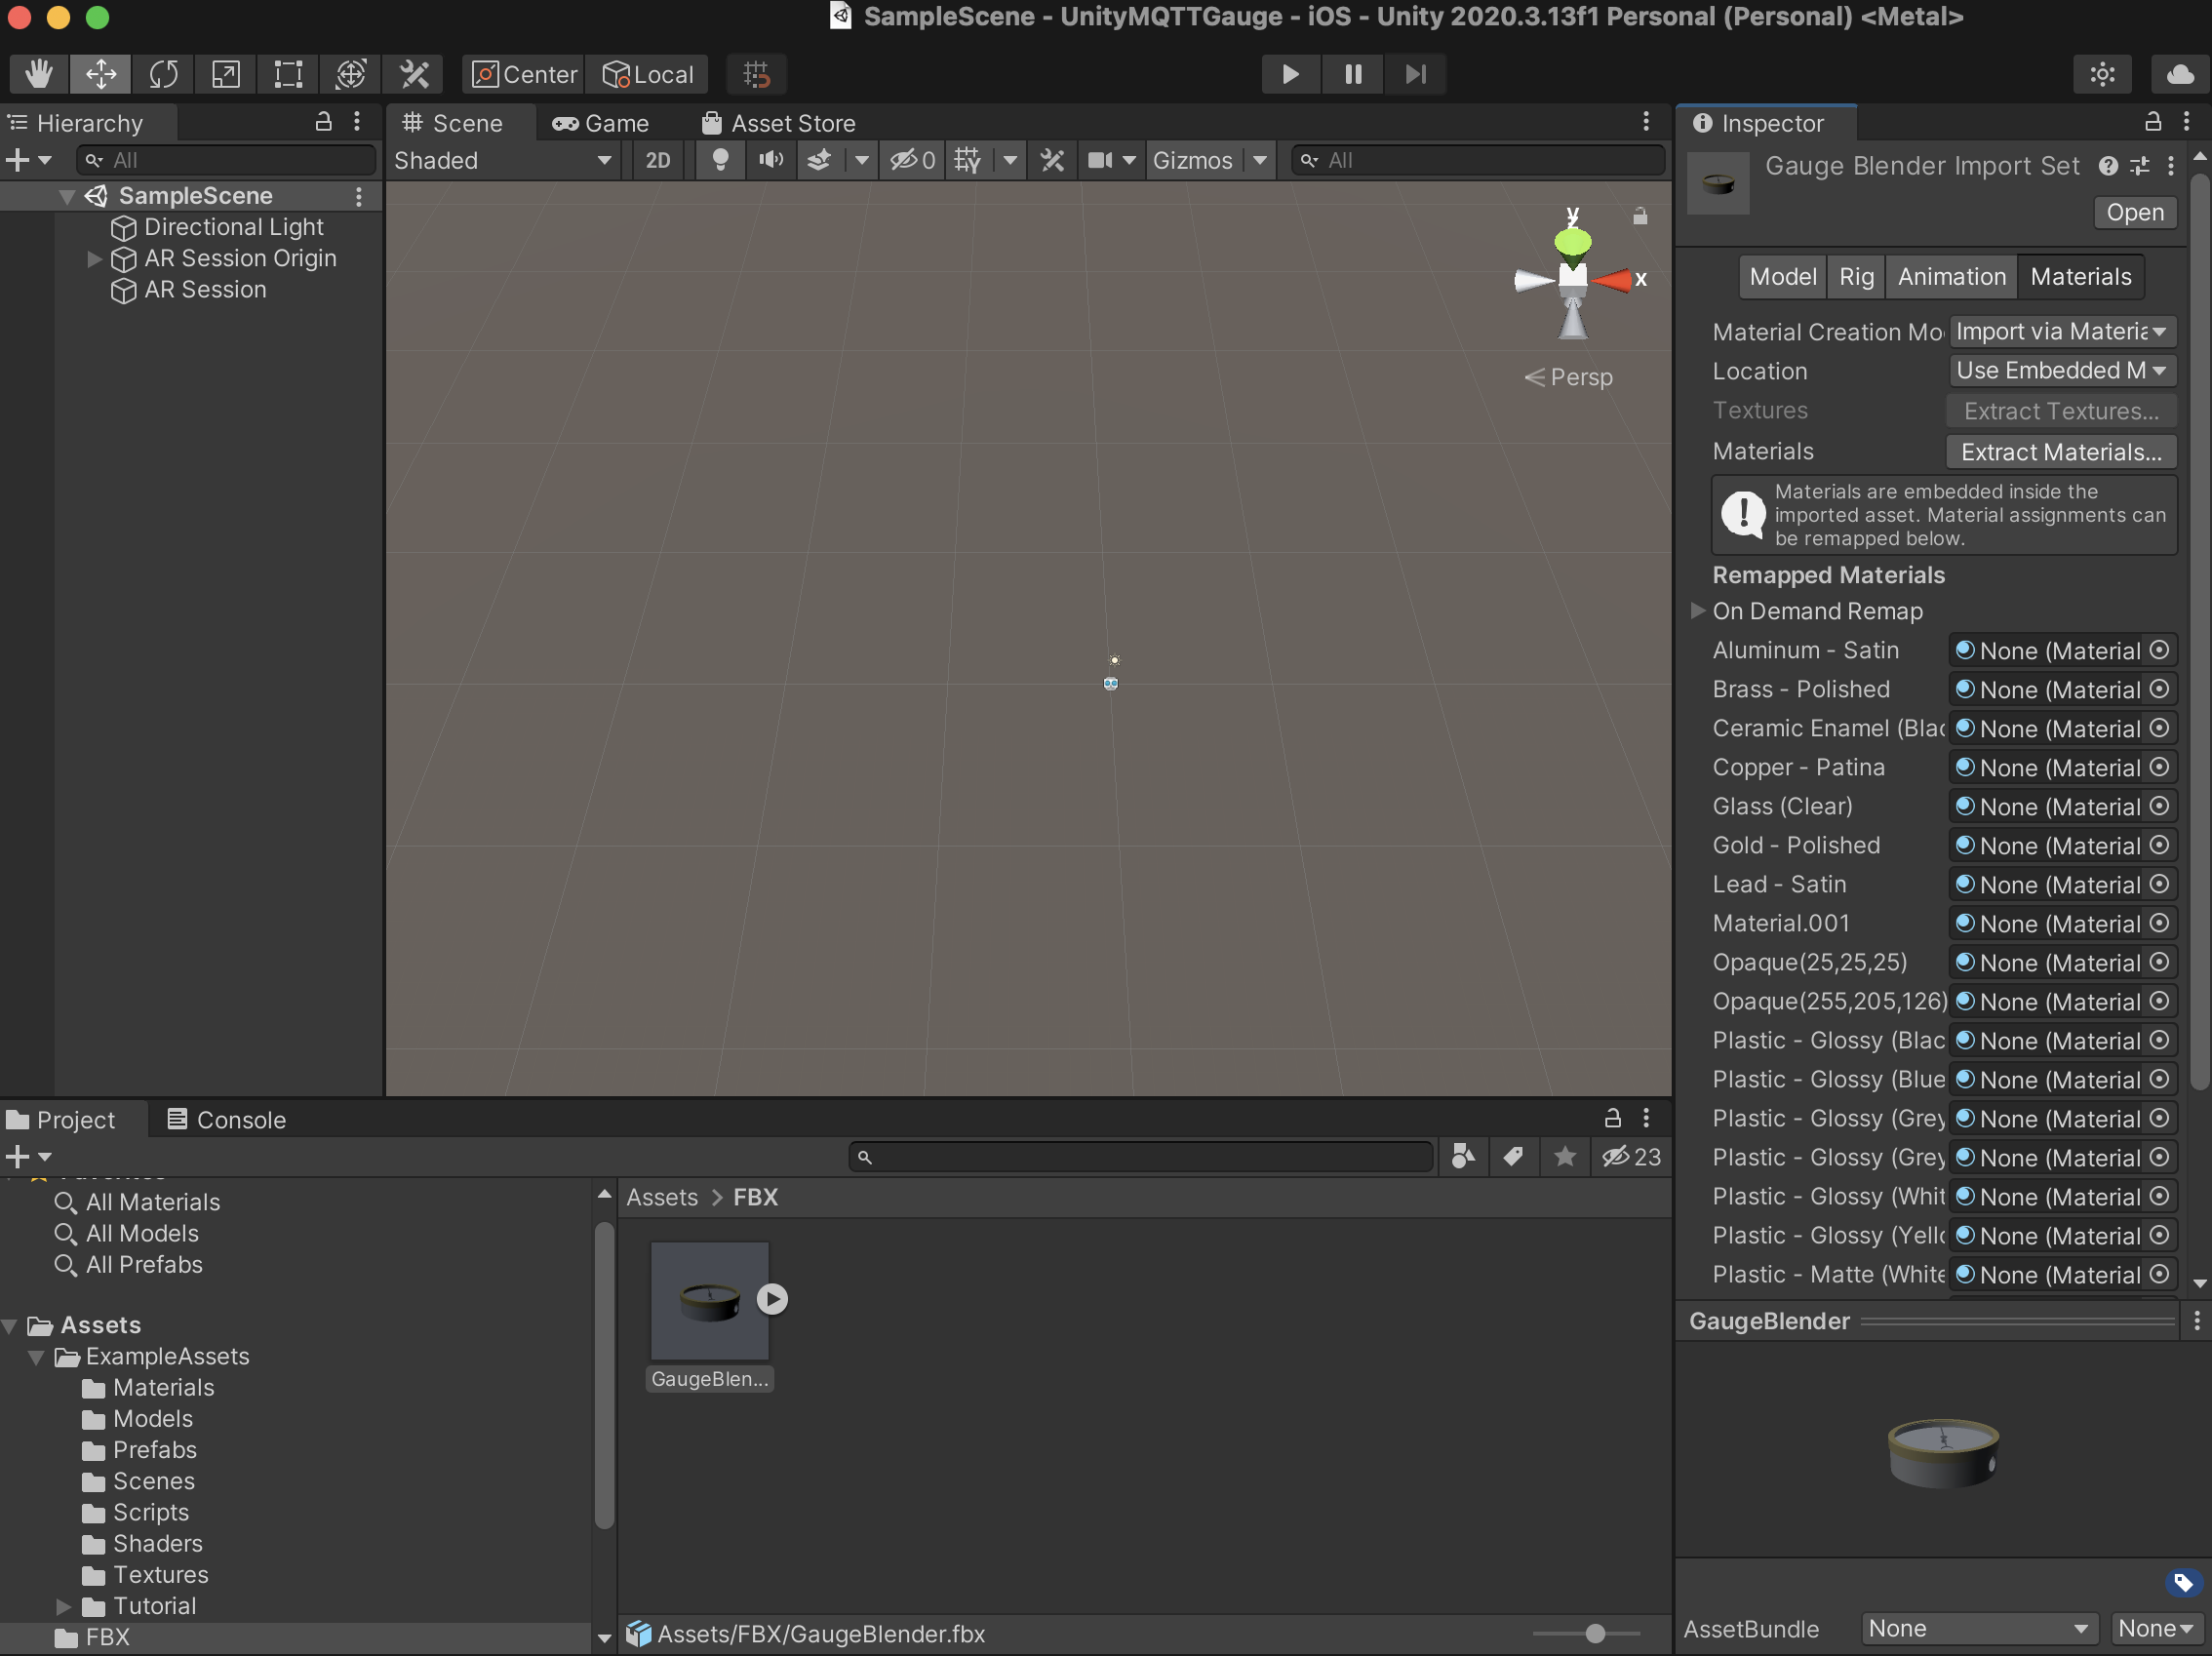
You now have your FBX model imported, complete with animation and textures.
Finally we are going to hold our Gauge in a Prefab. This allows us to attach all the scripts to the Prefab and swap models in and out for future AR applications.
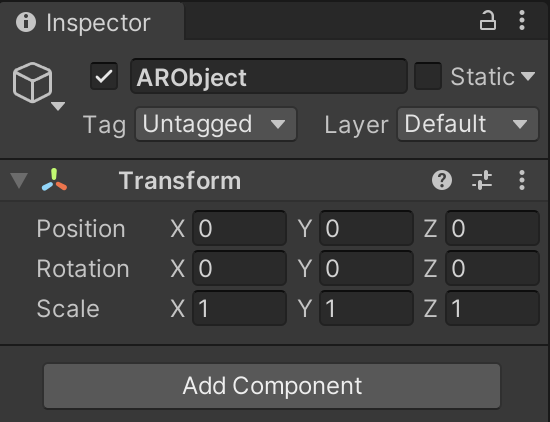
Right click in the Hierarchy window and create a new empty GameObject
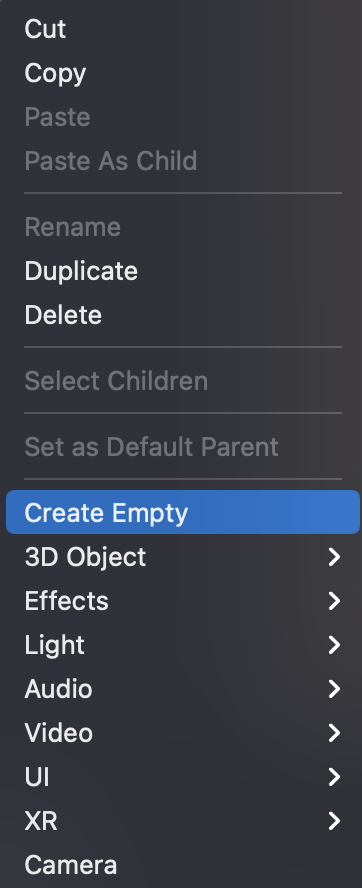
Give it a logical name - ie ARObjectand check the Inspector to move to position 0, 0, 0 (the centre of the scene)
Drag your FBX file into the ARObject and then Drag the ARObject into the Prefab folder - this create the Prefab and makes it editable.
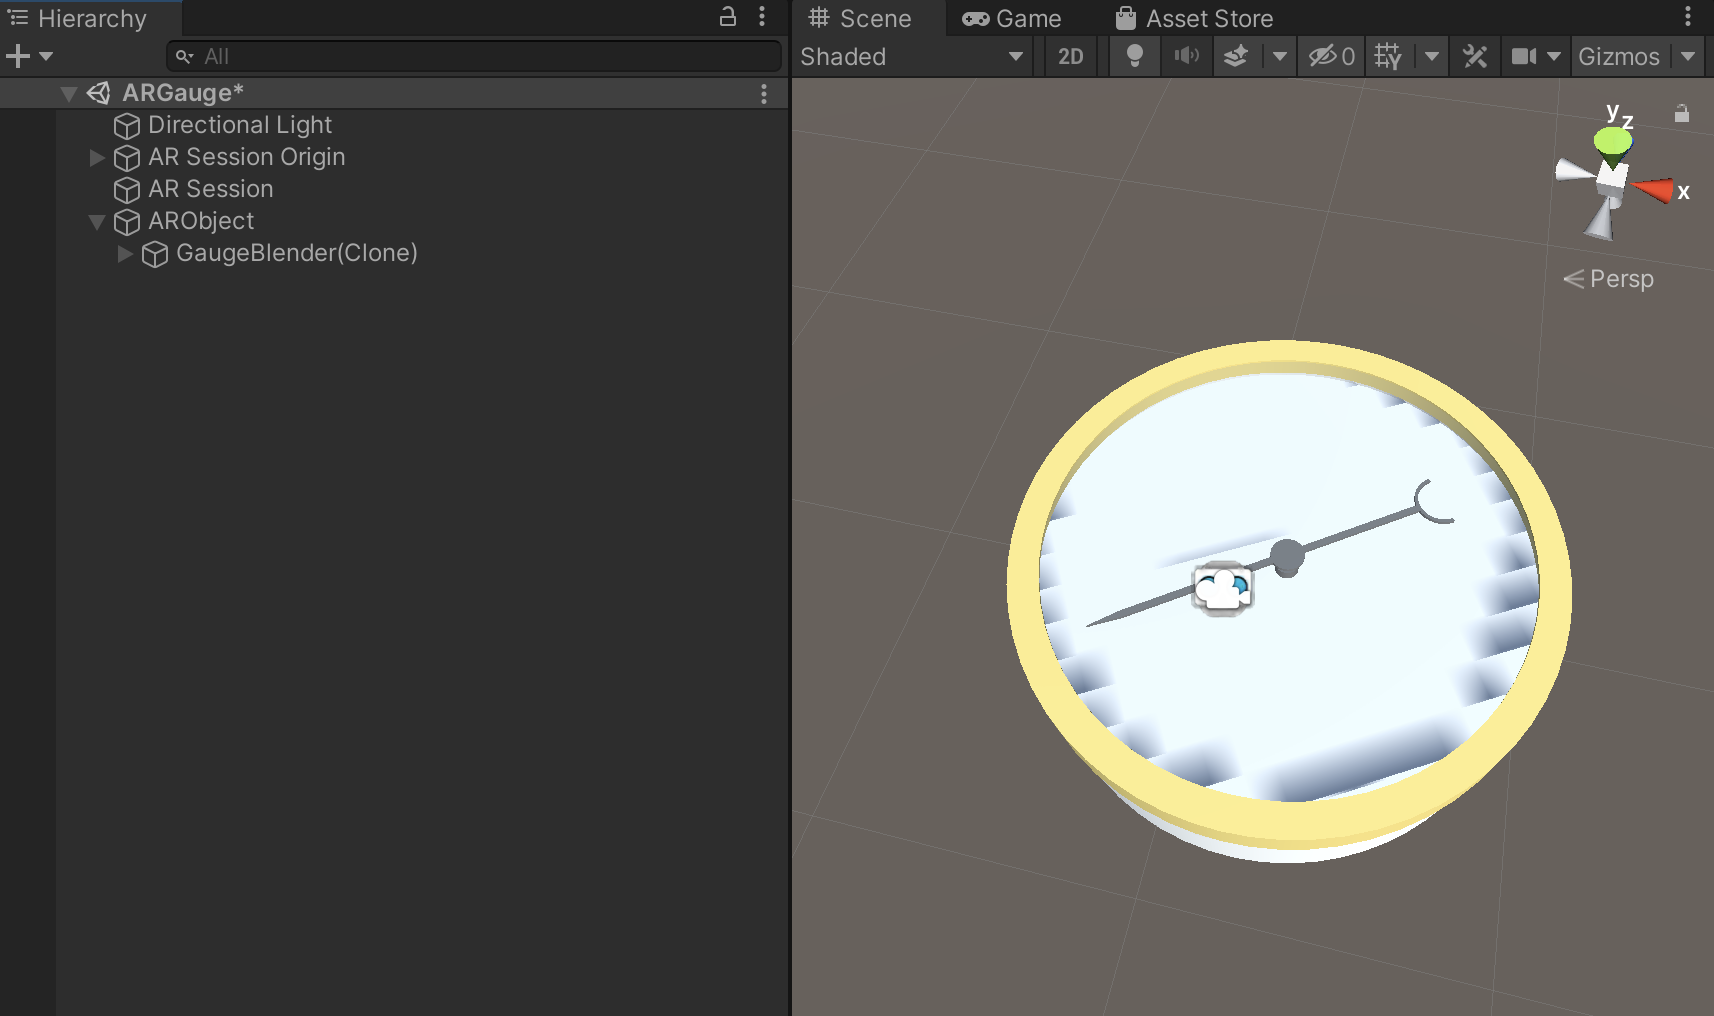
You now have a Prefab ready to hold an AR object and link to the Unity AR scripts.
You can now delete the ARObject from the Hierarchy while we make the final edits to the Gauge.
Now is a good time to save your scene, File -> save as and give it a logical name - ie ARGauge.
Texturing
Open the folder to where you extracted the textures - check if the Winddial.png is present. If it is not, drag it from your hard drive into the folder - we are now ready to reassign the texture to the dial face.
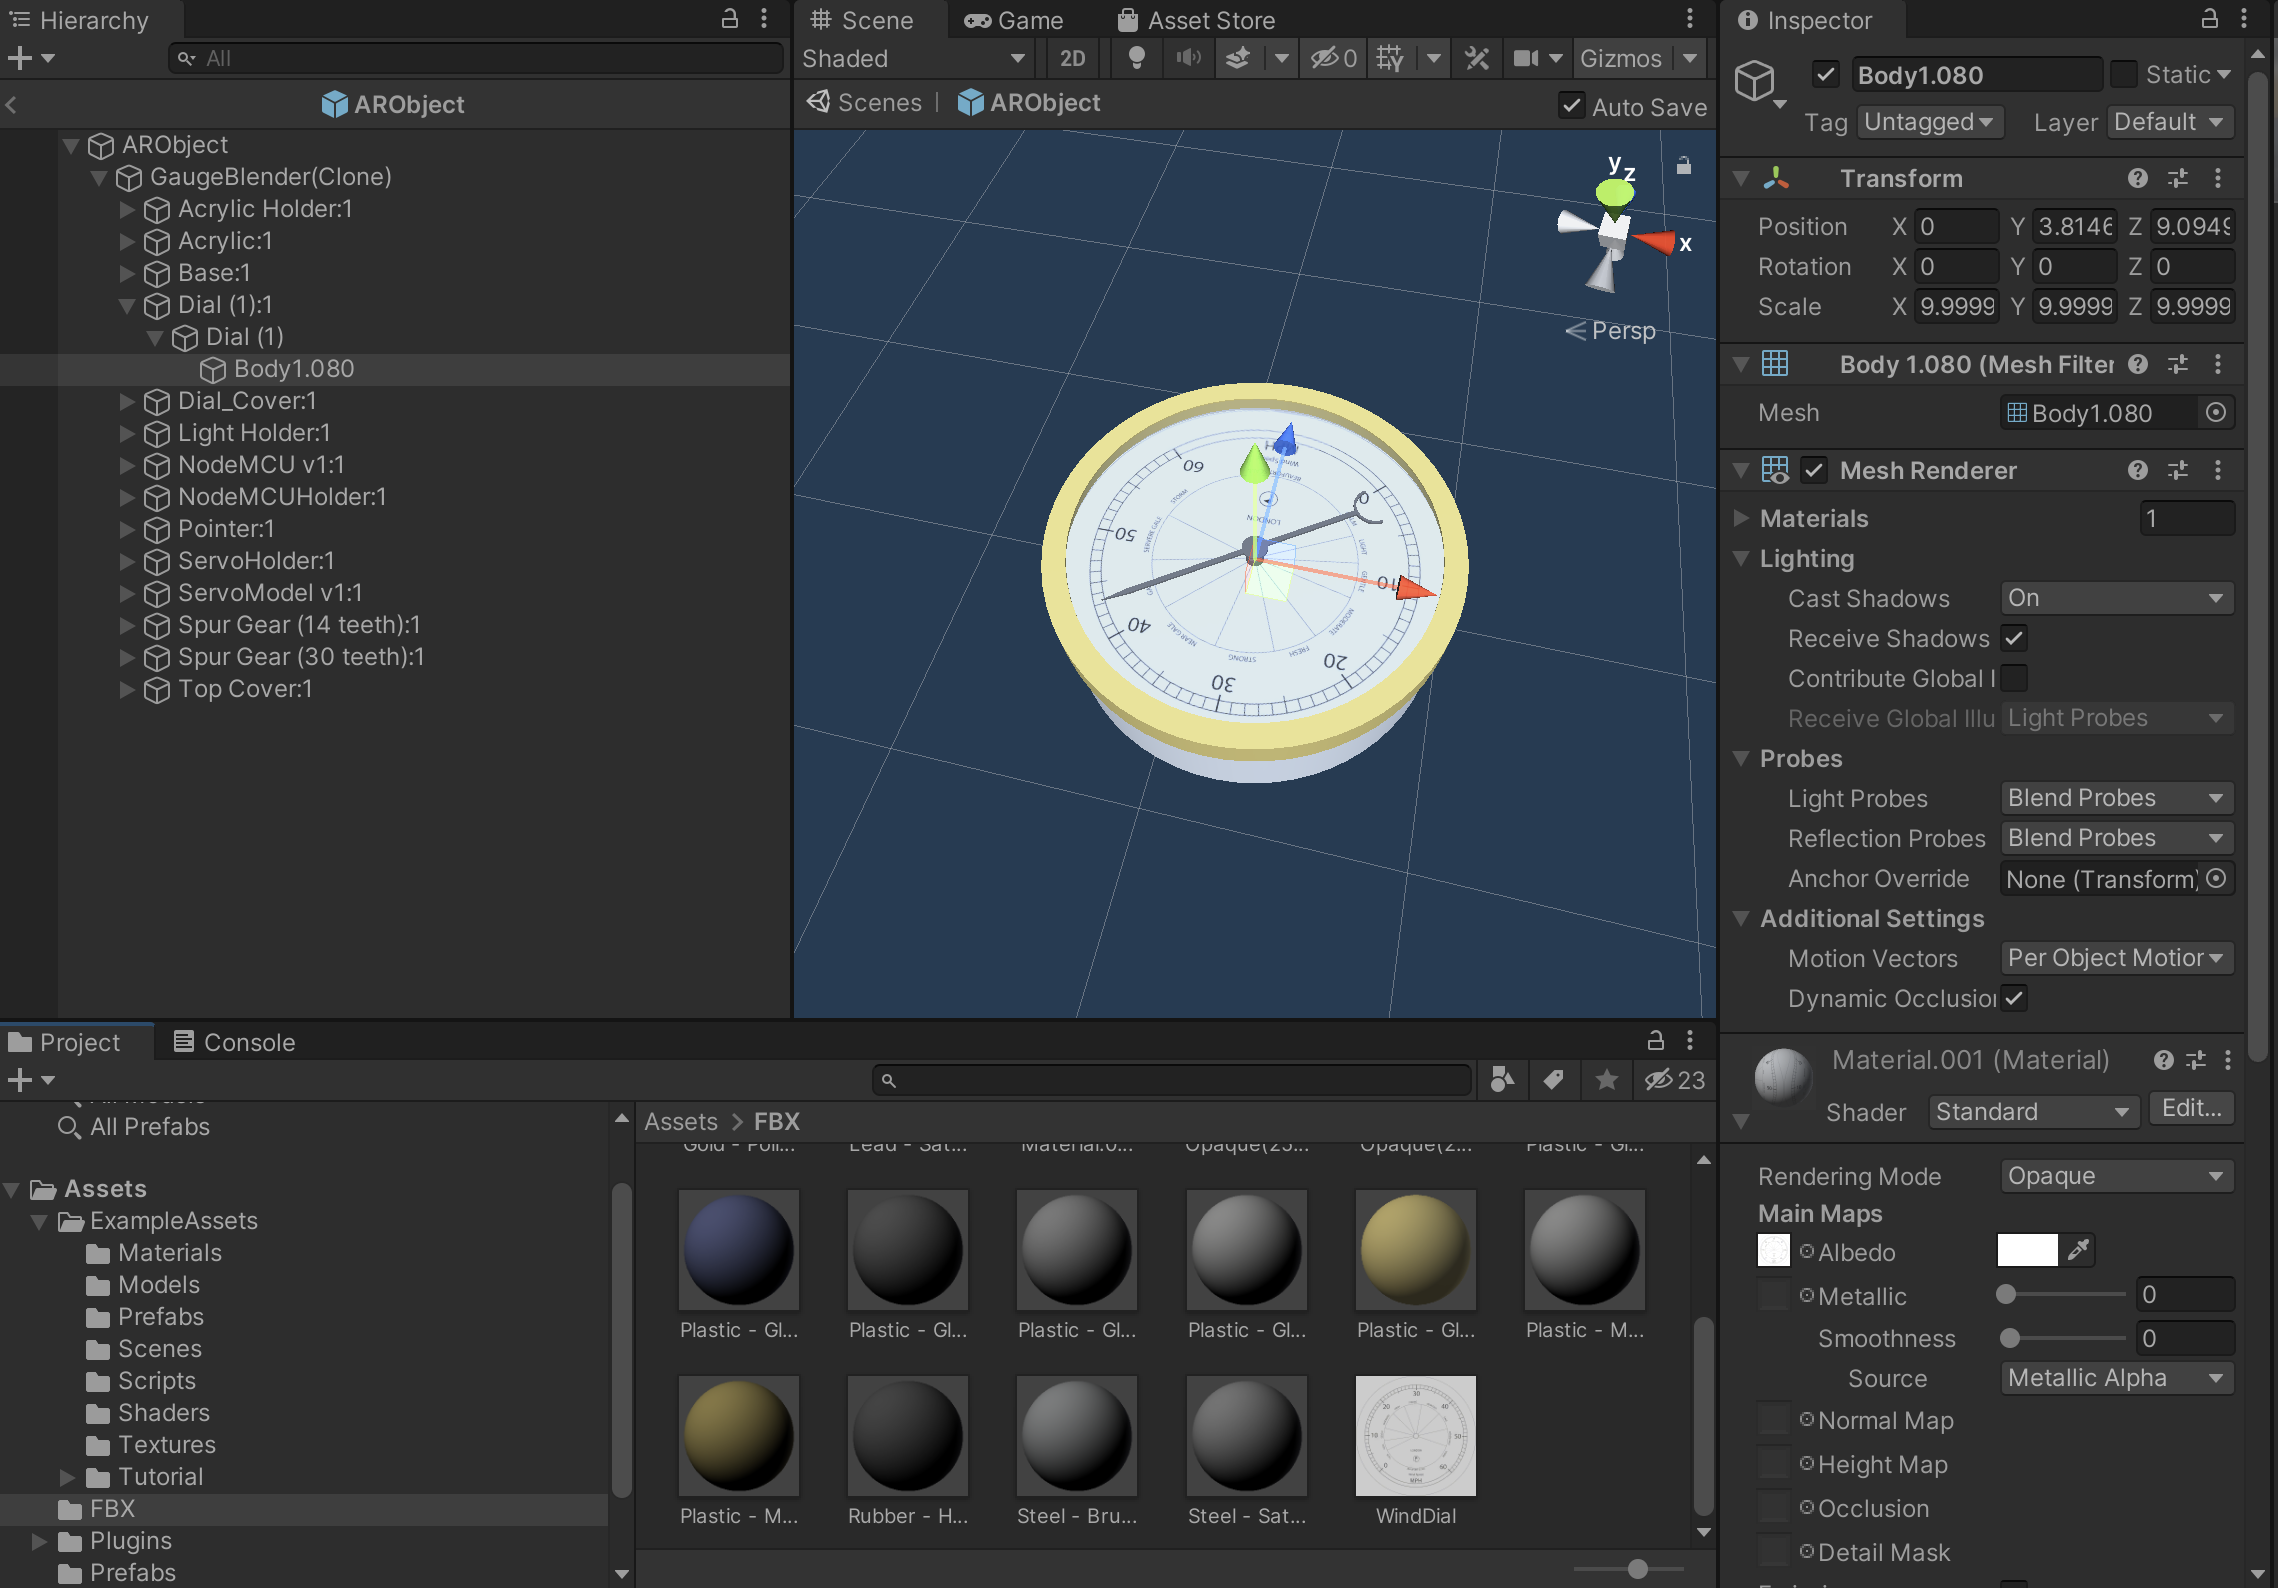
Open your Prefab folder and double click the ARObject - this puts it into edit mode and all changes are saved.
Navigate down to the Dial > Body location and in the drop down next to the Shader Drag the Winddial.png texture into the Albedo side box.
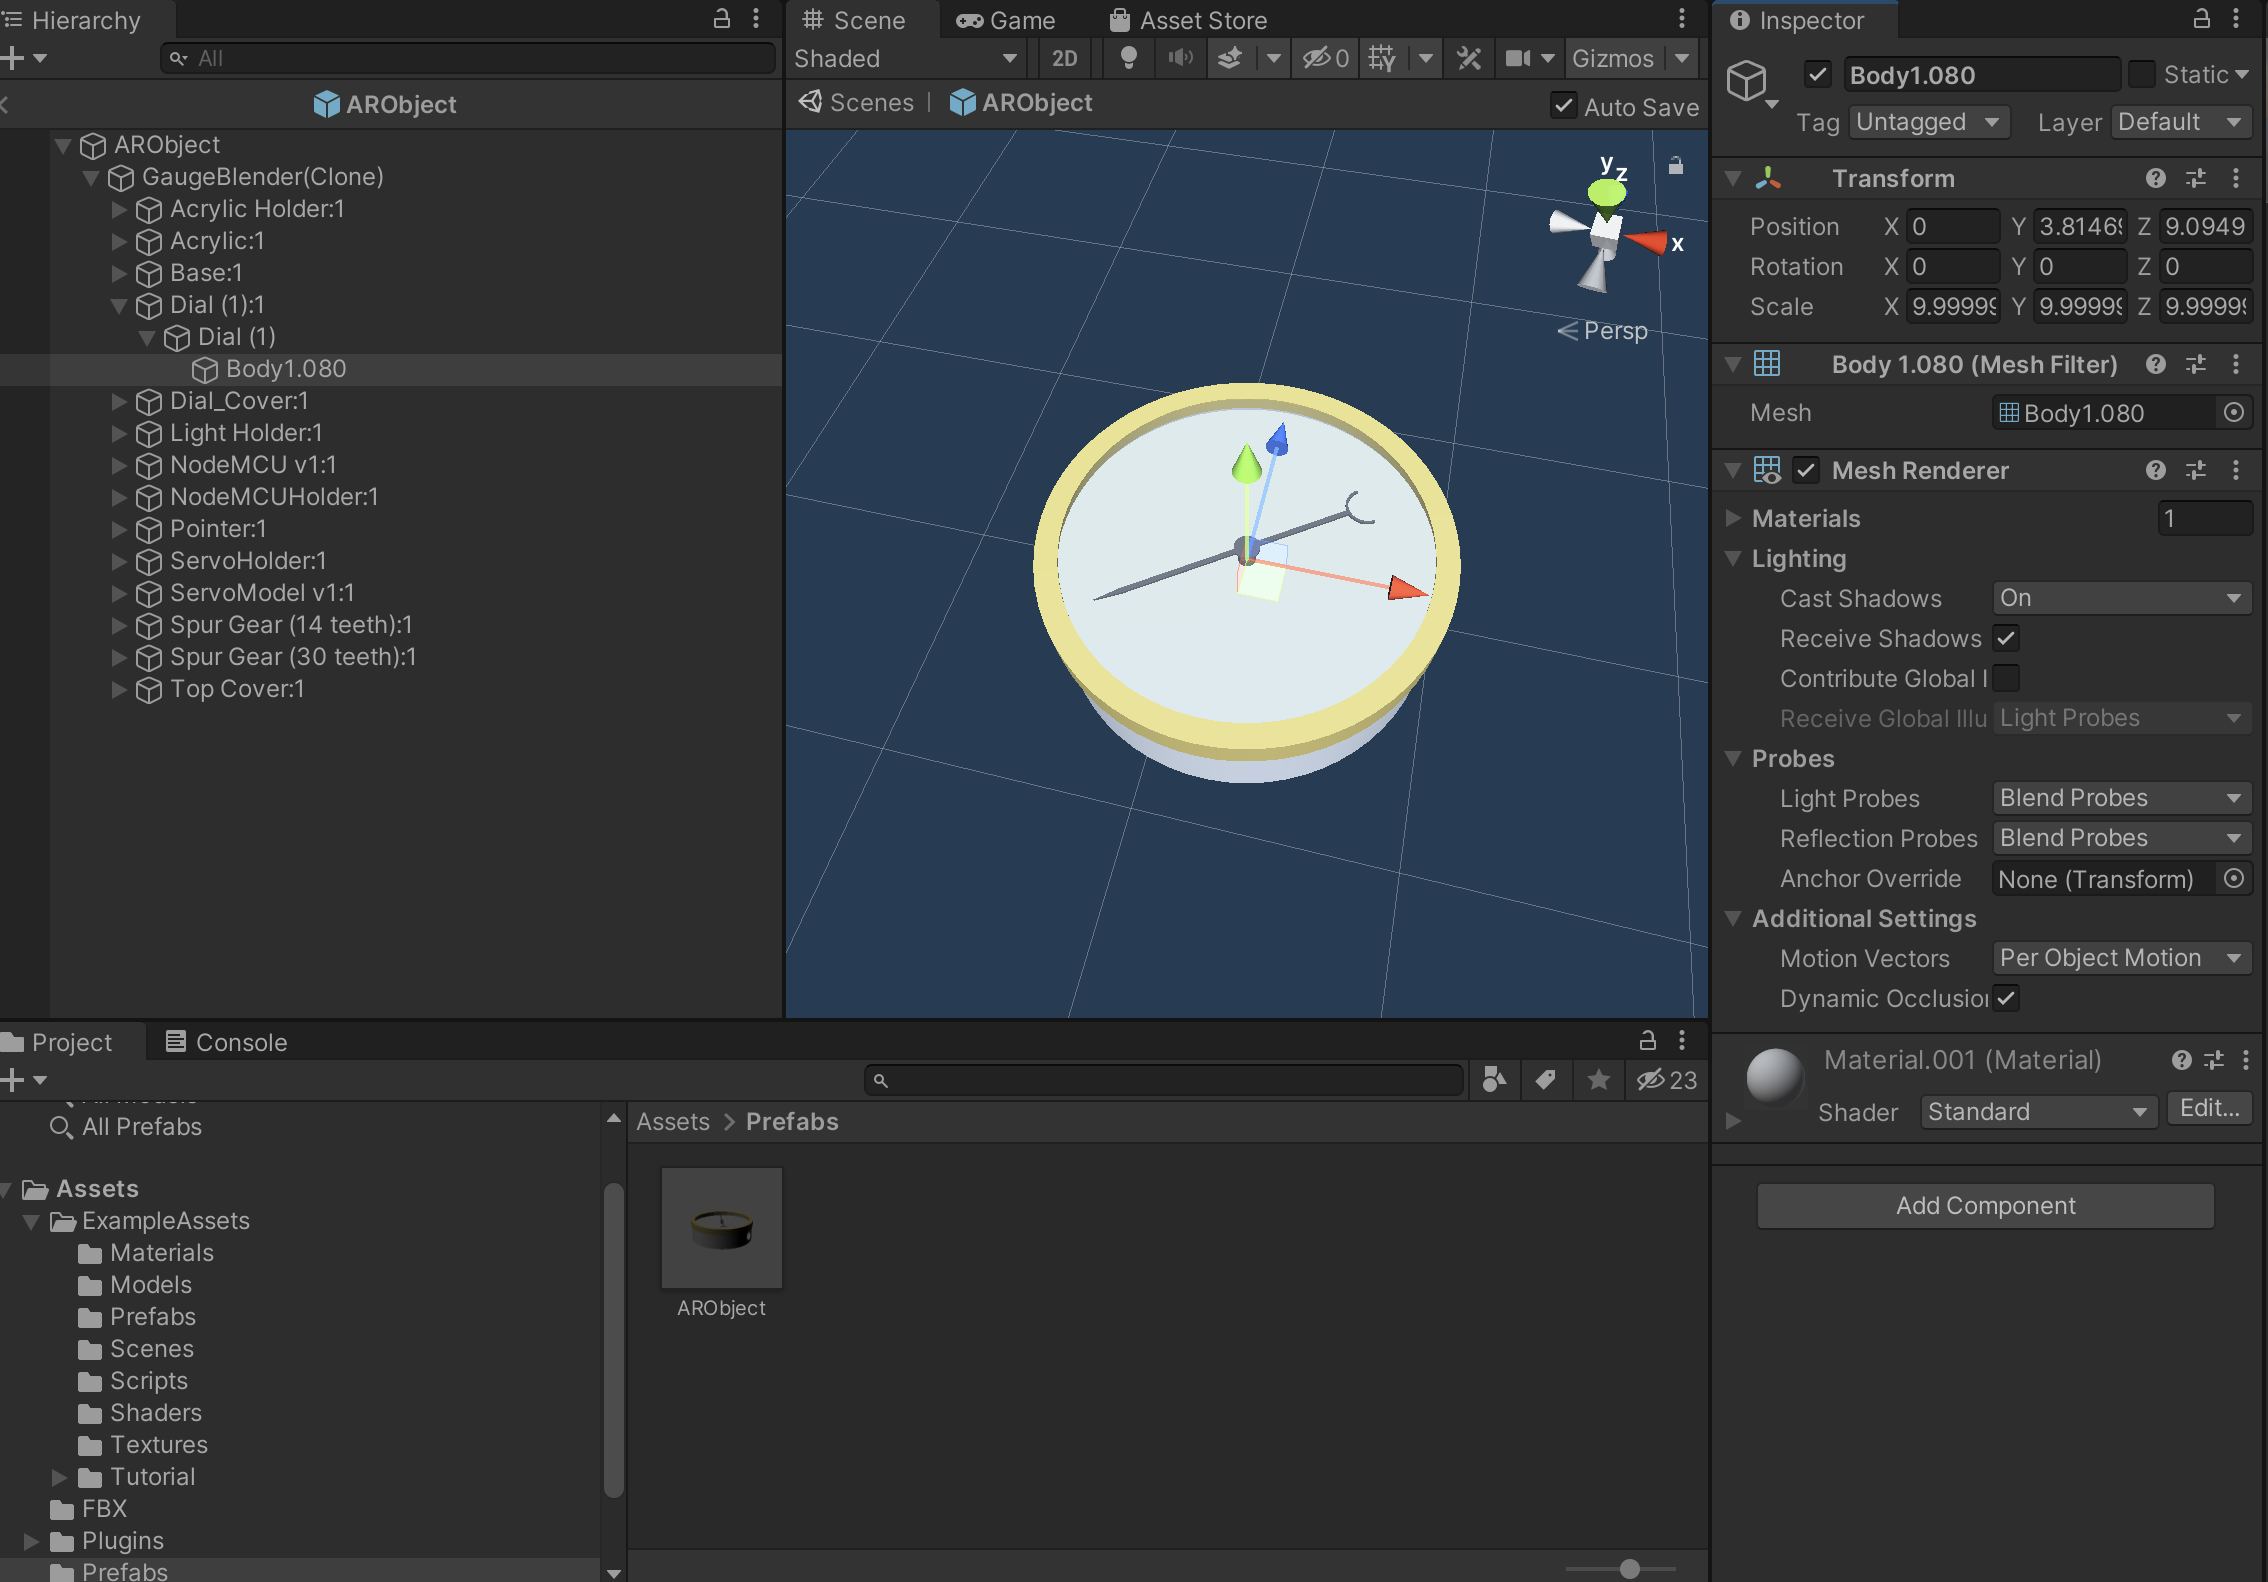
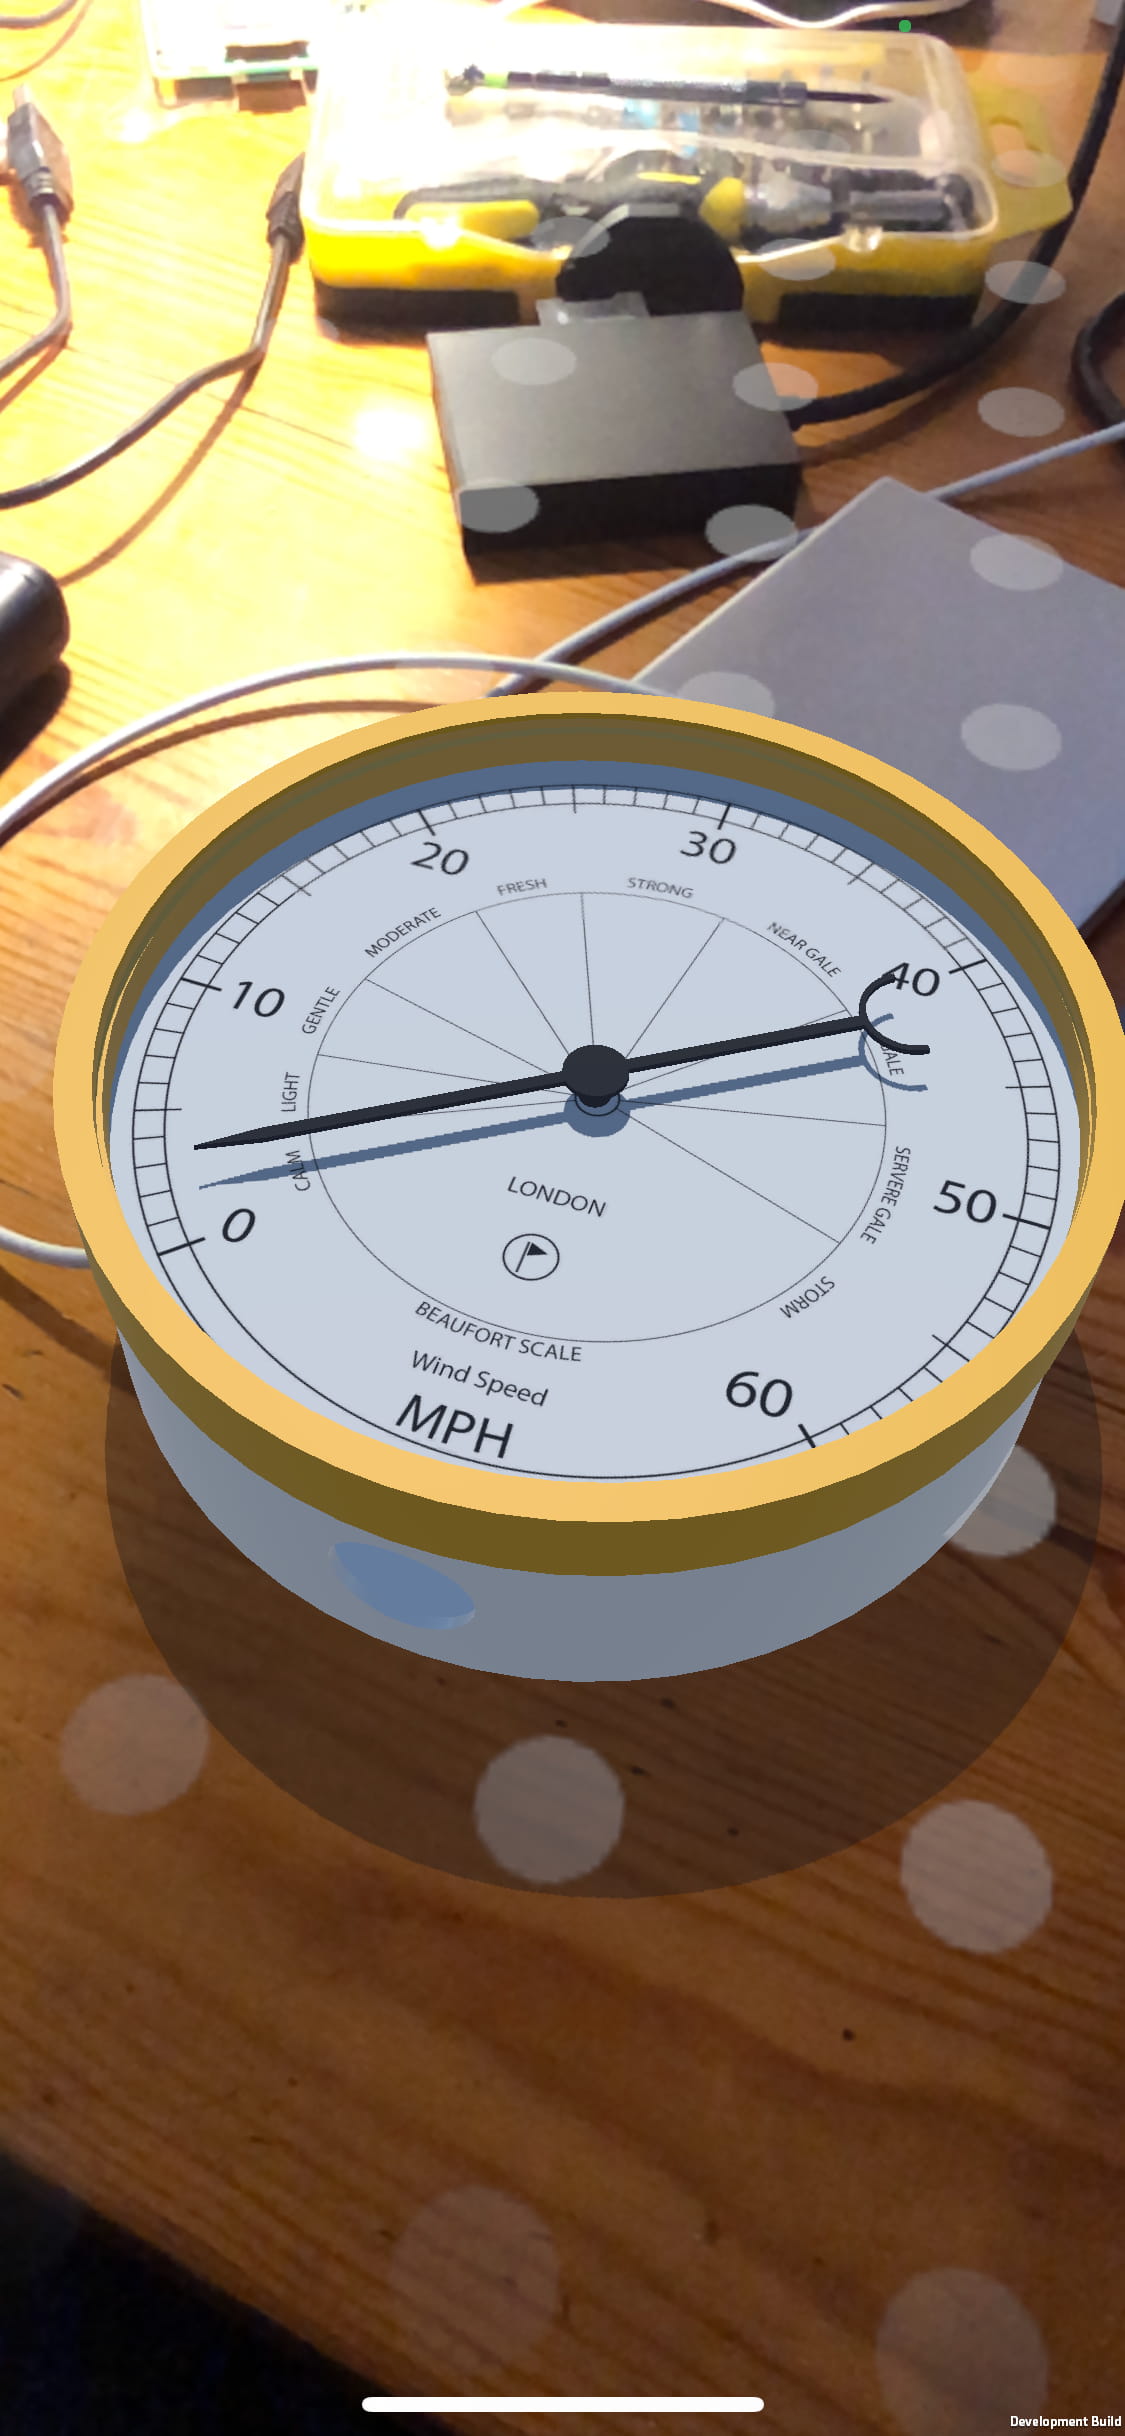
You now have the Guage, complete with the texture on the dial
Positive
:
This texture could now be changed to create any type of dial
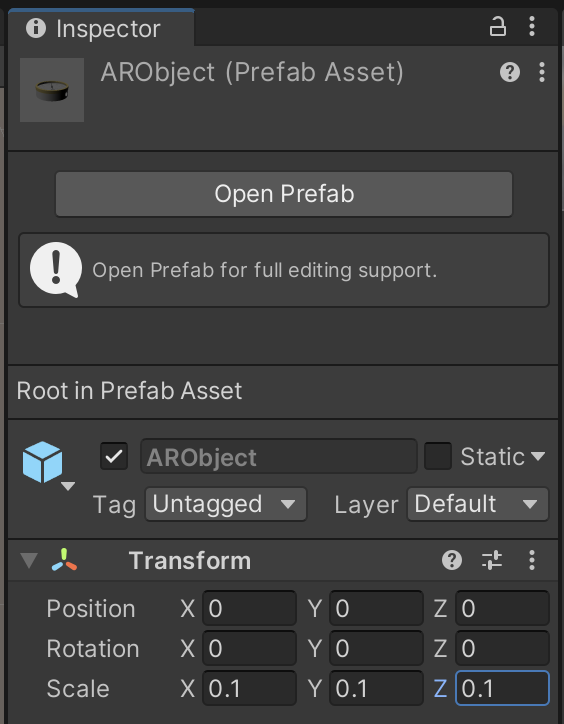
Finally - Scale
AR works on a smaller scale than other Unity scenes - as such you need to select your prefab and set all the scale options to 0.1.
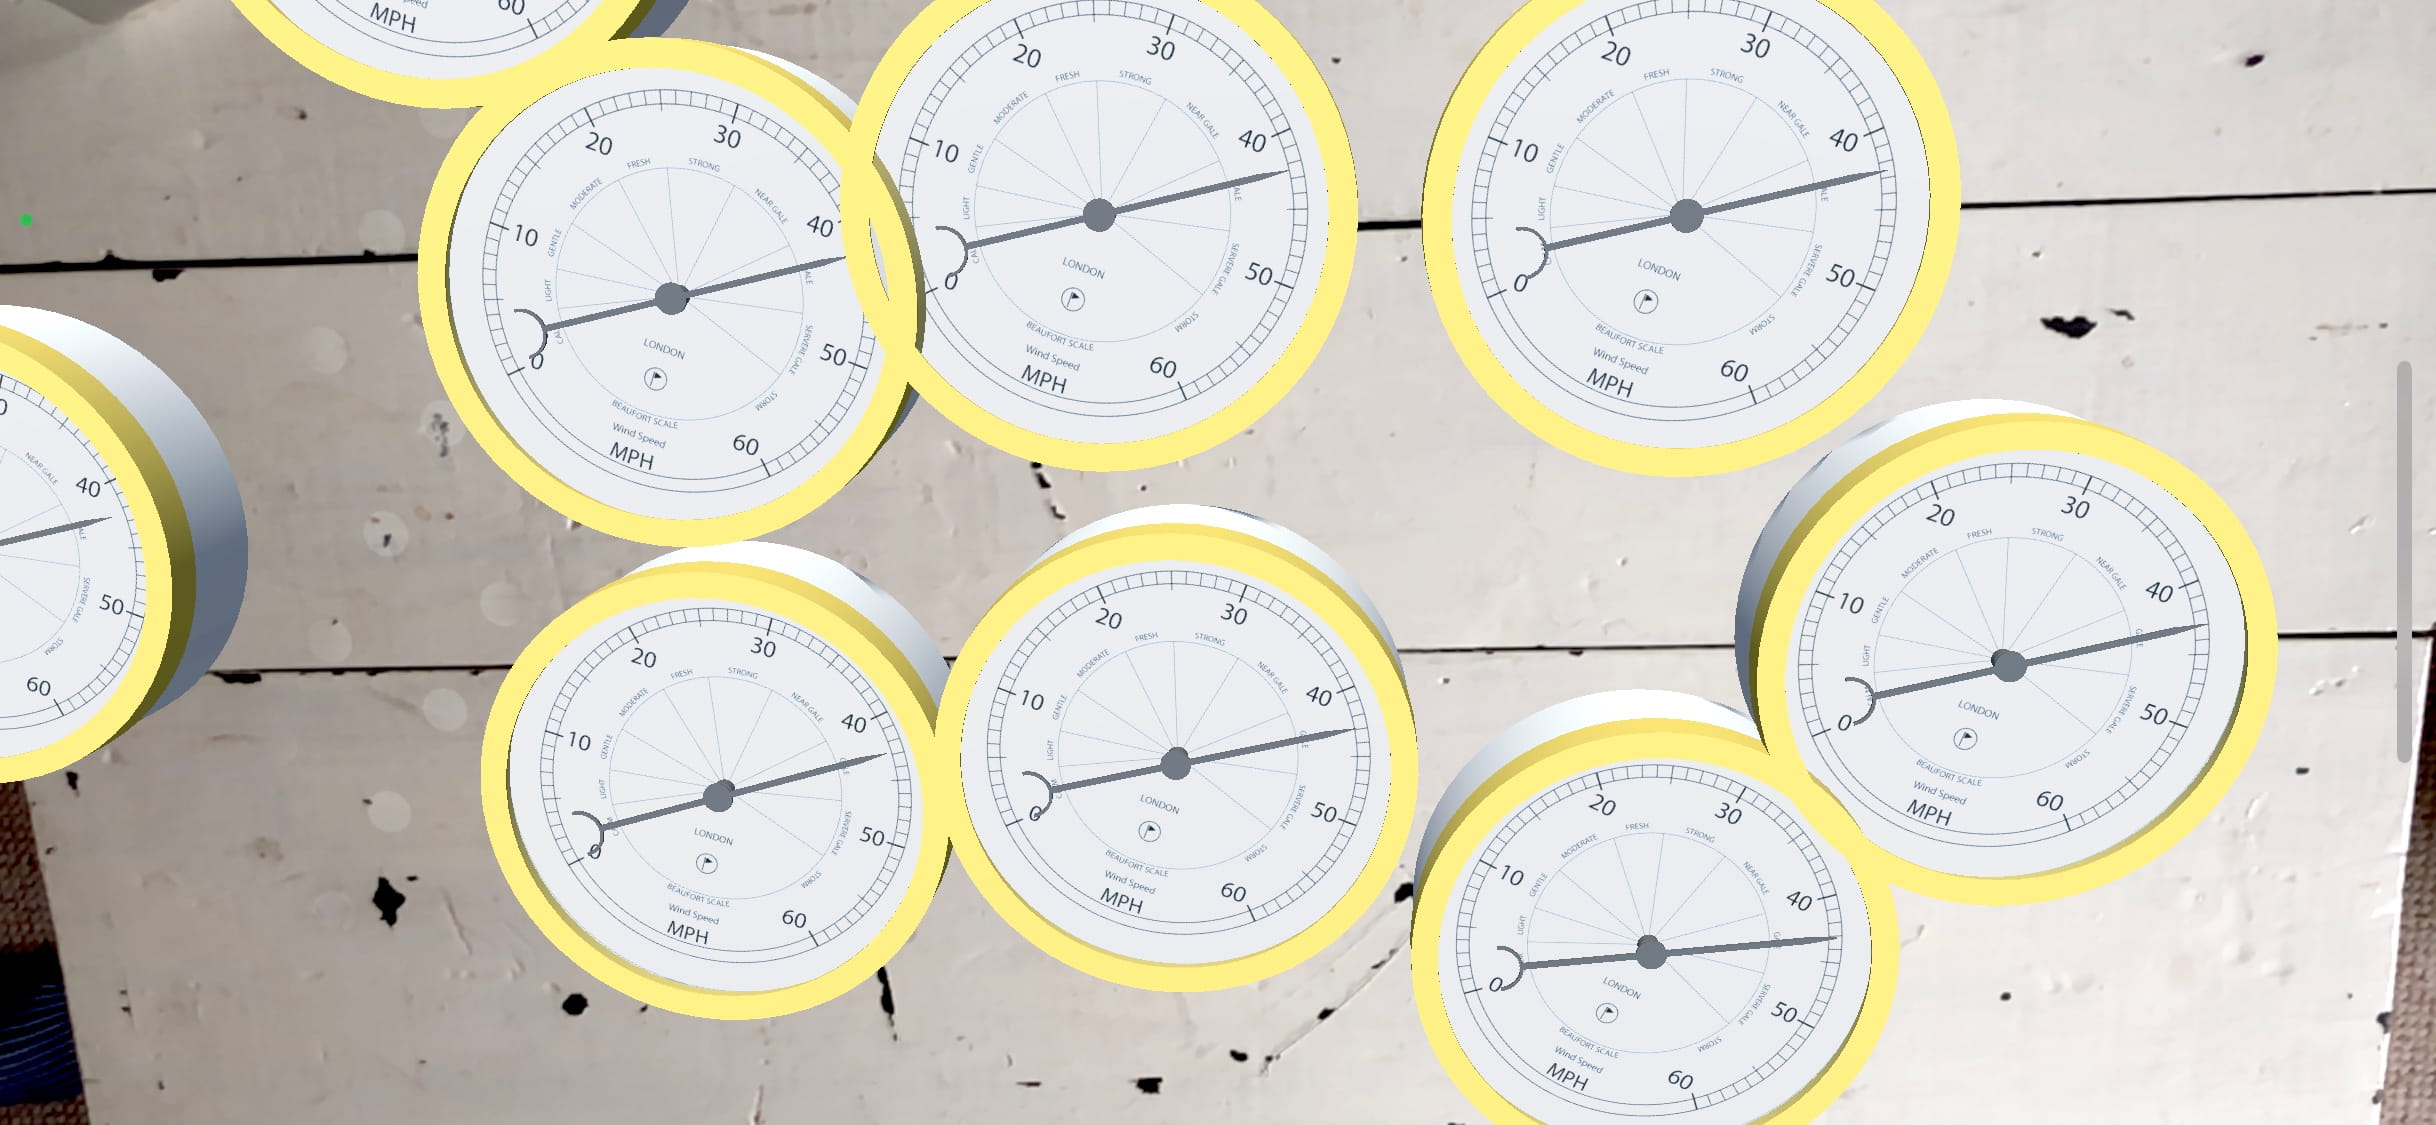
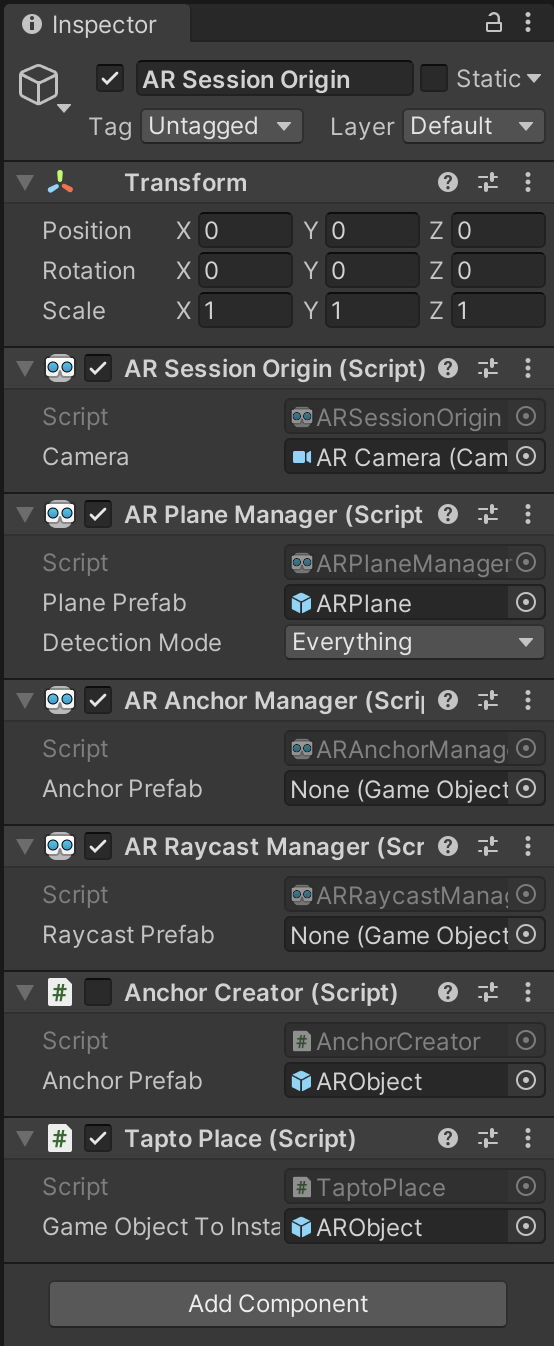
In the empty scene the main aspects of the AR settings can be found under AR Session Origin GameObject in the Hierarchy window. Everything we need is already set up, all that is required is to drag our ARObject onto the Archor Creator Component under Anchor Prefab. Also, be sure that the AR Camera GameObject, inside the AR Session Origin GameObject in the Hierarchy window, has a Tag MainCamera in the Inspector window and not Untagged.
The Unity default settings are however barely useable as Anchor Creator creates a new object in the Augmented Reality scene anytime the the screen is touched. This easily leads to multiple objects appearing and makes it hard to place the object where you want.
Adding a new Touch Anchor
With all the default Unity settings, new scripts can be added. To add a plane where we have the ability to ‘touch to add and object' and ‘hold to drag' (the basic requirements) we are going to add a new script.
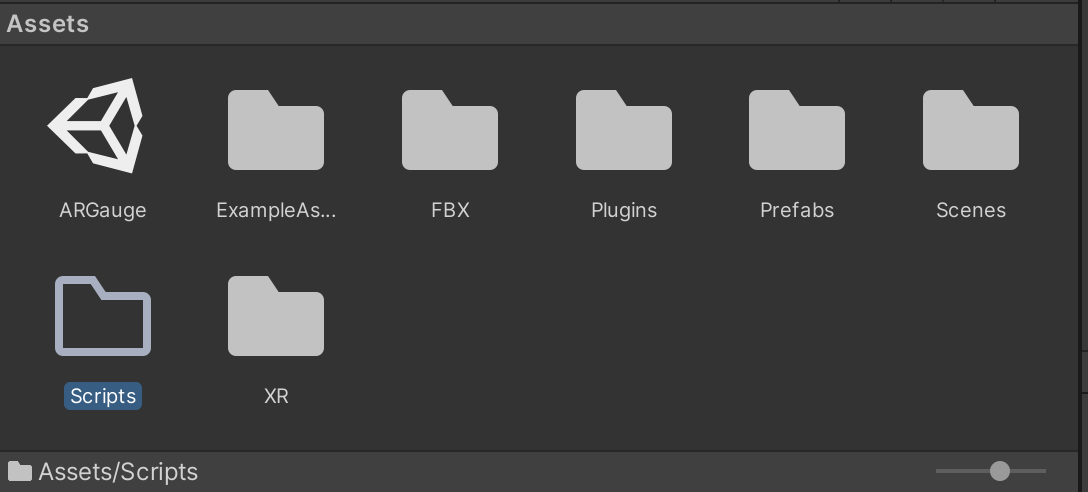
First off it should be organised, so create a new folder in the Assets and name it scripts.
Now right click in the folder and Create -> new C# Script name it TaptoPlace
Copy and paste the following to replace the default script
using System.Collections;
using System.Collections.Generic;
using UnityEngine;
using UnityEngine.XR.ARFoundation;
using UnityEngine.XR.ARSubsystems;

[RequireComponent(typeof(ARRaycastManager))]
public class TaptoPlace : MonoBehaviour
{
    public GameObject gameObjectToInstantiate; //the Prefab from the Asset folder
    private GameObject spawnedObject; //the Prefab Instantiate in the scene
    private ARRaycastManager _arRaycastManager;
    private Vector2 touchPosition;

    static List<ARRaycastHit> hits = new List<ARRaycastHit>();

    public float timeThreshold = 0.5f;
    public bool isTouching = false;

    private void Awake()
    {
        _arRaycastManager = GetComponent<ARRaycastManager>();
    }

    bool TryGetTouchPosition(out Vector2 touchPosition)
    {
        if (Input.touchCount > 0)
        {
            isTouching = true;

            touchPosition = Input.GetTouch(index: 0).position;
            return true;
        }
        touchPosition = default;
        isTouching = false;
        timeThreshold = 0;
        return false;

    }

    // Update is called once per frame
    void Update()
    {
        if (isTouching == true)
        {
            timeThreshold -= Time.deltaTime;
            //Debug.Log("TIMING: " + timeThreshold);
        }

        if (!TryGetTouchPosition(out Vector2 touchPosition))
            return;

        if (_arRaycastManager.Raycast(touchPosition, hits, trackableTypes: TrackableType.PlaneWithinPolygon))
        {
            var hitPose = hits[0].pose;

            if (timeThreshold < 0)
            {
                if (spawnedObject == null)
                {
                    spawnedObject = Instantiate(gameObjectToInstantiate, hitPose.position, hitPose.rotation);
                }
                else
                {
                    spawnedObject.transform.position = hitPose.position;
                }
            }
        }
    }

}
Drag the script into AR Session Origin GameObject (or select Add Component) and Drag the ARObject into the GameObject to Instantiate field. We need also to turn off, or delete, the component Anchor Creator.
Unity is now ready to deploy the application to your mobile device.
If all is set up correctly then deploying to your device is easy. There are a few catches which are useful to solve failed builds.
To build and run on your device - File -> Build Settings and add open scene also check you have the correct deployment selected - in our case, ios.
File -> Build and Run - this sets off the compile process.
iOS
In iOS after File -> Build and Run Unity will launch Xcode which in turn will process the build to be deployed on your mobile device. Your device needs to be connected and ‘trusted' by the computer it is connected to. If you press the play button at the top of Xcode, with your mobile device selected and the destination the Xcode should install and run the application on your iPhone or iPad. When it loads, move the phone so the camera can detect a plane and then tap to place your 3D model.
If xCode fails to build - the issue is normally with the Apple Account settings and often due to the Signing and Capabilities. Select the project from the left hand side (the top blue icon) and in the middle navigate to Signing and Capabilities.
Select Automatic Signing and then your account via the drop down Teams. If you now press the Play icon, the application should build to your device.
Well done - you have your first Augmented Reality Application.
Android
In Android the first time we run File -> Build and Run Unity will ask a destination folder to save the application as a APK file format then, if a device is connected, Unity will install the application on the device. If the device is not connected, or not recognised, it is possible to upload the file directly on the Android device, the file will be recognised and installed.
As for the iOS version, when it loads, move the phone so the camera can detect a plane and then tap to place your 3D model.
The Lean Touch Asset provides a quick and easy way to add multiple gestures to your AR project without writing code.
Installation is a two step process, firstly you need to "buy" the Assets (its free) from the Unity Store, to add it to your asset collection.
Head to The Unity Store

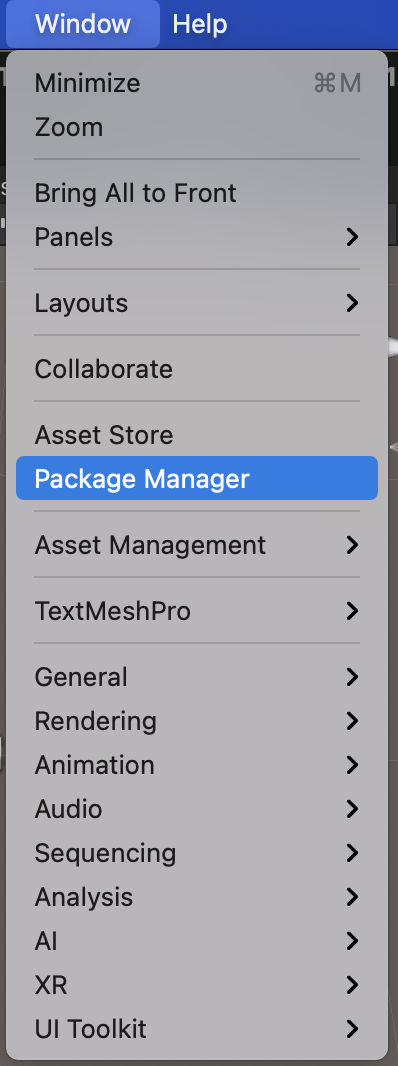
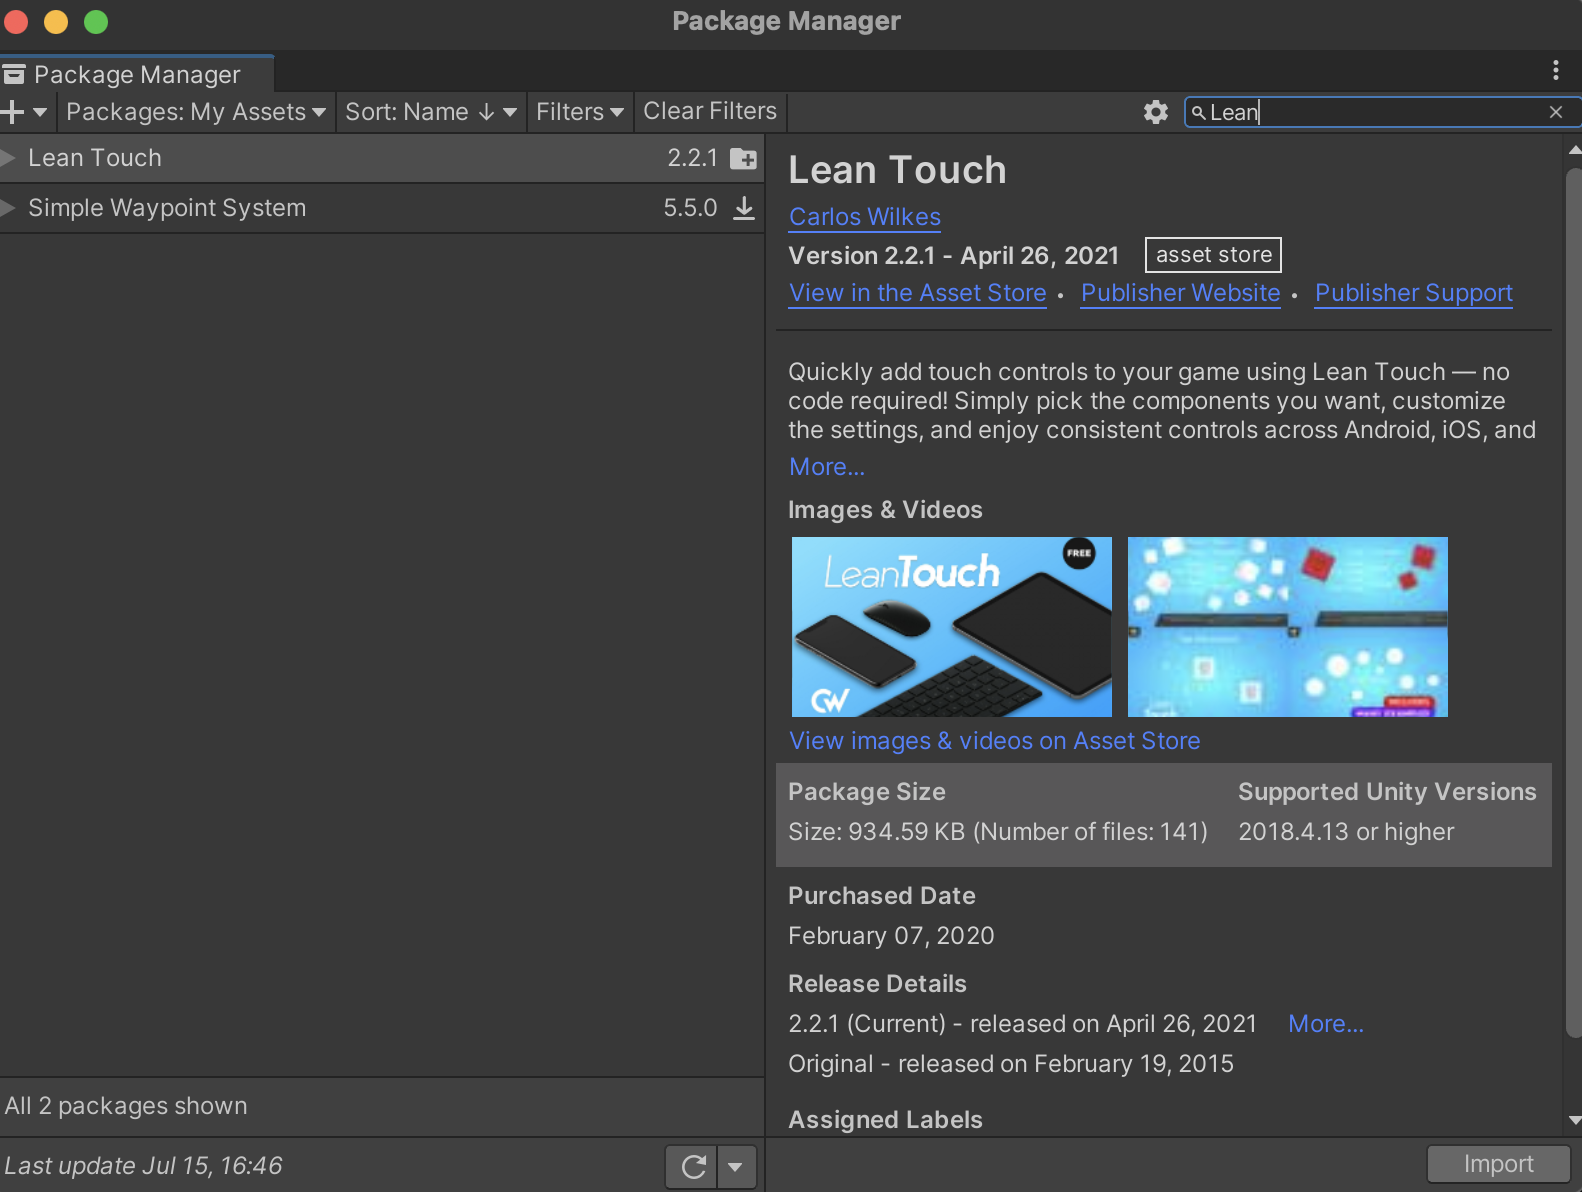
Secondly install in Unity by going to Window -> Package Manager
Search under Packages: My Assests for Lean Touch and import.
Lean Touch requires a listener and an EventSystem in the Hierarchy of the project. If you right click you will see a new Lean option, select it an click Touch. In the same way, right click UI -> EventSystem.
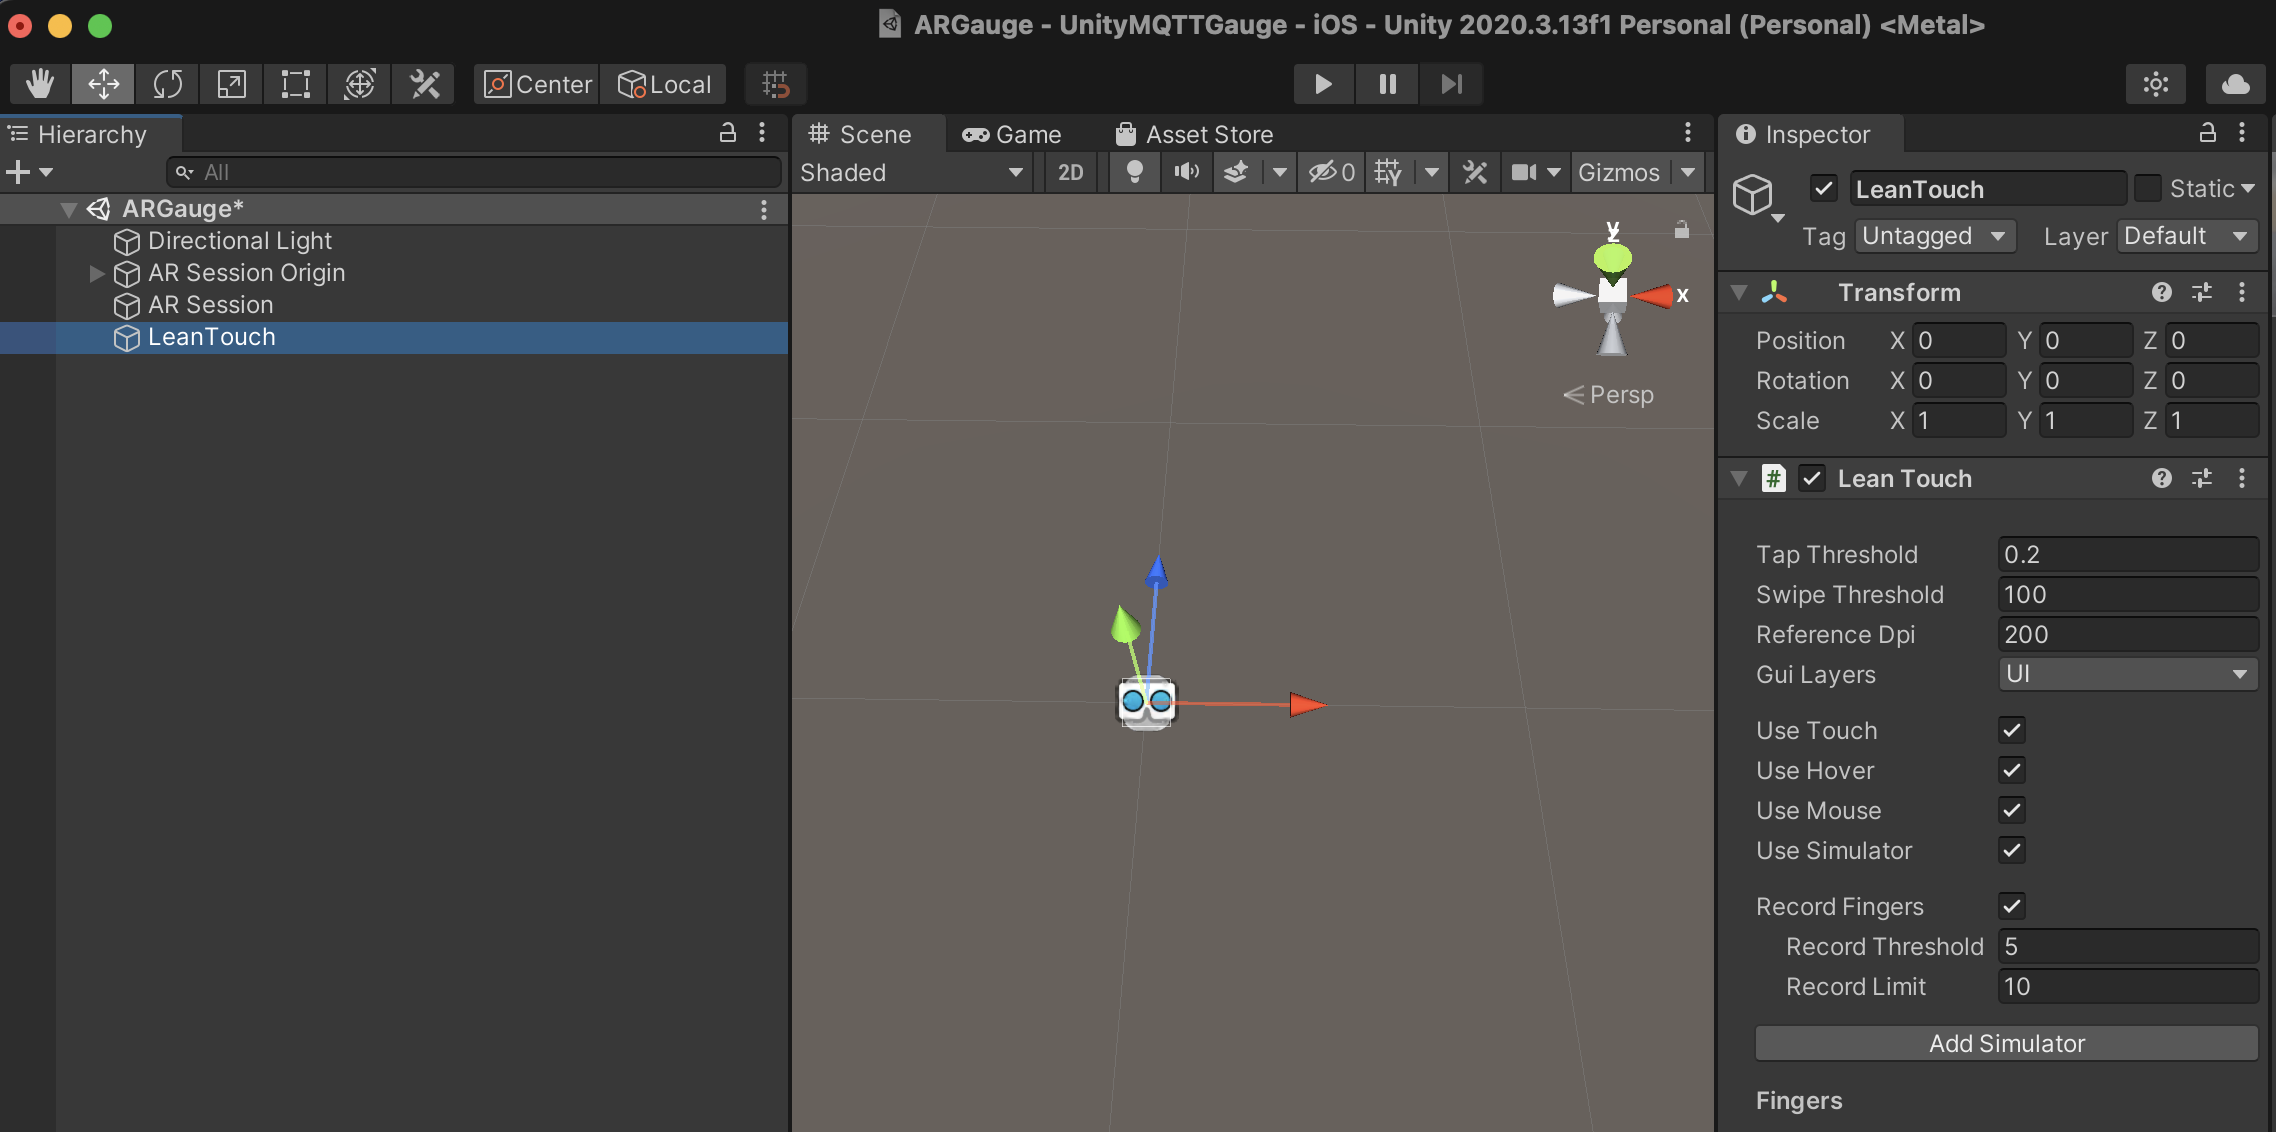
We now need to add the touch controls to our object (gauge Prefab) - there are numerous options and Lean Touch can be used for any application with a touch screen.
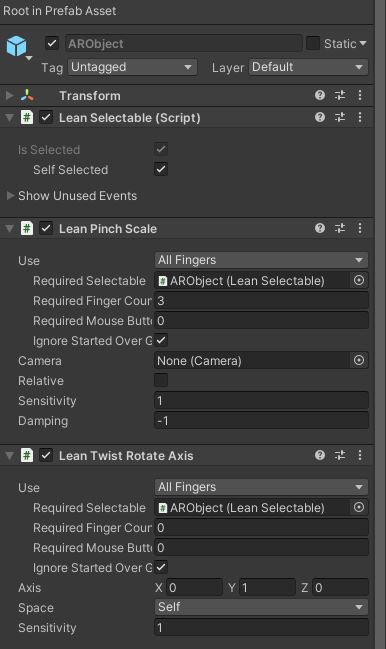
Double click your AR Object Prefab to open it and Add Component if you type in Lean you will see a long list of options. Our first one is Lean Selectable and we want to tick the Self Selected option - this simple makes sure our object to ready to touch.
Secondly add Lean Pinch Scale with Required Finger Count3
Finally Lean Twist Rotate Axis and we are moving the y axis - so set y to 1.
Full setting are below:
Back in the scene you can drag your Prefab into the Hierarchy and use the Add Simulator option to test the touch controls (with a mouse) - the object will be visible in the Scene mode not the Play Mode.
Arguably it more fun to build and run to try to on the device.
You should now be able to tap to place, scale and rotate your object in Augmented Reality.
Before we add in some live data, the Gauge should look a bit more realistic with shadows on the ground plane and on the dial.
Realistic lighting is central to making an object in Augmented Reality look real and they are various shadow, light and camera techniques which can be used to allow an object to look more natural in its surroundings.
Dial Shadow
The Gauge so far is not showing any shadows - this is due to a couple of settings in Unity which need to be changed. Firstly head to Edit -> Project Settings and, on the left-side panel, select quality. We are going to use the Medium settings and edit the shadows so they appear on small objects.
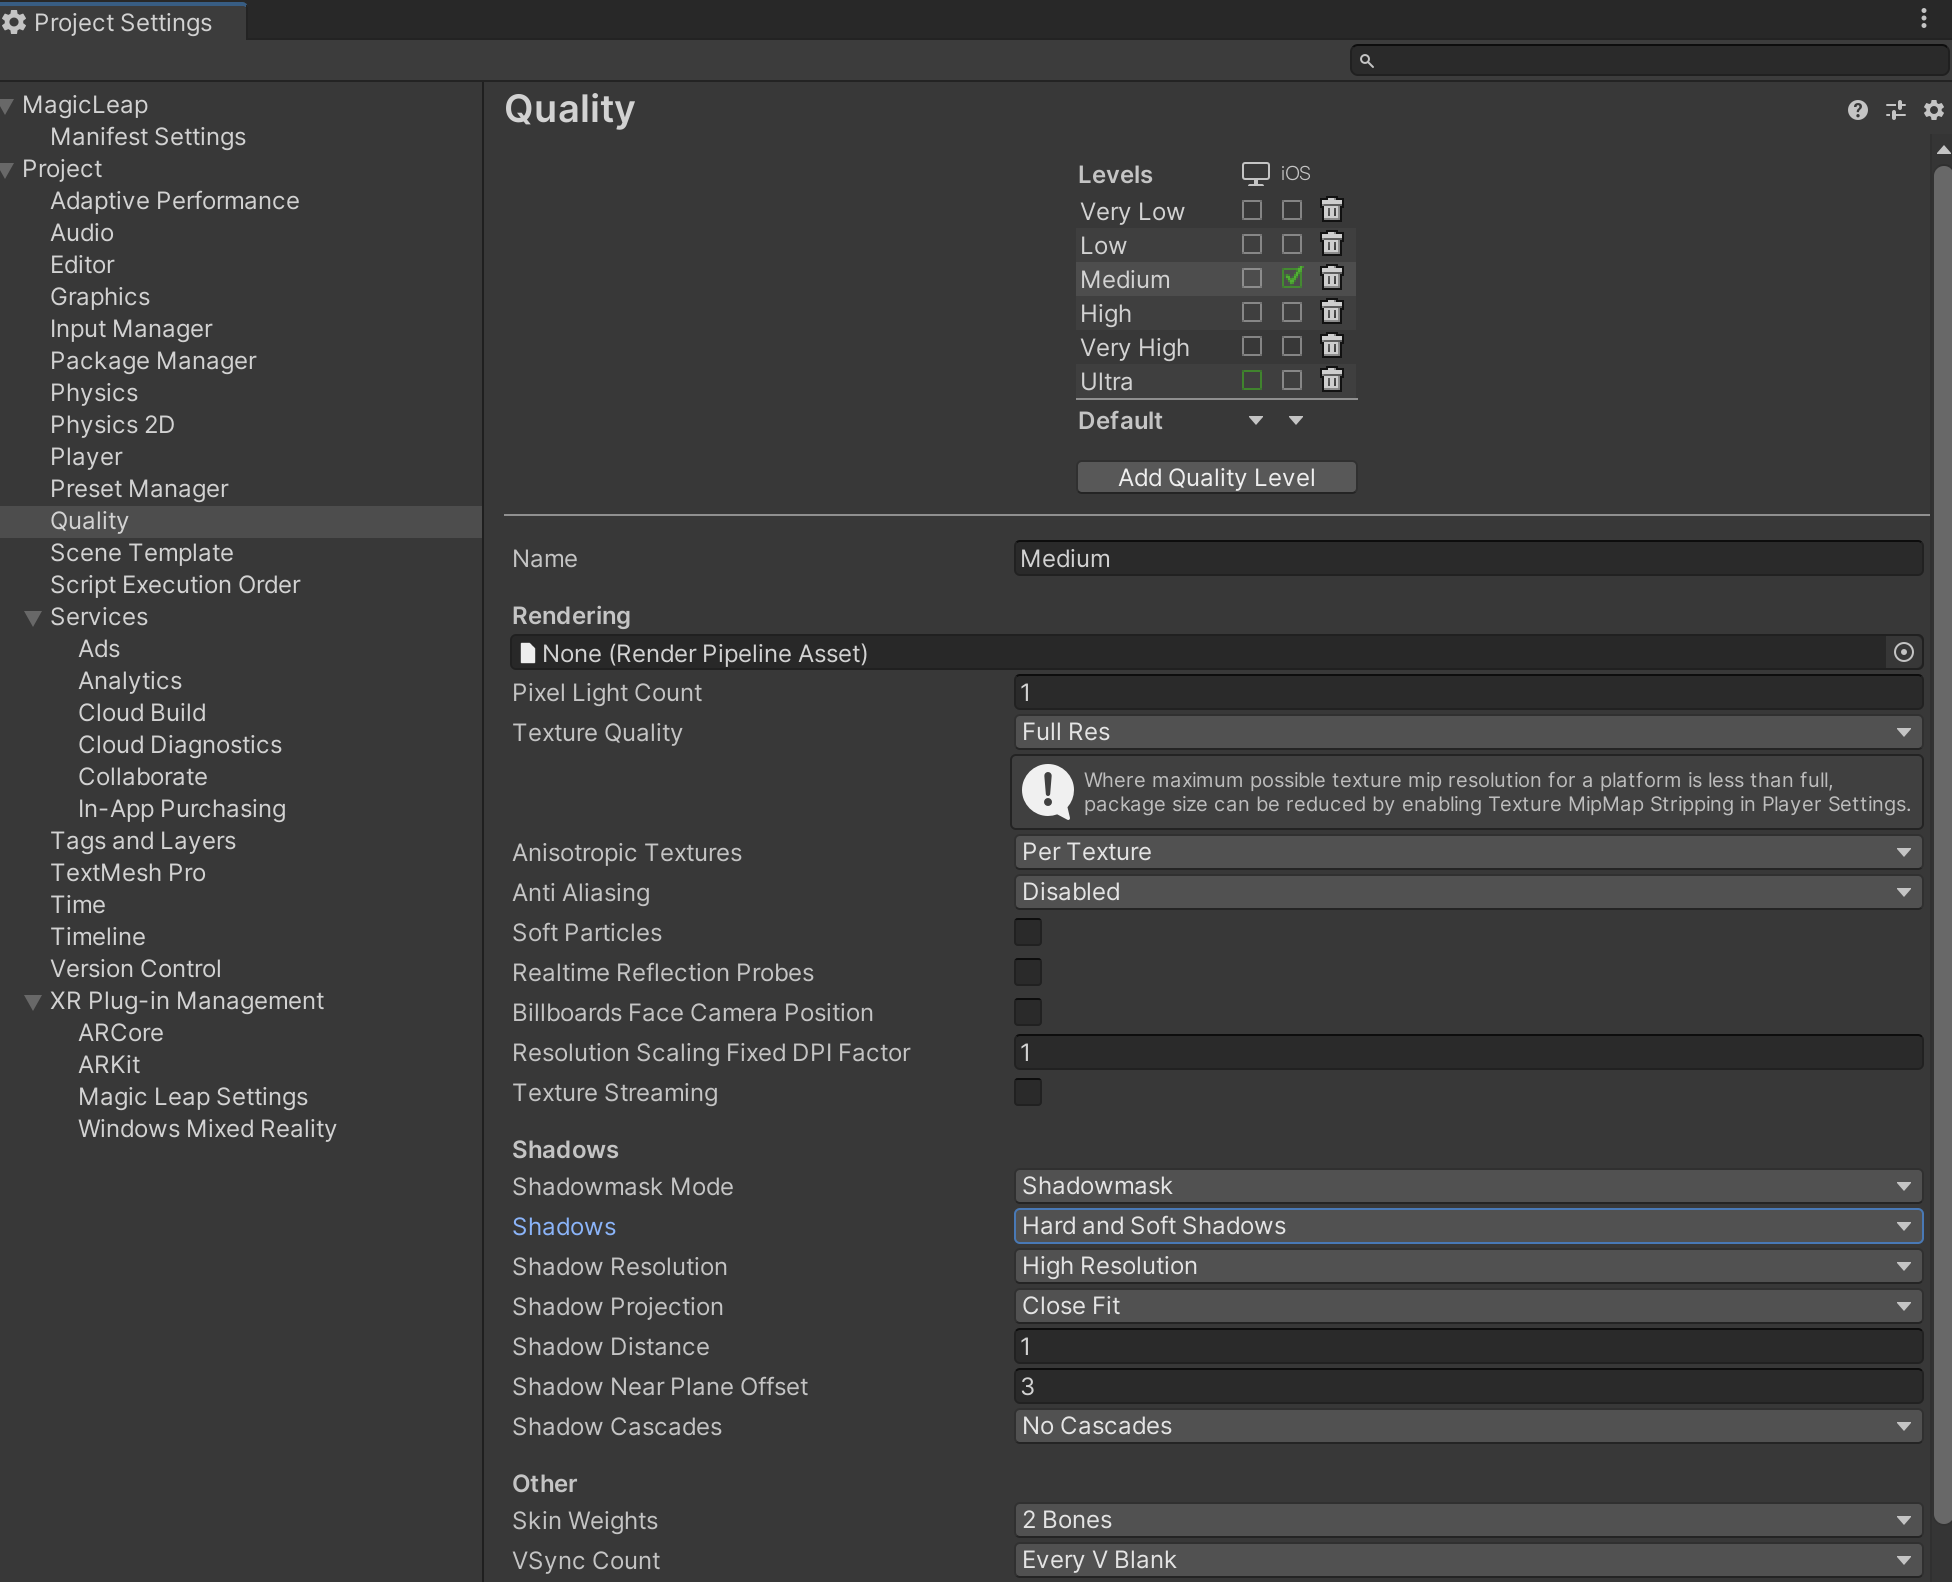
As above the main edits are to set:
- Shadow Resolution:
high - Shadow Projection:
close fit - Shadow distance :
1 - Shadow Near Plane Offset:
3
Lighting
To finalise these settings we need to head back to the editor. Select the Directional Light from the Hierarchy and in the Inspector change the Bias to 0 - as ever with Unity it is one of those settings that is slightly obscure but without set at 0 the shadows in AR do not show.

Textures
We have the dial texture in place, a final tweak is adding some gloss to the outer rim and the glass as well as making the pointer a true black.
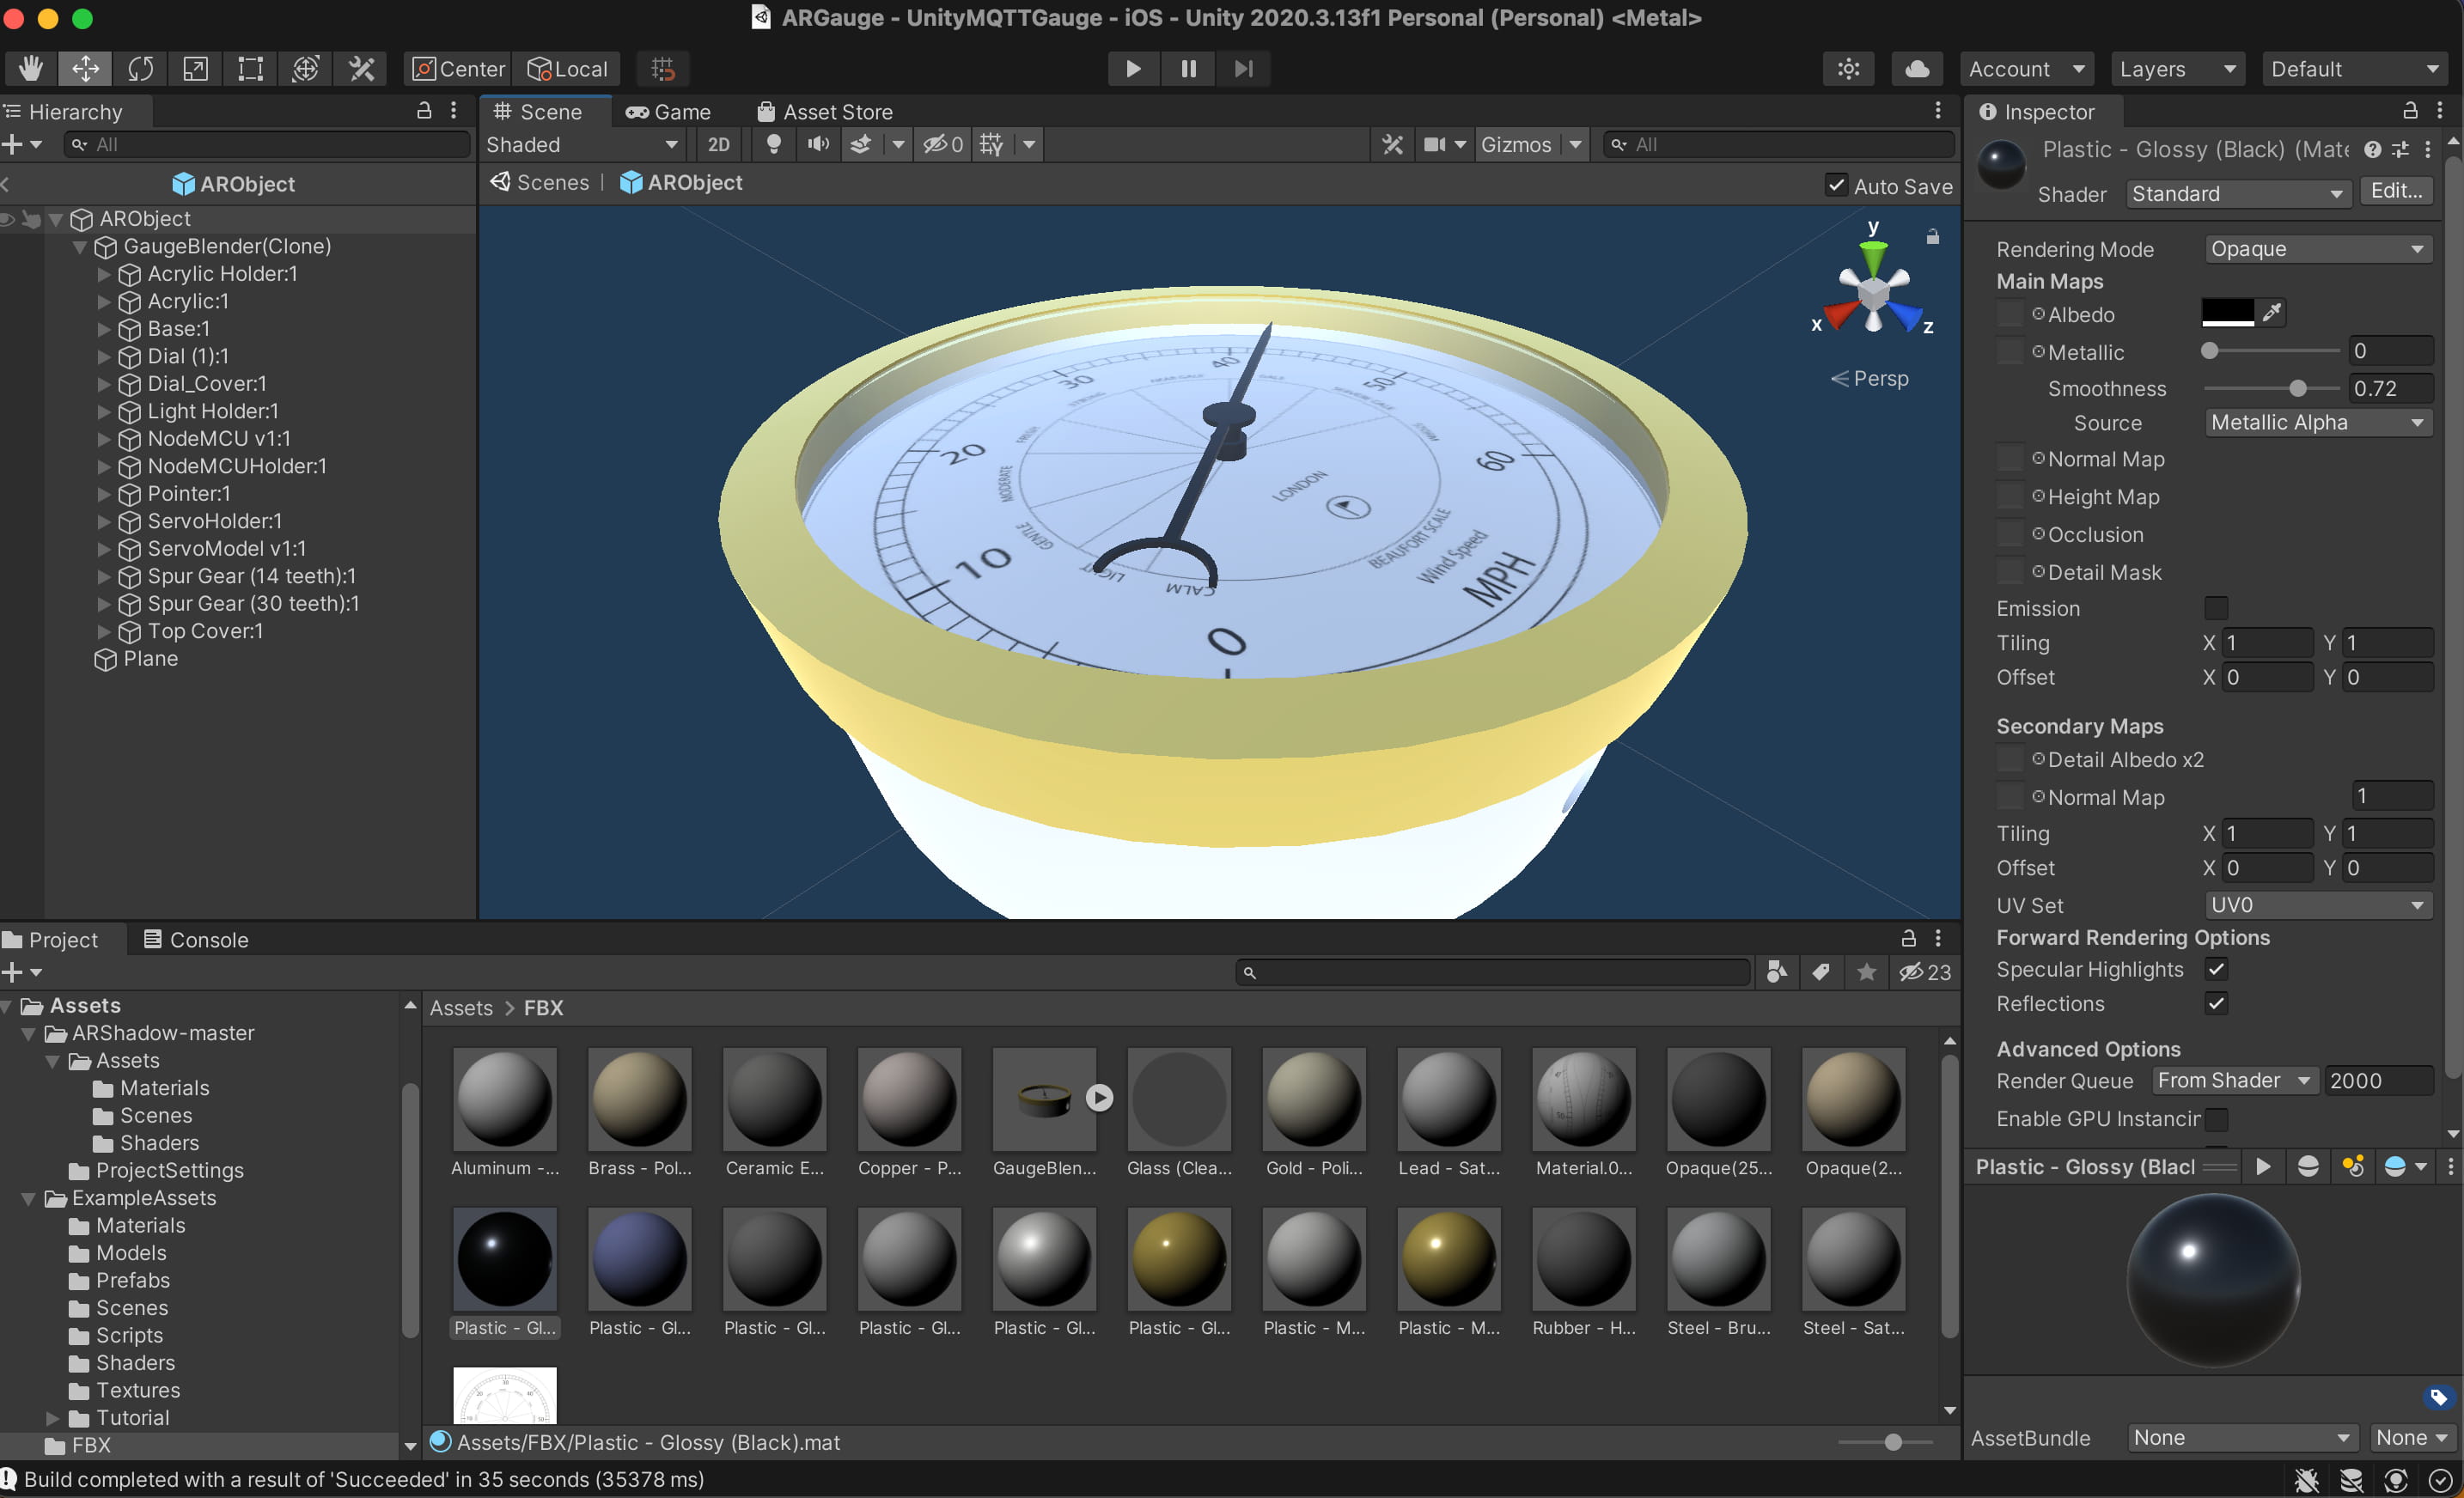
As shown above the route from Fusion into Blender imports a number of unused textures. For our use we simply need to increase the smoothness of the textures used - the yellow and the white. If you move the glossiness slider you will see the texture change in preview circle. A mid level is a good basis.
The black from fusion on the pointer is grey in Unity - this can be changed by opening the colour wheel by clicking the colour next to albedo - change it to black and also increase the smoothness.
Similarly with the glass texture, edit the smoothness - this can be almost at 1.
The effect is subtle but adds to the reality of the model. Textures are an art in unity and the asset store has a number of excellent free textures you can use.
Base Shadow
Finally shadows need to fall on any surface you use for the Augmented Reality. This used to be part of the asset set with the Augmented Reality system in Unity. However, at the time of writing June 2021 AR Foundation does not provide a similar solution. A similar asset can be manually downloaded from GitHub and imported as an extra asset
Download the assets (zip or github and unzip into a folder)
Import the asset by dragging the AR Shadow Master folder into your main assets location.
All we need now is a base plane on which to place the shadow texture.
The Base Plane
Open your AR Object Prefab and as part of the main Gauge Hierarchy add a Plane
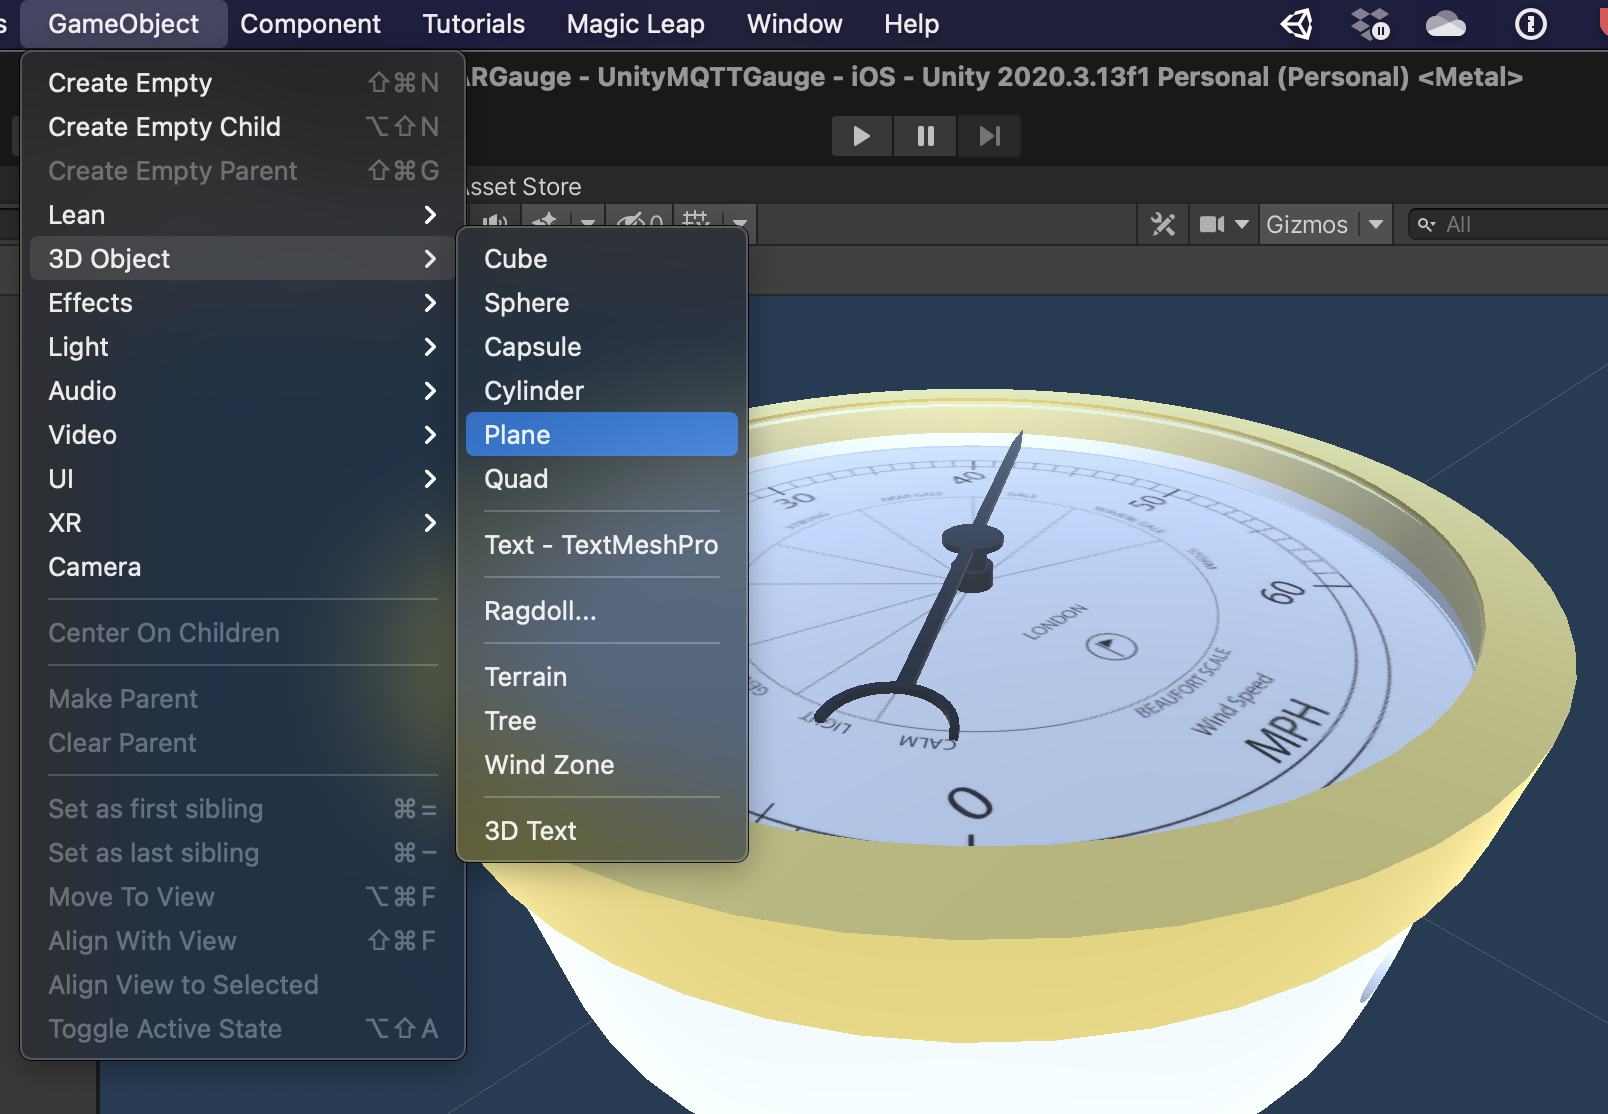
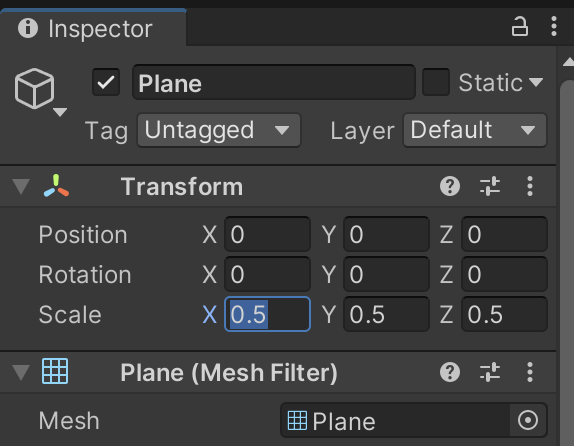
The plane needs to be moved so it sits at the bottom of the Gauge - so move it to position 0,0,0 and scale 0.5,0.5,0.5
The final part is to apply the shadow texture to the plane.
Open the folder Assets -> ARshadow-master -> Assets -> Materials and drag the ARShadow texture onto the plane.
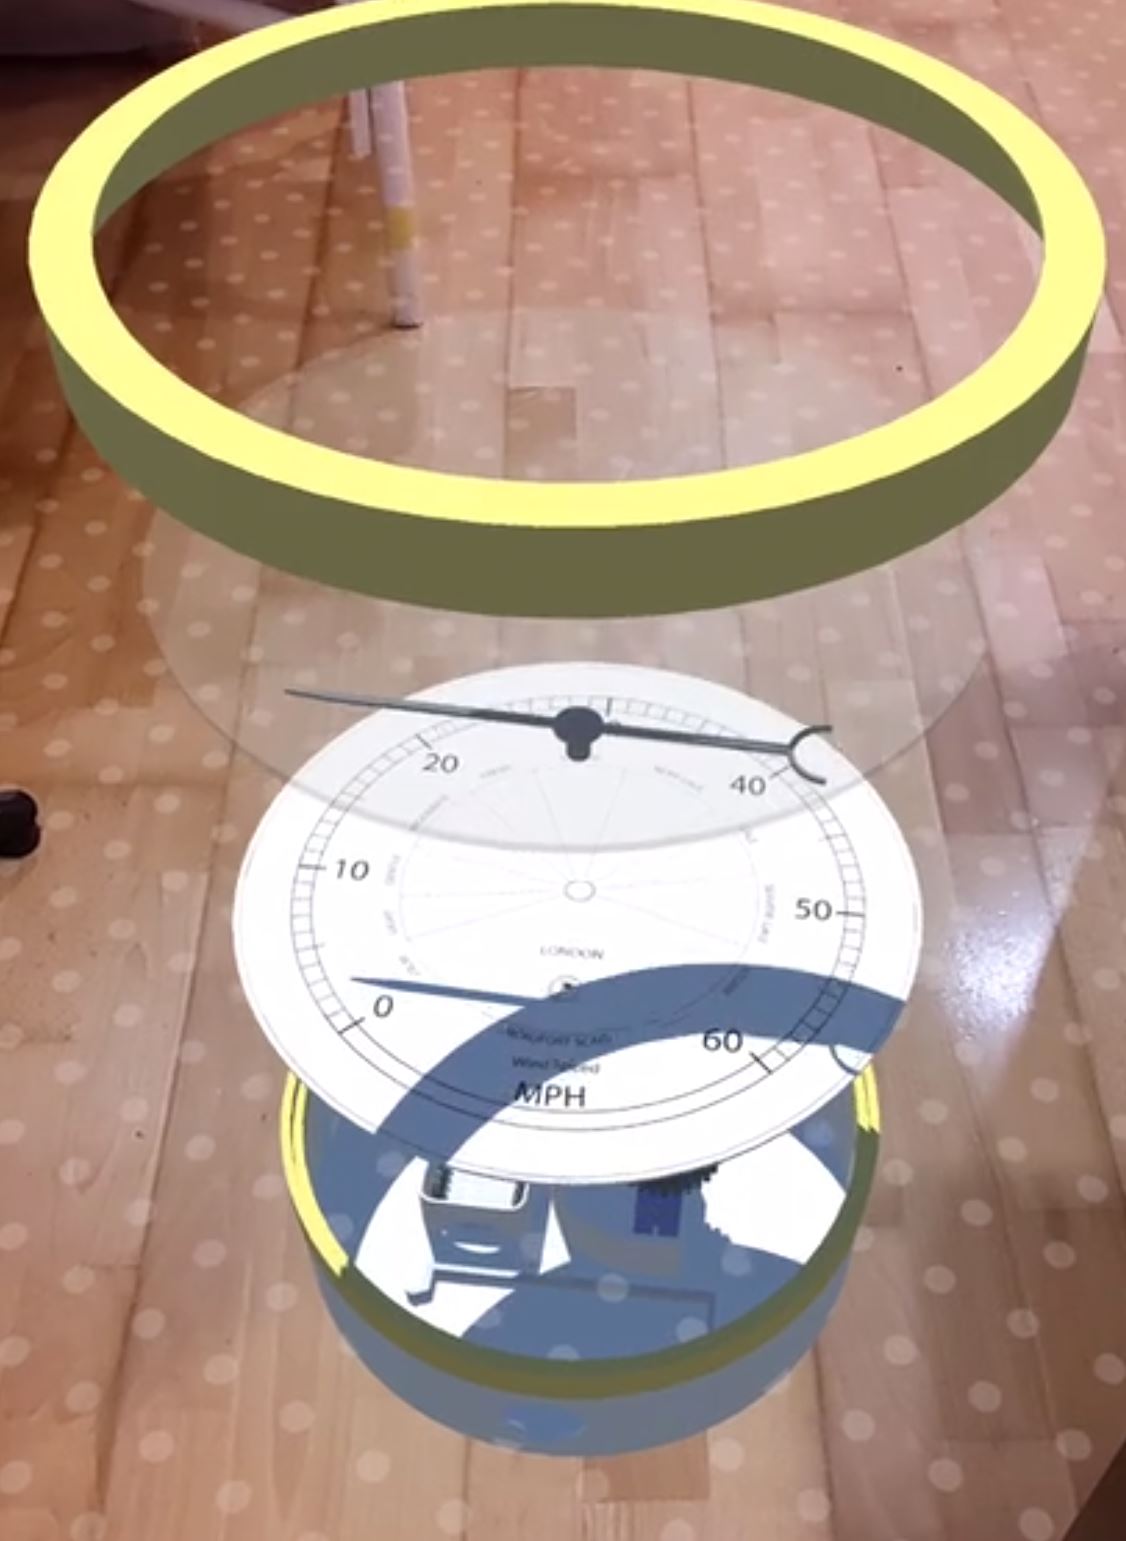
The plane will become transparent in Augmented Reality the shadow will appear.
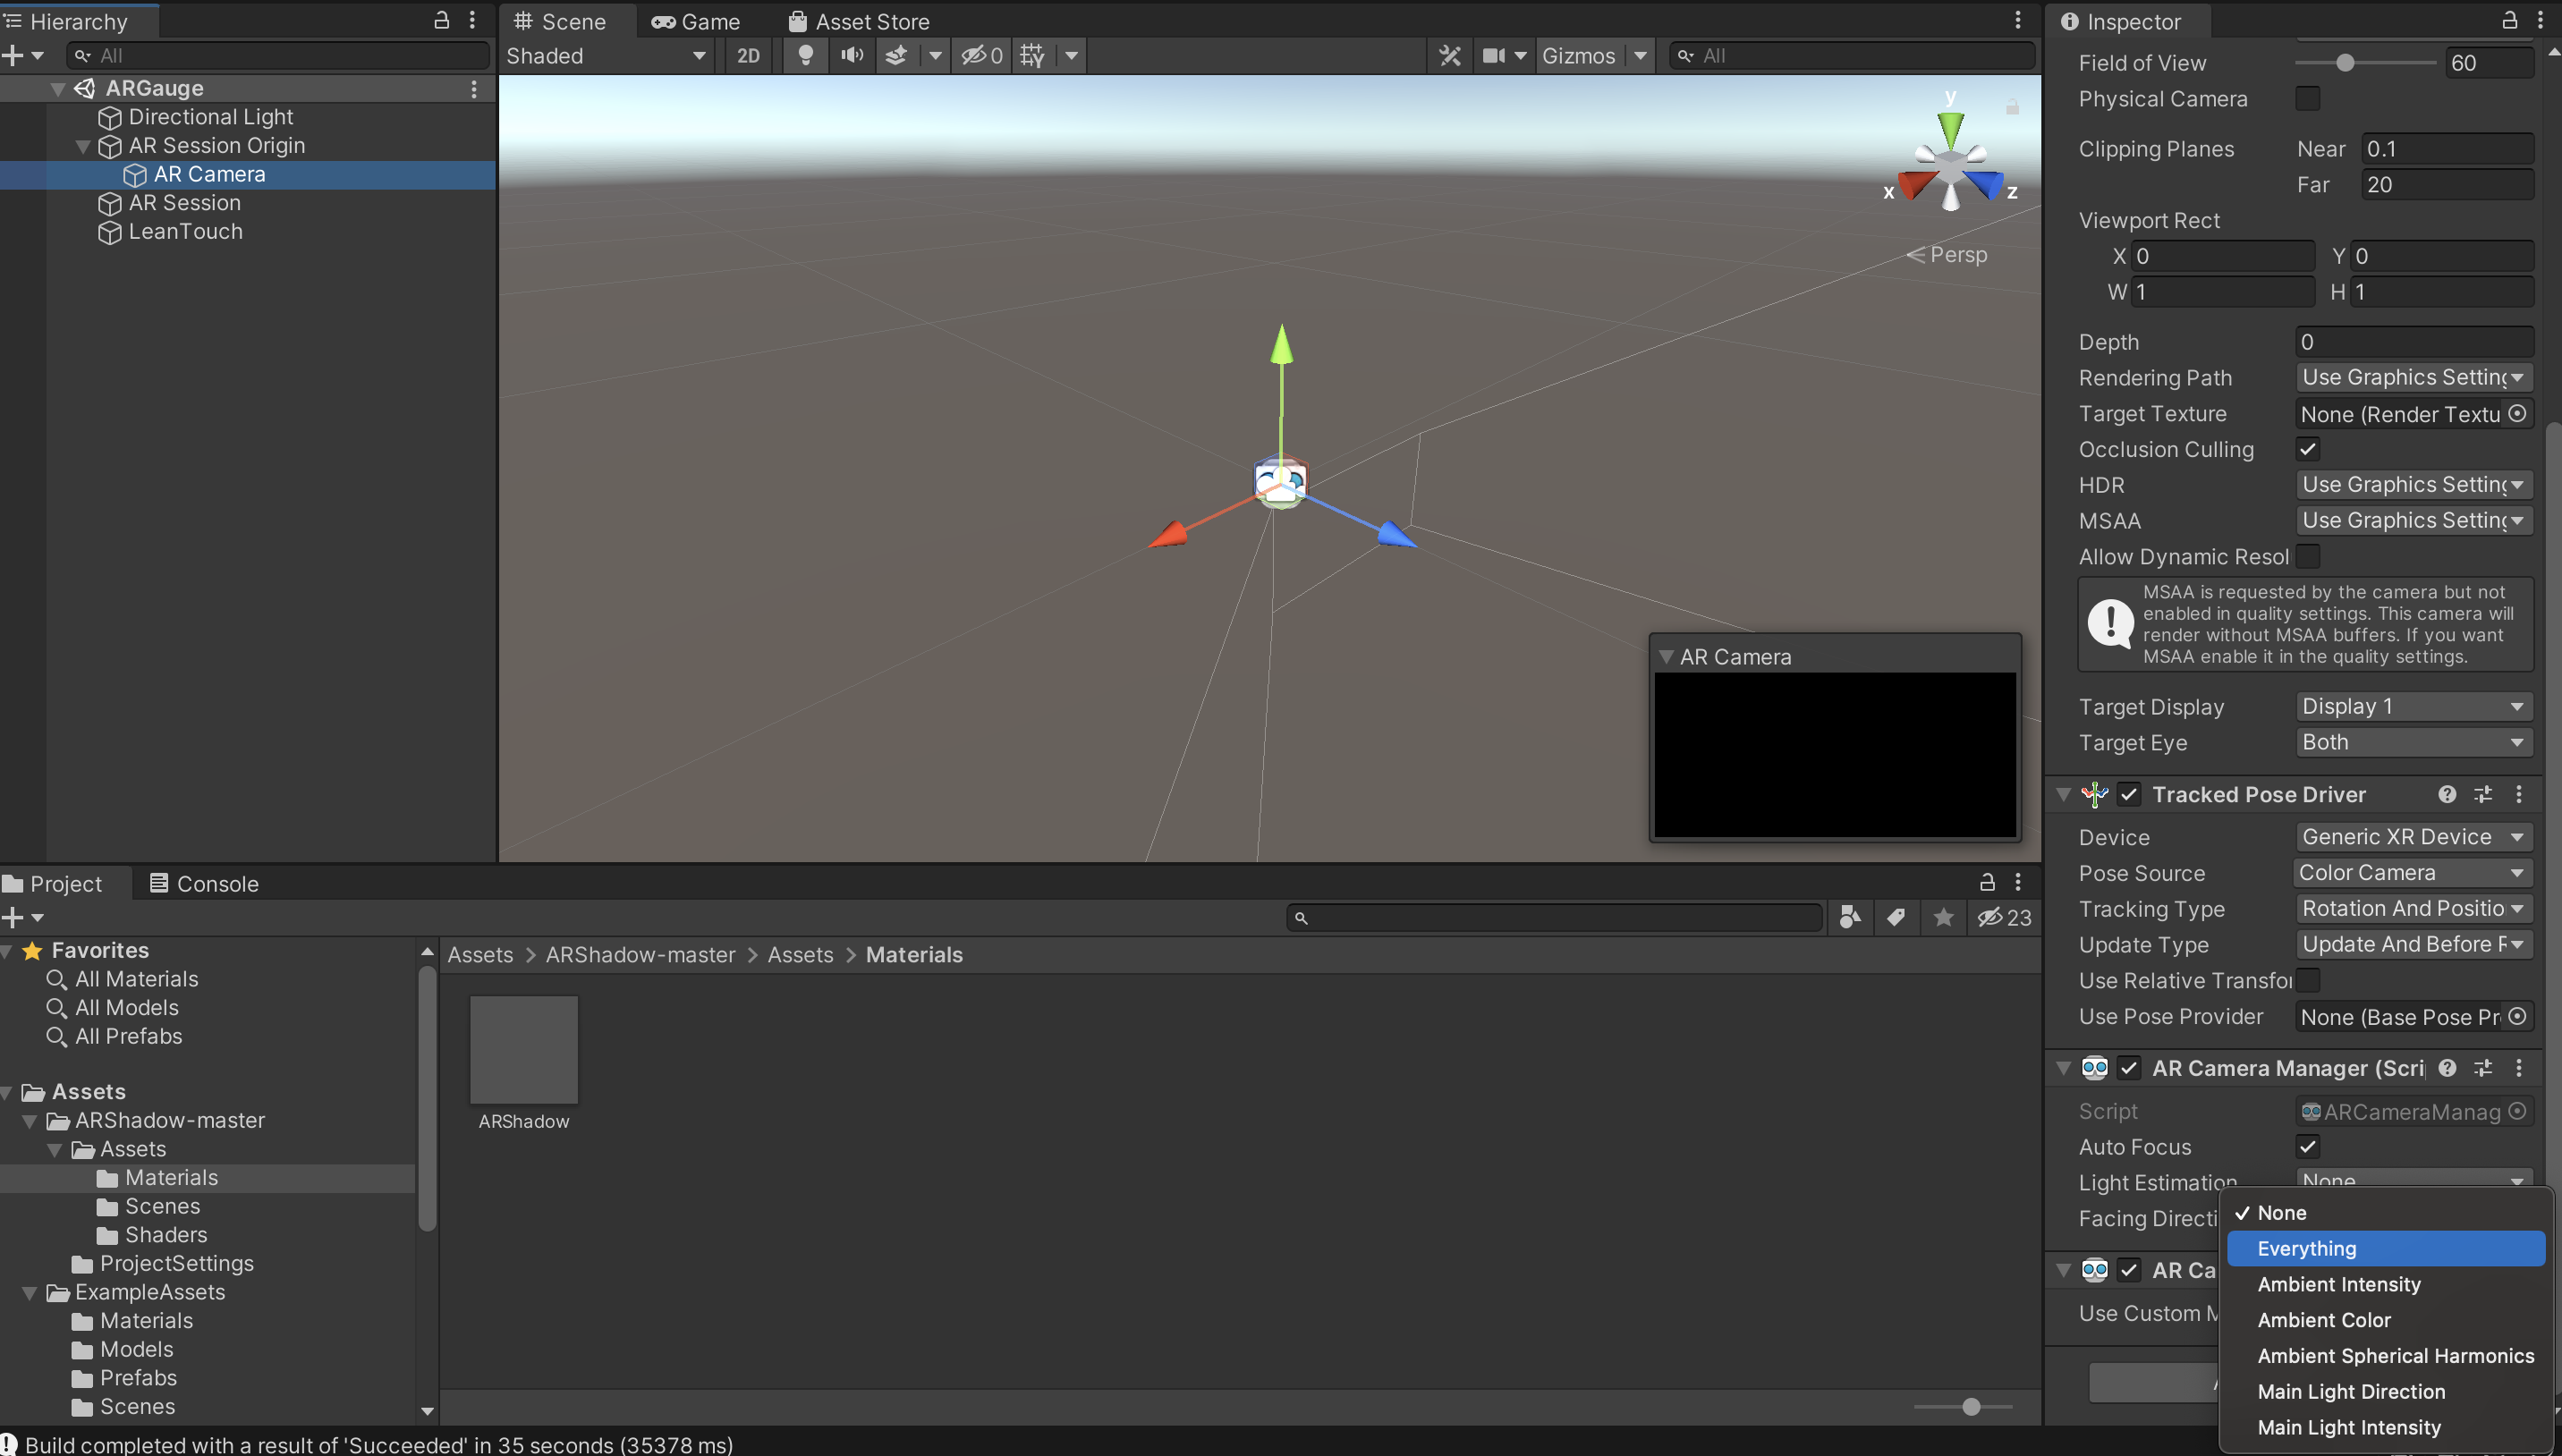
Light Estimation
Light Estimation is experimental, aiming to use the mobile devices camera to estimate the environmental lighting and apply it to the object. It can be turned on via the AR Camera Manager component on the AR Camera GameObject, child of AR Session Origin GameObject.
There are a number of options to try - everything is our current setting of choice.
You now have an Augmented Reality object with real-time lighting and shadows, it can be place and moved on any surface.
If you have not already - Save your Scene and congratulate yourself.
The next steps are to add in real-time data. We are connecting a MQTT live feed with the pointer of the gauge.
MQTT Receiver
Download the M2MQTT repository and copy the folders M2Mqtt and M2MqttUnity in the folder Assets of the repository in the Assets folder of your Unity project.
Create a new C# script mqttReceiver:
/*
The MIT License (MIT)
Copyright (c) 2018 Giovanni Paolo Vigano'
Permission is hereby granted, free of charge, to any person obtaining a copy
of this software and associated documentation files (the "Software"), to deal
in the Software without restriction, including without limitation the rights
to use, copy, modify, merge, publish, distribute, sublicense, and/or sell
copies of the Software, and to permit persons to whom the Software is
furnished to do so, subject to the following conditions:
The above copyright notice and this permission notice shall be included in all
copies or substantial portions of the Software.
THE SOFTWARE IS PROVIDED "AS IS", WITHOUT WARRANTY OF ANY KIND, EXPRESS OR
IMPLIED, INCLUDING BUT NOT LIMITED TO THE WARRANTIES OF MERCHANTABILITY,
FITNESS FOR A PARTICULAR PURPOSE AND NONINFRINGEMENT. IN NO EVENT SHALL THE
AUTHORS OR COPYRIGHT HOLDERS BE LIABLE FOR ANY CLAIM, DAMAGES OR OTHER
LIABILITY, WHETHER IN AN ACTION OF CONTRACT, TORT OR OTHERWISE, ARISING FROM,
OUT OF OR IN CONNECTION WITH THE SOFTWARE OR THE USE OR OTHER DEALINGS IN THE
SOFTWARE.
*/
using System.Collections.Generic;
using UnityEngine;
using M2MqttUnity;
using uPLibrary.Networking.M2Mqtt.Messages;
public class mqttReceiver : M2MqttUnityClient
{
[Header("MQTT topics")]
[Tooltip("Set the topic to subscribe. !!!ATTENTION!!! multi-level wildcard # subscribes to all topics")]
public string topicSubscribe = "#"; // topic to subscribe. !!! The multi-level wildcard # is used to subscribe to all the topics. Attention i if #, subscribe to all topics. Attention if MQTT is on data plan
[Tooltip("Set the topic to publish (optional)")]
public string topicPublish = ""; // topic to publish
public string messagePublish = ""; // topic to publish
[Tooltip("Set this to true to perform a testing cycle automatically on startup")]
public bool autoTest = false;
//using C# Property GET/SET and event listener to reduce Update overhead in the controlled objects
private string m_msg;
public string msg
{
get
{
return m_msg;
}
set
{
if (m_msg == value) return;
m_msg = value;
if (OnMessageArrived != null)
{
OnMessageArrived(m_msg);
}
}
}
public event OnMessageArrivedDelegate OnMessageArrived;
public delegate void OnMessageArrivedDelegate(string newMsg);
//using C# Property GET/SET and event listener to expose the connection status
private bool m_isConnected;
public bool isConnected
{
get
{
return m_isConnected;
}
set
{
if (m_isConnected == value) return;
m_isConnected = value;
if (OnConnectionSucceeded != null)
{
OnConnectionSucceeded(isConnected);
}
}
}
public event OnConnectionSucceededDelegate OnConnectionSucceeded;
public delegate void OnConnectionSucceededDelegate(bool isConnected);
// a list to store the messages
private List<string> eventMessages = new List<string>();
public void Publish()
{
client.Publish(topicPublish, System.Text.Encoding.UTF8.GetBytes(messagePublish), MqttMsgBase.QOS_LEVEL_EXACTLY_ONCE, false);
Debug.Log("Message published");
}
public void SetEncrypted(bool isEncrypted) => this.isEncrypted = isEncrypted;
protected override void OnConnecting() => base.OnConnecting();
protected override void OnConnected()
{
base.OnConnected();
isConnected = true;
if (autoTest) { Publish(); }
}
protected override void OnConnectionFailed(string errorMessage)
{
Debug.Log("CONNECTION FAILED! " + errorMessage);
}
protected override void OnDisconnected()
{
Debug.Log("Disconnected.");
isConnected = false;
}
protected override void OnConnectionLost() => Debug.Log("CONNECTION LOST!");
protected override void SubscribeTopics() => client.Subscribe(new string[] { topicSubscribe }, new byte[] { MqttMsgBase.QOS_LEVEL_EXACTLY_ONCE });
protected override void UnsubscribeTopics() => client.Unsubscribe(new string[] { topicSubscribe });
protected override void Start() => base.Start();
protected override void DecodeMessage(string topic, byte[] message)
{
//The message is decoded
msg = System.Text.Encoding.UTF8.GetString(message);
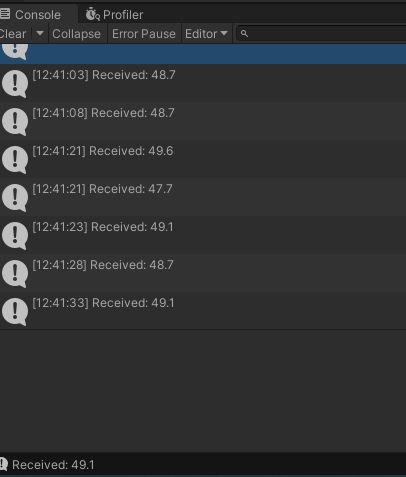
Debug.Log("Received: " + msg);
StoreMessage(msg);
if (topic == topicSubscribe)
{
if (autoTest)
{
autoTest = false;
Disconnect();
}
}
}
private void StoreMessage(string eventMsg)
{
if (eventMessages.Count > 50)
{
eventMessages.Clear();
}
eventMessages.Add(eventMsg);
}
protected override void Update() => base.Update(); // call ProcessMqttEvents()
private void OnDestroy() => Disconnect();
private void OnValidate()
{
if (autoTest)
{
autoConnect = true;
}
}
}
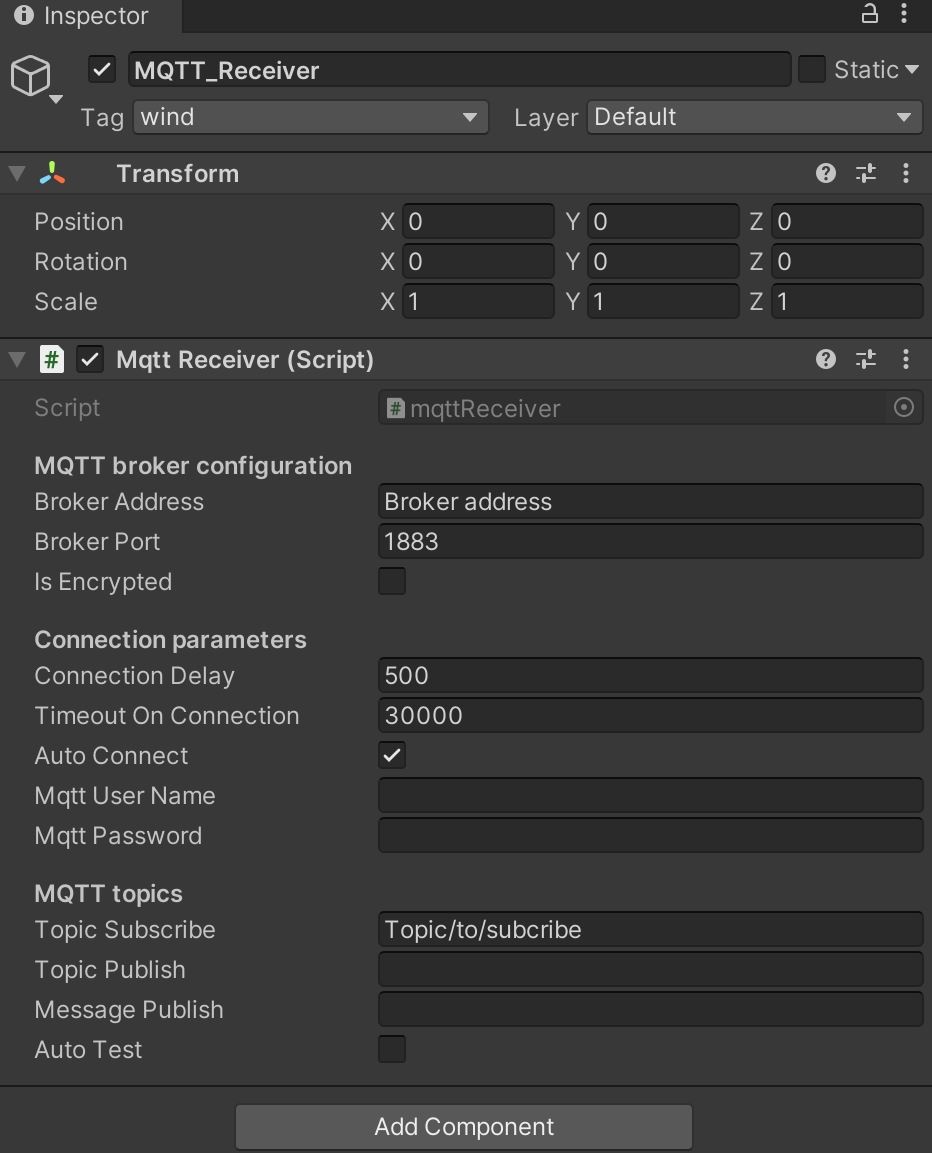
Create a new GameObject, name it MQTT_Receiver_wind and attach the mqttReceiver script just created. This GameObject is the MQTT client used to connect to the MQTT Broker. On the inspector we need to setup:
- Broker Address (without protocol e.g. no mqtt:// )
- Broker Port (1883 is a default port)
- Is Encrypted (need to be enabled only if TLS 1.2 is used)
- Auto Connect (the receiver tries to connect at Start)
- User name and Password for the MQTT Broker if needed
- Topic to Subscribe
On Play Unity will connect to the MQTT broker and it will print the received message, from the subscribed topic, on the console.
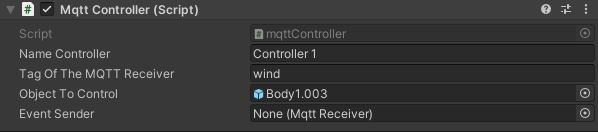
MQTT Controller
Next step is to use the received message to control an object in the scene. Specifically, we need to control the pointer of the gauge Prefab.
Create a new C# script mqttController and add it as component of the gauge Prefab. Open the script and add the following code blocks:
using UnityEngine;
public class mqttController : MonoBehaviour
{
    public string nameController = "Controller";
    public string tagOfTheMQTTReceiver = "";
    public GameObject objectToControl;
    private float numValue = 0.0f;

    public mqttReceiver _eventSender;
The variable tagOfTheMQTTReceiver (to be set in the Inspector window) needs to match the Tag of one of the GameObject with mqttReceiver script attached. The GameObject objectToControl needs to be the 3D model we need to control, in this case the pointer. The variable _eventSender is used to link the receiver with the controller: every message received by the MQTT Client will fire an event detected by this controller script.

    void Start()
    {
        if (GameObject.FindGameObjectsWithTag(tagOfTheMQTTReceiver).Length > 0)
        {
            _eventSender = GameObject.FindGameObjectsWithTag(tagOfTheMQTTReceiver)[0].gameObject.GetComponent<mqttReceiver>();
        }
        else
        {
            Debug.LogError("At least one GameObject with mqttReceiver component and Tag == tagOfTheMQTTReceiver needs to be provided");
        }
        _eventSender.OnMessageArrived += OnMessageArrivedHandler;
    }
The Start function is used to select the right receiver, based on its Tag, and to subscribe to the OnMessageArrived event defined in the mqttReceiver.
    private void OnMessageArrivedHandler(string newMsg)
    {
        numValue = float.Parse(newMsg);
        Debug.Log("Event Fired. The message, from Object " + nameController + " is = " + newMsg);
    }
When a message is received, the event is fired and, in this case, the message is parsed as a float number.
    private void Update()
    {
        float step = 0.5f * Time.deltaTime;

        Vector3 rotationVector = new Vector3(objectToControl.transform.localEulerAngles.x, -numValue * 4.5f, objectToControl.transform.localEulerAngles.z);

        objectToControl.transform.localRotation = Quaternion.Lerp(objectToControl.transform.localRotation, Quaternion.Euler(rotationVector), step);

    }
}
Finally, in the Update function it is possible to control the 3D object:
- the variable
stepis used to control the speed o the pointer - the
rotationVectorof type Vector3 is use to control the actual rotation of the object. As it needs to rotate just on the Y axe, the values of X and Z are not changing. In this case the minimum rotation of the pointer is0EulerAngles, with value0, and the maximum270EulerAngles, with value60, therefore the value received by the MQTT Client needs to be multiply by4.5f. - the
Quaternion.Lerpfunction is used to create a smooth rotation between the initial position of the pointer and the value received
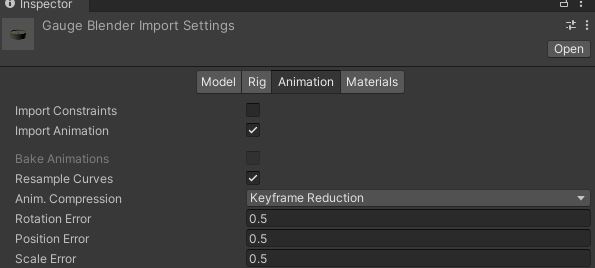
In the final part of the workshop we are going to play and control the animation of the gauge. It this example the animation needs to be part of the FBX object imported.
- Control from the Inspector that the animation exists and it has been imported
- Right click on the Project windows (a good location is the folder where the 3D model is located)
Create -> Animator Controller, provide a name for the controller (i.e. _Wind_GaugeAnimator) and double click on it to open theAnimation Panel.
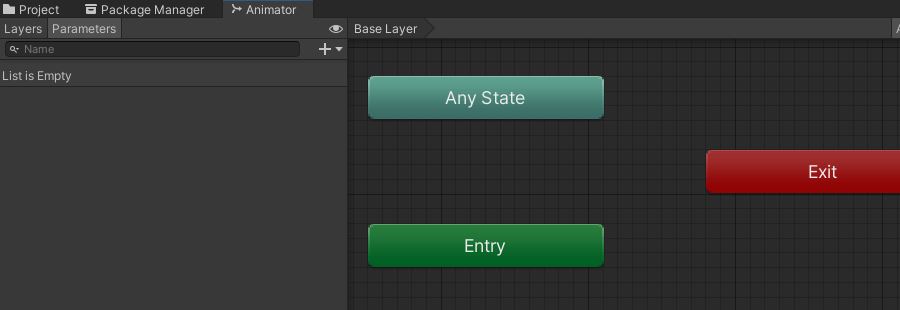
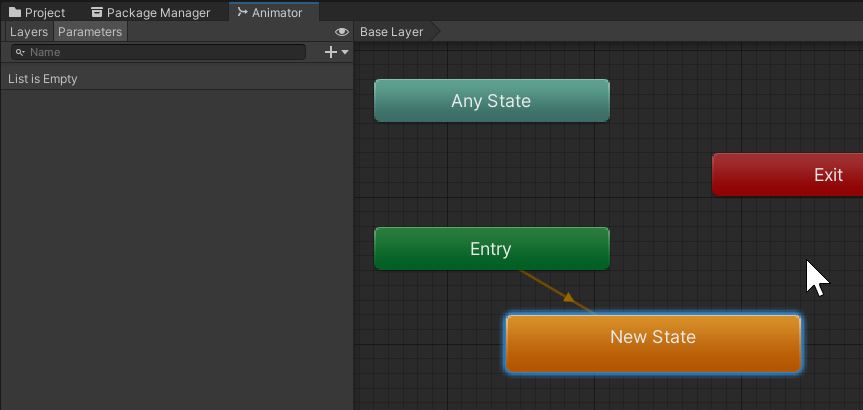
- Right click on
Animation Panel, not on the three existing block, andCreate State -> Empty. ANew Stateblock, link with theEntryblock, will be created. If not automatically linked, select theEntryblock, right click on it andSet StateMachine Default Stateand create the link with theNew Stateblock.
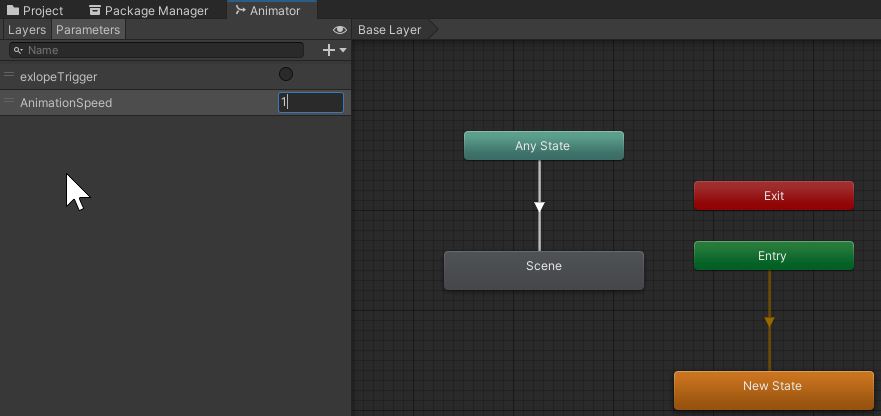
- Drag and drop the 3D model with the animation on the
Animation Panel(not the Prefab, but the FBX imported in Unity). A new grey block with the name of the animation will appear (e.g. Scene). Right click onAny Stateblock and Make Transition with the new grey blockScene.
On the left side, on the tab Parameters press the+button and add a Trigger namedexplodeTriggerand a Float namedAnimationSpeedto be set to 1.
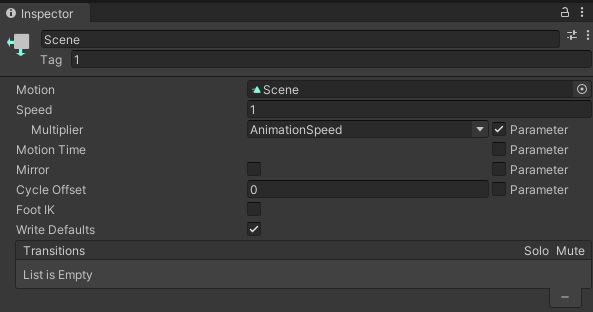
- with the grey block selected, in the Inspector add the Tag
1(any value or name can be used), we will need this later. - Add
AnimationSpeedto the Multiplier field.
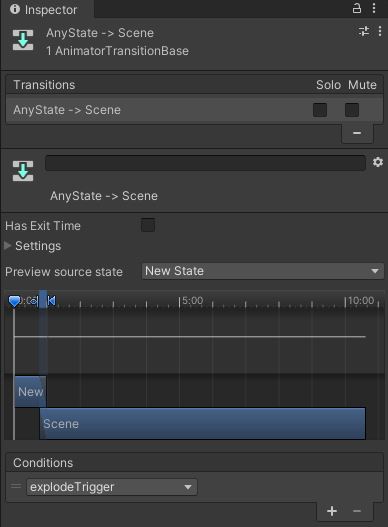
- with the arrow that connect
Any StatewithSceneselected, add a new Conditions and setexplodeTriggeras conditions to start the animation.
The Animator controller is now ready to be connected with a user interface. In this example we are controlling the animation using the Lean Touch asset. Specifically, we want to use a double tap on the object to start the animation (explodeTrigger), and another double tap on the object to play the animation backwards (AnimationSpeed from 1 to -1).
- add a new component
Animator(from Component/Miscellaneous) to the gauge Prefab and add to the Controller the _Wind_GaugeAnimator - Create a new C# script
animationExplodeand add it to the gauge Prefab. Open the script and add the following code blocks:
using UnityEngine;
[RequireComponent(typeof(Animator))]
public class animationExplode : MonoBehaviour
{
    Animator animator;
    float speed;
    bool isExploding = false;

    void Start()
    {
        //Get Animator component
        animator = GetComponent<Animator>();
        speed = animator.GetFloat("AnimationSpeed");
    }
The [RequireComponent(typeof(Animator))] ensure that the component Animator is added to the GameObject. The variable speed is used in this case to control the direction of the animation.
public void Explosion()
    {
        if (isExploding == false)
        {
            //Add a Tag value to the animation block, select the animation block from the Animator Controlelr and set its Tag in the Inspector
            if (animator.GetCurrentAnimatorStateInfo(0).IsTag("1"))
            {
                speed = 1;
                animator.SetFloat("AnimationSpeed", speed);
                isExploding = true;
            }
            else
            {
                animator.SetTrigger("explodeTrigger");
                isExploding = true;
            }

        }

        else
        {
            if (animator.GetCurrentAnimatorStateInfo(0).IsTag("1"))
            {
                speed = -1;
                animator.SetFloat("AnimationSpeed", speed);
                isExploding = false;
            }
            else
            {
                speed = -1;
                animator.SetFloat("AnimationSpeed", speed);
                animator.SetTrigger("explodeTrigger");
                isExploding = false;
            }

        }
    }
The Explosion function is used to control the animation and it will be linked to Lean Finger Tap.
    void Update()
    {

        if (animator.GetCurrentAnimatorStateInfo(0).IsTag("1") && animator.GetCurrentAnimatorStateInfo(0).normalizedTime > 1)
        {
            animator.Play("Scene", -1, 1);
        }
        else if (animator.GetCurrentAnimatorStateInfo(0).IsTag("1") && animator.GetCurrentAnimatorStateInfo(0).normalizedTime < 0)
        {
            animator.Play("Scene", -1, 0);
        }

        //Play animation on key press
        if (Input.GetKeyDown(KeyCode.Q))
        {
            //Add a Tag value to the animation block, select the animation block from the Animator Controlelr and set its Tag in the Inspector
            if (animator.GetCurrentAnimatorStateInfo(0).IsTag("1"))
            {
                speed = 1;
                animator.SetFloat("AnimationSpeed", speed);
            }
            else { animator.SetTrigger("explodeTrigger"); }
        }
        //Reverse animation on key press
        if (Input.GetKeyDown(KeyCode.W))
        {
            if (animator.GetCurrentAnimatorStateInfo(0).IsTag("1"))
            {
                speed = -1;
                animator.SetFloat("AnimationSpeed", speed);
            }
            else
            {
                speed = -1;
                animator.SetFloat("AnimationSpeed", speed);
                animator.SetTrigger("explodeTrigger");
            }
        }

    }
}
The Update function contains a conditional function to control when the animation is finished (to reset its Time to 0 or 1), and the same animation controller of the Explosion function, but triggered using the key Q and W.
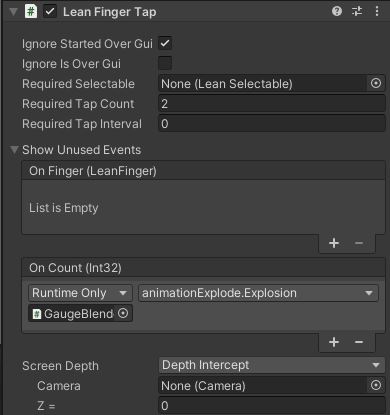
As final step, add a new component Lean Finger Tap to the gauge prefab with the following parameters:
- Required Tap Count: 2 (for double tap)
- Show Unused Events: drag and drop the gauge prefab and select
animationExplode -> Explosion()as function
You can now Build and Run your project to place the digital gauge in your environment.