This workshop will show you how to:
- How to control a digital device using real time data from MQTT
- Add UI elements and interactivity to the AR experience
- Create onboarding UI for the AR App
To complete this workshop you will need:
- Unity 6000.0 LTS
- M2MQTT library
- Gauge in FBX file format sample from GitHub - Open Gauge
- Energy Dial
- UX Video from arfoundation-demos repository
- VS Code
- Unity scene with ARFoundation set up
Languages used:
- C#
Additional resources
Digital Gauges
In Unity Hub create a New Project using the AR Mobile (Core) template and give it a logical name. Instead of using the default Sample Scene, create a new one following the Setting up the AR Scene from Workshop 2 - Step 3 and 4. Do also include the tapToPlace script and remember to switch platform.
Additionally, in Project Settings -> Player -> Resolution and Presentation, change the Orientation -> Default Orientation to Auto Rotation, and Auto rotation Behaviour to Sensor
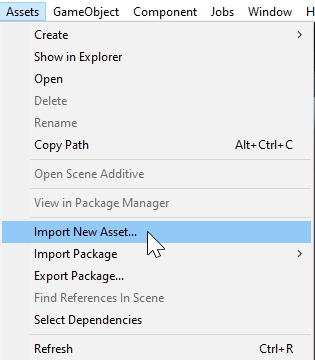
Import the gauge model. There are two ways to import - click and drag your FBX file into a folder in the Project panel or head to Assets -> import assets
The FBX files will import, complete with animation if any. To be able to edit the materials we need to extract them from the FBX file. in the Inspector window, from the tab Materials chose Use External Materials (Legacy) from the Location dropdown menu. Unity will extract the Materials and texture images in the folder of the FBX model. From the Tab Animation, it is possible to play the imported animation if embedded in the FBX model.
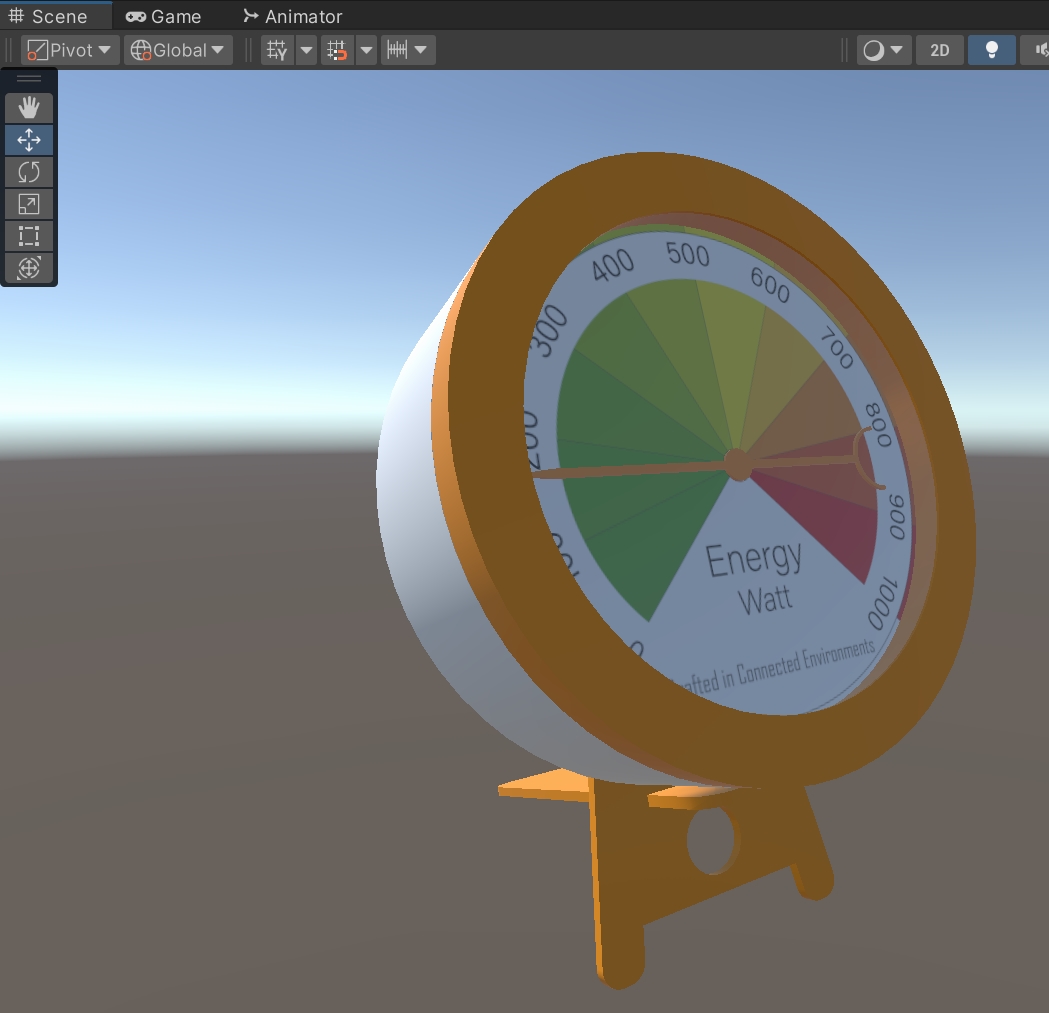
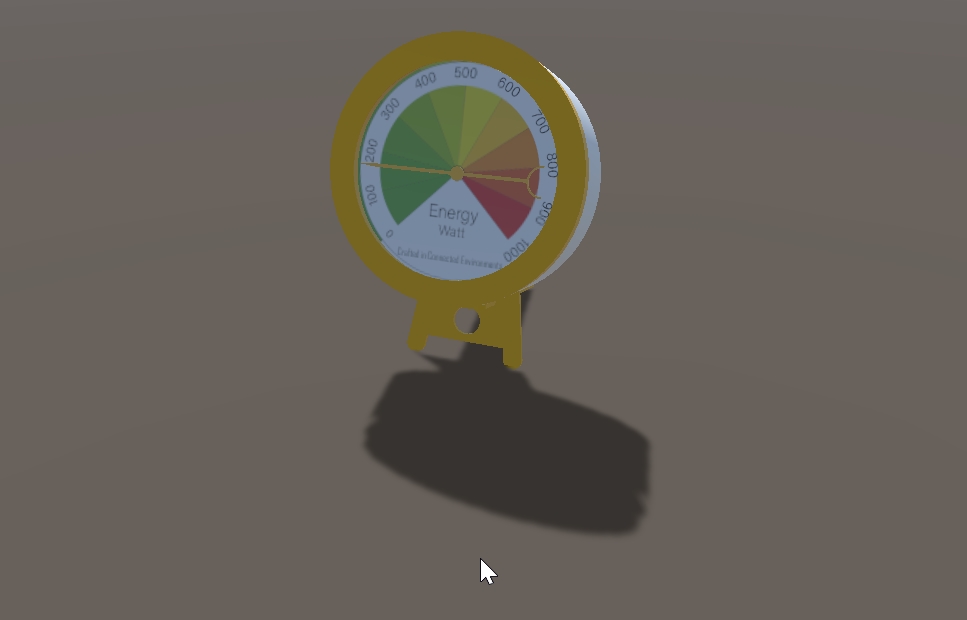
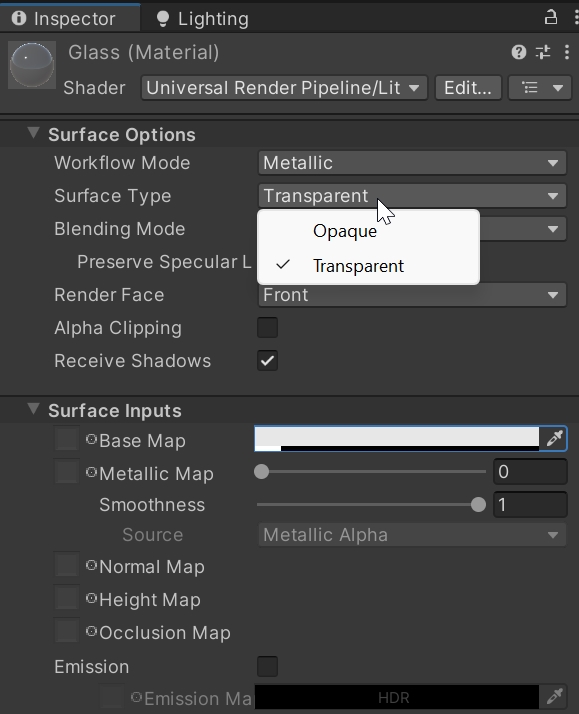
Not all the material are compatible between different software. For example, the material used for the Glass it may appear Opaque in Unity. To change the appearance, select the Glass material (from the GameObject or from the Materials folder created by Unity), change the surface type from Opaque to Transparent and change the Alpha Channel of the Base Map colour
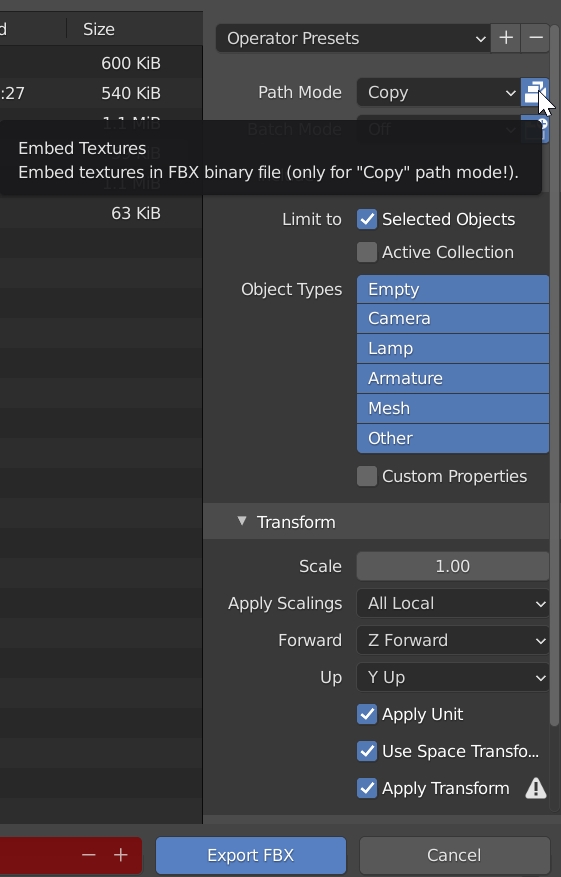
ATTENTION: Unity might not have the same axes conventions used by your 3D modelling software. E.g. Unity uses a left-hand coordinate system with Y axes up, Blender uses a right-hand system with Z axes up. This difference can introduce some issues in both local and global rotations. A quick fix is to export the FBX model from Blender and select, in the Export options:
- Forward: Z Forward (positive sign)
- Up: Y Up (positive sign)
- Apply Transform: Checked
Also, if the model contains texture images, these can be embedded in the FBX model by selecting, from the Blender Export window, Path ModeCopy and selecting the small icon next to the same field.
Download and Import the M2MQTT library and create the C# script mqttManager.
We are going to set up an empty GameObject in the scene and save it as a Prefab this allows it to act as a holder for any GameObject, digital model and scripts we want to use in Augmented Reality.
To keep things organised the first thing to do is to right-click in the Assets folder of the Project window and create a Prefab folder alongside the folder with the gauge model.
- Right click in the
Hierarchywindow and create a new empty GameObject - Give it a logical name (e.g.
ARObject), and check the Inspector to move toposition 0, 0, 0(the centre of the scene) - Drag the FBX model into the empty GameObject on the
Hierarchy panel - Then drag the GameObject
ARObjectinto the Prefab folder. This will automatically create thePrefab, the icon of the GameObject will change in solid light blue.
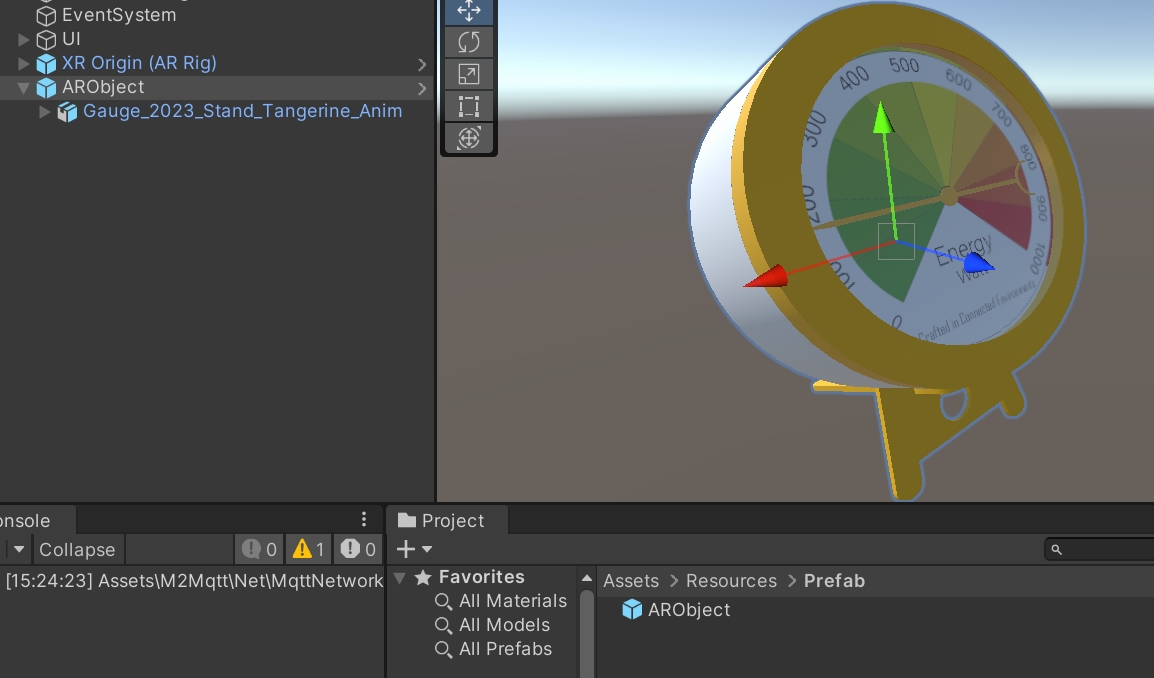
You now have a Prefab ready to hold an AR object.
Depending on how the model has been exported from Blender, the scale could be too big or too small for the one we need for the AR scene.
A quick way to control the scale of our object is to create a primitive cube. The cube has a side of 1 Unity unit that in Augmented Reality is equal to 1 meter.
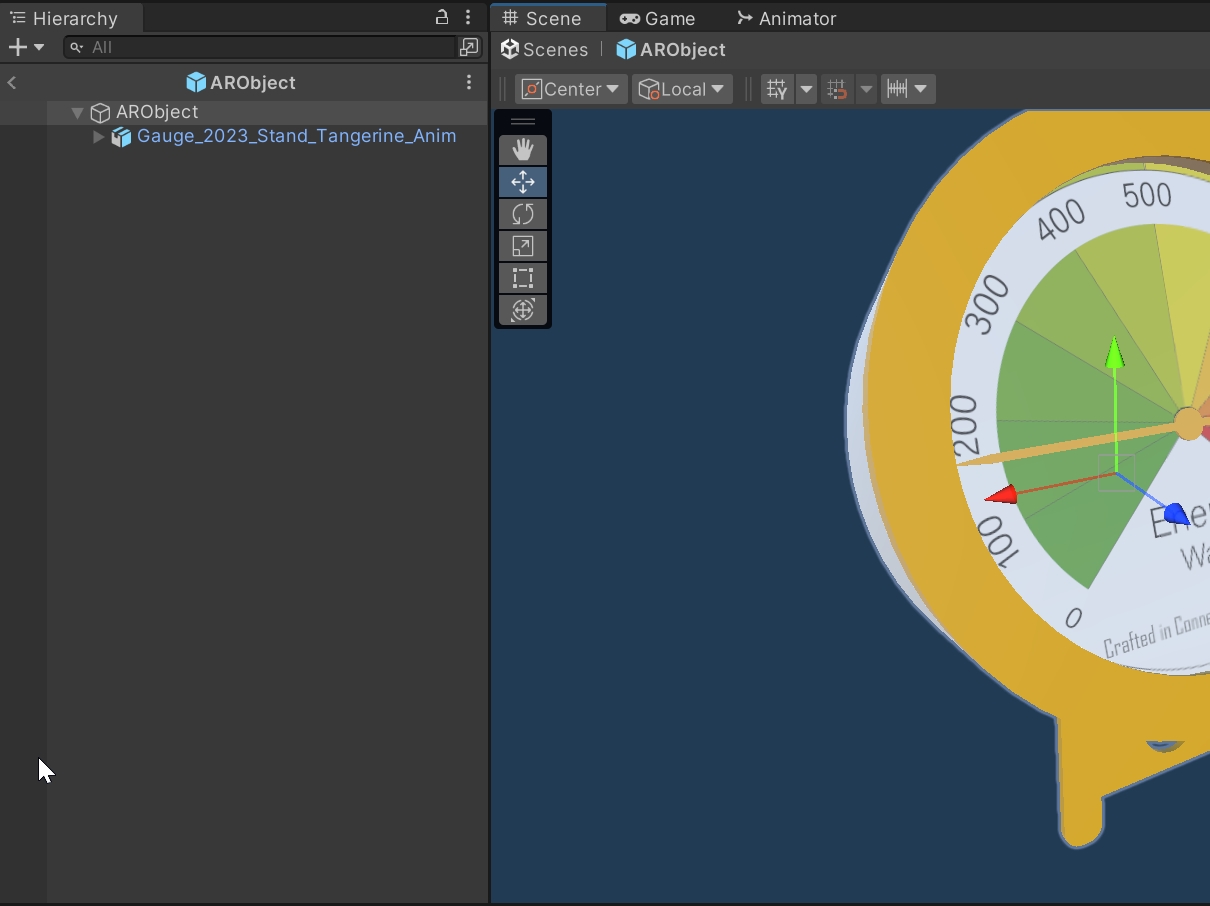
The scale can be changed on the FBX object during the import (recommended), or on the Prefab object just created from the Inspector window. To change the scale on the Prefab we can double click from the Project panel, this will bring us to the Prefab Edit Mode and the various changes will be automatically saved
Add a new empty GameObject to the scene, add the mqttManager script created before as new component. The following parameters need to be provided:
- Broker Address
- Broker Port
- List of the Topic Subscribe
Add a new Tag to this GameObject (e.g. mqttManager).
Attach to the Prefab (e.g. ARObject) a new MonoBehaviour Script mqttController
using System;
using UnityEngine;

public class mqttController : MonoBehaviour
{
    [Tooltip("Optional name for the controller")]
    public string nameController = "Controller 1";
    public string tag_mqttManager = ""; //to be set on the Inspector panel. It must match one of the mqttManager.cs GameObject
    [Header("   Case Sensitive!!")]
    [Tooltip("the topic to subscribe must contain this value. !!Case Sensitive!! ")]
    public string topicSubscribed = ""; //the topic to subscribe, it need to match a topic from the mqttManager
    private float pointerValue = 0.0f;
    [Space]
    [Space]
    public GameObject objectToControl; //pointer of the gauge, or other 3D models
    [Tooltip("Select the rotation axis of the object to control")]
    public enum State { X, Y, Z };
    public State rotationAxis;
    [Space]
    [Tooltip("Direction Rotation")]
    public bool ClockWise = true; // false CounterClockWise ; true ClockWise
    private int rotationDirection = 1;
    [Space]
    [Space]
    [Tooltip("minimum value on the dial")]
    public float startValue = 0f; //start value of the gauge
    [Tooltip("maximum value on the dial")]
    public float endValue = 180f; // end value of the gauge
    [Tooltip("full extension of the gauge in EulerAngles")]
    public float fullAngle = 180f; // full extension of the gauge in EulerAngles

    [Tooltip("Adjust the origin of the scale")]
    public float adjustedStart = 0f;

    [Space]
    public mqttManager _eventSender;

    void Awake()
    {
        if (GameObject.FindGameObjectsWithTag(tag_mqttManager).Length > 0)
        {
            _eventSender = GameObject.FindGameObjectsWithTag(tag_mqttManager)[0].gameObject.GetComponent<mqttManager>();
            _eventSender.Connect(); //Connect tha Manager when the object is spawned
        }
        else
        {
            Debug.LogError("At least one GameObject with mqttManager component and Tag == tag_mqttManager needs to be provided");
        }
    }

    void OnEnable()
    {
        _eventSender.OnMessageArrived += OnMessageArrivedHandler;

    }

    private void OnDisable()
    {
        _eventSender.OnMessageArrived -= OnMessageArrivedHandler;
    }

    private void OnMessageArrivedHandler(mqttObj mqttObject) //the mqttObj is defined in the mqttManager.cs
    {
        //We need to check the topic of the message to know where to use it
        if (mqttObject.topic.Contains(topicSubscribed))
        {
            //convert the received string into a JSON object
            var response = JsonUtility.FromJson<tasmotaSensor.Root>(mqttObject.msg);
            //Use the Realtime Power
            pointerValue = response.ENERGY.Power;

            Debug.Log("Event Fired. The message, from Object " + nameController + " is = " + pointerValue);
        }
    }

    private void Update()
    {
        float step = 1.5f * Time.deltaTime;
        // ternary conditional operator https://learn.microsoft.com/en-us/dotnet/csharp/language-reference/operators/conditional-operator
        rotationDirection = ClockWise ? -1 : 1;

        if (pointerValue >= startValue)
        {
            Vector3 rotationVector = new Vector3();
            //If the rotation Axis is X
            if (rotationAxis == State.X)
            {
                rotationVector = new Vector3(
                (rotationDirection * ((pointerValue - startValue) * (fullAngle / (endValue - startValue)))) - adjustedStart,
                objectToControl.transform.localEulerAngles.y,
                objectToControl.transform.localEulerAngles.z);
            }
            //If the rotation Axis is Y
            else if (rotationAxis == State.Y)
            {
                rotationVector = new Vector3(
                objectToControl.transform.localEulerAngles.x,
                (rotationDirection * ((pointerValue - startValue) * (fullAngle / (endValue - startValue)))) - adjustedStart,
                objectToControl.transform.localEulerAngles.z);

            }
            //If the rotation Axis is Z
            else if (rotationAxis == State.Z)
            {
                rotationVector = new Vector3(
                objectToControl.transform.localEulerAngles.x,
                objectToControl.transform.localEulerAngles.y,
                (rotationDirection * ((pointerValue - startValue) * (fullAngle / (endValue - startValue)))) - adjustedStart);
            }
            objectToControl.transform.localRotation = Quaternion.Lerp(
                    objectToControl.transform.localRotation,
                    Quaternion.Euler(rotationVector),
                    step);
        }
    }
}

// Root myDeserializedClass = JsonConvert.DeserializeObject<Root>(myJsonResponse);
[Serializable]
public class tasmotaSensor
{
    [Serializable]
    public class ENERGY
    {
        public string TotalStartTime;
        public double Total;
        public double Yesterday;
        public double Today;
        public int Period;
        public int Power;
        public int ApparentPower;
        public int ReactivePower;
        public double Factor;
        public int Voltage;
        public double Current;
    }
    [Serializable]
    public class Root
    {
        public DateTime Time;
        public ENERGY ENERGY;
    }
}
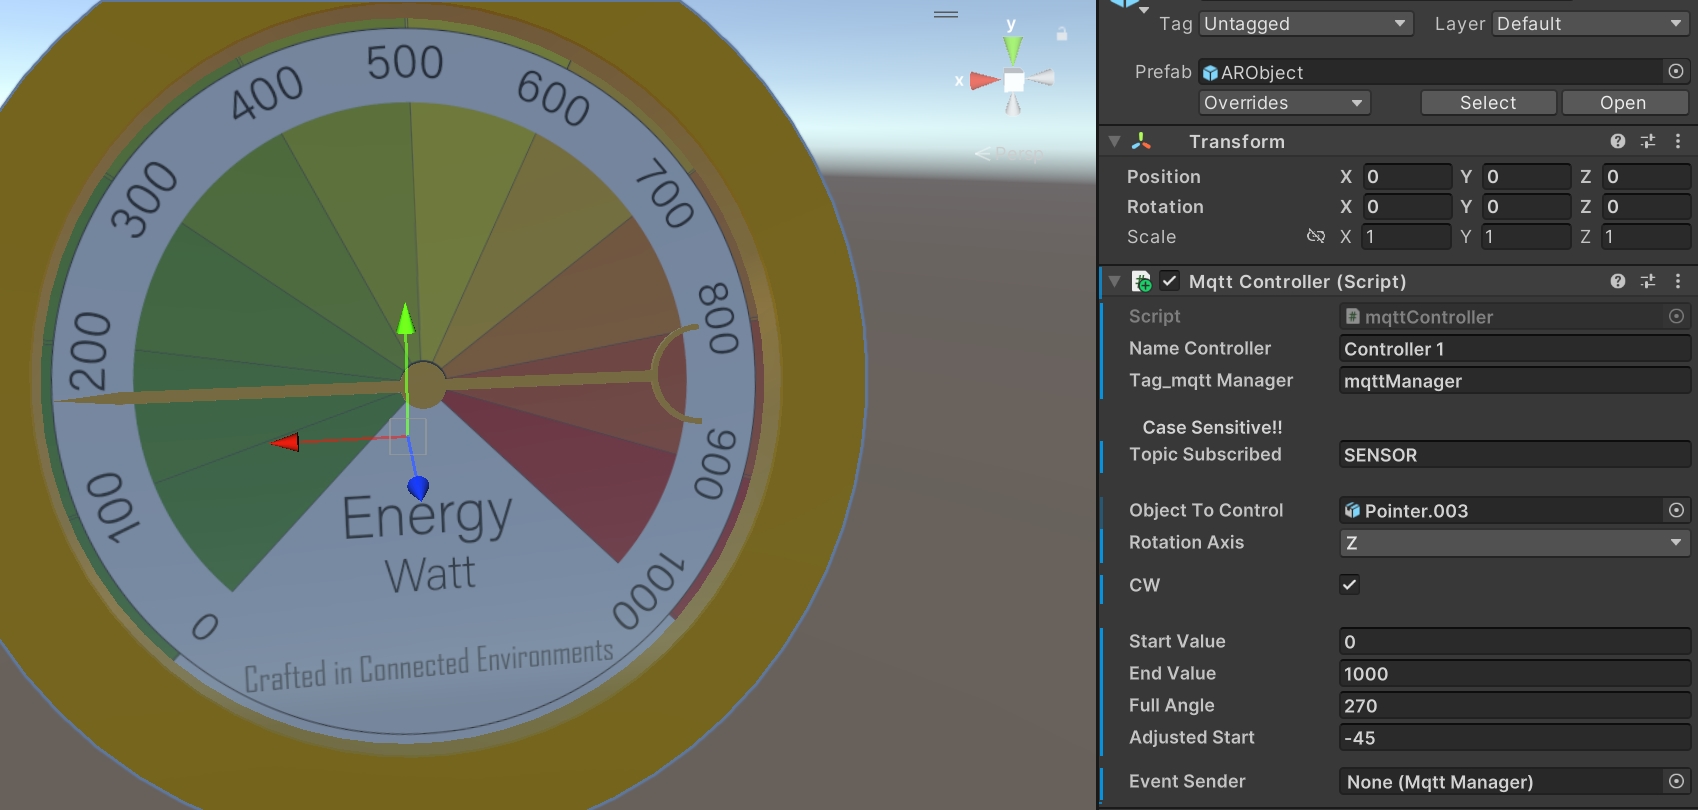
From the Inspector panel change following values:
- Set the same Tag of the _MQTTManager GameObject (e.g. noise in this example)
- Set the topic to subscribe (it doesn't need to be the full path). The field is case sensitive
SENSOR != Sensor - Select the 3D model Prefab and drag the model of the
pointerfrom theHierarchy Panelto the field Object To Control in theInspector panel - chose the rotation axis (for gauges is generally Y or Z, depending on the export from Fusion360 and Blender)
- Tick
ClockWiseif the rotation is positive (clockwise), or untick if negative startValue, the minimum value on the dialendValue, the maximum value on the dialfullAngle, full extension of the gauge in EulerAnglesadjustStart, value used to change the start position of the pointer
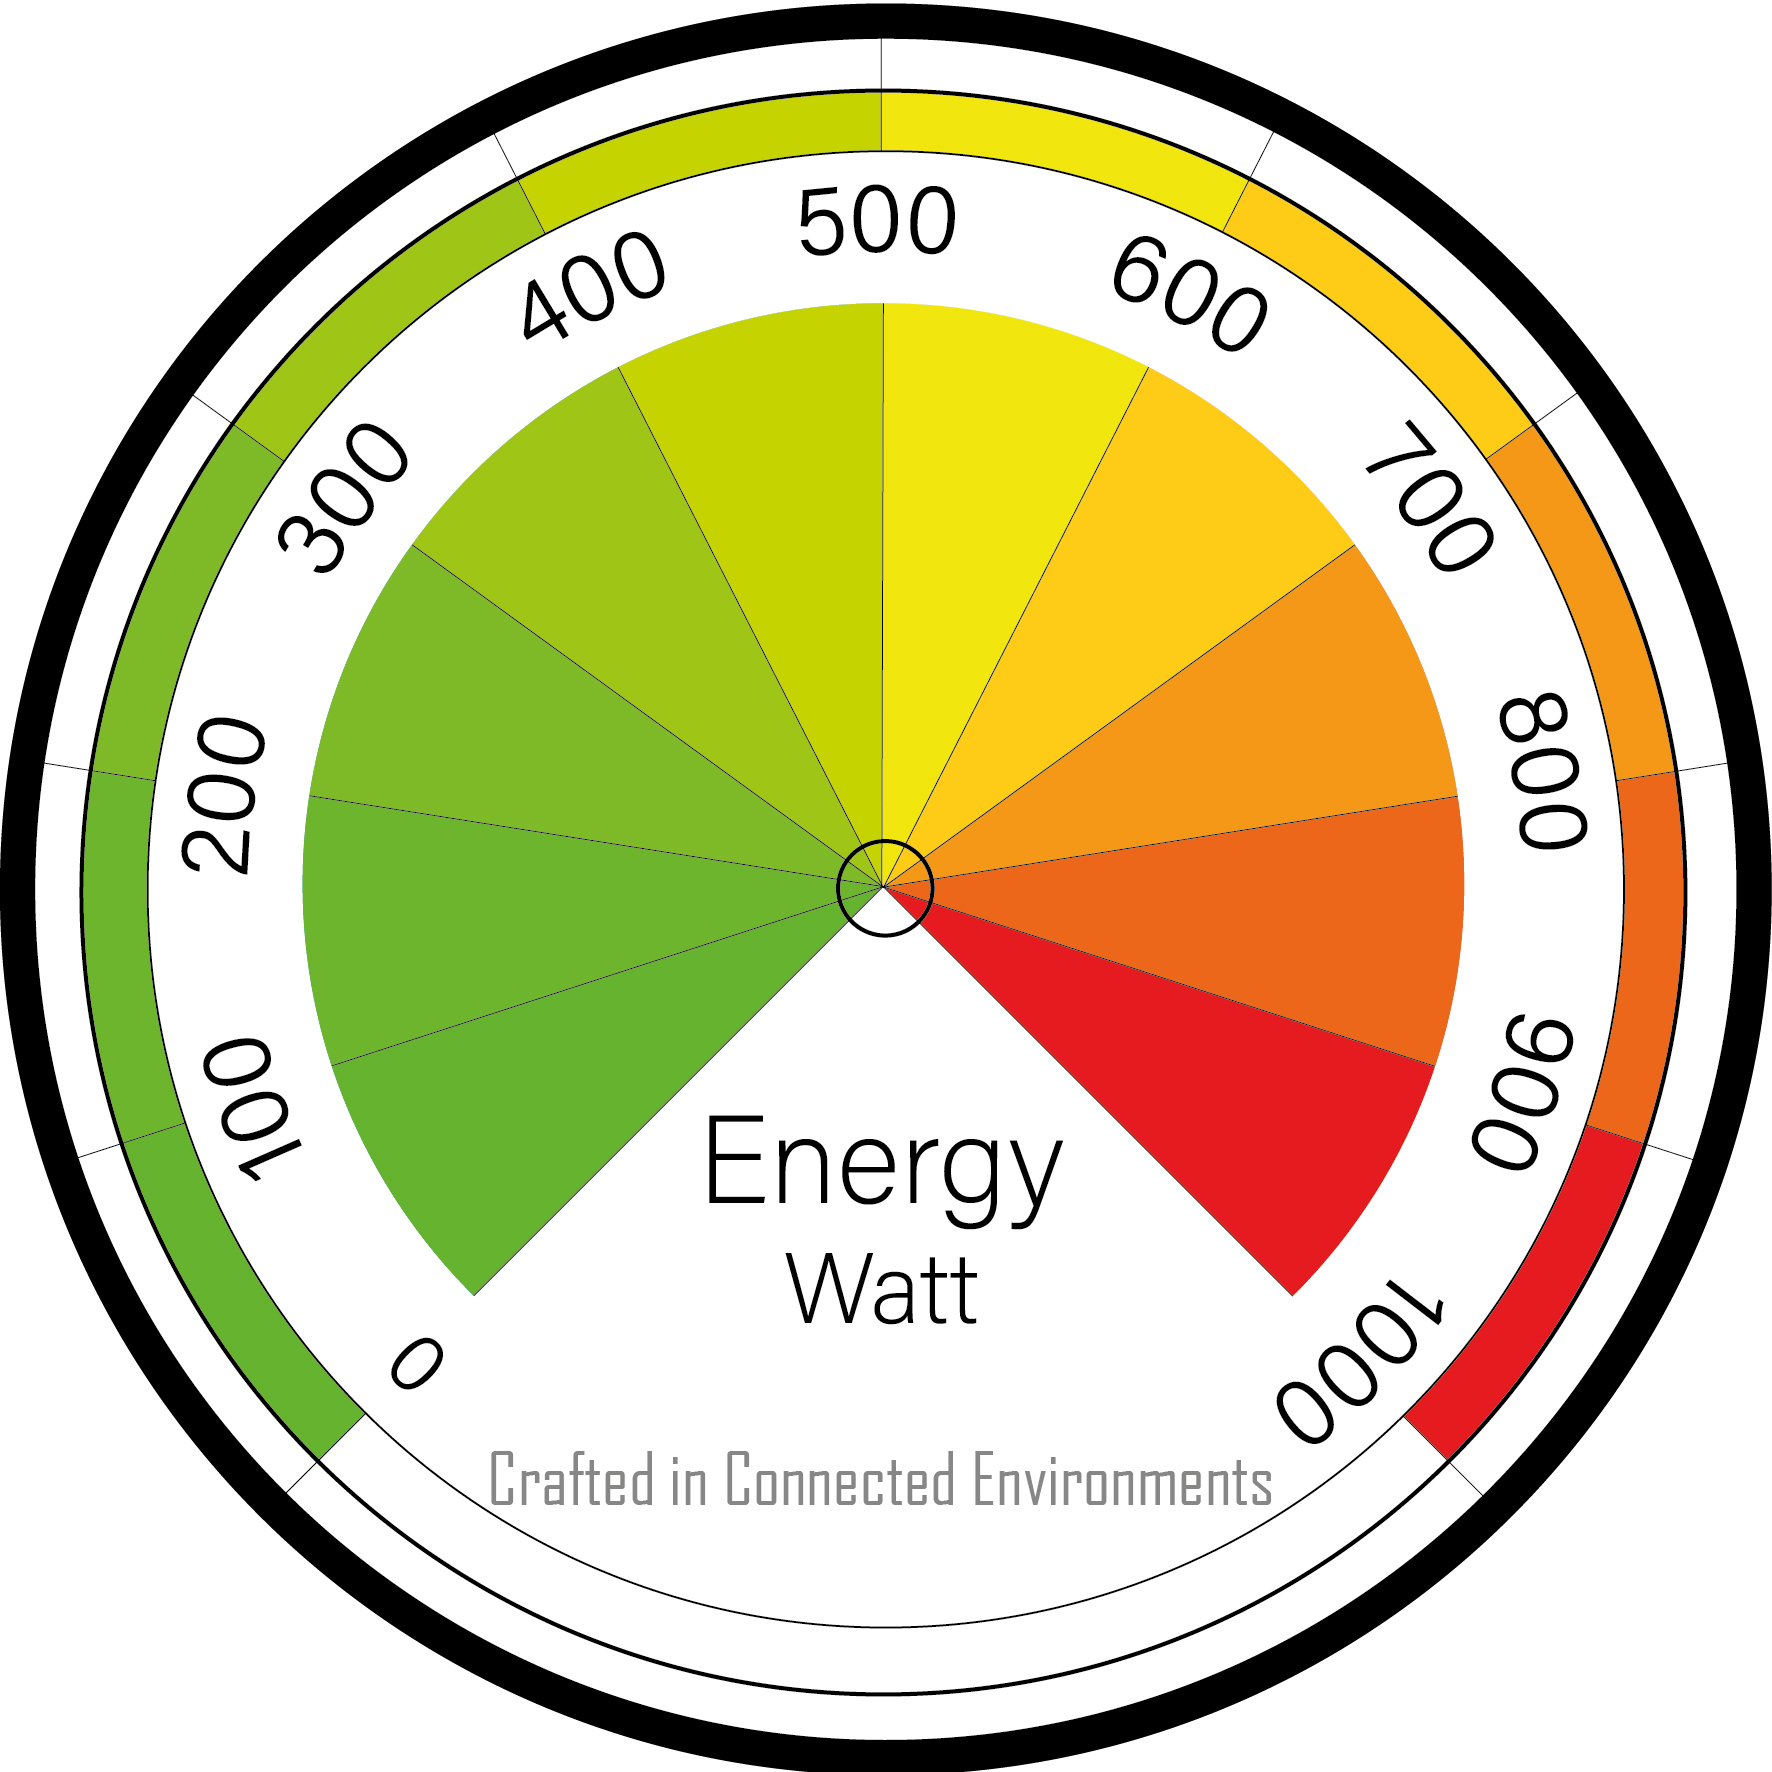
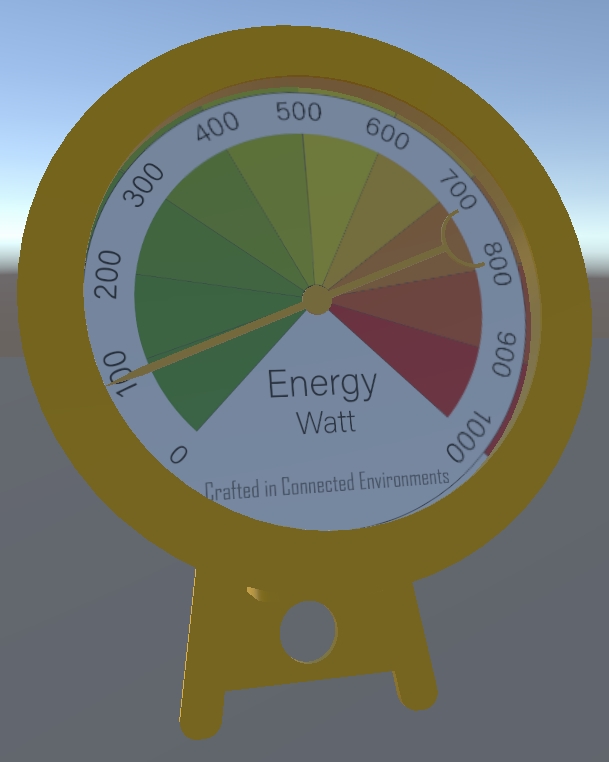
E.g. with the pointer 0 at W
startValue = 0endValue = 1000fullAngle = 270adjustStart = -45
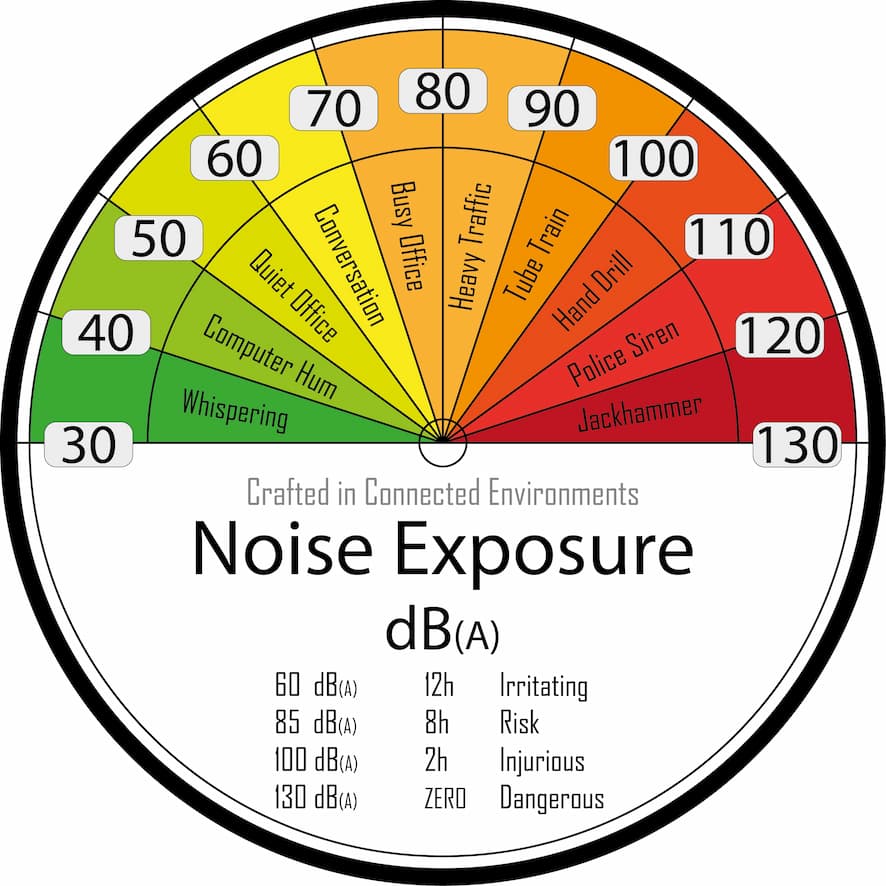
startValue = 30endValue = 130fullAngle = 180adjustStart = 0
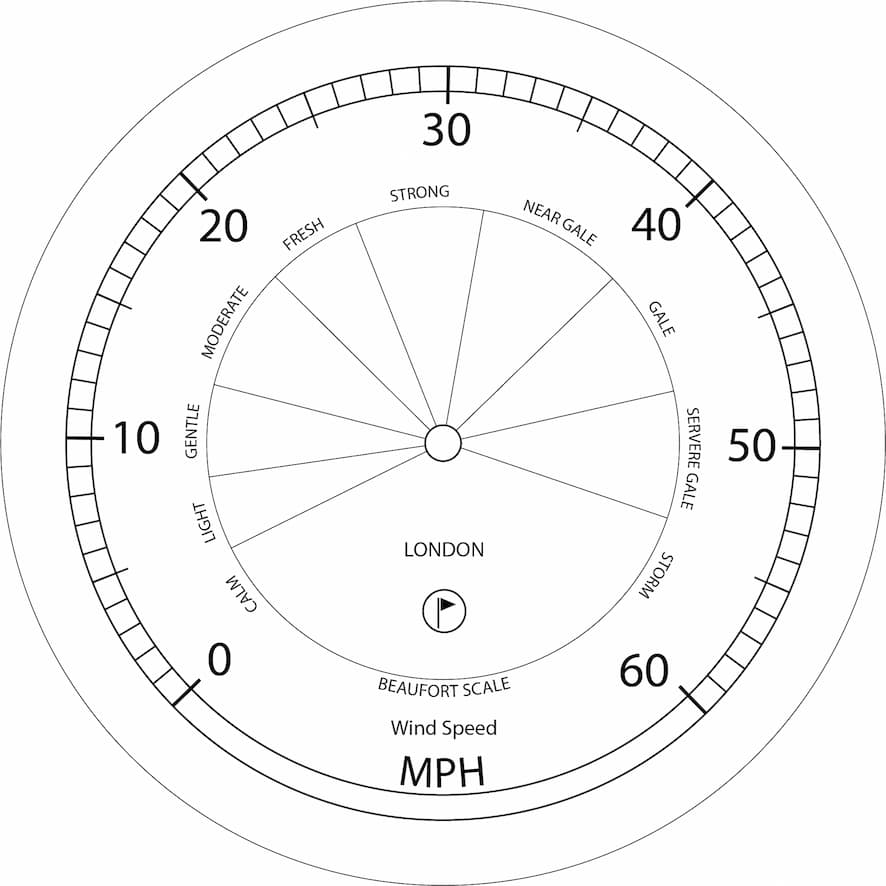
startValue = 0endValue = 60fullAngle = 270adjustStart = -45
Realistic lighting is central to making an object in Augmented Reality look real and they are various shadow, light and camera techniques which can be used to allow an object to look more natural in its surroundings.
Gauge Shadow
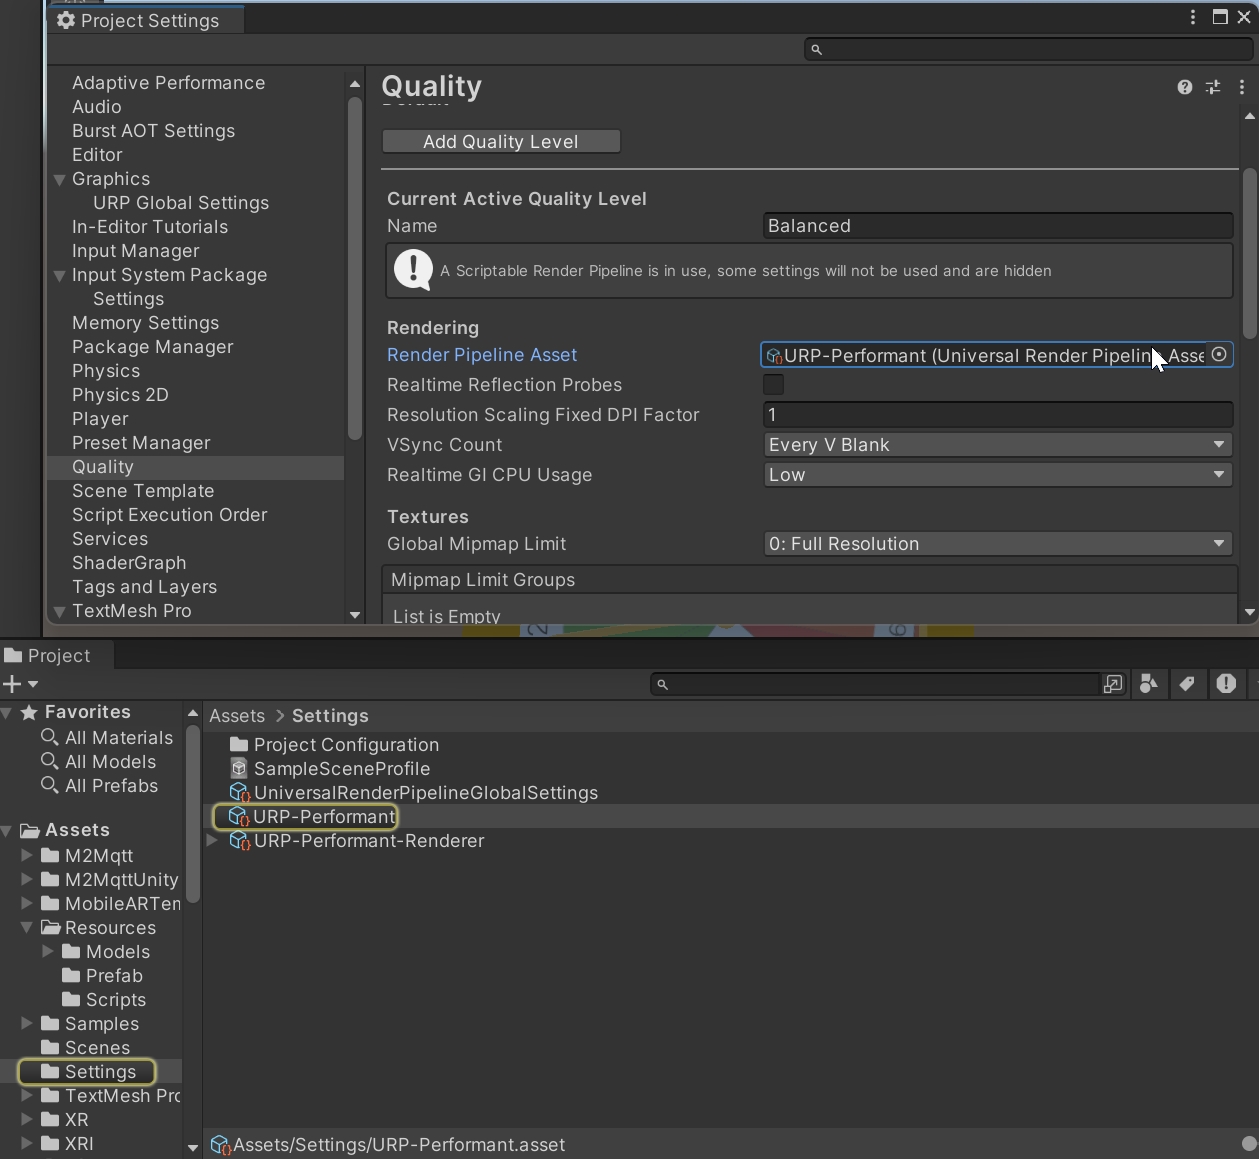
The Gauge so far is not showing any shadows or very low-resolution shadows - this is due to a couple of settings in Unity which need to be changed. Firstly head to Edit -> Project Settings and, on the left-side panel, select Quality. We are going to use the Balanced settings (click on it). The template chosen used the URP-Performant Asset to control the various quality settings. Click on it and find the asset in the Project window
Select the URP Asset (e.g. URP-Performant) and in the Inspector window, for the Shadows settings use
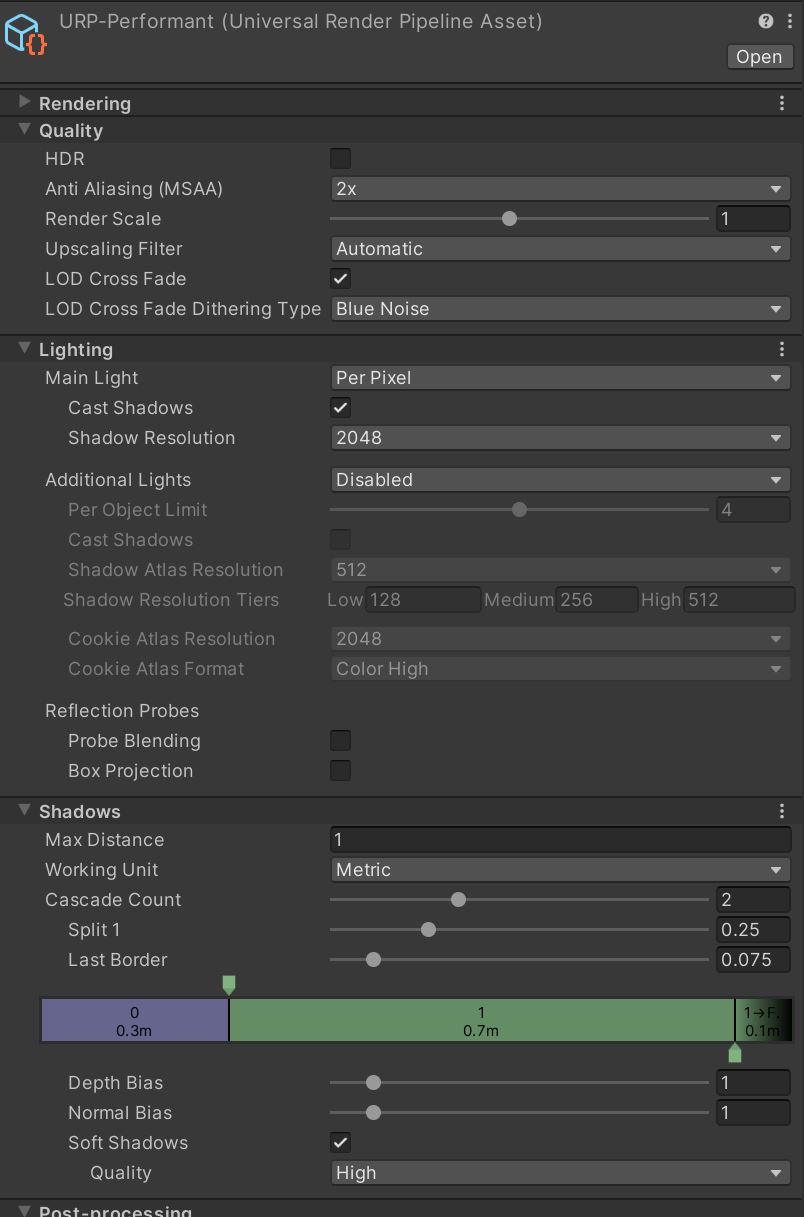
As above the main edits are to set:
- Shadow Resolution: 2048
- Max Distance : 1
- Quality: High
- Shadow Cascades_: Two Cascade
Base Shadow
Finally, shadows need to fall on any surface you use for Augmented Reality. We are going to create a new custom shader
- in the
Projectwindow search for shadow
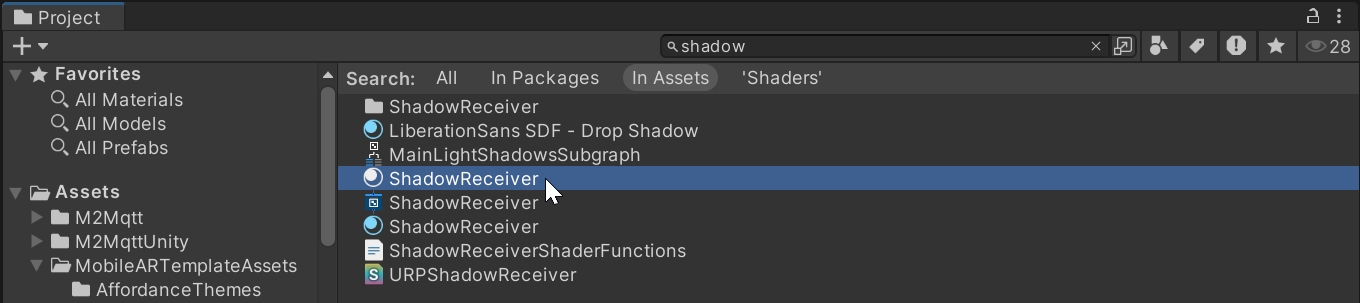
- one of the result is a ready made material named
ShadowReceiverwith the followingURP Shadow Shaderattached to it
Shader "URP Shadow Receiver"
{
    Properties
    {
        _ShadowColor ("Shadow Color", Color) = (0.35, 0.4, 0.45, 1.0)
    }

    SubShader
    {
        Tags
        {
            "RenderPipeline" = "UniversalPipeline"
            "RenderType" = "Transparent"
            "Queue" = "Transparent-1"
        }

        Pass
        {
            Name "ForwardLit"

            Tags
            {
                "LightMode" = "UniversalForward"
            }

            Blend DstColor Zero, Zero One
            Cull Back
            ZTest LEqual
            ZWrite Off

            HLSLPROGRAM

            #pragma vertex vert
            #pragma fragment frag
            #pragma prefer_hlslcc gles
            #pragma exclude_renderers d3d11_9x
            #pragma target 2.0
            #pragma multi_compile _ _MAIN_LIGHT_SHADOWS _MAIN_LIGHT_SHADOWS_CASCADE _MAIN_LIGHT_SHADOWS_SCREEN
            #pragma multi_compile _ _SHADOWS_SOFT
            #include "Packages/com.unity.render-pipelines.universal/ShaderLibrary/Lighting.hlsl"

            CBUFFER_START(UnityPerMaterial)
                float4 _ShadowColor;
            CBUFFER_END

            struct Attributes
            {
                half4 positionOS : POSITION;
            };

            struct Varyings
            {
                half4 positionCS : SV_POSITION;
                half3 positionWS : TEXCOORD0;
            };

            Varyings vert(Attributes input)
            {
                Varyings output;
                VertexPositionInputs vertexInput = GetVertexPositionInputs(input.positionOS.xyz);
                output.positionCS = vertexInput.positionCS;
                output.positionWS = vertexInput.positionWS;
                return output;
            }

            half4 frag(Varyings input) : SV_Target
            {
                half4 color = half4(1, 1, 1, 1);
                #if (defined(_MAIN_LIGHT_SHADOWS) || defined(_MAIN_LIGHT_SHADOWS_CASCADE) || defined(_MAIN_LIGHT_SHADOWS_SCREEN))
                    VertexPositionInputs vertexInput = (VertexPositionInputs)0;
                    vertexInput.positionWS = input.positionWS;
                    float4 shadowCoord = GetShadowCoord(vertexInput);
                    half shadowAttenutation = MainLightRealtimeShadow(shadowCoord);
                    color = lerp(half4(1, 1, 1, 1), _ShadowColor, (1.0 - shadowAttenutation) * _ShadowColor.a);
                #endif
                return color;
            }

            ENDHLSL
        }
    }
}
- open the prefab of the Gauge and create a plane just below the stand
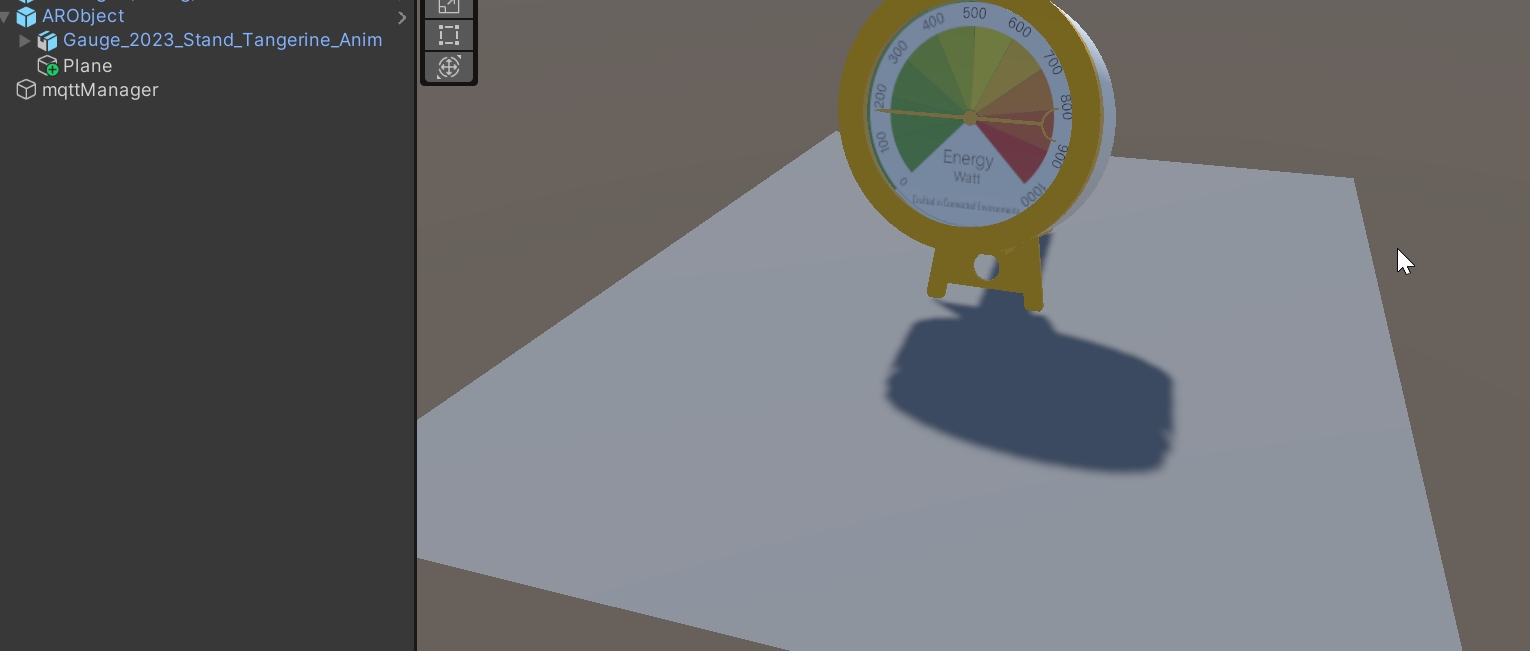
Apply the ShadowReceiver material to the plane and, in the Inspector panel under ShadowReceiver (Material), adjust the PlaneAlpha to 0 to remove the dots. The new material will render just the shadows projected by a light source in the scene, but it will be otherwise invisible
Light Estimation
Light Estimation uses the camera of the mobile device to estimate the environmental lighting and apply it to the main light of the scene. ARFoundation provides an inbuilt light estimation option. To turn it on, select the Main Camera GameObject inside the XR Origin (Mobile AR) and, in the Inspector Panel, in the AR Camera Manager component, select Light Estimation -> Everything
You now have an Augmented Reality object with real-time lighting and shadows, it can be placed and moved on any surface.
If you have not already - Save your Scene.
The onboarding experience is an important aspect of any AR app. Its main purpose is to provide users with straightforward information on how to use the app. While each application will have specific instructions, the initial steps (e.g. finding a plane, placing an object) are commonly used in any application. There are no specific rules on how the onboarding experience needs to be; the important part is that the user needs to be informed from the beginning about what they need to do to use the application (e.g., which button to press, which actions to perform).
Overlays video
One effective solution is to add overlaid videos and/or text to alert the user. Both uGUI and UIToolkit can be used for displaying and controlling the user interface. In this tutorial, we are going to use the uGUI system.
Canvas Screen space
Before building the UI we need to import the onboarding AR videos. Import the findaplane.webm, findanimage.webm and taptoplace.webm in a subfolder (e.g. Videos) of the Assets.
Select the three videos in the Assets folder and in the Inspector panel:
- select the
Androidtab - Check
Override for Android - Check
Transcode - Check
Keep Alpha

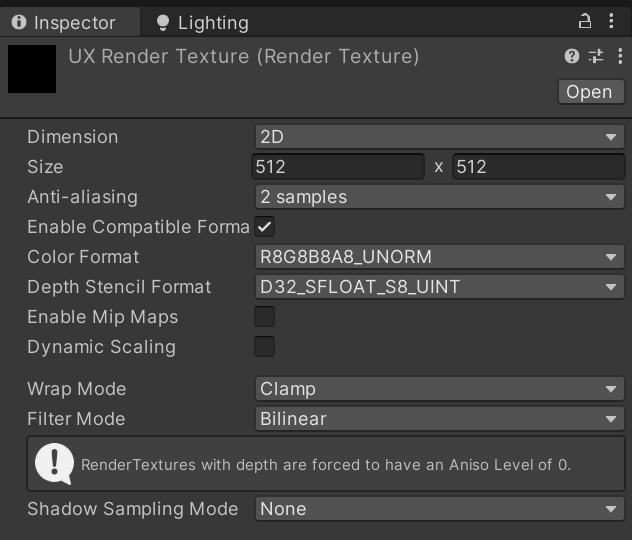
Inside the same subfolder create a RenderTexture (Create -> Rendering -> Render Texture) named UXRenderTextureand change the size to 512 x 512 in the Inspector window and Anti-aliasing to 2 samples
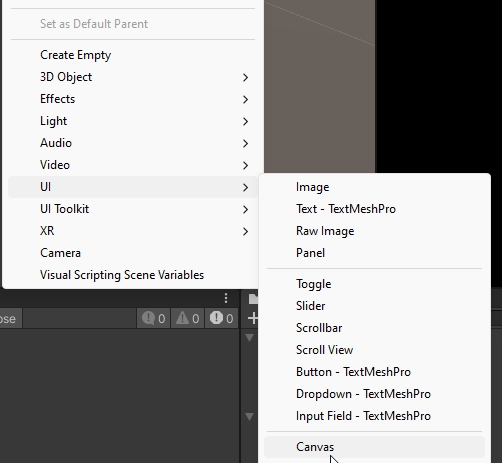
Create a new UI -> Canvas and change the name to Onboarding
In the Inspector Window:
- Render Mode: Screen Space - Overlay
- Pixel perfect: check
- Canvas Scaler: Scale with screen with Size
x:1080 y:1920 - Screen Match Mode: Expand
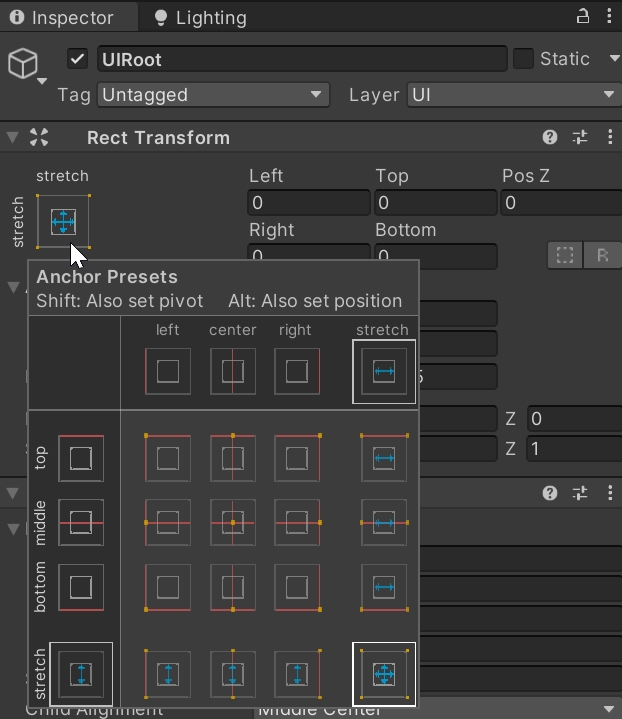
Create a new Empty Game Object inside the Canvas GameObject and name it UIRoot this is going to be the container of the UI.
With the UIRoot selected, in the Inspector Window:
- change the pivot to
Stretch Stretchand set all the properties to 0 (i.e. Top; Left; Pos Z; Right; Bottom)
- Add a new component
Vertical Layout Group, this will help to organise the three additional UI components we need to create. Set the following parameters:- Spacing:
100 - Child Alignment:
Middle Centre - Control Child Size:
WidthandHeight - Child Force Expand:
WidthandHeight
- Spacing:
We can now add the actual GameObjects that hold the UX information in the UIRoot:
- a
UI -> Text - TextMeshPro, named Info1; - an Empty Game Object named Video
- another
UI -> Text - TextMeshPronamed Info2.
The order of these components in the Hierarchy Panel is important.
With both Info1 and Info2 selected, in the Inspector Window:
- Add a
Layout Elementcomponent and set themin widthto1080 - in the
TextMeshPro - Text (UI)component, check the Auto Size and set themin 70; max 100and alignment tomiddle and centre
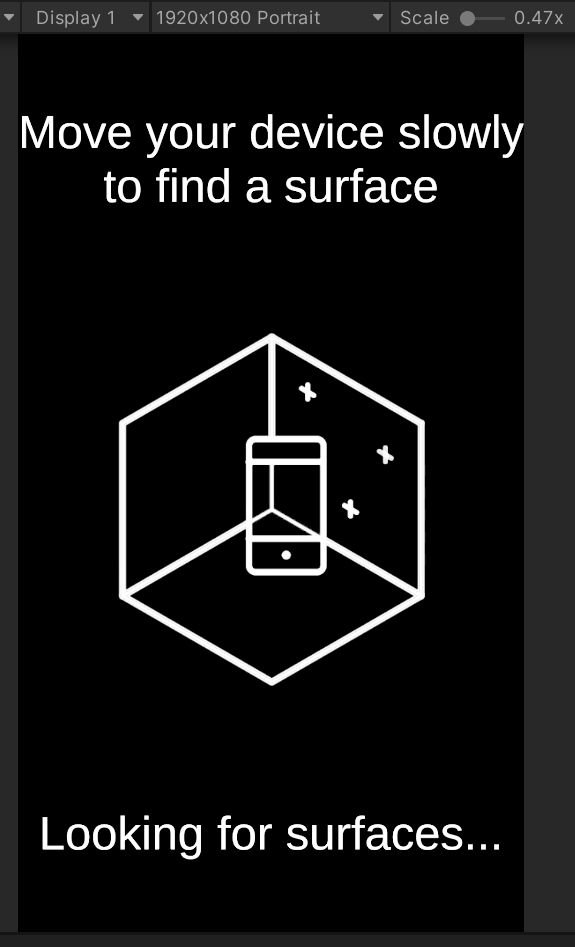
Select the Info1 GameObject and in the TextMeshPro - Text (UI) component change the text input to:
Move your device slowly to find a surface
Similarly, for the Info2, change the text to:
Looking for surfaces...
Select the the Video GameObject, and in the Inspector Window:
- add a
Layout Elementcomponent with bothMin SizeWidthandHeight450 - add a
Vertical Layout Group:- Alignment:
Middle Centre - Child Size:
WidthandHeight - Force to Expand:
WidthandHeight
- Alignment:
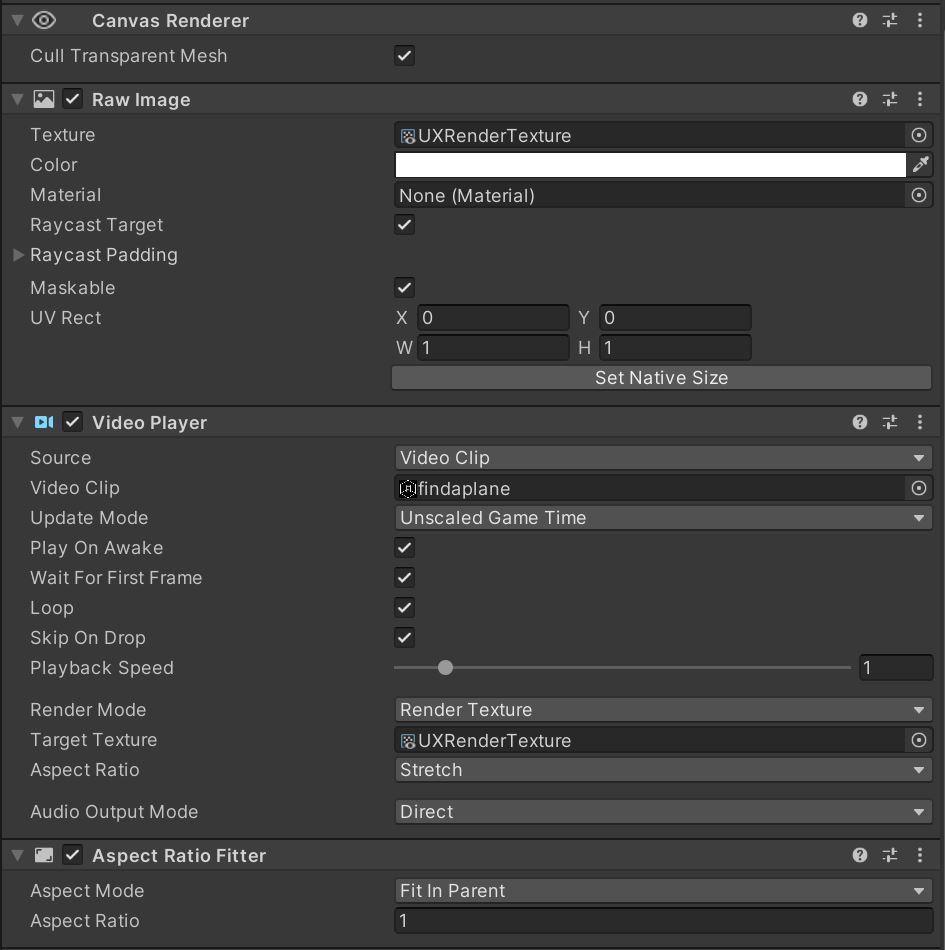
Finally, add to the Video GameObject a new UI -> Raw Image and named it videoUX, and in the Inspector Window:
- In the
Raw Imagecomponent set the Texture toUXRenderTexture - Add a
Video Playercomponent- Video Clip:
findaplane - Play On Awake:
check - Loop:
check - Target Texture:
UXRenderTexture - Aspect Ration:
Strecth
- Video Clip:
- Add an
Aspect Ratio Fittercomponent- Aspect Mode:
Fit In Parent - Aspect Ratio:
1
- Aspect Mode:
- Control that the
Rect transformis set toStretch Stretchand Pivot isX 0.5; Y 1
Press Play, you should be able to see the UI interface and the video running in the centre
Control the UI
The final step is to make the UI respond to the underlying ARFoundation system. This involves changing the text and video when the surface is found and removing the interface once the user places the object. This functionality is controlled by a new C# script.
Create a new MonoBehaviour Script named uiAR
using UnityEngine;
using UnityEngine.Video;
using UnityEngine.XR.ARFoundation;
using TMPro;
//Script need to be added to XROrigin, as it has ARPlaneManager and tapToPlace
public class uiAR : MonoBehaviour
{
//Video player
public VideoPlayer videoUX;
//Video Clips
public VideoClip v_findSurface;
public VideoClip v_tapPlace;
//Info texts
public TextMeshProUGUI t_info1;
public TextMeshProUGUI t_info2;
// Events for found plane and content created
private ARPlaneManager m_ARPlaneManager; //ARFoundation system
private tapToPlace m_tapToPlace; //used to detect when the user create the content
bool isContentVisible = false;
// Start is called before the first frame update
private void Awake()
{
videoUX.clip = v_findSurface;
m_ARPlaneManager = GetComponent<ARPlaneManager>();
m_ARPlaneManager.planesChanged += planeFound; //Subscribe to the event `plane is detected`
m_tapToPlace = GetComponent<tapToPlace>();
m_tapToPlace._contentVisibleEvent += contentVisible; //Subscribe to the event `content is created` (user Tap)
}
void planeFound(ARPlanesChangedEventArgs args)
{
//Plane found, turn off UI and Video
videoUX.clip = v_tapPlace;
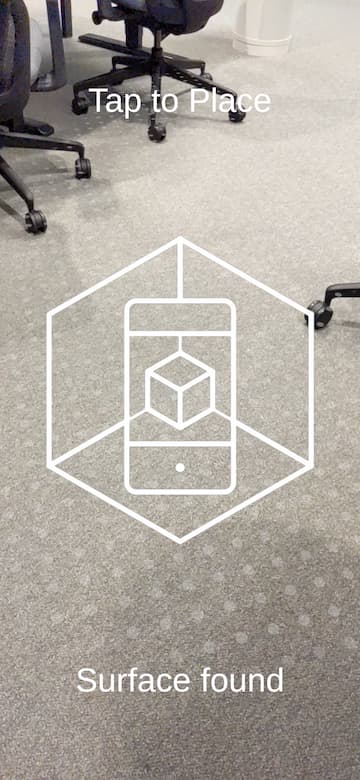
t_info1.text = "Tap to Place";
t_info2.text = "Surface found";
m_ARPlaneManager.planesChanged -= planeFound; //Unsubcribe
if (isContentVisible)
{ //Content created, turn off UI and Video
videoUX.gameObject.SetActive(false);
t_info1.gameObject.SetActive(false);
t_info2.gameObject.SetActive(false);
}
}
void contentVisible()
{
isContentVisible = true; //if the content is visible
m_tapToPlace._contentVisibleEvent -= contentVisible; //Unsubscribe
//Content created, turn off UI and Video
videoUX.gameObject.SetActive(false);
t_info1.gameObject.SetActive(false);
t_info2.gameObject.SetActive(false);
}
}
Add the script to the XR Origin (Mobile AR) GameObject and set the public variables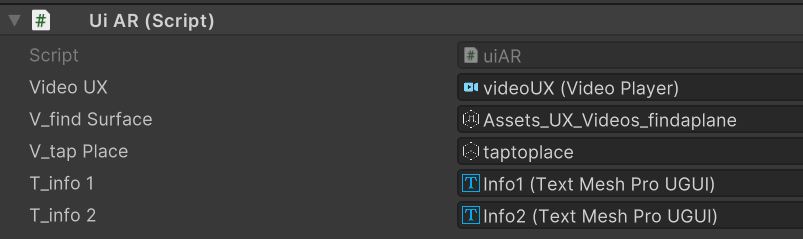
In order to see the script in action we need to build and deploy the App