This workshop will show you how to:
- Create portals between digital and physical places
- Use geo-location services in a AR experience
- Add spatial sounds
To complete this workshop you will need:
- Unity 2022.3 or above
- VS Code
- Vuforia Account
- Vuforia Unity Package 10.10
- Room model
- Prefab Lightmapping script
- Native GPS Plugin (iOS/Android)
- Steam Audio plugin
- Unity scene with MQTT Gauge and UI
Languages used:
- C#
Additional resources
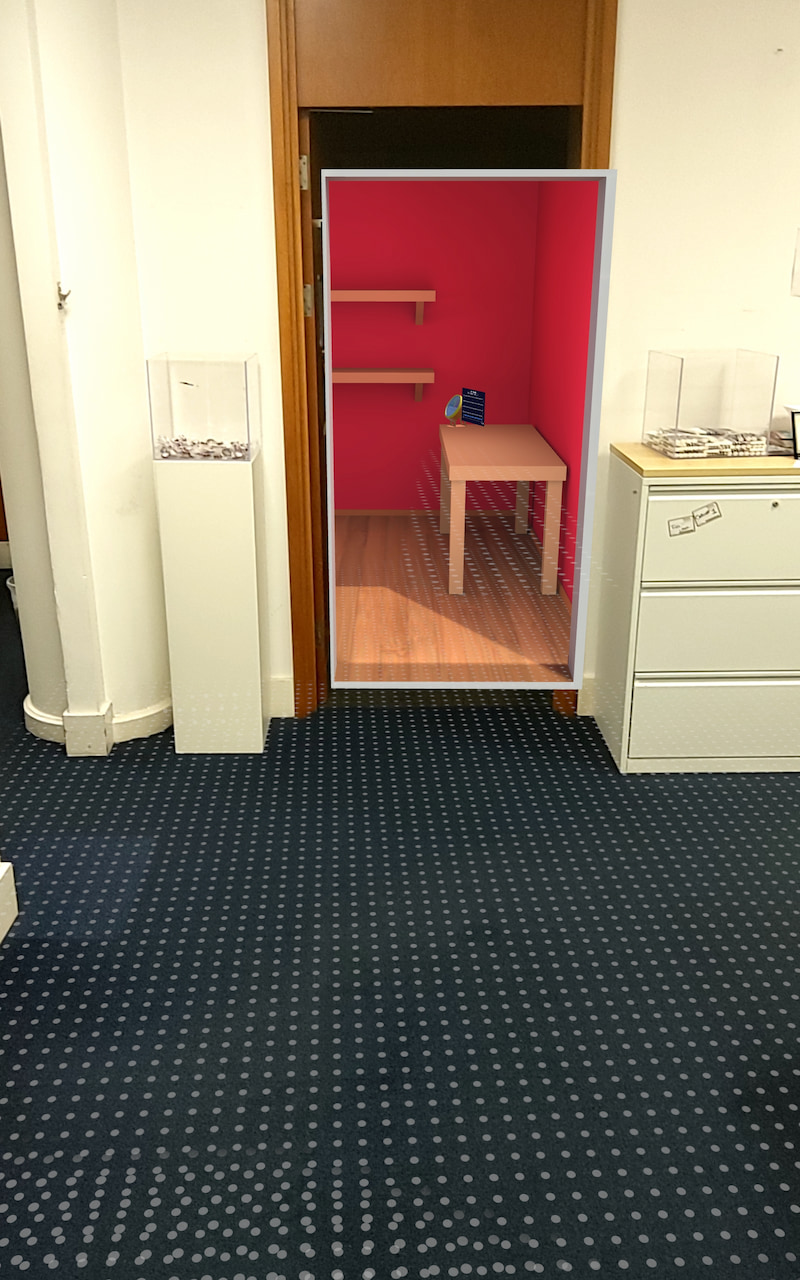
In addition to overlay data and models to the physical environment, Augmented Reality can be used to materialise immersive digital places, overlapping realities, that can be explored by walking in them. In order to maintain the illusion of transition between physical and digital places one of the possible solutions is to use portals.
Conceptually, the use of a portal in Augmented Reality allows us to visualise just a small part of the digital environment (e.g. a door frame, a hole in the wall) that is fully presented once the user crosses the threshold of the portal itself. To achieve this illusion we can hide the digital model behind an invisible layer.
Room Environment
Create a new Unity project using the AR Core template. Switch the Platform to Android.
Import the Room environment in Unity. There are two ways to import - click and drag your FBX file into a folder in the Project panel or head to Assets -> import assets
To be able to edit the materials we need to extract them from the FBX file. in the Inspector window, from the tab Materials chose Use External Materials (Legacy) from the Location dropdown menu. Unity will extract the Materials and texture images in the folder of the FBX model.
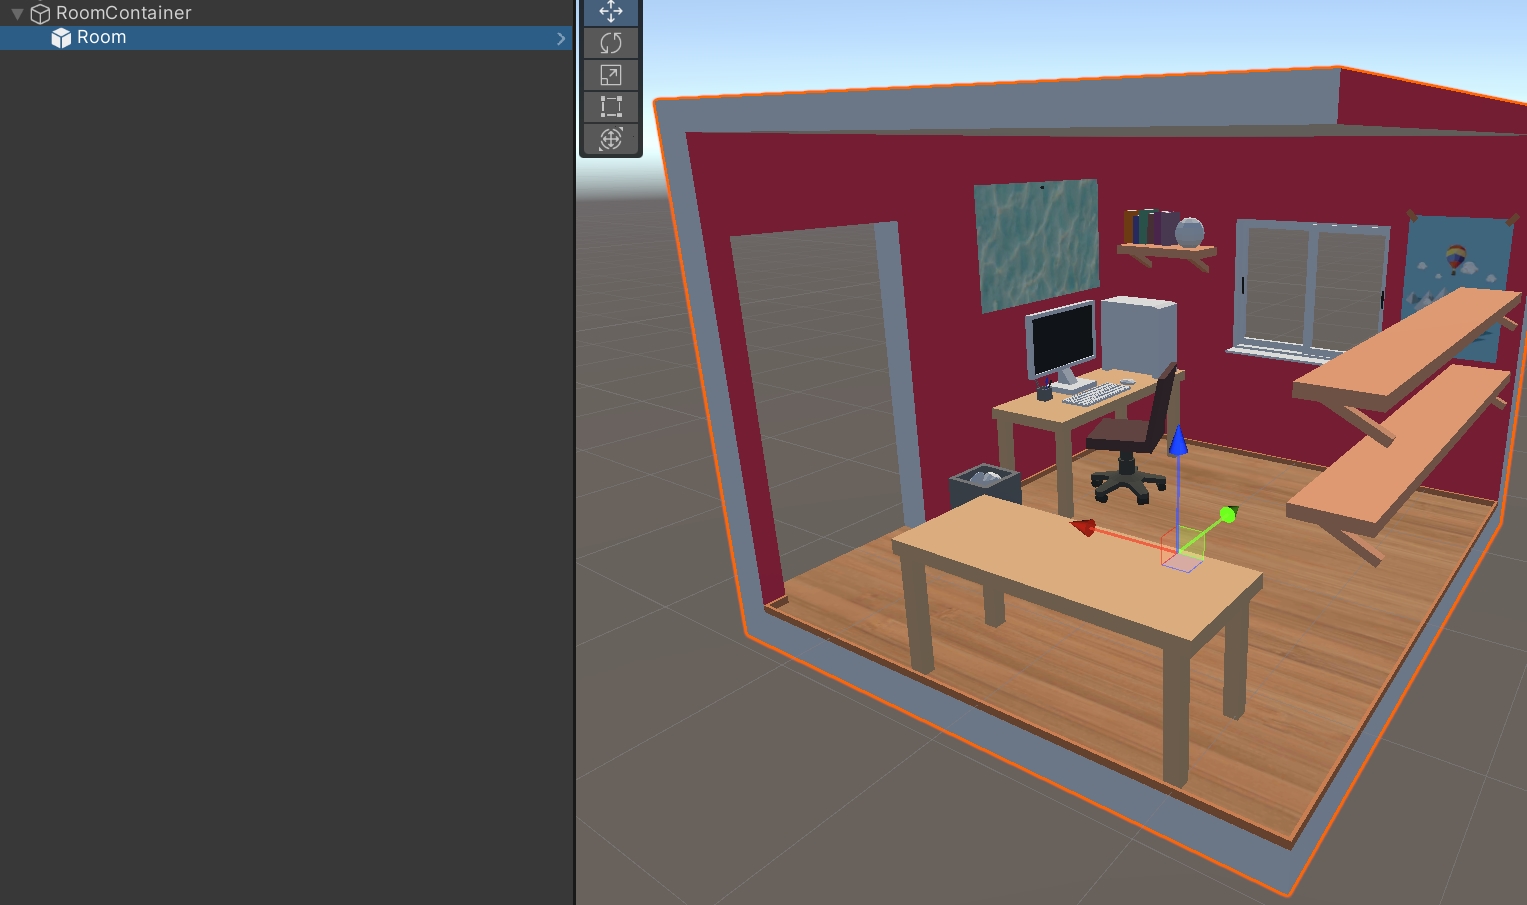
- Create a new empty object named
RoomContainerin the scene - Drag the model of the room in the empty
RoomContainerobject (be sure that the room is placed atposition = 0, 0, 0) - move back the
RoomContainerto the Prefab folder to create a prefab of it (we will need this later for applying light mapping).
DepthMask Shader
A quick and effective way to visually hide a digital model is by using a Shader that, as an invisible cloak, it lets us see behind the model without revealing the model itself
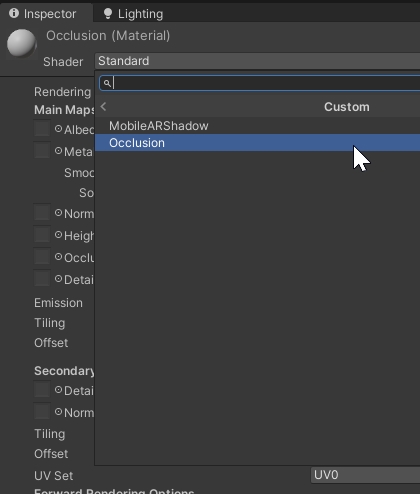
- create a new Shader
Standard Surface Shadernamed Occlusion - Open the shader in VSCode delete the content and copy and paste the content of this Gist
- create a new material named Occlusion
- with the material Occlusion selected, in the
Inspector Panelchange the shader to Custom/Occlusion
- create a new empty object named
Occlusioninside theRoomContainerGameObject and add to it 4 planes (GameObject -> 3D Object -> Plane) - use the plane to cover the model in order to have just the door, or any other opening, visible. The planes need to cover a larger part of the actual size of the model, to avoid the model will be visible from the sides
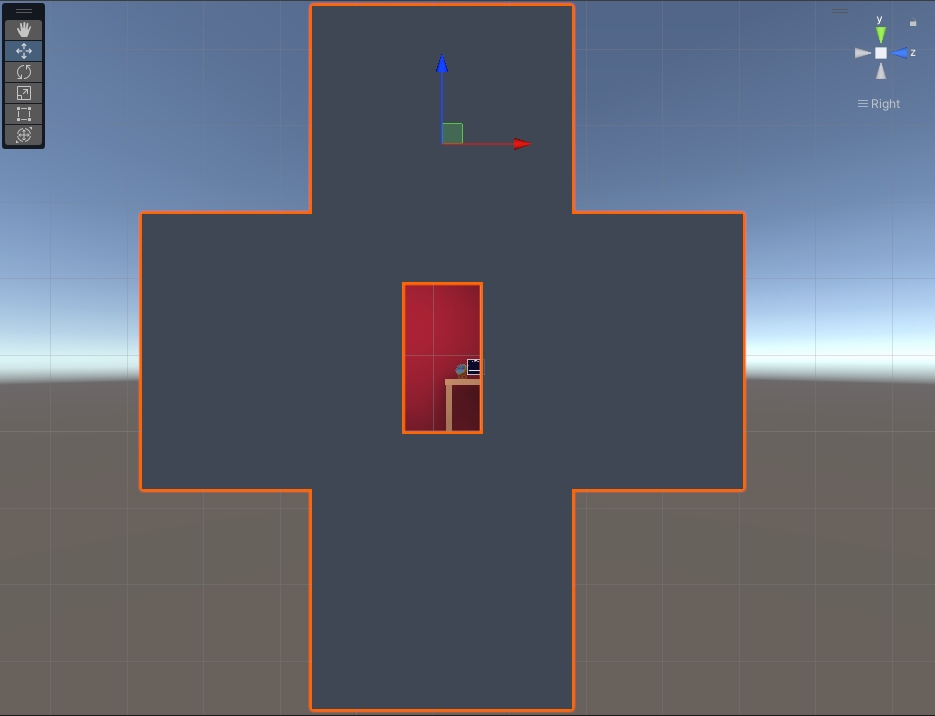
- finally apply the Occlusion material to the 4 planes
Using real-time lighting in Augmented Reality with large models can impact negatively the overall performance of the application, especially on older devices. Using lightmapping technique it is possible to store light information in a lightmap texture. Lightmaps in Unity can be generated just for static GameObjects, however, in Augmented Reality, the GameObjects need to be moved around the scene and Instantiate at Runtime. To overcome these limits it is possible to use the Prefab Lightmapping script that allows us to save lightmap information to the prefab itself
- download and import the
PrefabLightmapData.csscript in yourAssets -> Scriptsfolder (create a new folder if it does not exists) - add the script to the parent GameObject of the room (e.g.
RoomContainer GameObject) - select the Room model (child of the
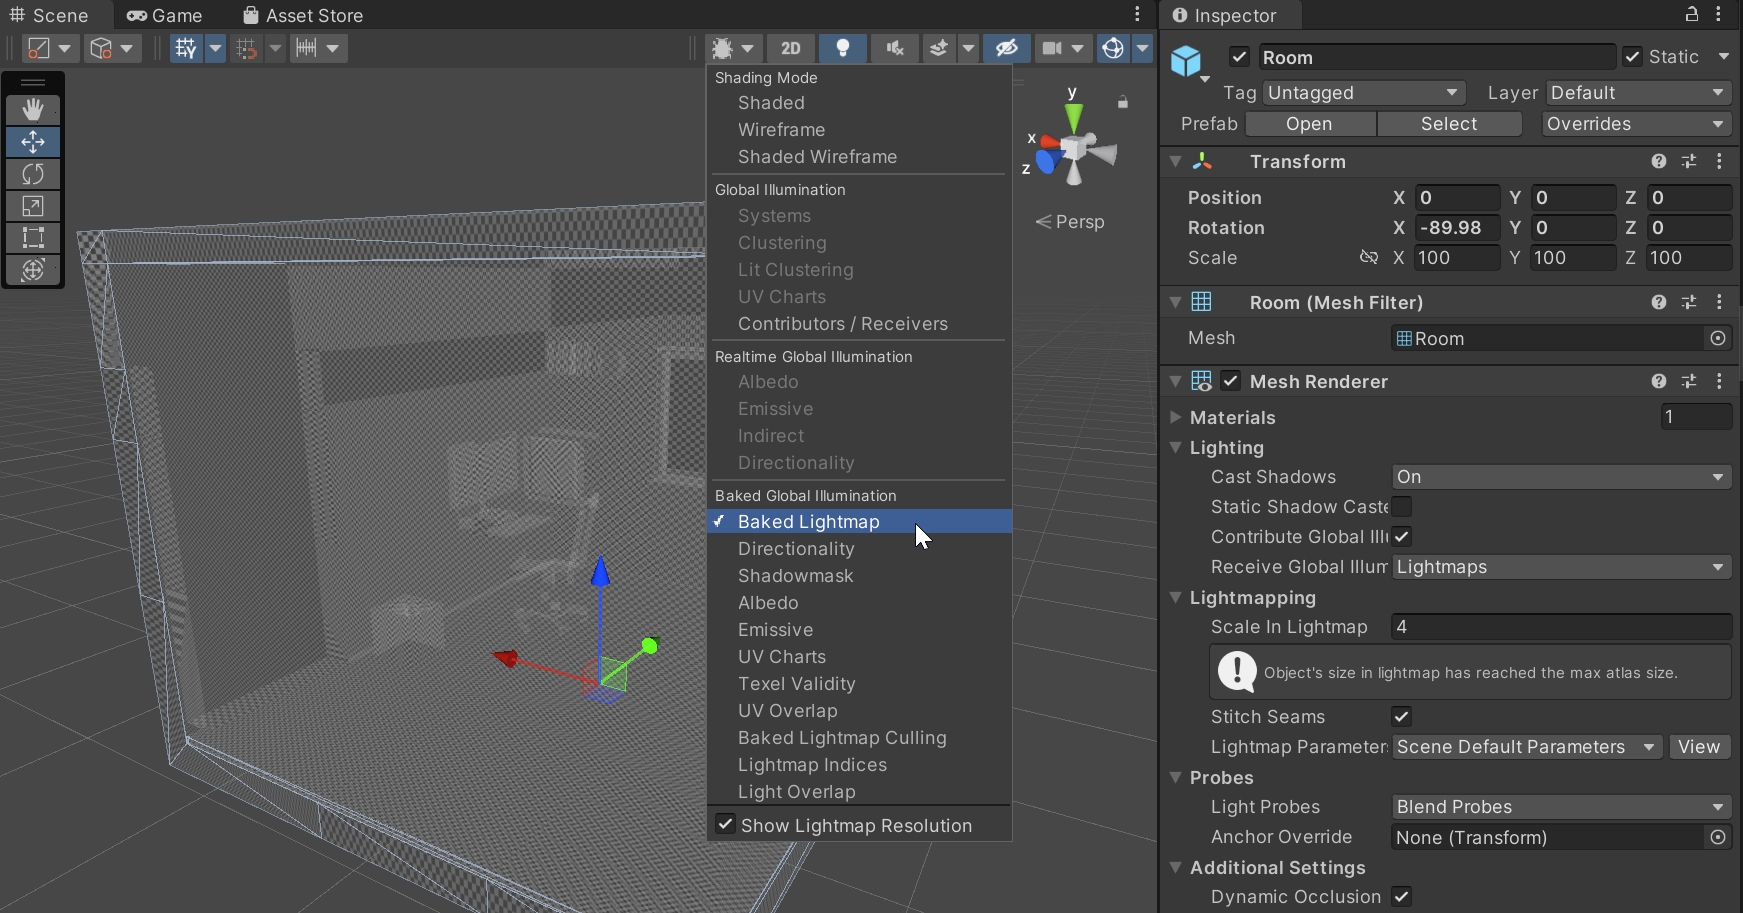
RoomContainer) and, from the top right of theInspector Panelcheck the Static checkbox - change the visualisation style to
Baked Lightmap, the model will show a grey and white grid. This is the resolution of the lightmap, the smaller the square (or textel) the higher the quality (and the longer the computation time) - in the
Inspector Panelchange theMesh Renderer -> Lightmapping -> Scale in Lightmapto3
We can now add some light to the scene
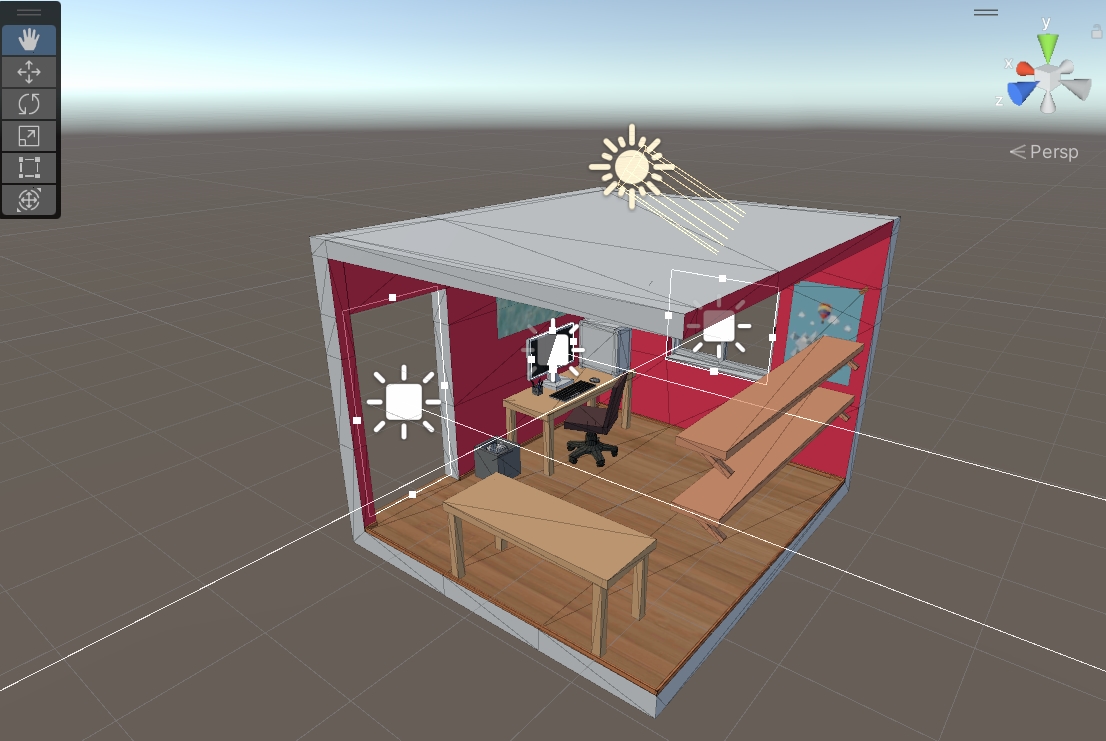
- create a new empty object named
Lightsinside theRoomContainer GameObject - add one
Area lightfor the window, one for the door and one on the monitor. Use theShapeproperty in theInspector Panelto set the size of the light. Also, pay attention that the direction of the light towards the inside of the room (blue arrow). Intensity can be adjusted to have a brighter environment - add a
Directional Lightor, if present, change the rotation to have the light entering the door (e.g.rotation = 30, -109, 0). Activate the shadows from the inspector (Soft Shadows) Be sure that theGeneral -> Modeof the light is set toBaked(Area lightcan be just baked lights) - Remember to save the Prefab by selecting the parent object
RoomContainerand, in theInspector panel, Overrides and Apply All
- open the
Window -> Rendering -> Lighting Panelto set the lightmapper parameter. Most of the default values are fine - each scene needs a
Lighting Settings Assets. By pressingNew Lighting Settingsa new asset will be created. As the lightmap is linked to the scene, named theLighting Settings Assetwith the same name of the scene. - the following setting can be used as a reference for the lightmap:
- Lightmapper: Progressive GPU (Preview). This might not be available if a dedicated GPU card is not installed
- Filtering: Advanced. Optix is available just on NVidia GPU
- Max Lightmap Size: 1024 || 2024
- Lightmap Compression: None. Compression can reduce greatly the quality of the texture
- Ambient Occlusion: Enabled
- Finally, save the scene and generate the lightmap for the Prefab using
Assets -> Bake Prefab Lightmap(the buttonGenerate Lightmapis the will not work to create the lightmap for the prefab)
The Prefab can be removed from the scene and it will keep the lightmaps once Instantiate in the AR App. Build the app to test it.
Depending on the model used, to have the door facing the user it might be needed to rotate the model. It is usually better to rotate the object within the RoomContainer.
It is possible to mix baked and real time lighting in the same scene.
- Import the Gauge inside the
RoomContainer(is better to disable or remove the LeanTouch Drag, Twist and Pinch for now) - Add a directional light with mode set to Realtime in the Lights GameObject
- Change the layer of the Gauge from the
Inspector Paneland change theRendering -> Culling Maskto match only the same Layer. In this way the real time light will affect just the objects belonging to the same layer. - Remember to save the Prefab (e.g.
Overrides), add the prefab to theTapToPlacecomponent
Build the app to test the scene
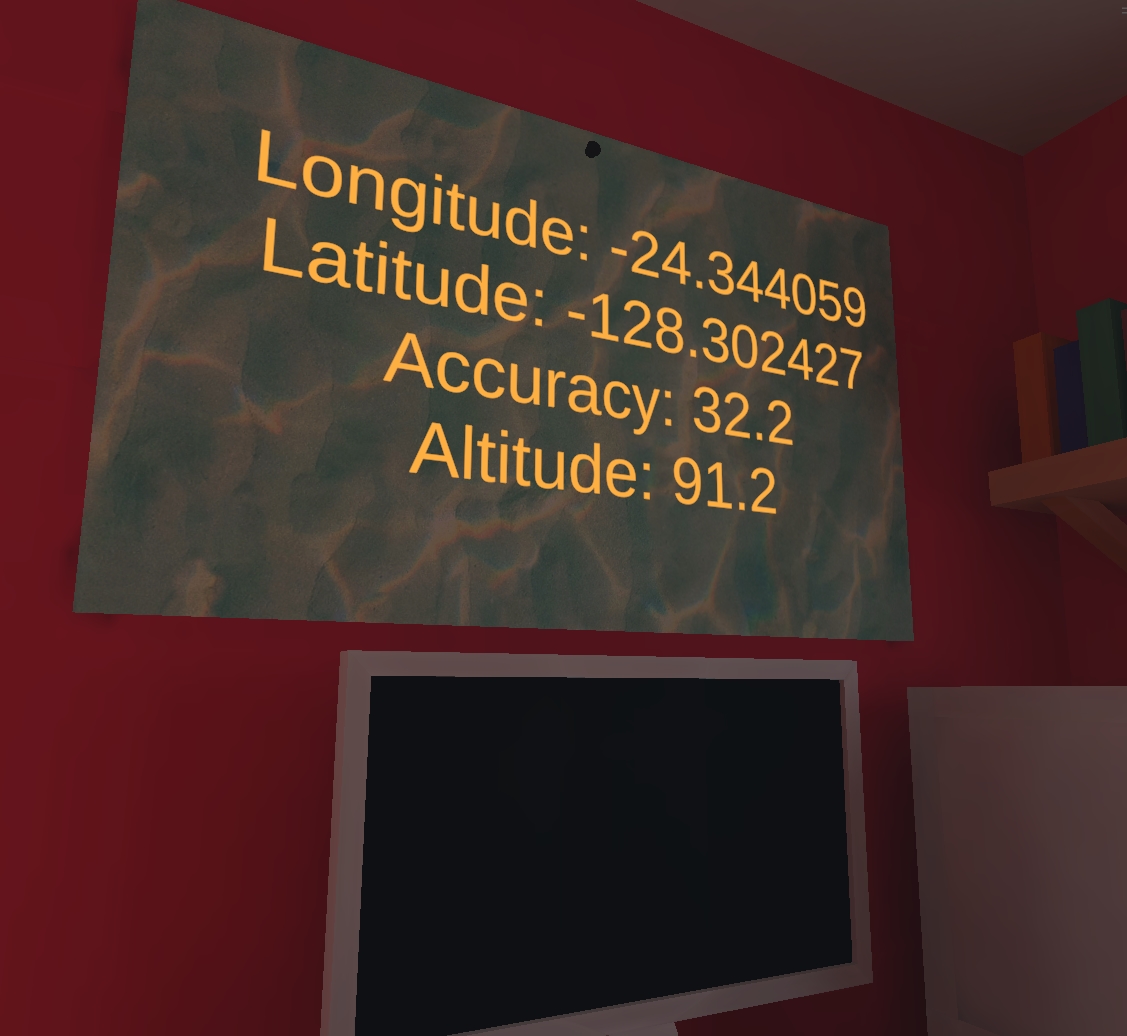
Unity can be use to access multiple sensors from the mobile device. The GPS location it could be useful to trigger AR experiences just if the user is in a specific place. Newer versions of Android and iOS requires specific permissions from the user to access the various sensors. In addition, Unity provides Latitude and Longitude as a float instead of a more accurate double provided by the mobile device. To overcome this problem, it is possible to leverage a native platform plugin (Android or iOS).
The Native GPS Plugin (iOS/Android) provide these plugin out-of-the-box:
- Add the asset to the Unity project
- A new folder
Native GPS Plugin (iOSAndroid)is created in theAssetsfolder whit a sample scene - Open the
Room Containerprefab in edit mode - create an empty GameObject, named
GPSDatainposition = 1.4, 1.7, -0.65 - add to it a
3D Object -> TextMeshPro(install the essential assets if required)- Width: 1.3; Height: 0.8
- Rotation Y: 90
- Change
Sample texttoWaiting GPS... - Font Size: 1
- Change colour
- Alignment: Centre; Middle
The script NativeGPSUI, provided by the asset, can be used to test the GPS location. As we use a TextMeshPro GameObject, we need to change the references in the script from Text to TextMeshPro and add the using TMPro; at the top of the script. You may want to comment out the Speed value of the GPS to keep the text in the panel
Build the app to test the scene
Valve Steam Audio provides a free audio spatialiser that can be use to create immersive experience in VR and AR environments. Compare to other add-on, Valve Steam Audio provides some interesting solutions to create credible sound occlusion and reflection.
- Download and install the Valve Steam Audio Unity Plugin
- in
Edit -> Project Settings -> AudioselectSpatializer PlugintoSteam Audio Spatializer, andAmbisonic Decoder PlugintoSteam Audio Ambisonics - Open the Prefab
Room Containerand add a newAudio -> Audio Source - in the
Inspector PanelAudioClipadd an audio file (wav or mp3, Freesound.org is a great resource)- Spatialize: True
- Loop: True
- Add a new component
Steam Audio Source- Distance Attenuation: True
- Directivity: True
- Occlusion: True
- Transmission: True
- Reflection: True
- Select the
Roomprefab inside theRoom Container- Add a
Mesh Collider, Convex: True - Add a
Steam Audio Geometry, Change material toBricks - Add a
Steam Audio Dynamic Objectand selectExport Dynamic Object
- Add a
- Finally select the
Main Camerain theHierarchy Paneland add a componentAudio Listener
Build and Run the application (or use the Editor Play to test the effects of the sound occlusion and transmission)