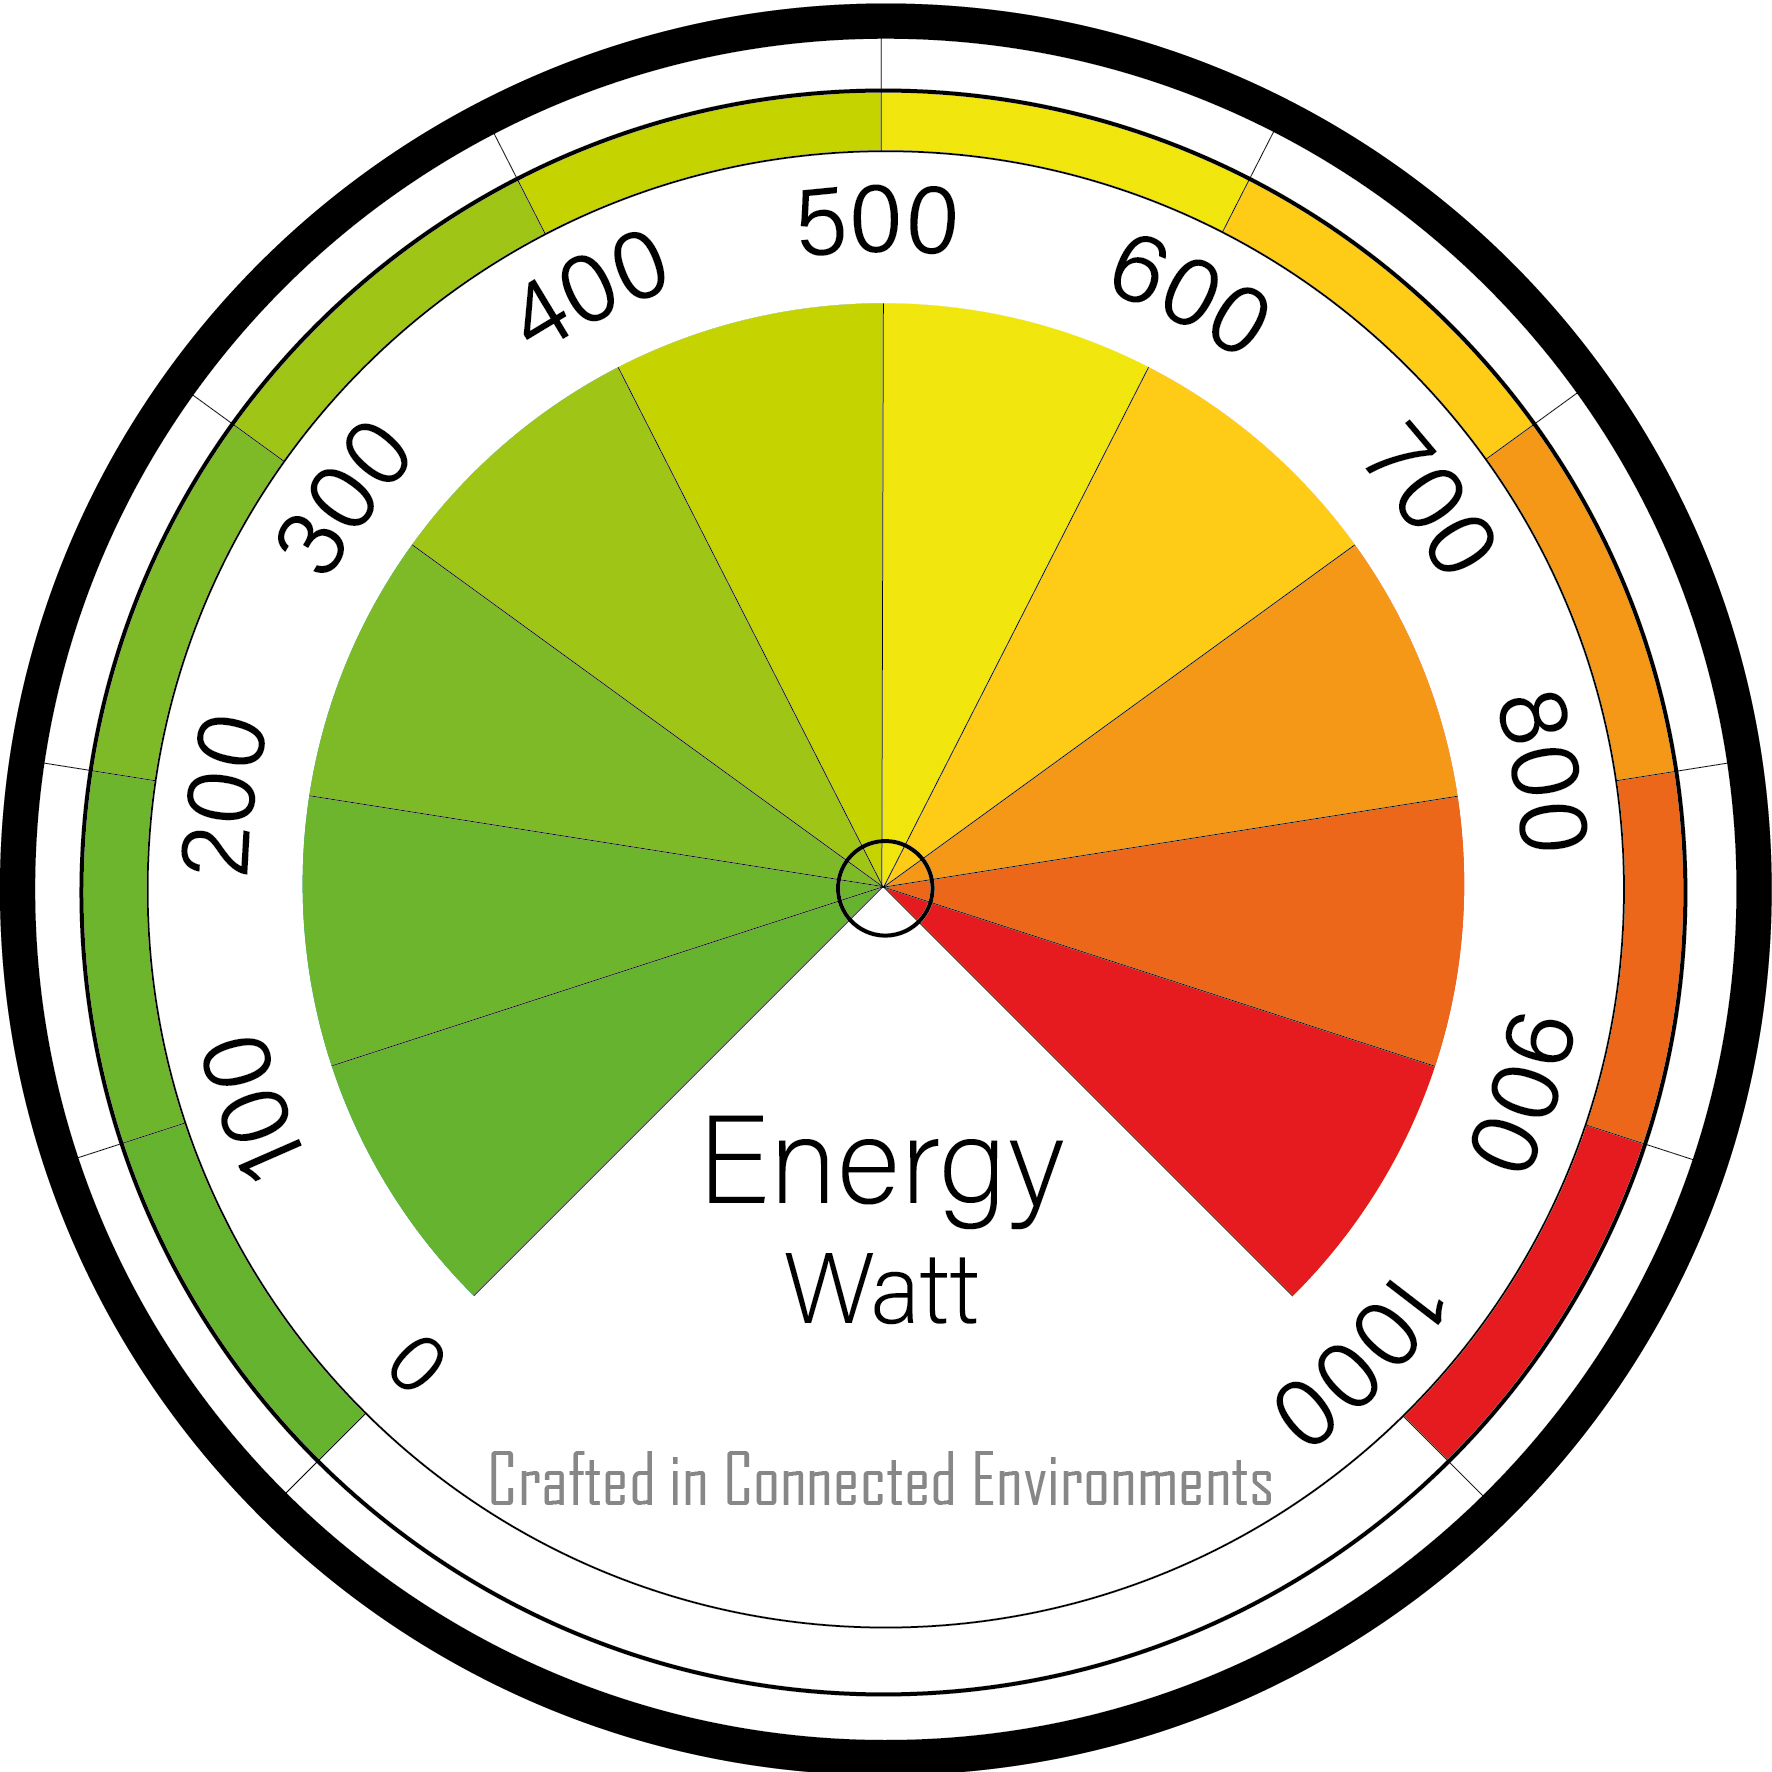
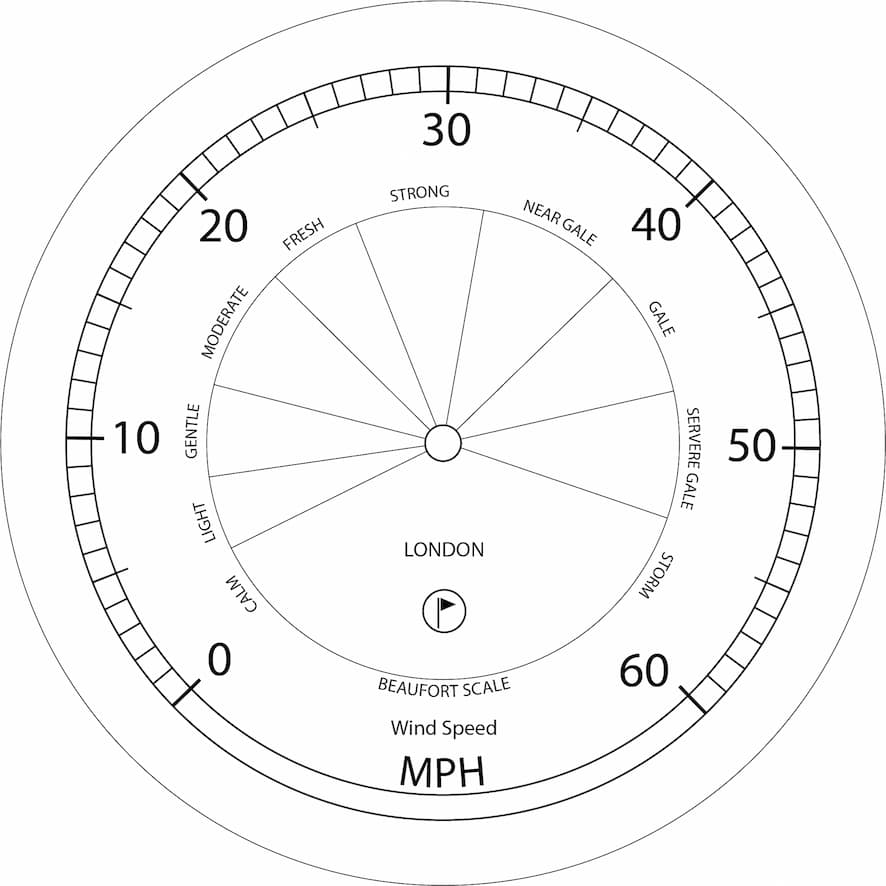
This workshop will show you how to:
- How to control a digital device using real time data from MQTT
- Add UI elements and interactivity to the AR experience
- Create onboarding UI for the WebAR App
To complete this workshop you will need:
- Visual Studio Code
- Node.js LTS and NPM
- Android SDK Platform Tools
- Chromium-based browser (e.g. Microsoft Edge or Google Chrome)
- Connected Environments Postcard Image Front
- Connected Environments Postcard Image Reverse
- Data Device in GLB format
- Mobile Device (suggested Android for using the WebXR API)
- Workshop 3 completed
Languages used:
- HTML
- JavaScript
Additional resources
When sharing a Babylon.js project, as with many other development projects, not every file and folder needs to be included. Environment files, such as .env, should not be shared because they may contain sensitive information, including API keys or access credentials. The node_modules folder can also be excluded because it contains installed dependencies that can be downloaded again using package.json and the pacakge-lock.json file. Similarly, the dist folder contains generated build output and can usually be recreated from the source files.
create a new folder for this Workshop and add the previous project avoiding .env, node_modules and dist folders
navigate to the folder of the project from the terminal cd [name of your project]
Run npm install to install all the dependencies listed in package.json
When ready, run npm run dev to launch the local development server and access the WebApp from the address and ports listed in the terminal.
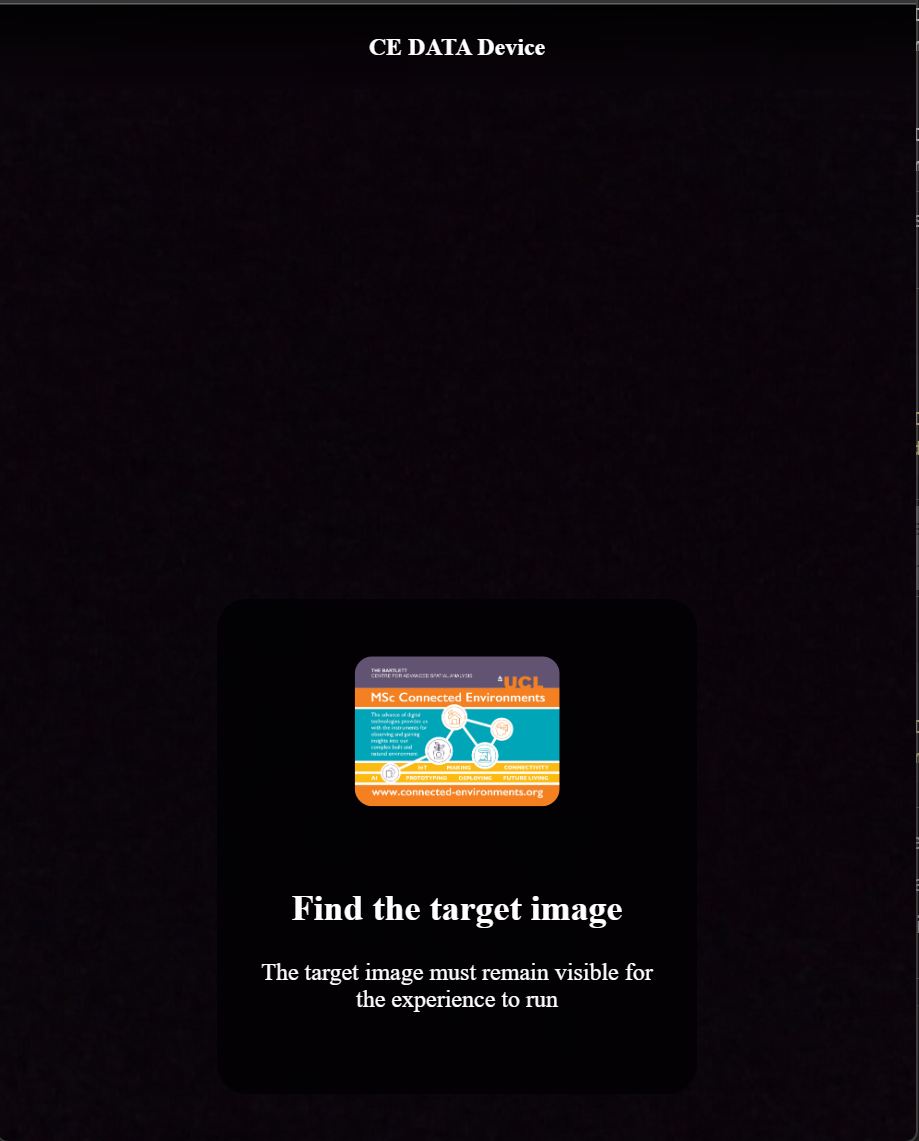
The onboarding experience is an important aspect of any AR application. Its primary purpose is to provide users with clear and straightforward guidance on how to use the app. While each application may require specific instructions, the initial steps, such as finding a surface or placing an object, are common across many AR experiences. There are no strict rules for designing an onboarding flow; what matters most is ensuring that users understand from the outset what actions they need to take, such as which buttons to press or how to interact with the experience.
In this example, the onboarding experience is designed to help users find the image targets needed to trigger the AR content. A similar approach can be used for surface recognition experiences, guiding users to scan their surroundings, detect a surface, and place the digital content.
- In the
index.html, add the onboarding panel before thecanvaselement
<div id="top-bar" class="hidden">
        CE DATA Device
    </div>

    <div id="onboarding-panel" class="hidden">

        <img id="target-preview" alt="Target image" class="target-thumbnail">
        <h2>Find the target image</h2>

        <p> Keep the target image visible at all times </p>

    </div>
- Create a new file called
style.cssinside thesrcfolder
#top-bar {
    position: absolute;
    top: 0;
    left: 0;
    right: 0;

    height: 56px;

    display: flex;
    align-items: center;
    justify-content: center;

    background: linear-gradient(
        to bottom,
        rgba(0,0,0,.8),
        rgba(0,0,0,0)
    );
    backdrop-filter: blur(12px);

    color: white;
    font-size: 1rem;
    font-weight: 600;

    z-index: 1000;
}

#onboarding-panel {
    position: absolute;
    left: 50%;
    bottom: 32px;
    transform: translateX(-50%);
    width: 280px;
    padding: 20px;
    border-radius: 20px;
    background: rgba(0,0,0,.75);
    backdrop-filter: blur(16px);
    text-align: center;
    color: white;
    z-index: 1000;
    transition: opacity .3s ease;
}

.target-thumbnail {
    width: 100px;
    /* in case is needed for vertical images */
    transform: rotate(-90deg);
    border-radius: 12px;
    margin-bottom: 12px;
}

.hidden {
    opacity: 0;
    pointer-events: none;
}
- In
index.js, import the stylesheet
import "./style.css"
- After loading the image targets, use the first image in the array as the entry point to the AR experience and display it in the onboarding preview
// 1st Load the image-target definitions from the public folder
const imageTargets =
    await loadImageTargetsFromJson(
        "/targets/image-targets.json"
    );

//Use the first image target as the entry point to the AR experience and add it as a thumbnail of the onboarding
document.getElementById("target-preview").src = imageTargets[0].imagePath;
The onboarding UI is then controlled from imageTargetPipeline.js
- After
await startScene(), show the onboarding panel and the application title once the AR experience is running
await startScene();

// The AR experience is ready and running
document.getElementById("onboarding-panel").classList.remove("hidden");

document.getElementById("top-bar").classList.remove("hidden");
- In
onXrImageFoundObservable, hide the onboarding panel when the image target that triggers the experience is detected
document.getElementById("onboarding-panel").classList.add("hidden");
- In
onXrImageLostObservable, show the onboarding panel again when the image target that triggers the experience is no longer visible
document.getElementById("onboarding-panel").classList.remove("hidden");
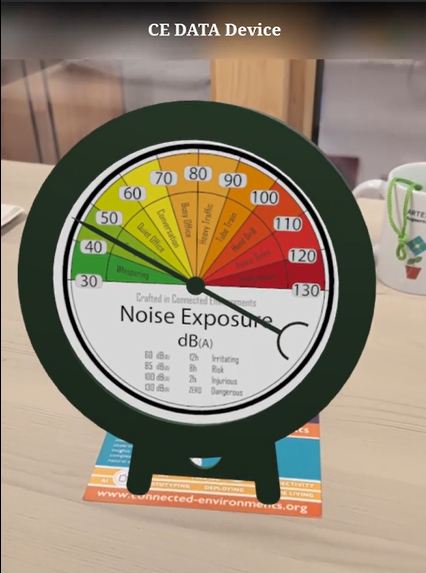
We can now add the GLB model of the data device
- Place the GLB model inside the project's
publicfolder - in the
createContent.jslink the model of the data device
import { Vector3, Quaternion } from "@babylonjs/core/Maths/math.vector";
import { TransformNode } from "@babylonjs/core/Meshes/transformNode";
import { HemisphericLight } from "@babylonjs/core/Lights/hemisphericLight";
import { DirectionalLight } from "@babylonjs/core/Lights/directionalLight";

import { LoadAssetContainerAsync } from "@babylonjs/core/Loading/sceneLoader";
import "@babylonjs/loaders/glTF";

export async function createContent(scene) {

// --------------------------------------------------
// Model to place
// --------------------------------------------------
    // Root node for content attached to the main image target
    const originModel = new TransformNode("anchorModel", scene);
    originModel.setEnabled(false);

    // Load the model without adding its original meshes directly to the scene
    const dataDevice = await LoadAssetContainerAsync(
        "/models/DATA_DEVICE.glb",
        scene
    );

    const instance = dataDevice.instantiateModelsToScene();

    const modelRoot = instance.rootNodes[0];

    if (!modelRoot) {
        throw new Error("The imported model has no root node.");
    }

    modelRoot.parent = originModel;

    // Rotate the model to align with the image (use the BabylonJS Sandbox to find out the right rotation)
    // Radians 0° = 0 | 45°  = Math.PI / 4 | 90°  = Math.PI / 2 | 180° = Math.PI | 270° = Math.PI * 1.5 | 360° = Math.PI * 2
    modelRoot.rotationQuaternion = Quaternion.RotationYawPitchRoll(
    Math.PI,
    Math.PI/2,
    0)


// --------------------------------------------------
// Lights
// --------------------------------------------------
    const hemisphericLight = new HemisphericLight(
        "hemisphericLight",
        new Vector3(0, 1, 0),
        scene
    );

    hemisphericLight.intensity = 1;

    const directionalLight = new DirectionalLight(
        "directionalLight",
        new Vector3(1, -2, -1),
        scene
    );

    directionalLight.intensity = 1;

// Return the objects needed by the tracking module
    return {
        originModel
    };
}
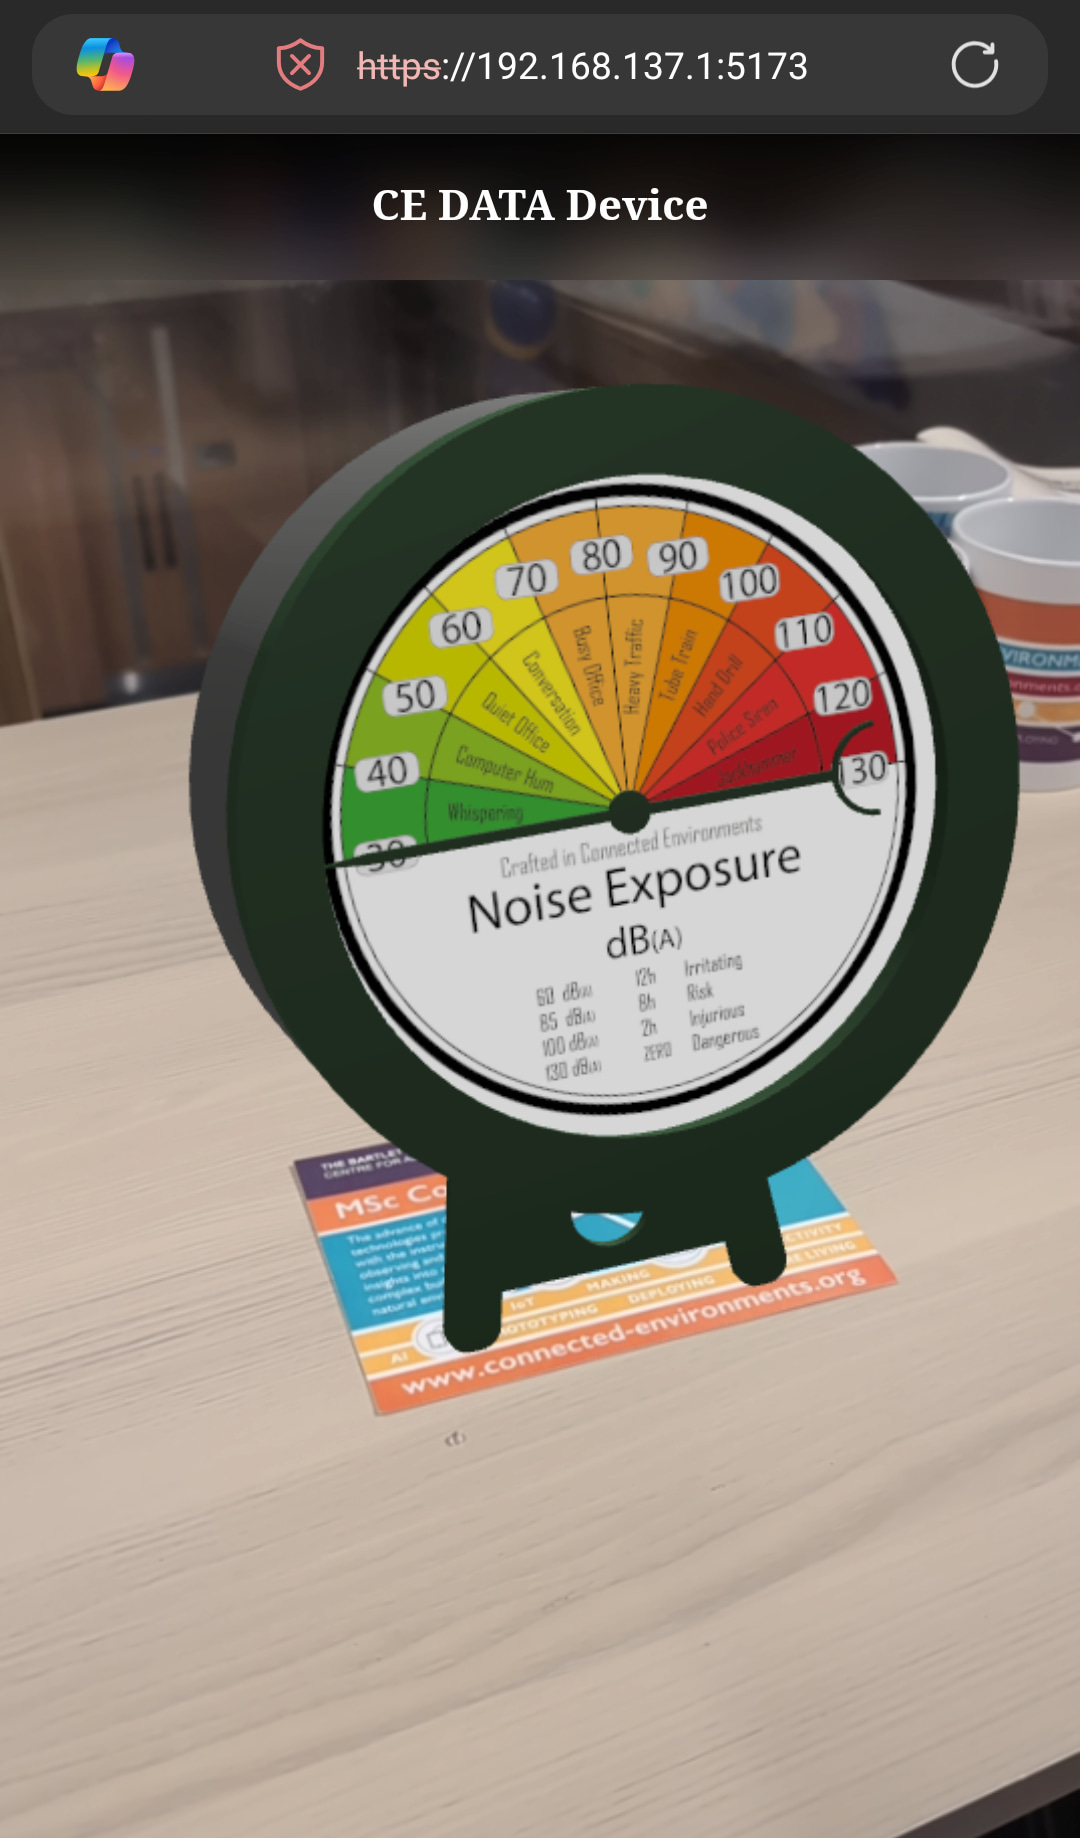
The data device now needs to react to live MQTT data. The first step is to import the MQTT scripts used in the previous workshop. Before proceeding, ensure that the MQTT library has been installed correctly. This can be easily verified by opening the package.json file and checking that the MQTT dependency is listed among the project's installed packages.
- Be sure that the
mqttlibrary is installed and is present in thepackage.json(if notnpm i mqtt) - Place the two MQTT scripts (
mqttManager.jsandmqttController.js) inside thesrc/utilsfolder of the project
mqttManager.js
import mqtt from "mqtt";
/**
* Creates an MQTT manager.
* onConnect() Called when the broker connection opens.
* onDisconnect() Called when the broker connection closes.
* onError(error) Called when an MQTT error occurs.
*/

export function createMQTTManager(
    brokerAddress,
    username,
    password,
    {
        onConnect,
        onDisconnect,
        onError
    } = {}
) {

// Select the WebSocket protocol that matches the page protocol.
const WS_PROTOCOL = location.protocol === "https:" ? "wss" : "ws";

// Use the authenticated broker ports only when
// username and password have been provided.
const authenticated = Boolean(username && password);

const PORT = authenticated ? (WS_PROTOCOL === "wss" ? "8091" : "8090") : (WS_PROTOCOL === "wss" ? "8081" : "8080");

// Build the complete MQTT broker URL using the address
// received from the mqttController.
const BROKER_URL =`${WS_PROTOCOL}://${brokerAddress}:${PORT}`;

const OPTIONS = {
    keepalive: 60,
    reconnectPeriod: 2000,
    connectTimeout: 30_000,
    clean: true,
    username,
    password
};

// Create the MQTT client and connect it to the broker.
const client = mqtt.connect(
    BROKER_URL,
    OPTIONS
);

// When the connection is established...
client.on("connect", () => {
    onConnect?.();
    console.log(
        `[MQTT] connected to ${BROKER_URL}`
    );
});

client.on("reconnect", () => {
    console.log("[MQTT] reconnecting...");
});

client.on("error", error => {
    onError?.(error);
    console.error("[MQTT] error", error);
});

client.on("close", () => {
    console.log("[MQTT] disconnected");
    onDisconnect?.();
});

/**
 * Subscribe to one or more MQTT topic filters.
 *
 * Example filter:
 * TOPIC/TO/SUBSCRIBE/../SENSOR
 *
 * The # wildcard subscribes to every child topic:
 * TOPIC/TO/SUBSCRIBE/../DEVICE/#
 *
 * When a message arrives, the callback receives:
 * onMessage(topic, payload)
 *
 * topic   -> The full MQTT topic that published the message
 * payload -> The message content converted to text
 **/
function subscribe(topicFilters, onMessage) {
    // Allow the function to receive either one topic filter
    // or an array.
    if (!Array.isArray(topicFilters)) {
        topicFilters = [topicFilters];
    }

    // Subscribe to each supplied topic filter
    topicFilters.forEach(filter => {
        const wildcard = `${filter}/#`;

        client.subscribe(wildcard, error => {
            if (error) {
                console.error("[MQTT] subscribe error", error);
            } else {
                console.log(`[MQTT] subscribed to ${wildcard}`);
            }
        });
    });

    // Handle every message received by the MQTT client
    const messageHandler = (
        topic,
        payload
    ) => {
        // Pass the full MQTT topic and payload
        // to the supplied callback
        onMessage(
            topic,
            payload.toString()
        );
    };

    // Register the message handler with the MQTT client
    client.on("message", messageHandler);

    // Return a function that stops receiving messages
    // from these topic filters
    return function unsubscribeController() {
        client.off("message", messageHandler);

        topicFilters.forEach(filter => {
            client.unsubscribe(`${filter}/#`);
        });
    };
}

function publish(topic, payload, options = {}) {
    if (!client.connected) {
        console.warn("[MQTT] publish failed - not connected");
        return;
    }

    client.publish(
        topic,
        typeof payload === "string"
            ? payload
            : JSON.stringify(payload),
        options,
        error => {
            if (error) {
                console.error("[MQTT] publish error", error);
            }
        }
    );
}

function disconnect() {
    if (client) {
        client.end(true);

        console.log("[MQTT] disconnected");
    }
}

    // Make the subscribe function available to the controller.
    return {
        subscribe,
        publish,
        disconnect
    };
}
- and the
mqttController.js
import { createMQTTManager } from "./mqttManager.js";

/**
 * Creates an MQTT controller.
 *
 * @param {Object} config
 * @param {string} [config.brokerAddress]
 * MQTT broker hostname or IP.
 *
 * @param {string} [config.username]
 * MQTT username.
 *
 * @param {string} [config.password]
 * MQTT password.
 *
 * @param {boolean} [config.autoConnect=true]
 * If true, the controller connects immediately.
 * If false, a connection must be established
 * via connect().
 *
 * @example
 * // Auto-connect (current behaviour)
 * const mqttController = createMQTTController({
 *     brokerAddress: "example.broker.org"
 * });
 *
 * @example
 * // Manual connection from UI
 * const mqttController = createMQTTController({
 *     autoConnect: false
 * });
 *
 * @example
 * createMQTTController({
 * brokerAddress: "mqtt.example.com",
 * topics: [
 * "BUILDING/FLOOR1/TEMPERATURE",
 * "BUILDING/FLOOR1/HUMIDITY"
 * ]
 * });
 */
export function createMQTTController({
    brokerAddress,
    username,
    password,
    autoConnect = true
} = {}) {

    let mqttManager = null;
    let unsubscribe = null;

    // Optional automatic connection
    if (autoConnect && brokerAddress) {
        mqttManager = createMQTTManager(
            brokerAddress,
            username,
            password
        )
    }

    /**
     * Create a new MQTT connection.
     */
    function connect(
        brokerAddress,
        username,
        password,
        callbacks={}
    ) {

        if (mqttManager) {
            mqttManager.disconnect();
        }

        mqttManager = createMQTTManager(
            brokerAddress,
            username,
            password,
            callbacks
        );
        console.log(`[MQTT Controller] Connecting to ${brokerAddress}`);
    }

       function isConnected() {
    return mqttManager !== null;
}

    /**
     * Disconnect from the broker.
     */
    function disconnect() {

        if (unsubscribe) {
            unsubscribe();
            unsubscribe = null;
        }
        mqttManager?.disconnect();
        mqttManager = null;

        console.log("[MQTT Controller] Disconnected");
    }

    /**
     * Subscribe to a topic filter.
     */
    function subscribeToTopic(
        topic,
        onMessage
    ) {

        if (!mqttManager) {
            console.warn("[MQTT Controller] Not connected");
            return;
        }

        if (unsubscribe) {
            unsubscribe();
        }

        unsubscribe = mqttManager.subscribe(
            topic,
            (topic, payload) => {

                console.log(`[MQTT MESSAGE] From: ${topic} | Payload: ${payload}`);

                onMessage?.(
                    topic,
                    payload
                );
            }
        );
    }

    /**
     * Publish a message.
     */
    function publish(
        topic,
        payload,
        options = {}
    ) {
        console.log(
            "[MQTT Controller Publisher] Publishing",
            topic,
            payload
            );

        if (!mqttManager) {
            console.warn("[MQTT Controller Publisher] Not connected");
            return;
        }

        mqttManager.publish(
            topic,
            payload,
            options
        );
    }

    /**
     * Remove the current subscription.
     */
    function clearSubscription() {

        if (unsubscribe) {

            unsubscribe();

            unsubscribe = null;

            console.log("[MQTT Controller] Unsubscribed");
        }
    }

    return {
        connect,
        disconnect,
        subscribeToTopic,
        publish,
        clearSubscription,
        isConnected,
        destroy: disconnect
    };
}
The next step is to use the MQTT feeds to animate our data device, in this case, the pointer on the dial
- Add the MQTT controller import to
imageTargetPipeline.js
import { createMQTTController } from "./mqttController.js";
- To animate the model in response to incoming MQTT data, we need some additional BabylonJS imports to add on the
imageTargetPipeline.js
import {
    Tools,
    Axis,
    Animation,
    SineEase,
    EasingFunction
}
from "@babylonjs/core";
- Inside
startScene(), afterawait createScene()and the twoconstapplicationandcontent, but before theonXrImageFoundObservablelistener, create the MQTT controller
const mqttController = createMQTTController({
    brokerAddress: "BROKER.ADDRESS"
});
Next, add the logic required to subscribe to the MQTT topic and react to incoming data. In this example, the incoming values will be used to rotate the pointer of the data device.
- We select the mesh to be moved immediately after creating the
const mqttController
const pointer = originModel
    .getChildMeshes()
    .find(mesh =>
        mesh.name.includes("Pointer")
    );
    // Start angle of the pointer (0 keep the starting position of the geometry)
    const startAngle=0
    const angle = Tools.ToRadians(startAngle);
    const delta =
        Quaternion.RotationAxis(
            Axis.Z,
            angle
        );
pointer.rotationQuaternion = pointer.rotationQuaternion.multiply(delta);

// Range of incoming sensor values on the dial
const minValue = 30;
const maxValue = 130;
// Maximum rotation angle of the gauge pointer
const maxAngle = 180;
// 1 = clockwise, -1 = counter-clockwise
const direction = 1;
// Save the pointer's initial rotation.
const baseQuat = pointer.rotationQuaternion.clone();
Next, we create a function that receives data from an MQTT message and uses it to rotate the pointer. The incoming value is converted into a rotation angle, which is then applied to the pointer using a smooth animation, to be added just after the above code
function pointerMove(data){

const normalized = (data - minValue) / (maxValue - minValue);

// Convert the sensor value into an angle in radians
const angle = Tools.ToRadians(((normalized * maxAngle))*(-direction));

// Create a rotation offset around the Z axis.
    const delta =
        Quaternion.RotationAxis(
            Axis.Z,
            angle
        );

// Apply the rotation relative to the pointer's original orientation.
    const targetQuat= baseQuat.multiply(delta);

// Configure a smooth ease-in/ease-out transition
    const easing = new SineEase();
    easing.setEasingMode(EasingFunction.EASINGMODE_EASEINOUT);

// Animate the pointer from its current position
// to the new target rotation
    Animation.CreateAndStartAnimation(
    "needle",
    pointer,
    "rotationQuaternion",
    60, // fps
    180, // duration in frames - 3 seconds
    pointer.rotationQuaternion.clone(),
    targetQuat,
    Animation.ANIMATIONLOOPMODE_CONSTANT,easing
    );
}
Lastly, we can subscribe to the MQTT topic that provides the values used to control the pointer. The subscription is activated as soon as the image target is detected. When the image target is no longer visible, the application automatically unsubscribes from the topic to avoid processing unnecessary messages.
- in the
onXrImageFoundObservable, inside the conditional function of the target-image we finally subscribe to the topic that provide the value to move the pointer, that will be pass to thepointerMove()function created above
mqttController.subscribeToTopic('TOPIC/TO/SUBSCRIBE/SENSOR/VALUE',(topic,payload)=>{
const data = JSON.parse(payload);
// The data must be sent as a single float or integer value, not as a JSON object
// check in the console what format is received and if needed, access the exact sub-value
console.log(data)

pointerMove(data)
})
Customise the Dial
Modify the dial by changing its graphic, minimum and maximum values, and starting position of the pointer.