This workshop will show you how to:
- Use ARFoundation Framework for ground and image recognition
- Control the digital model of the gauge using MQTT data stream
- Add light estimation and shadows components
- Create and deploy to a mobile device (iOS/Android)
To complete this workshop you will need:
- Unity 2022.3 LTS or above
- VS Code
- Updated Visual Studio Editor Package from in Unity Package Manager (version 2.0.21)
- Connected Environments Postcard Image
- 3D models of the Gauge in FBX file format sample from GitHub - Open Gauge
- MQTT Data stream
- iOS or Android Mobile Device
- for iOS deployment, XCode and Apple Developer Account
Languages used:
- C#
Additional resources
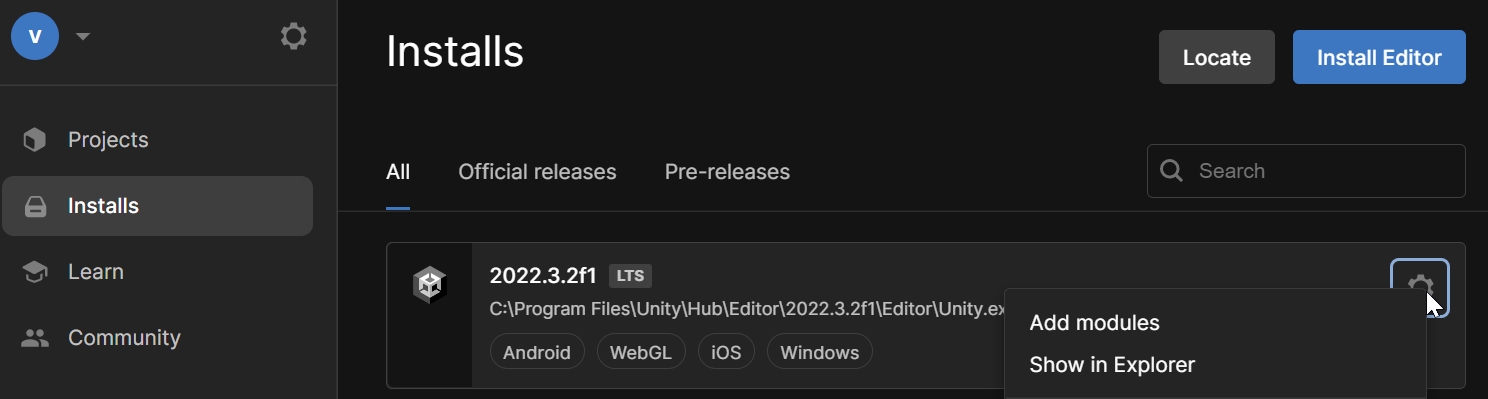
Ensure you have the required modules installed into your Unity setup, in particular the mobile platforms iOS and Android.
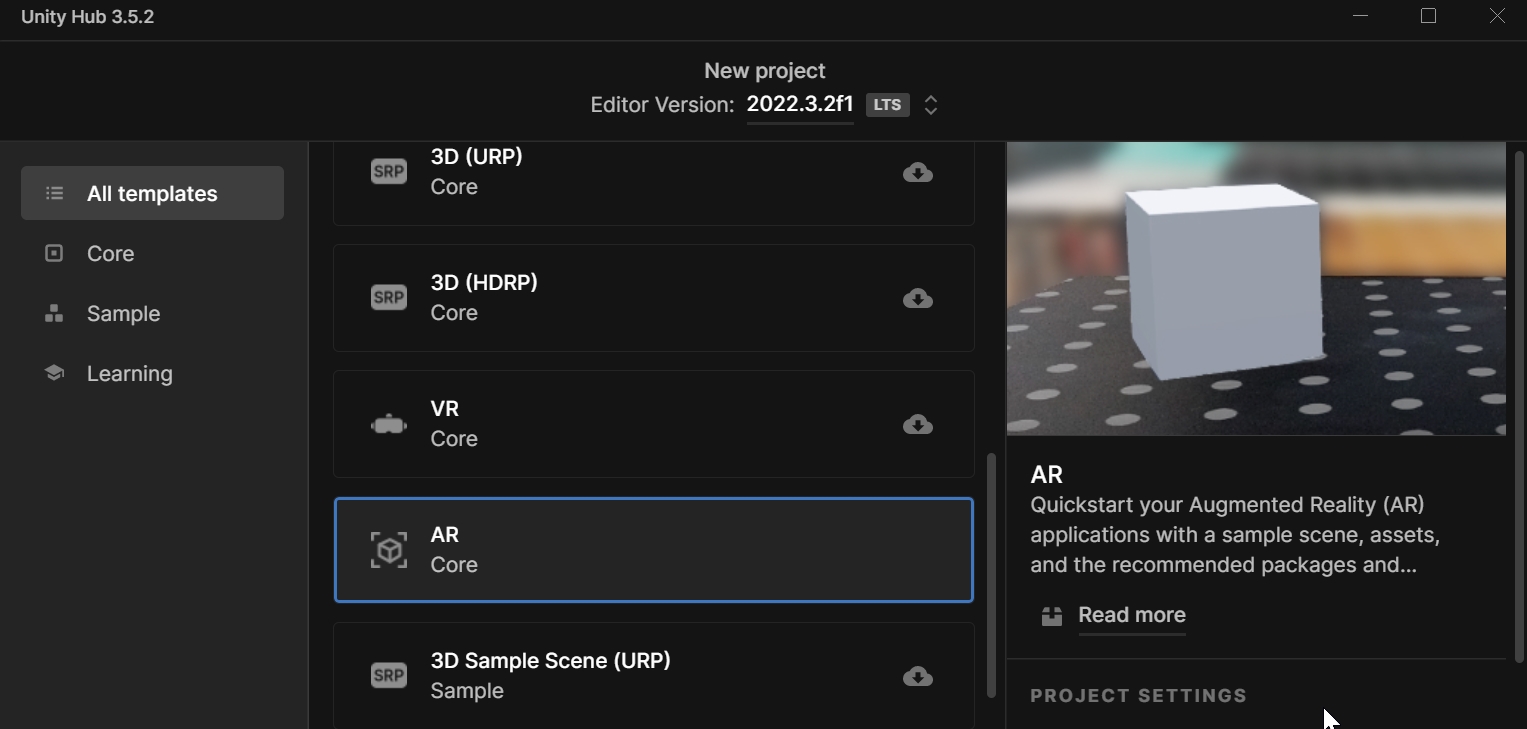
In Unity Hub create a New Project using the AR (Core) template and give it a logical name - i.e. UnityMQTTGauge.
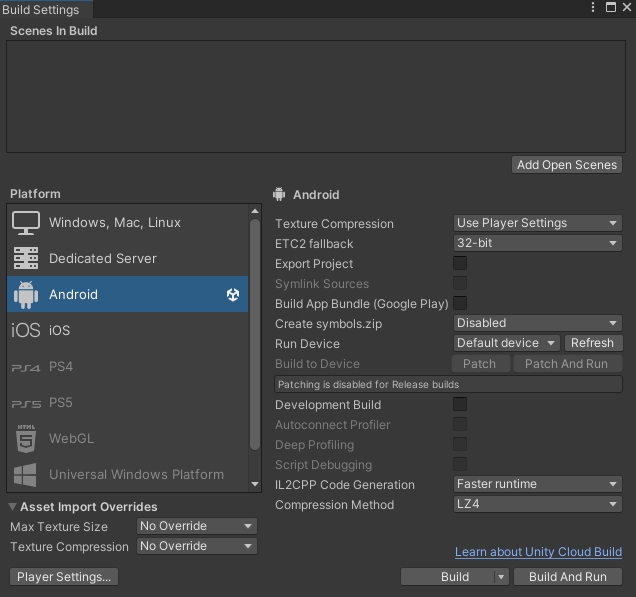
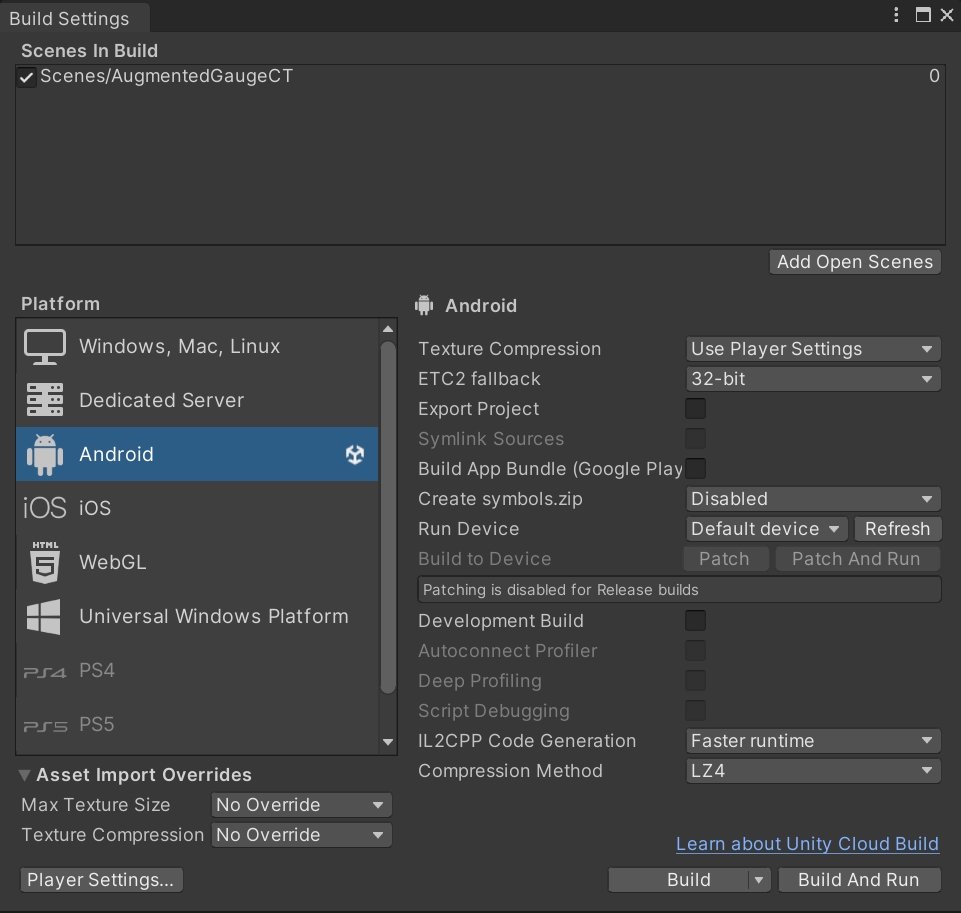
The first step is to switch the platform to the one we are intended to use, iOS or Android, from File -> Build Settings.
Select Player Settings... from the Build Settings windows and provide:
- Company Name
- Product Name
- Version
Depending on the chosen platform, there are some additional settings that need to be made:
Android
In the Other Settings section set the following parameters:
- Color Space: Linear
- Auto Graphics API: unchecked
- Graphics APIs: only OpenGLES3
- Override Default Package Name: unchecked
- Minimum API Level: Android 10.0
- Scripting backend: IL2CPP
- Target Architectures: ARM64 (uncheck ARMv7)
Icon and Splash screen can be added as well.
iOS
In the Other Settings section set the following parameters:
- Color Space: Linear
- Override Default Package Name: unchecked
- Signing Team ID: your Apple Developer ID
- Automatically Sign: checked
- Camera Usage Description: AR Camera permission
- Target Device: iPhone+iPad
- Target minimum iOS Version: 12
Icon and Splash screen can be added as well.
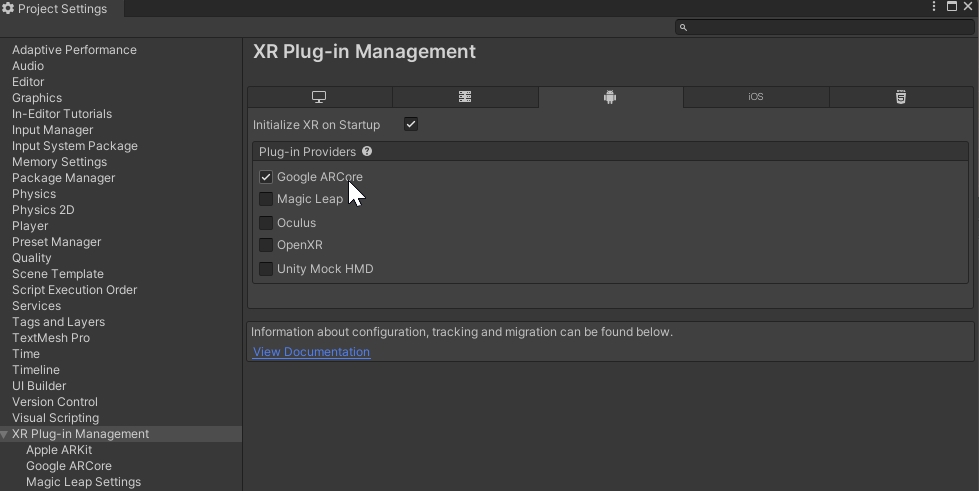
Finally, from Project Settings -> XR Plug-in Management select the Plug-in Provider for the selected platform (ARCore for Android, ARKit for iOS)
[Optional] URP (Universal Render Pipeline)
In addition to the Built-in Render Pipeline that we are going to use in this tutorial, Unity provides two additional Render Pipelines:
- URP (Universal Render Pipeline)is a Scriptable Render Pipeline that is quick and easy to customize, and lets you create optimized graphics across a wide range of platforms.
- HDRP (High Definition Render Pipeline)is a Scriptable Render Pipeline that lets you create cutting-edge, high-fidelity graphics on high-end platforms.
HDRP does not support mobile platforms, therefore it cannot be used for mobile AR development. More information about the URP setup can be found here.
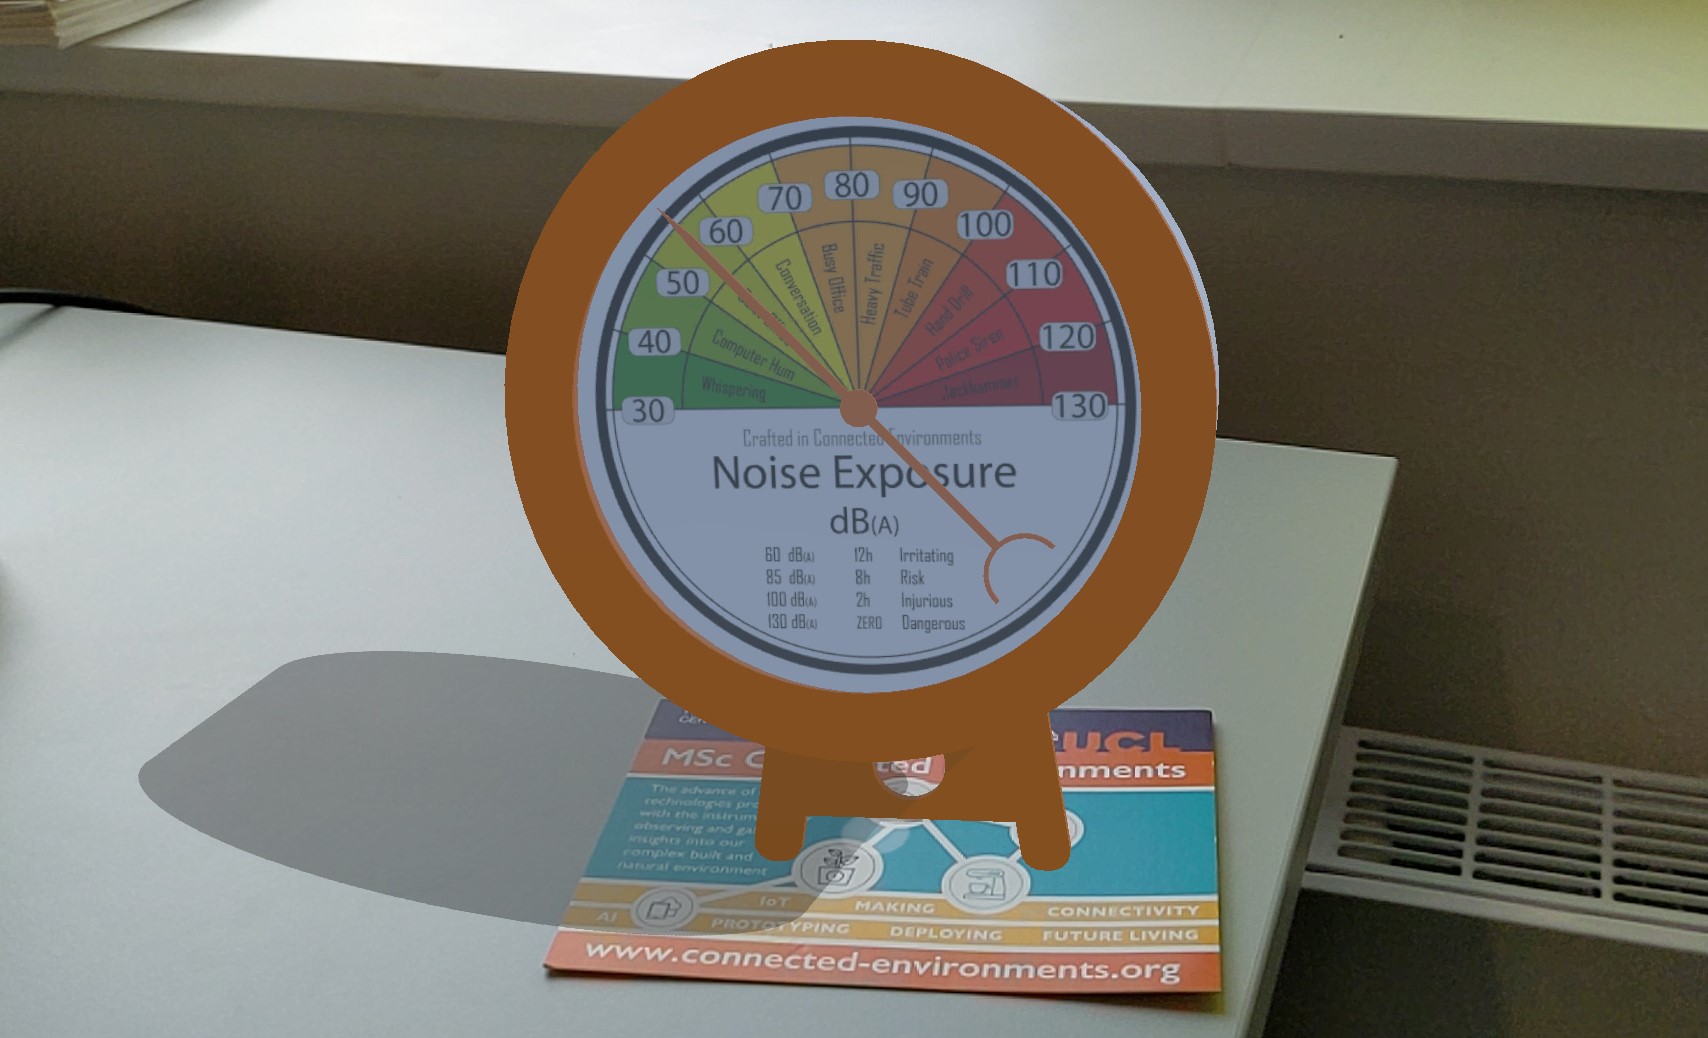
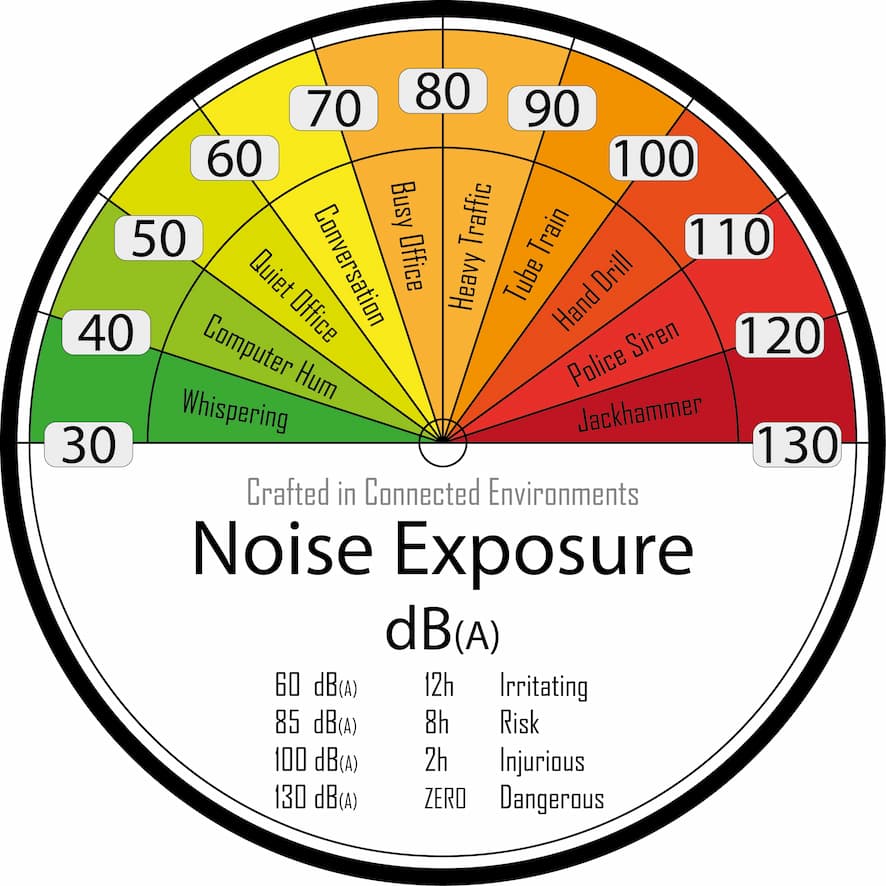
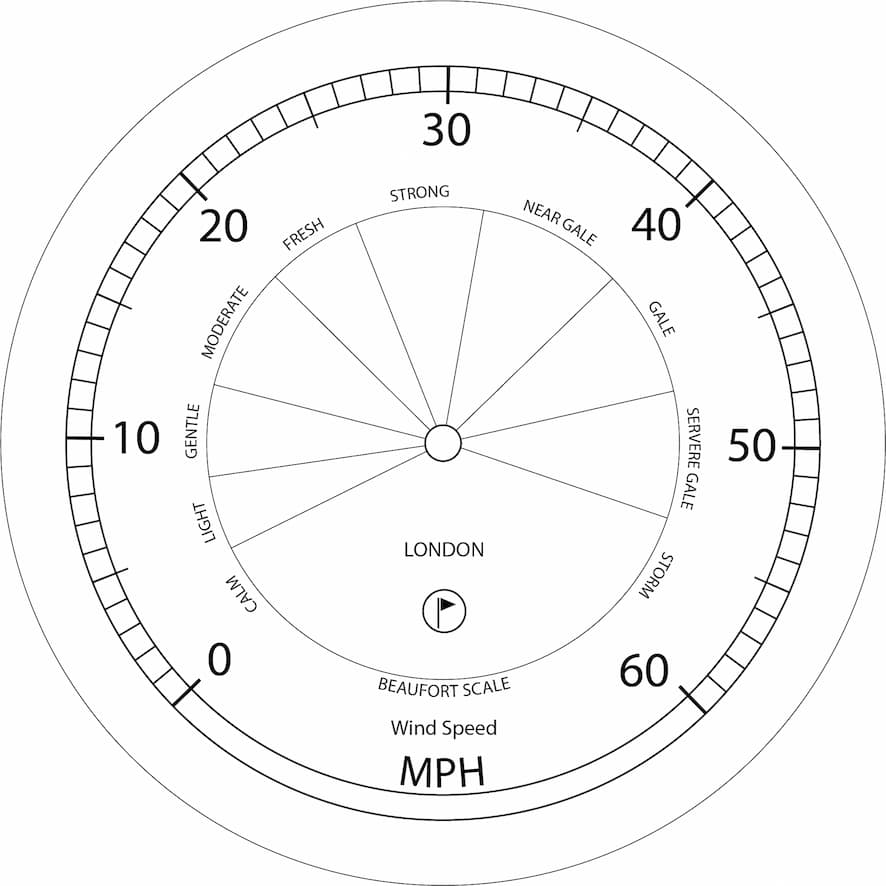
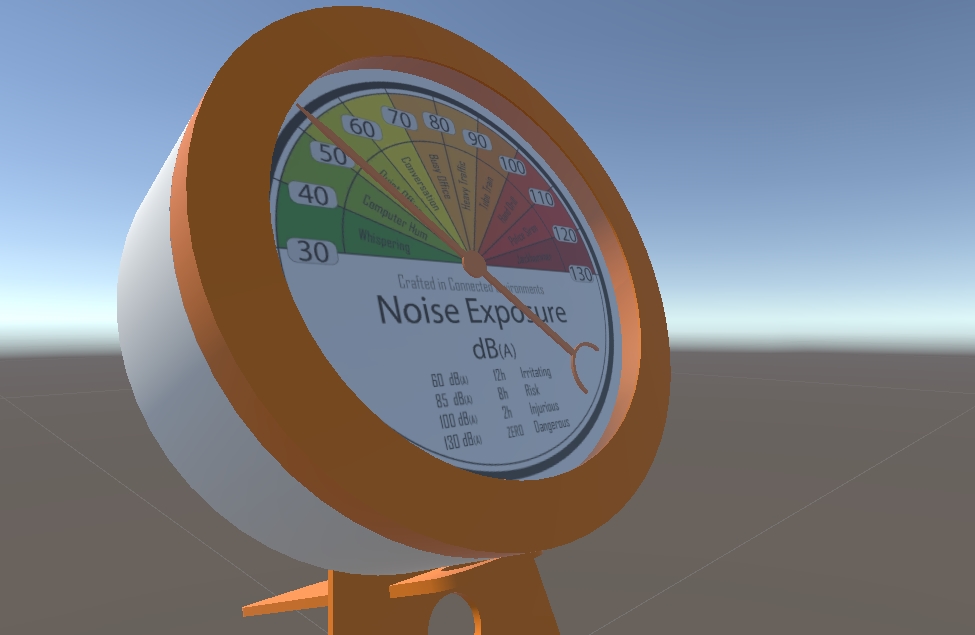
Digital Gauges
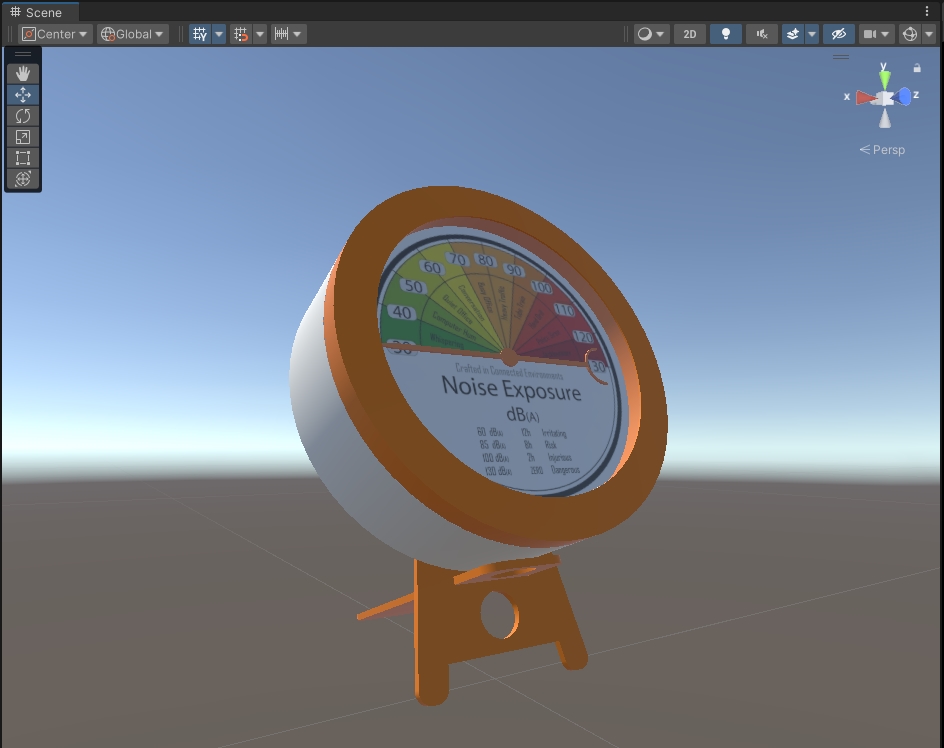
If you close all the windows from the set up you will see that Unity has created a Sample Scene with a series of folders containing examples and the main components required for an Augmented Reality application. We will test two different approaches to visualise them in Augmented Reality.
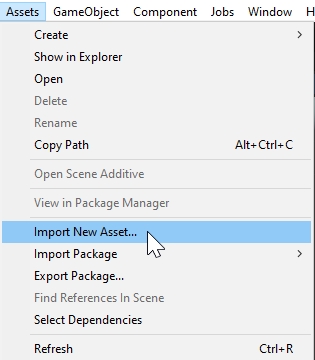
Import the gauge model. There are two ways to import - click and drag your FBX file into a folder in the Project panel or head to Assets -> import assets
The FBX files will import, complete with animation if any. To be able to edit the materials we need to extract them from the FBX file. in the Inspector window, from the tab Materials chose Use External Materials (Legacy) from the Location dropdown menu. Unity will extract the Materials and texture images in the folder of the FBX model. From the Tab Animation, it is possible to play the imported animation if embedded in the FBX model.
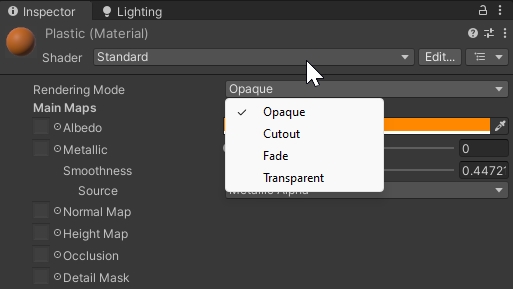
Not all the material are compatible between different software. For example, the material used for the Glass it may appear Opaque in Unity. To change the appearance, select the Glass material (from the GameObject or from the Materials folder created by Unity), change the surface type from Opaque to Transparent and change the Alpha Channel of the Base Map colour
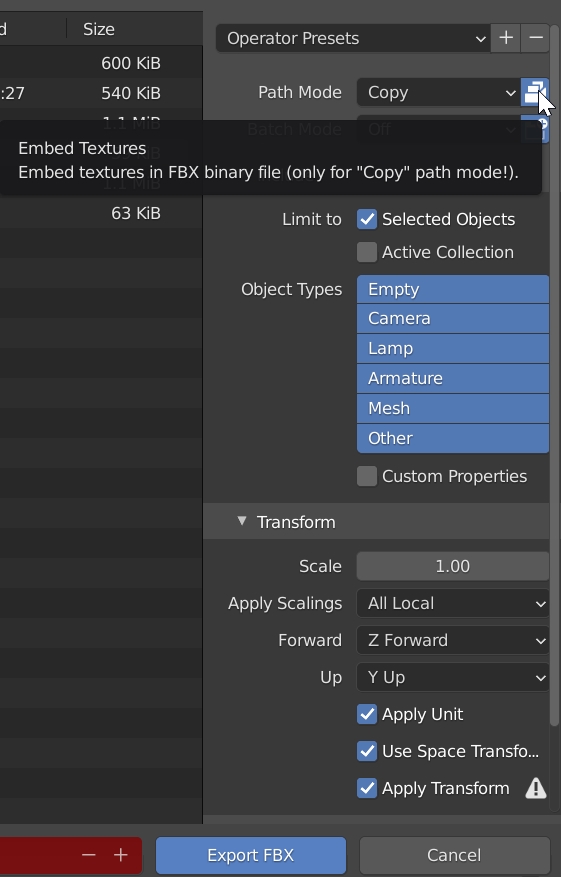
ATTENTION: Unity might not have the same axes conventions used by your 3D modelling software. E.g. Unity uses a left-hand coordinate system with Y axes up, Blender uses a right-hand system with Z axes up. This difference can introduce some issues in both local and global rotations. A quick fix is to export the FBX model from Blender and select, in the Export options:
- Forward: Z Forward (positive sign)
- Up: Y Up (positive sign)
- Apply Transform: Checked
Also, if the model contains texture images, these can be embedded in the FBX model by selecting, from the Blender Export window, Path ModeCopy and selecting the small icon next to the same field.
MQTT Libraries
Download and Import the M2MQTT library and create the C# script mqttManager.
Organising
We are going to set up an empty GameObject in the scene and save it as a Prefab this allows it to act as a holder for any GameObject, digital models and scripts we want to use in Augmented Reality.
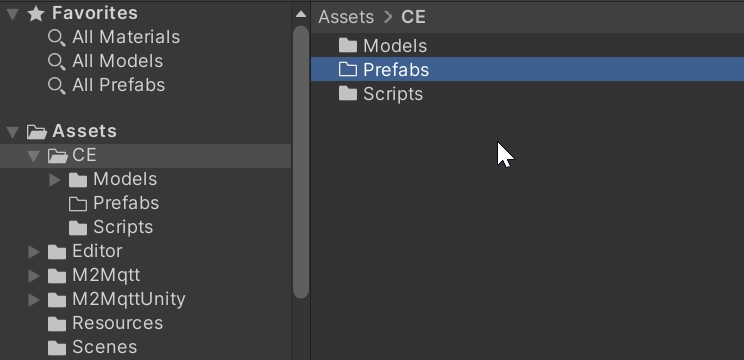
To keep things organised the first thing to do is to right-click in the Assets folder and create a Prefab folder alongside the folder with the two gauge models.
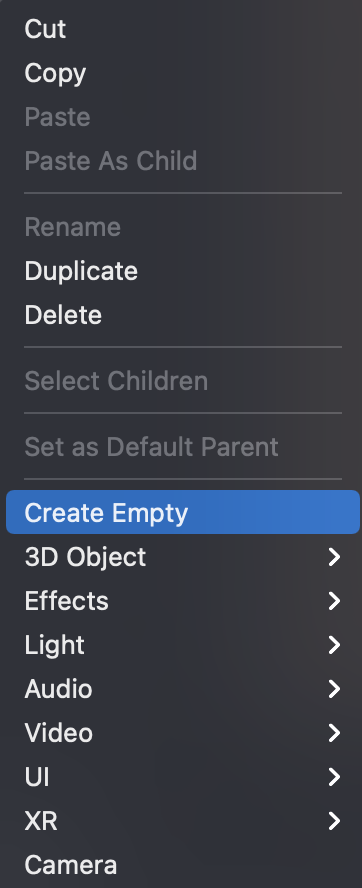
Right click in the Hierarchy window and create a new empty GameObject
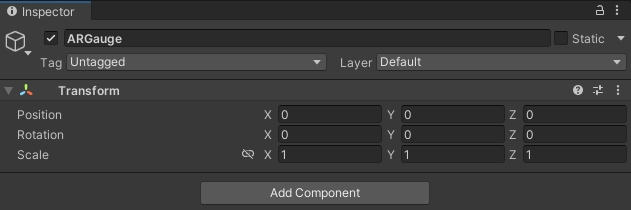
Give it a logical name (e.g. ARGaugeStand; ARObject), and check the Inspector to move to position 0, 0, 0 (the centre of the scene)
Drag the FBX model into the empty GameObject on the Hierarchy panel and then drag the GameObject into the Prefab folder. This will automatically create the Prefab, the icon of the GameObject will change in solid light blue.
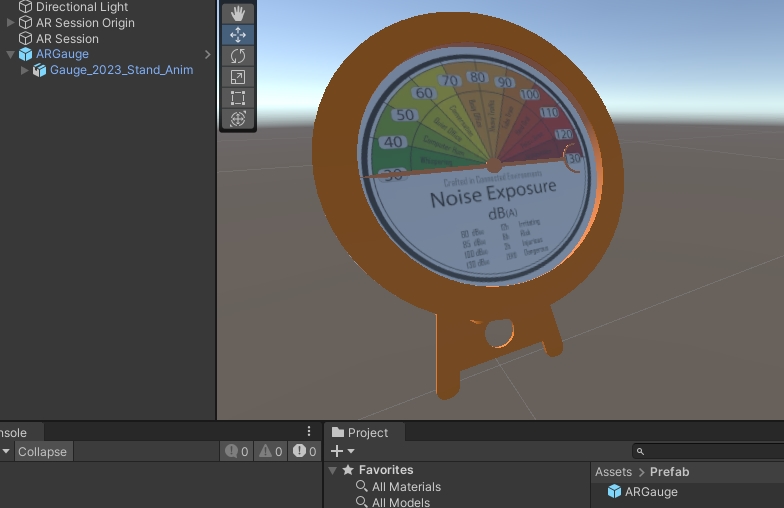
You now have a Prefab ready to hold an AR object and link to the Unity AR scripts.
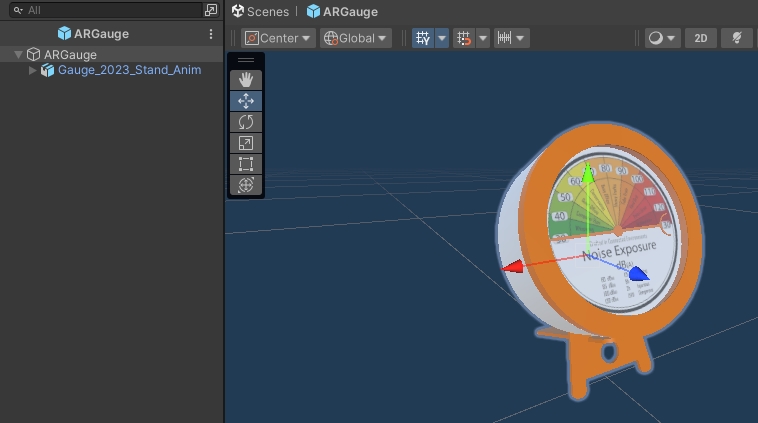
Depending on how the model has been exported from Blender, the scale could be too big or too small for the one we need for the AR scene.
A quick way to control the scale of our object is to create a primitive cube. The cube has a side of 1 Unity unit that in Augmented Reality is equal to 1 meter.
The scale can be changed on the FBX object during the import (recommended), or on the Prefab object just created from the Inspector window. To change the scale on the Prefab we can double click from the Project panel, this will bring us to the Prefab Edit Mode and the various changes will be automatically saved
Add a new empty GameObject to the scene, add the mqttManager C# script created before. The following parameters need to be provided:
- Broker Address
- Broker Port
- List of the Topic Subscribe
Add a new Tag to this GameObject (e.g. noise).
Attach to the Prefab (the previously empty object) a new C# script mqttController
using UnityEngine;

public class mqttController : MonoBehaviour
{
    [Tooltip("Optional name for the controller")]
    public string nameController = "Controller 1";
    public string tag_mqttManager = ""; //to be set on the Inspector panel. It must match one of the mqttManager.cs GameObject
    [Header("   Case Sensitive!!")]
    [Tooltip("the topic to subscribe must contain this value. !!Case Sensitive!! ")]
    public string topicSubscribed = ""; //the topic to subscribe, it need to match a topic from the mqttManager
    private float pointerValue = 0.0f;
    [Space]
    [Space]
    public GameObject objectToControl; //pointer of the gauge, or other 3D models
    [Tooltip("Select the rotation axis of the object to control")]
    public enum State { X, Y, Z };
    public State rotationAxis;
    [Space]
    [Tooltip("Direction Rotation")]
    public bool CW = true; //CW True = 1; CW False = -1
    private int rotationDirection = 1;
    [Space]
    [Space]
    [Tooltip("minimum value on the dial")]
    public float startValue = 0f; //start value of the gauge
    [Tooltip("maximum value on the dial")]
    public float endValue = 180f; // end value of the gauge
    [Tooltip("full extension of the gauge in EulerAngles")]
    public float fullAngle = 180f; // full extension of the gauge in EulerAngles

    [Tooltip("Adjust the origin of the scale. negative values CCW; positive value CW")]
    public float adjustedStart = 0f; // negative values CCW; positive value CW
    [Space]
    public mqttManager _eventSender;

    void Awake()
    {
        if (GameObject.FindGameObjectsWithTag(tag_mqttManager).Length > 0)
        {
            _eventSender = GameObject.FindGameObjectsWithTag(tag_mqttManager)[0].gameObject.GetComponent<mqttManager>();
            _eventSender.Connect(); //Connect tha Manager when the object is spawned
        }
        else
        {
            Debug.LogError("At least one GameObject with mqttManager component and Tag == tag_mqttManager needs to be provided");
        }
    }

    void OnEnable()
    {
        _eventSender.OnMessageArrived += OnMessageArrivedHandler;

    }

    private void OnDisable()
    {
        _eventSender.OnMessageArrived -= OnMessageArrivedHandler;
    }

    private void OnMessageArrivedHandler(mqttObj mqttObject) //the mqttObj is defined in the mqttManager.cs
    {
        //We need to check the topic of the message to know where to use it
        if (mqttObject.topic.Contains(topicSubscribed))
        {
            pointerValue = float.Parse(mqttObject.msg);

            Debug.Log("Event Fired. The message, from Object " + nameController + " is = " + pointerValue);
        }
    }

    private void Update()
    {
        float step = 1.5f * Time.deltaTime;
        // ternary conditional operator https://learn.microsoft.com/en-us/dotnet/csharp/language-reference/operators/conditional-operator
        rotationDirection = CW ? 1 : -1;

        if (pointerValue >= startValue)
        {
            Vector3 rotationVector = new Vector3();
            //If the rotation Axis is X
            if (rotationAxis == State.X)
            {
                rotationVector = new Vector3(
                (rotationDirection * ((pointerValue - startValue) * (fullAngle / (endValue - startValue)))) - adjustedStart,
                objectToControl.transform.localEulerAngles.y,
                objectToControl.transform.localEulerAngles.z);
            }
            //If the rotation Axis is Y
            else if (rotationAxis == State.Y)
            {
                rotationVector = new Vector3(
                objectToControl.transform.localEulerAngles.x,
                (rotationDirection * ((pointerValue - startValue) * (fullAngle / (endValue - startValue)))) - adjustedStart,
                objectToControl.transform.localEulerAngles.z);

            }
            //If the rotation Axis is Z
            else if (rotationAxis == State.Z)
            {
                rotationVector = new Vector3(
                objectToControl.transform.localEulerAngles.x,
                objectToControl.transform.localEulerAngles.y,
                (rotationDirection * ((pointerValue - startValue) * (fullAngle / (endValue - startValue)))) - adjustedStart);
            }
            objectToControl.transform.localRotation = Quaternion.Lerp(
                    objectToControl.transform.localRotation,
                    Quaternion.Euler(rotationVector),
                    step);
        }
    }
}
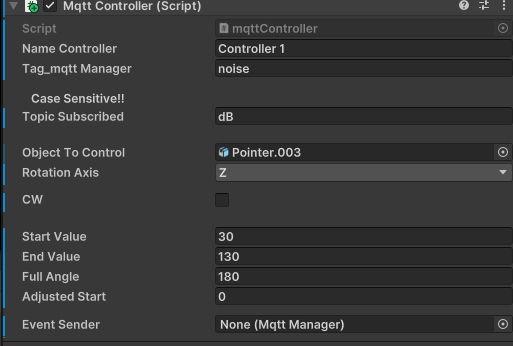
From the Inspector panel change following values:
- Set the same Tag of the _MQTTManager GameObject (e.g. noise in this example)
- Set the topic to subscribe (it doesn't need to be the full path). The field is case sensitive
noise != Noise - Select the 3D model Prefab and drag the pointer model from the
Hierarchy Panelto the field Object To Control in theInspector panel - chose the rotation axis (for gauges is generally Y or Z, depending on the export from Fusion360 and Blender)
- Tick
CWif the rotation is positive, or untick if negative startValue, the minimum value on the dialendValue, the maximum value on the dialfullAngle, full extension of the gauge in EulerAnglesadjustStart, value used to change the start position of the pointer
E.g. with the pointer 0 at W
startValue = 30endValue = 130fullAngle = 180adjustStart = 0
startValue = 0endValue = 60fullAngle = 270adjustStart = -45
Be sure to have in the Hierarchy panel the essential ARFoundation objects:
XR Origin, with theCamera OffsetandMain CamerawithinAR Session
Select the XR Origin GameObject and in the Inspector Window add the component Anchor Creator, a series of other components will be added as well
Add the Prefab (e.g. ARObject) to the Archor Prefab field in the component Anchor Creator of the XR Origin GameObject.
Add also the ARPlane Prefab to the AR Plane Manager component (the Prefab is located in Assets -> ExampleAssets -> Prefabs).
Also, be sure that the Main Camera GameObject, inside the XR Origin - Camera Offset GameObject in the Hierarchy window, has a Tag MainCamera in the Inspector window and not Untagged.
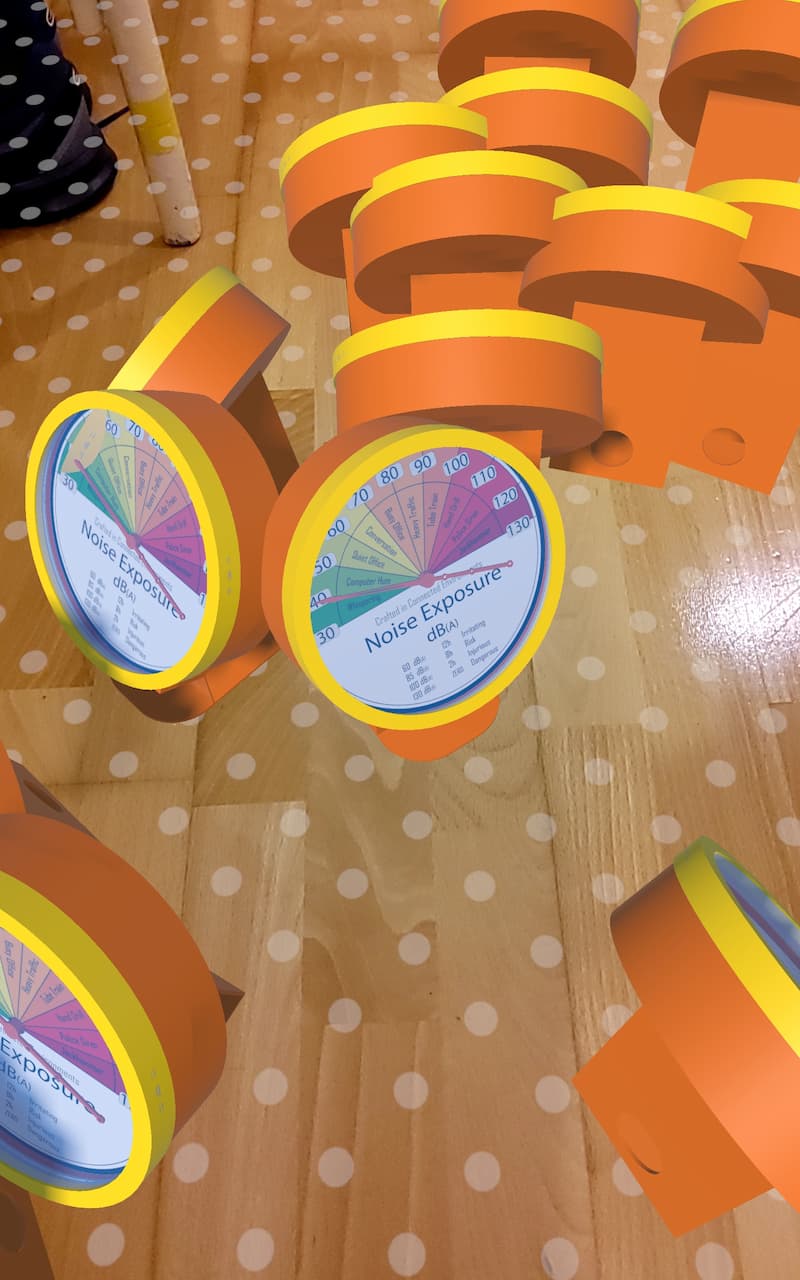
If we build and deploy the app (follow the steps from Building/Deploying the Scene) we will noticed that the Unity default settings are barely useable, as Anchor Creator clone a new object anytime the screen is touched. This easily leads to multiple objects appearing and makes it hard to place the object where you want.
Adding a new Touch Anchor
Via scripting is possible to customise the behaviour of the touch control (touch to add and object and hold to drag to move the object on the AR surface.
Create -> new C# Script name it tapToPlace
Copy and paste the following to replace the default script
using System.Collections.Generic;
using UnityEngine;
using UnityEngine.XR.ARFoundation;
using UnityEngine.XR.ARSubsystems;


[RequireComponent(typeof(ARRaycastManager))]
public class tapToPlace : MonoBehaviour
{
    public GameObject gameObjectToInstantiate; //the Prefab GameObject to instantiate in the AR environment. To be added in the inspector window
    private GameObject spawnedObject; //the Prefab Instantiate in the scene. Used internally by the script
    private ARRaycastManager _arRaycastManager; //part of the XROrigin
    private Vector2 touchPosition; //XZ position of the user Tap

    static List<ARRaycastHit> hits = new List<ARRaycastHit>();
    public float timeThreshold = 0.5f; //User need to tap and hold the finger for at least 0.5 sec to create the content
    public bool isTouching = false;

    //Event design to fire when content is created
    public delegate void ContentVisibleDelegate();
    public event ContentVisibleDelegate _contentVisibleEvent;

    private void Awake()
    {
        _arRaycastManager = GetComponent<ARRaycastManager>();
    }

    public bool TryGetTouchPosition(out Vector2 touchPosition)
    {
        if (Input.touchCount > 0)
        {
            isTouching = true;
            touchPosition = Input.GetTouch(index: 0).position;
            return true;
        }
        touchPosition = default;
        isTouching = false;
        timeThreshold = 0;
        return false;
    }

    // Update is called once per frame

    void Update()
    {
        if (isTouching == true)
        {
            timeThreshold -= Time.deltaTime;
            //Debug.Log("TIMING: " + timeThreshold);
        }

        if (!TryGetTouchPosition(out Vector2 touchPosition))
            return;

        if (_arRaycastManager.Raycast(touchPosition, hits, trackableTypes: TrackableType.PlaneWithinPolygon))
        {
            var hitPose = hits[0].pose;

            if (timeThreshold < 0)
            {
                if (spawnedObject == null)
                {
                    spawnedObject = Instantiate(gameObjectToInstantiate, hitPose.position, hitPose.rotation);
                    _contentVisibleEvent(); //fire the event
                }
                else
                {
                    spawnedObject.transform.position = hitPose.position;
                }
            }
        }
    }
}
Drag the script into XR Origin GameObject (or select Add Component) and Drag the ARObject into the GameObject to Instantiate field.
We need also to turn off, or delete, the component Anchor Creator, as the GameObject is controlled by the new script.
If all is set up correctly then deploying to your device is easy. There are a few catches which are useful to solve failed builds.
To build and run on your device - File -> Build Settings and add open scene also check you have the correct deployment platform selected.
Select Player Settings... from the Build Settings windows and provide:
- Company Name
- Product Name
- Version
Android
In the Other Settings section set the following parameters:
- Color Space: Linear
- Auto Graphics API: unchecked
- Graphics APIs: only OpenGLES3
- Override Default Package Name: unchecked
- Minimum API Level: Android 10.0
- Scripting backend: IL2CPP
- Target Architectures: ARM64 (uncheck ARMv7)
Icon and Splash screen can be added as well
Back to the Build Settings windows, connect an Android phone (it must be in developer mode) and run File -> Build and Run. The first time Unity will ask a destination folder to save the application as an APK file format then, if a device is connected, Unity will install the application on the device. If the device is not connected, or not recognised, it is possible to upload the file directly on the Android device, the file will be recognised and installed.
The App will run automatically, move the phone so the camera can detect a plane and then tap to place your 3D model.
iOS
In the Other Settings section set the following parameters:
- Color Space: Linear
- Override Default Package Name: unchecked
- _Signing Team ID: your Apple Developer ID
- _Automatically Sign: checked
- Camera Usage Description: AR Camera permission
- Target Device: iPhone+iPad
- Target minimum iOS Version: 12
Icon and Splash screen can be added as well
On Windows, Unity cannot Build and Run, but it is still possible to build the project to open in XCode on a macOS system.
On macOS systems, after File -> Build and Run, Unity will launch XCode which in turn will process the build to be deployed on your mobile device. Your device needs to be connected and ‘trusted' by the computer it is connected to.
If you press the play button at the top of Xcode, with your mobile device selected and the destination the Xcode should install and run the application on your iPhone or iPad. When it loads, move the phone so the camera can detect a plane and then tap to place your 3D model. If XCode fails to build - the issue is normally with the Apple Account settings and often due to the Signing and Capabilities. Select the project from the left-hand side (the top blue icon) and in the middle navigate to Signing and Capabilities.
Select Automatic Signing and then your account via the drop-down Teams. If you now press the Play icon, the application should build to your device.
Well done - you have your first Augmented Reality Application.
Realistic lighting is central to making an object in Augmented Reality look real and they are various shadow, light and camera techniques which can be used to allow an object to look more natural in its surroundings.
Gauge Shadow
The Gauge so far is not showing any shadows or very low-resolution shadows - this is due to a couple of settings in Unity which need to be changed. Firstly head to Edit -> Project Settings and, on the left-side panel, select Quality. We are going to use the Medium settings (click on it). For the Shadows settings use
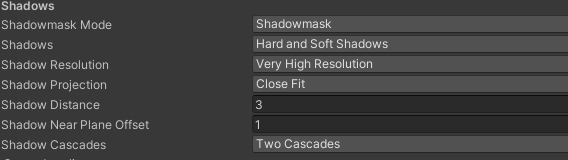
As above the main edits are to set:
- Shadowmask Mode: Shadowmask
- Shadows: Hard and Soft Shadows
- Shadow Resolution: Very High Resolution
- Shadow Projection: Close Fit
- Shadow Distance : 3
- Shadows Near Plane Offest: 1
- Shadow Cascades_: Two Cascade
Base Shadow
Finally, shadows need to fall on any surface you use for Augmented Reality. We are going to create a new custom shader
- in the Assets create a new folder Materials
- create a new
Standard Surface Shader, right clickCreate -> Shader -> Standard Surface Shaderand name itMobileARShadow - open the shader, remove the existing code and add the following one
//This is based on a shader from https://alastaira.wordpress.com/2014/12/30/adding-shadows-to-a-unity-vertexfragment-shader-in-7-easy-steps/

Shader "Custom/MobileARShadow"
{
SubShader {
    Pass {

        // 1.) This will be the base forward rendering pass in which ambient, vertex, and
        // main directional light will be applied. Additional lights will need additional passes
        // using the "ForwardAdd" lightmode.
        // see: http://docs.unity3d.com/Manual/SL-PassTags.html
        Tags { "LightMode" = "ForwardBase" "RenderType"="Opaque" "Queue"="Geometry+1" "ForceNoShadowCasting"="True"  }
        LOD 150
        Blend Zero SrcColor
        ZWrite On

        CGPROGRAM

        #pragma vertex vert
        #pragma fragment frag
        #include "UnityCG.cginc"

        // 2.) This matches the "forward base" of the LightMode tag to ensure the shader compiles
        // properly for the forward bass pass. As with the LightMode tag, for any additional lights
        // this would be changed from _fwdbase to _fwdadd.
        #pragma multi_compile_fwdbase

        // 3.) Reference the Unity library that includes all the lighting shadow macros
        #include "AutoLight.cginc"


        struct v2f
        {
            float4 pos : SV_POSITION;

            // 4.) The LIGHTING_COORDS macro (defined in AutoLight.cginc) defines the parameters needed to sample
            // the shadow map. The (0,1) specifies which unused TEXCOORD semantics to hold the sampled values -
            // As I'm not using any texcoords in this shader, I can use TEXCOORD0 and TEXCOORD1 for the shadow
            // sampling. If I was already using TEXCOORD for UV coordinates, say, I could specify
            // LIGHTING_COORDS(1,2) instead to use TEXCOORD1 and TEXCOORD2.
            LIGHTING_COORDS(0,1)
        };
        v2f vert(appdata_base v) {
            v2f o;
            o.pos = UnityObjectToClipPos (v.vertex);

            // 5.) The TRANSFER_VERTEX_TO_FRAGMENT macro populates the chosen LIGHTING_COORDS in the v2f structure
            // with appropriate values to sample from the shadow/lighting map
            TRANSFER_VERTEX_TO_FRAGMENT(o);

            return o;
        }

        fixed4 frag(v2f i) : COLOR {

            // 6.) The LIGHT_ATTENUATION samples the shadowmap (using the coordinates calculated by TRANSFER_VERTEX_TO_FRAGMENT
            // and stored in the structure defined by LIGHTING_COORDS), and returns the value as a float.
            float attenuation = LIGHT_ATTENUATION(i);
            return fixed4(1.0,1.0,1.0,1.0) * attenuation;
        }

        ENDCG
    }
}

// 7.) To receive or cast a shadow, shaders must implement the appropriate "Shadow Collector" or "Shadow Caster" pass.
// Although we haven't explicitly done so in this shader, if these passes are missing they will be read from a fallback
// shader instead, so specify one here to import the collector/caster passes used in that fallback.
Fallback "VertexLit"

}
- Create a new material and apply the shader to it (drag and drop will work)
- open the prefab of the Gauge and create a plane just below the stand and apply the material to it
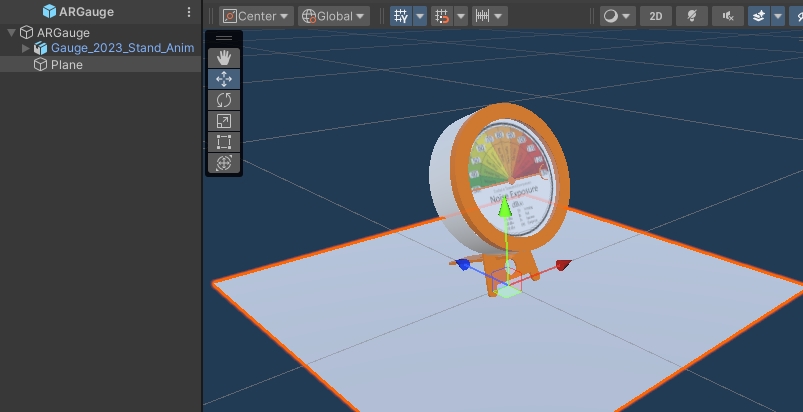
The new material will render just the shadows projected by a light source in the scene, but it will be otherwise invisible
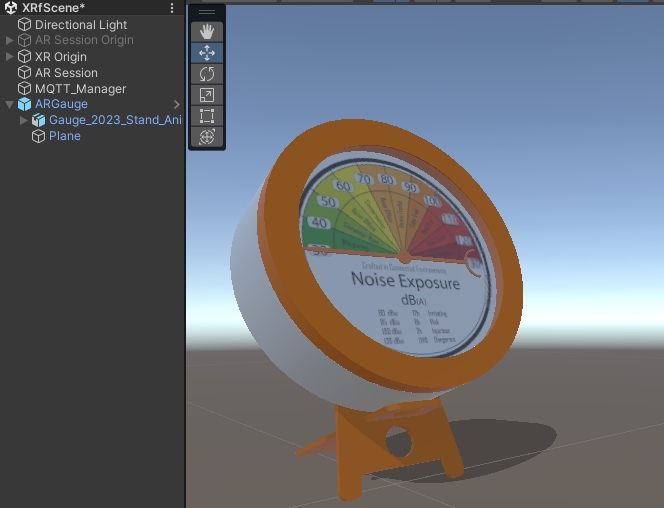
Light Estimation
Light Estimation uses the camera of the mobile device to estimate the environmental lighting and apply it to the main light of the scene. ARFoundation provides an inbuilt light estimation option. To turn it on, select the Main Camera GameObject inside the XR Origin and, in the Inspector Panel, in the AR Camera Manager component, select Light Estimation -> Everything
You now have an Augmented Reality object with real-time lighting and shadows, it can be placed and moved on any surface.
If you have not already - Save your Scene and congratulate yourself.
ARFoundation can be used also to track images and objects (Objects just on iOS devices).
Save the scene using File -> Save As and provide a new name (in this way we can keep all the existing settings and GameObjects in place).
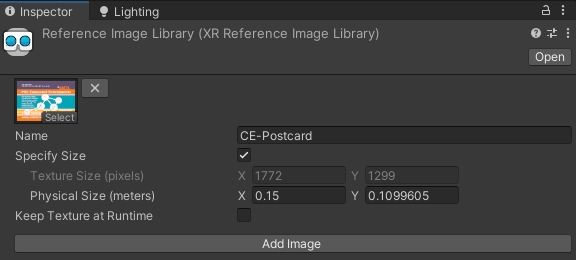
Import the CE Postcard image in the Assets folder. In the Inspector Window, in Advanced change Non-Power of 2 to None and apply.
Create a new ReferenceImageLibrary from Asset -> Create -> XR -> Reference Image Library and add the CE Postcard as new image. Set the physical size and the name
Select the XR Origin and in the Inspector Window add a new component AR Tracked Image Manager. Select the Reference Image Library for the Serialized Library and the ARGauge for the Tracked Image Prefab.
Build the App. Remember to change the name in the Player Settings to avoid to overwrite the previous example.