This workshop will show you how to:
- Import your Fusion Model into Blender and Retexture/Animate
- Export the model for import into Unity of other systems such as Sketchfab
To complete this workshop you will need:
Texture / Human Resources and Fusion Model
- Energy Dial Texture
- 3D Model from Github (in fbx format)
- A smile at the initial quirkiness of Blender - you will soon become a Blender Master.
Your export from Fusion 360 did not retain any texture or animation information (it is a notable missing feature in the software). Blender allows us to retexture the model and in addition add in any animation we might like to show in Augmented Reality - such as an exploded view of the model. It also acts as a useful base for the model, allowing export to a variety of current and future formats.
Open Blender and first of all right click on the cube and delete. You now have a clear first scene.
Go to File -> Import -> FBX
Import gauge2023.fbx
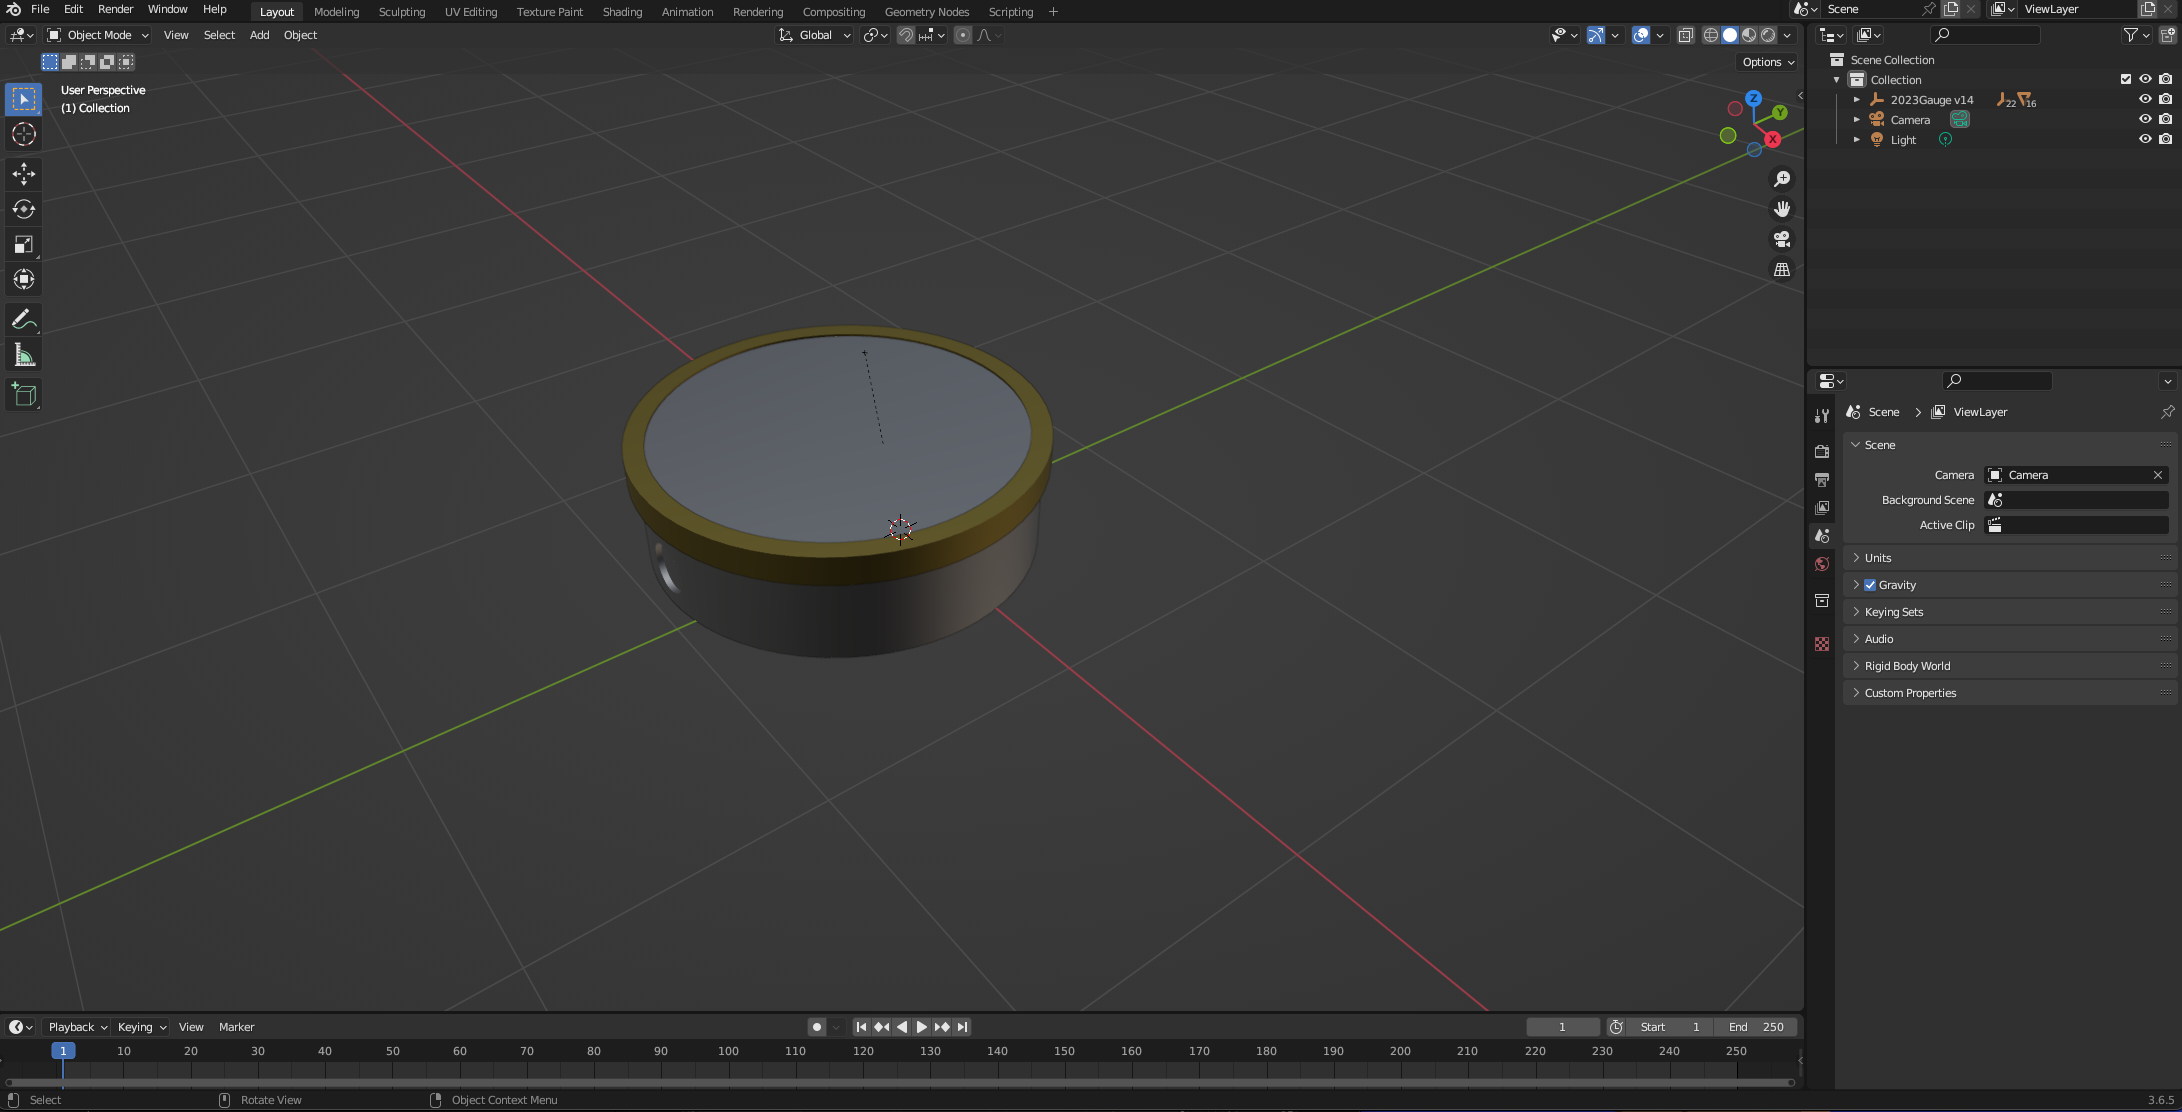
You will notice that none of the textures have loaded - the glass front is now grey. We will work on the glass render in a later step. For now we will hide it, allowing us to work on retexturing the dial.
Navigate the heirachy on the right and go down to the Glass Body to hide the asset
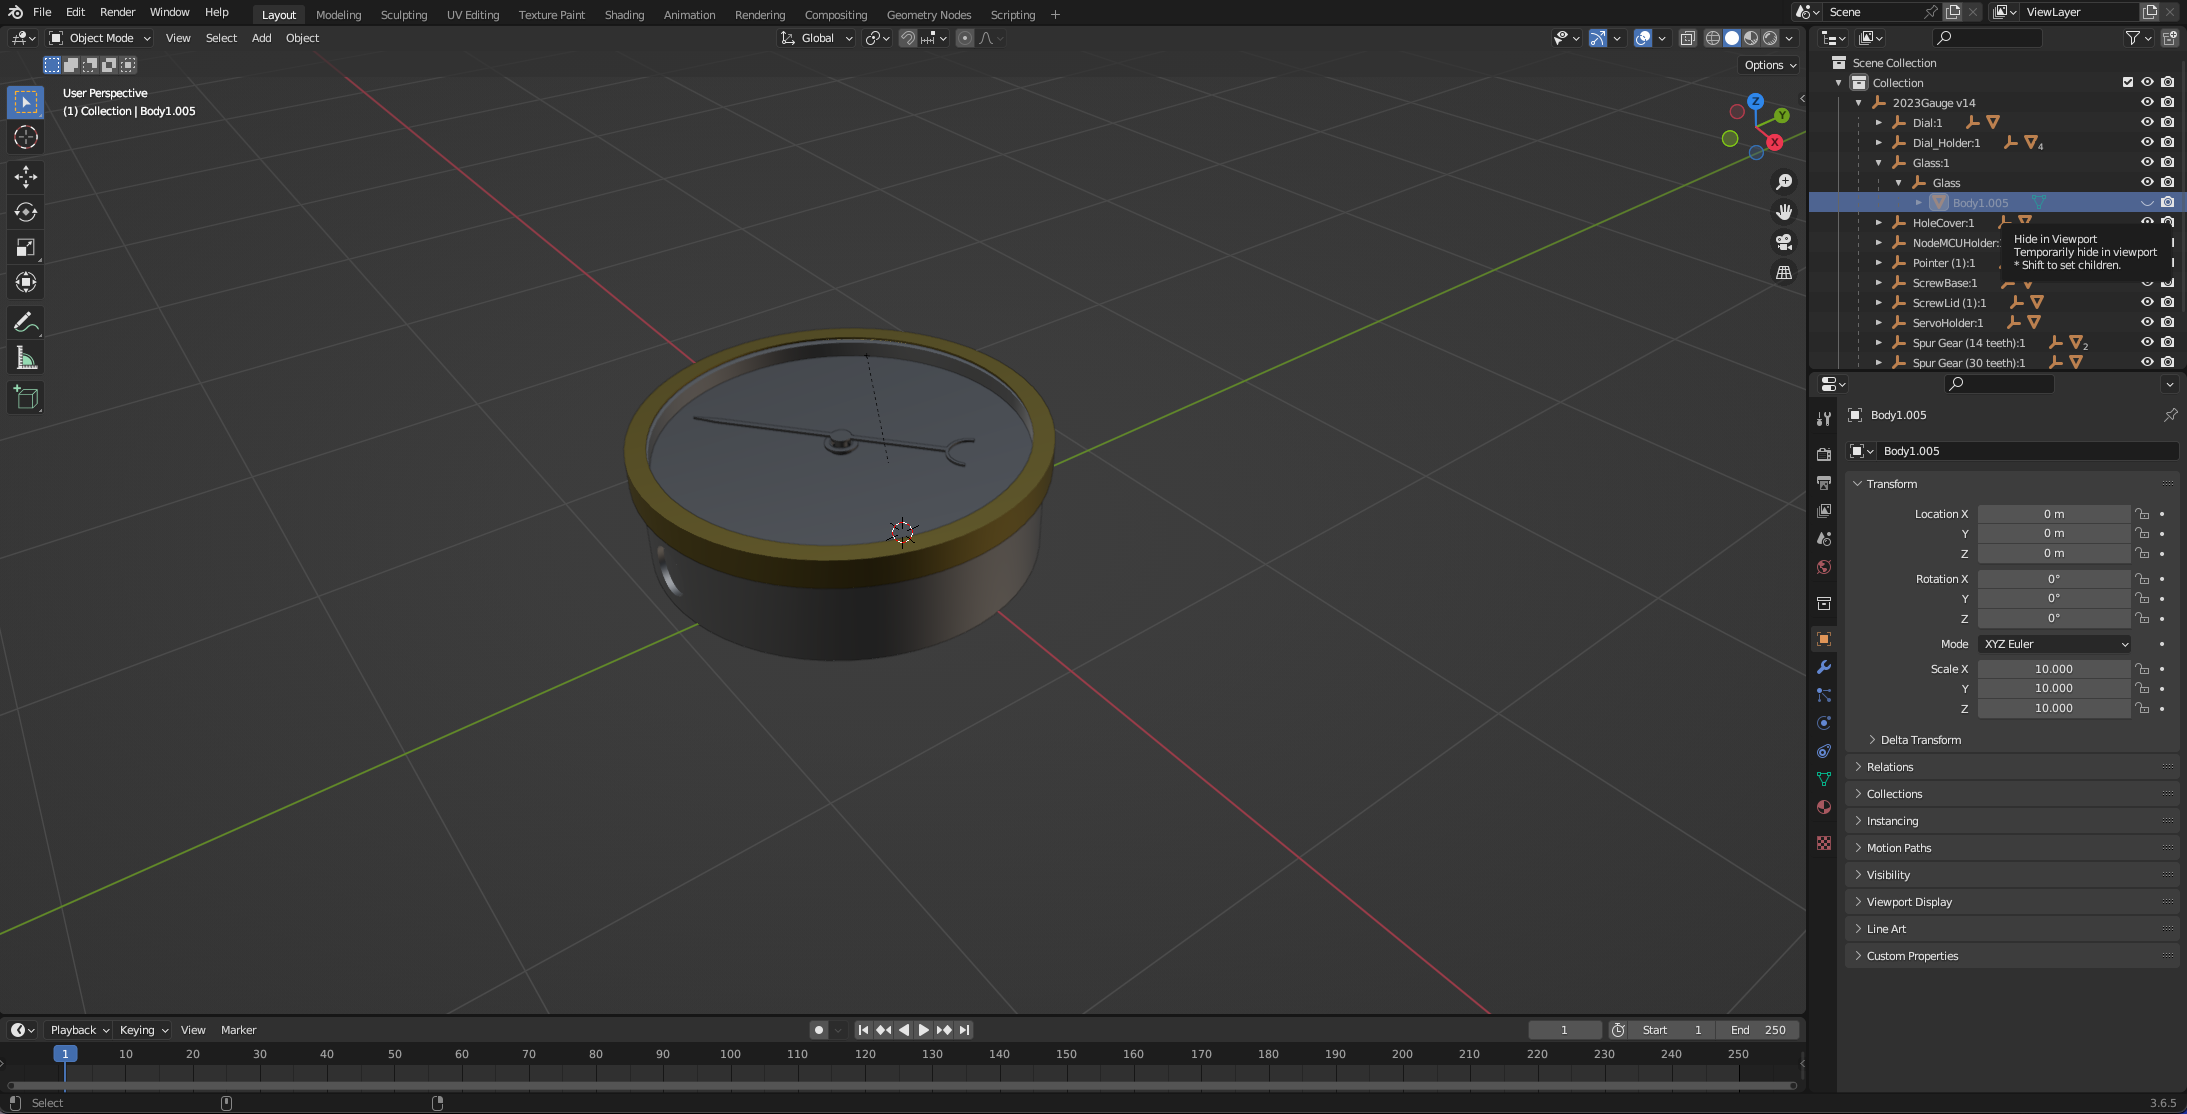
The pointer needle and dial will now be viewable in blender
Texturing/UV Mapping
Each face of a model can be given a texture. In our case we want to assign the Dial Image to the Dial Face.
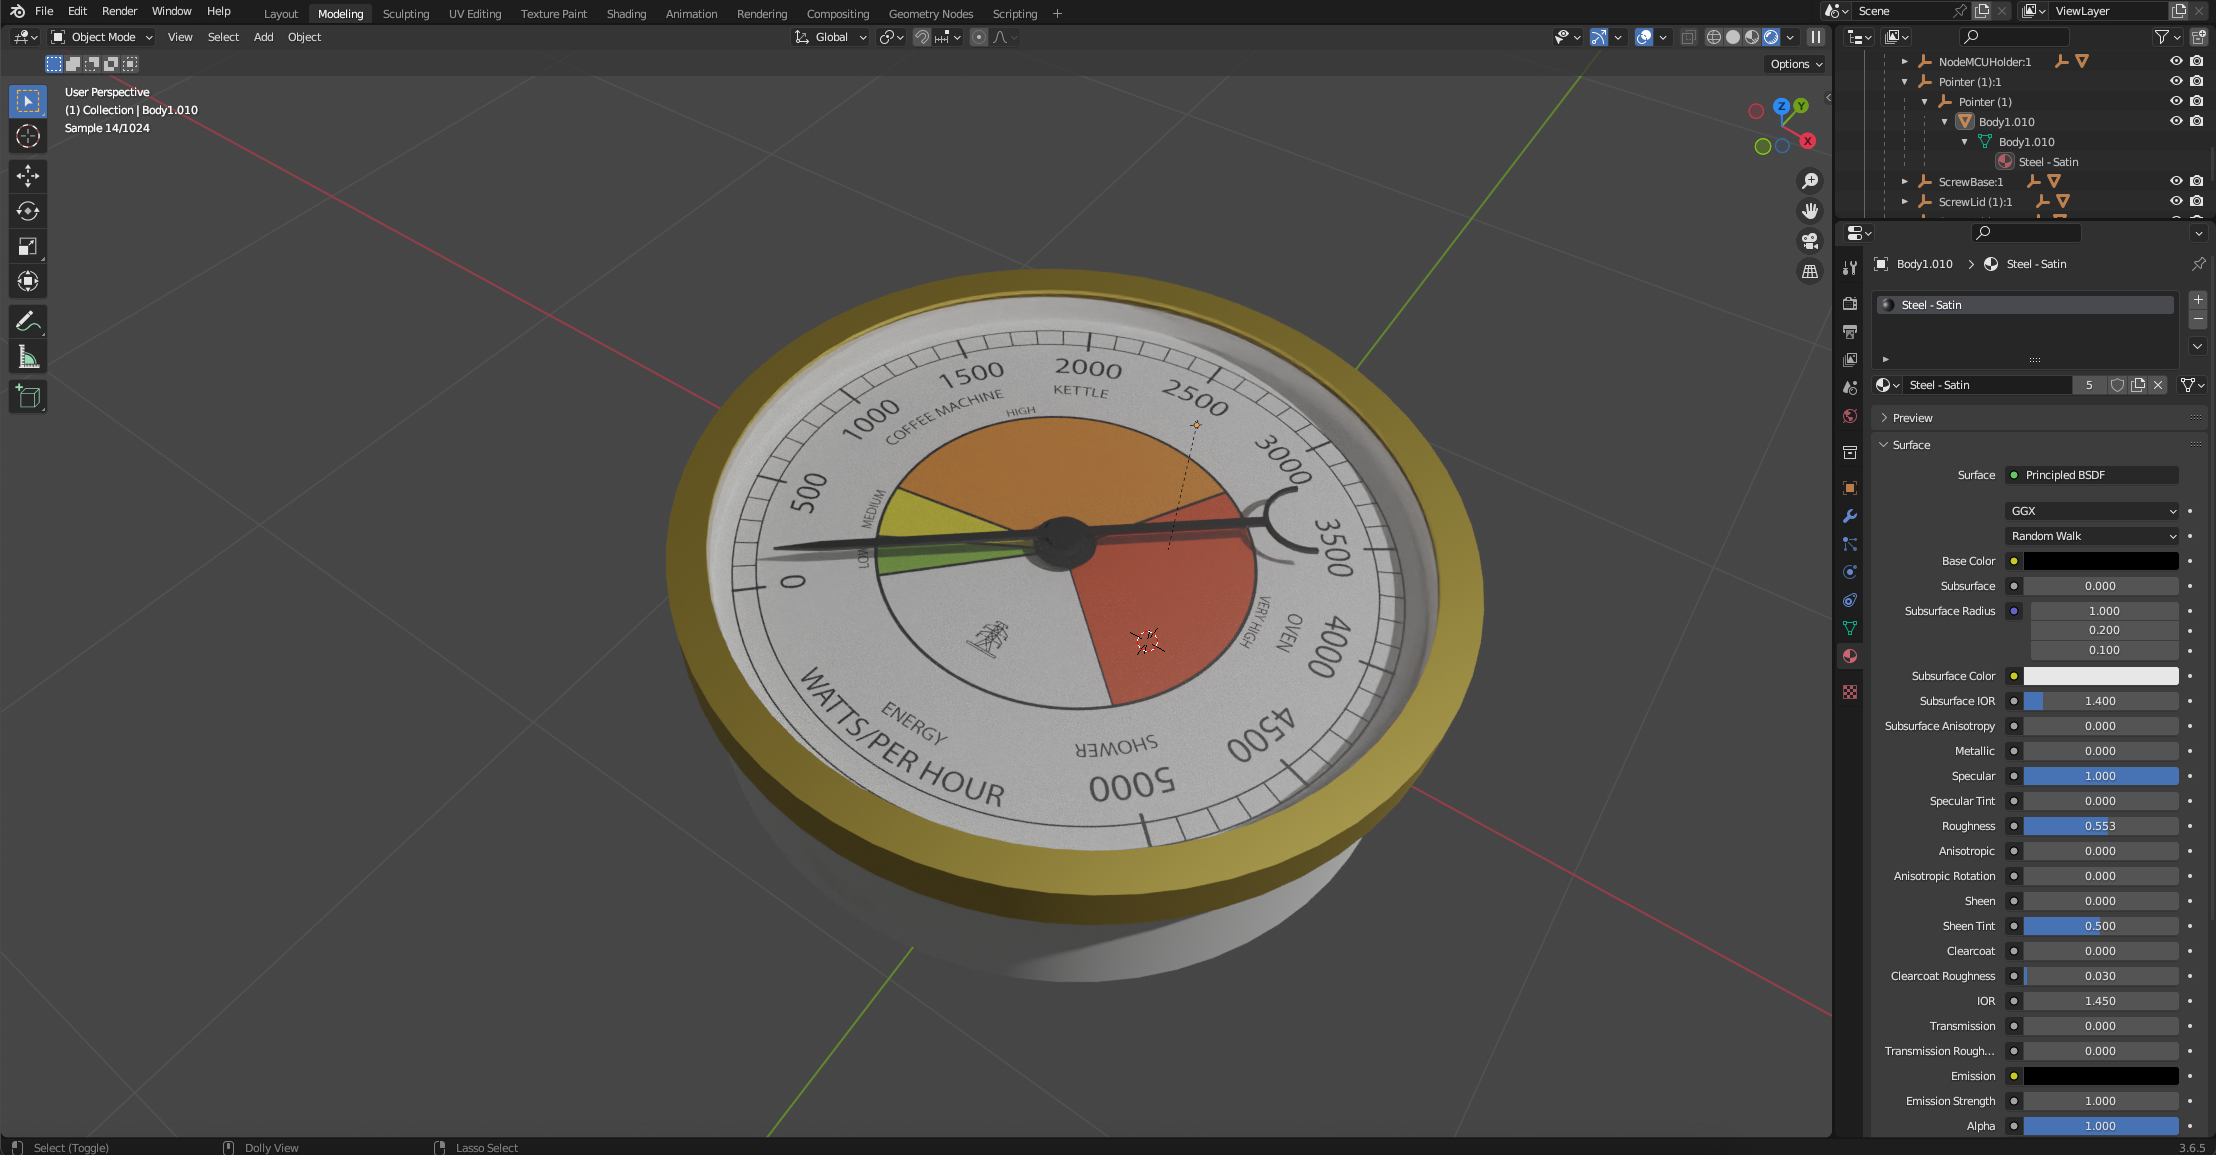
Select the dial face in blender and on the right hand side click the texture icon (the round red ball).
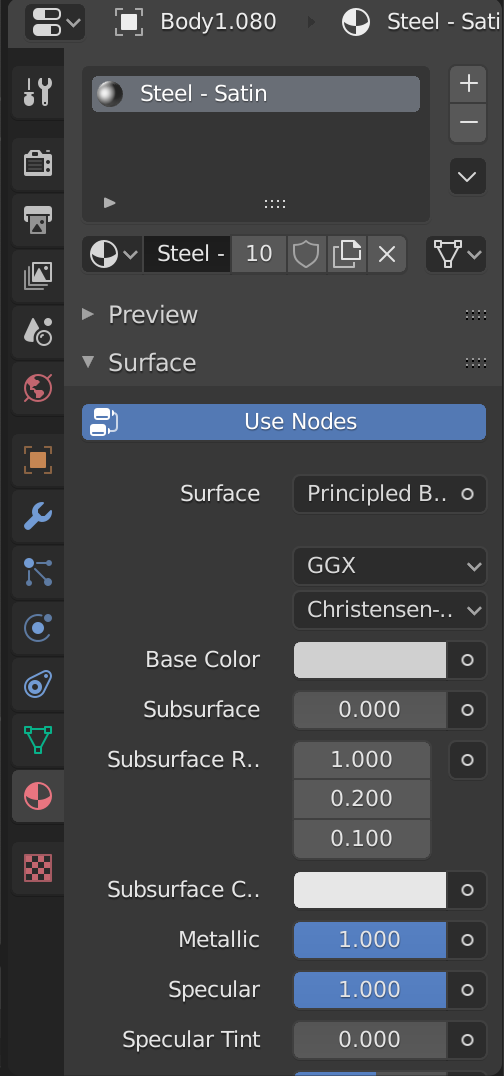
You will notice Fusion as assigned a material - the wrong one - so simply delete with the - button and add a new one using the new button
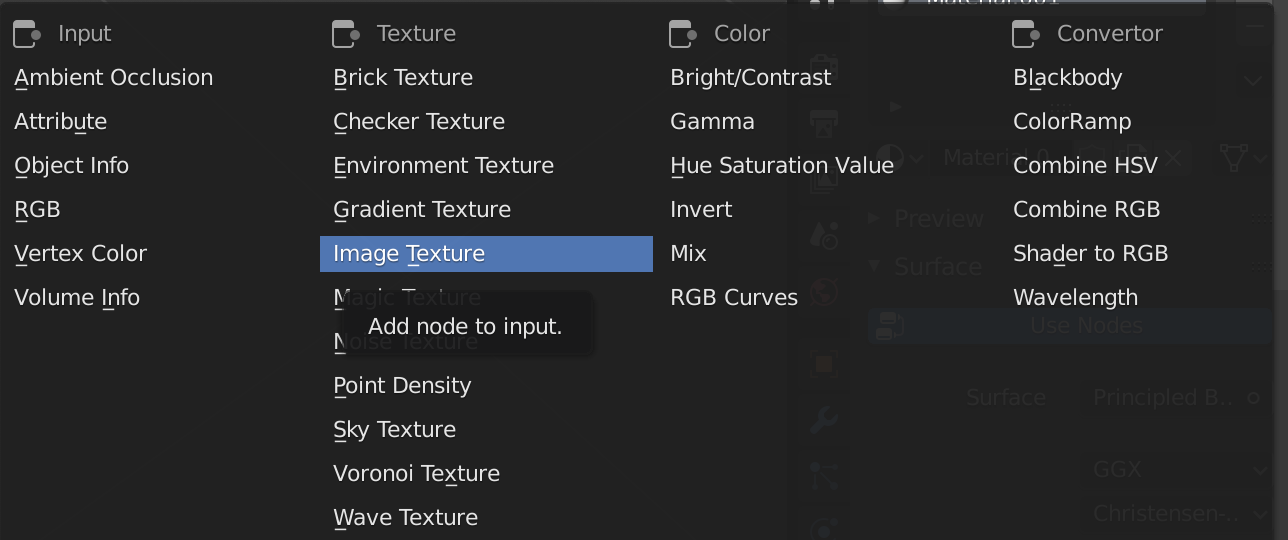
Material types are assigned via the Base Colour - this can be found under the Surface drop down. Click the circle next to Base Colour and select Image Texture in the pop up box.
A folder will now appear -
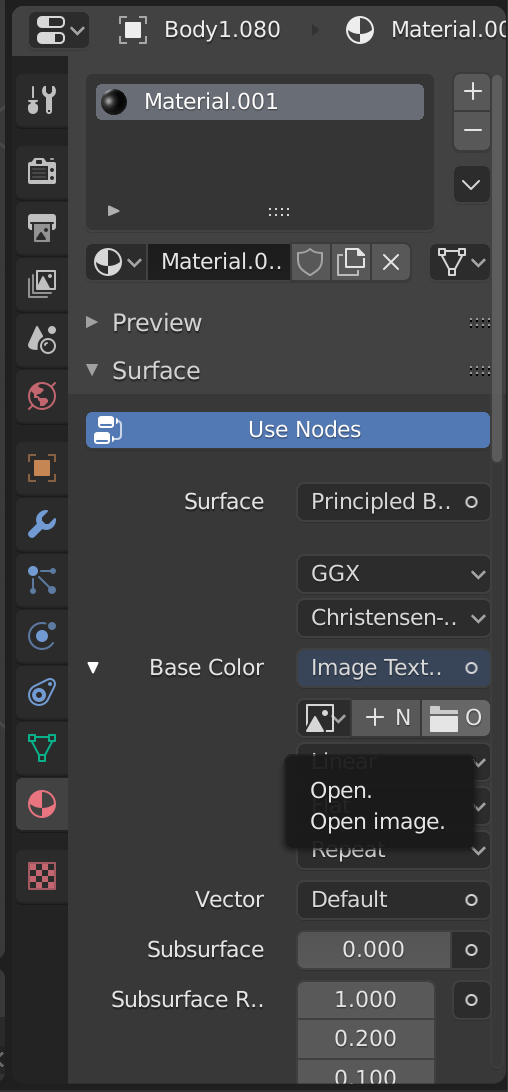
Open our Gauge Image (Energy in this example)
Nothing will change (this is typical of blender)
To see the image on the dial you need to change the viewport rendering mode. Select viewport shading (main window top right - the round balls change the texture mode)
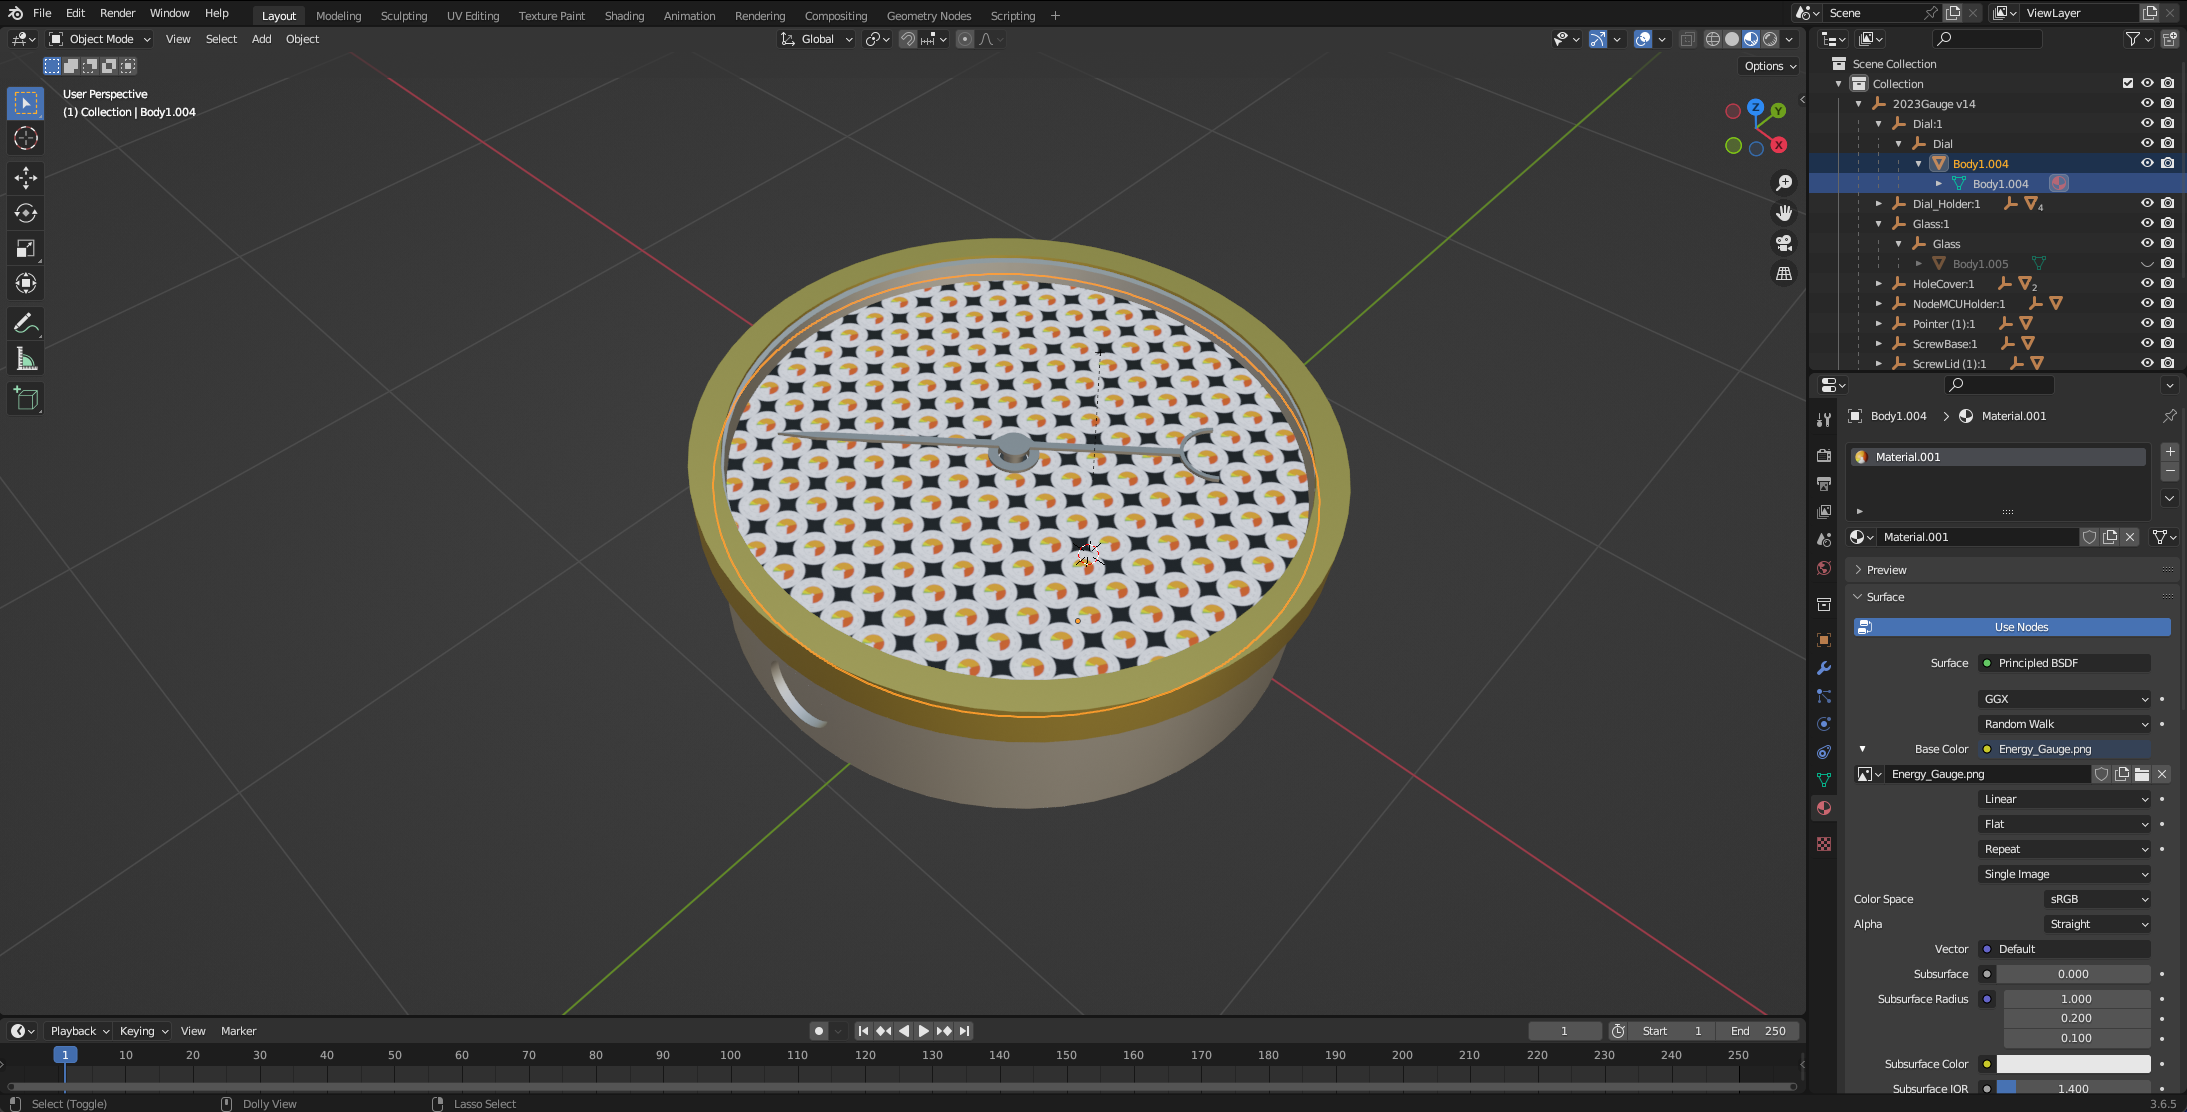
The texture will now be visible on the face. At the moment it is repeated, so get it as a single image we need to change the UV Mapping.
UV Mapping
There are multiple routes to UV Mapping a texture in Blender, our workflow here allows an insight into wider texture mapping:
Select the UV Editing Option from the top ribbon.
The window will be spilt, to the left is your texture and to the right is the 3D model. Check the shader is set (so you can see the texture) and move from Object Mode to Edit Mode (Keyboard shortcut Tab). Move your view to Top Down - by clicking the Z in the XYZ viewport gizmo - this allows us to Project our Texture downwards.

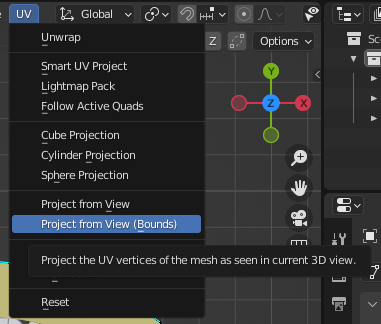
Select the UV Drop Down in the Right Window and choose Project from View (Bounds).
Your model should look like the image below - if not, repeat the process but make sure you are in Edit mode and the Dial is selected (it will auto select if you move from Object to Edit View).
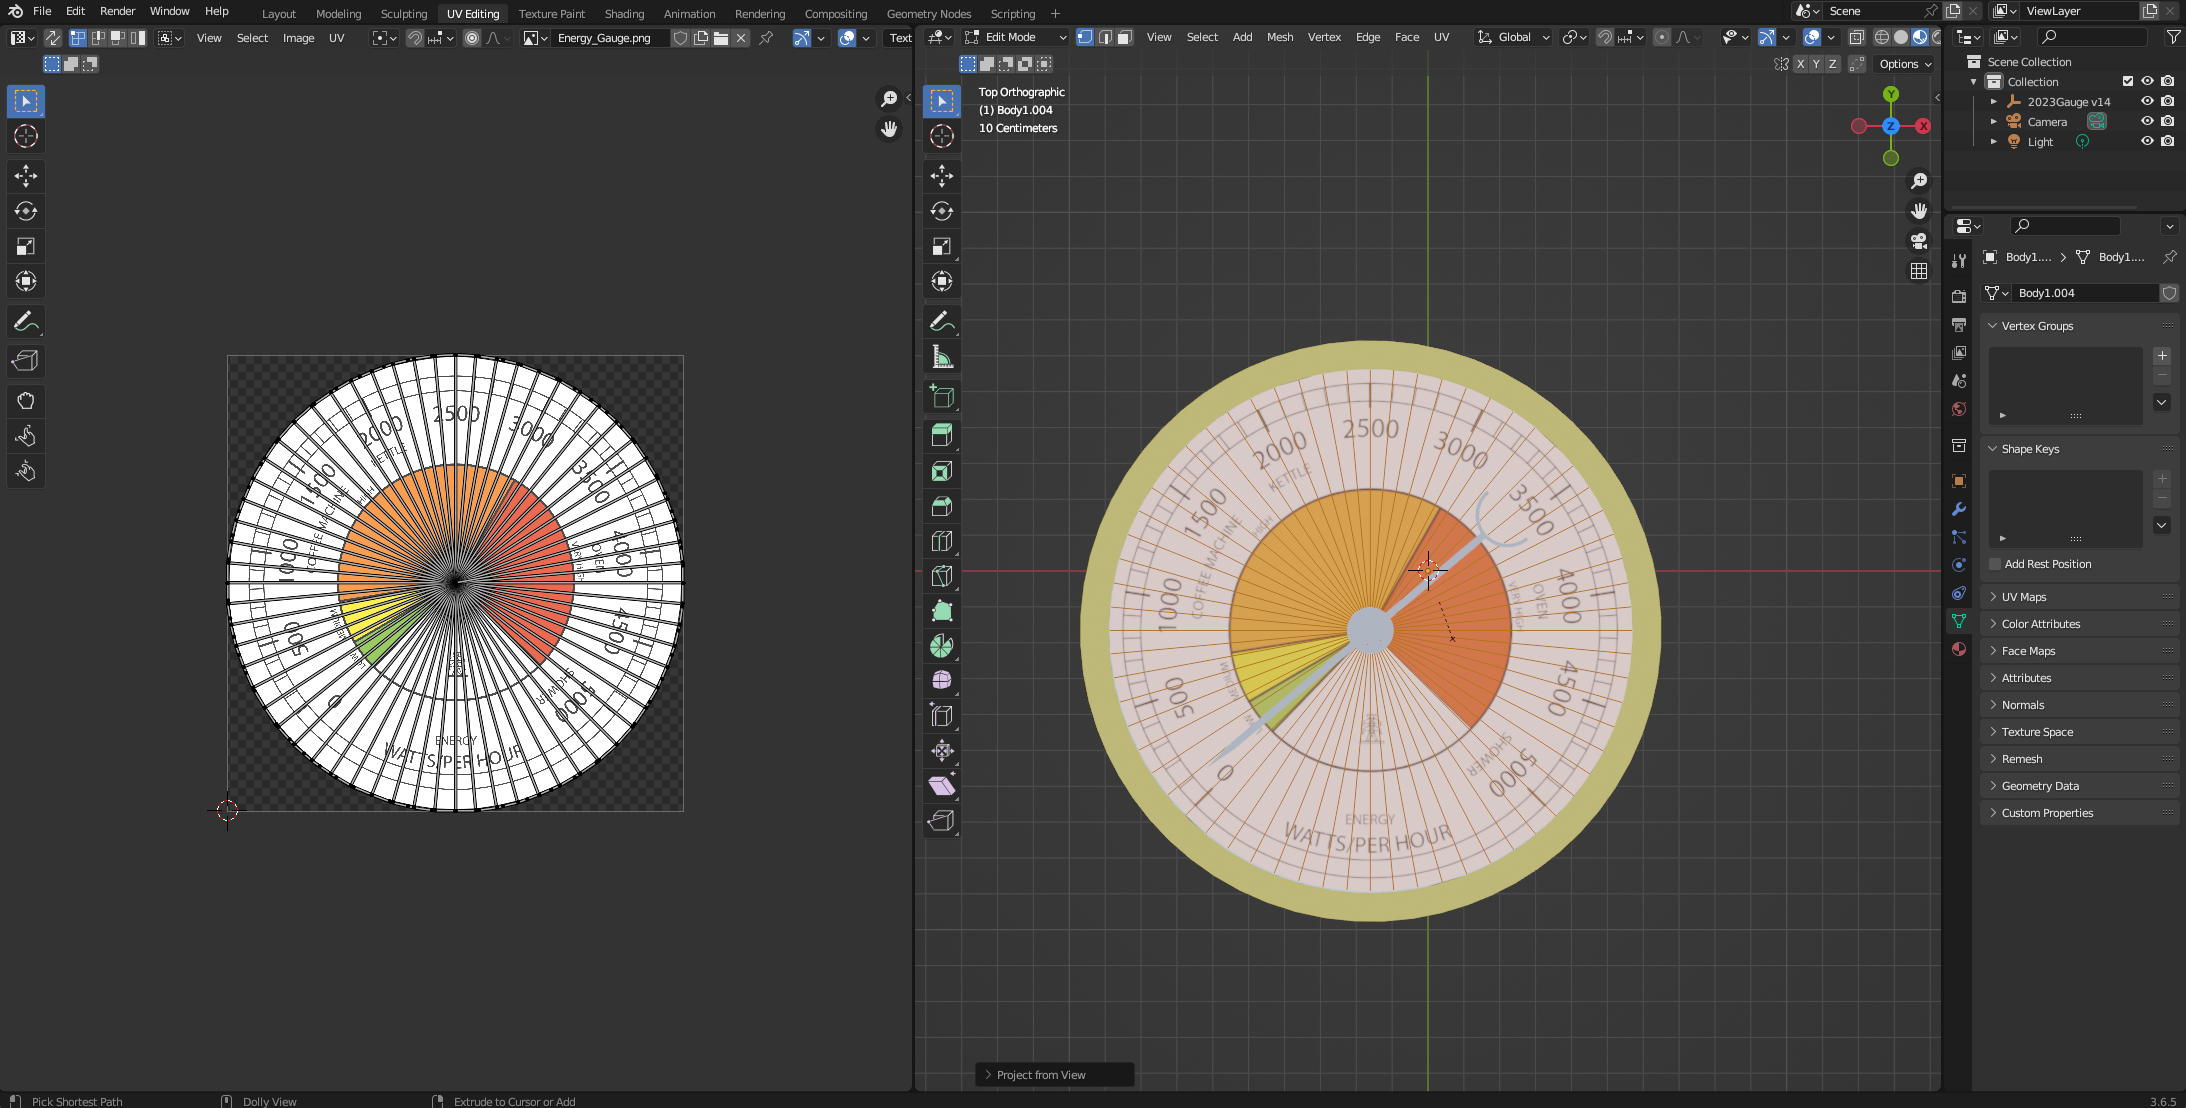
Your model is now texture mapped - well done, thats the hardest part of Blender complete.
Save your file as a Blender Model (.blend)
Adding the Glass
Now our dial is texture mapped we want to add back in the glass material.
Go back to the Modelling workflow on the to ribbon and navigate back to the Glass. Note you need to be in Object Mode to select the object.
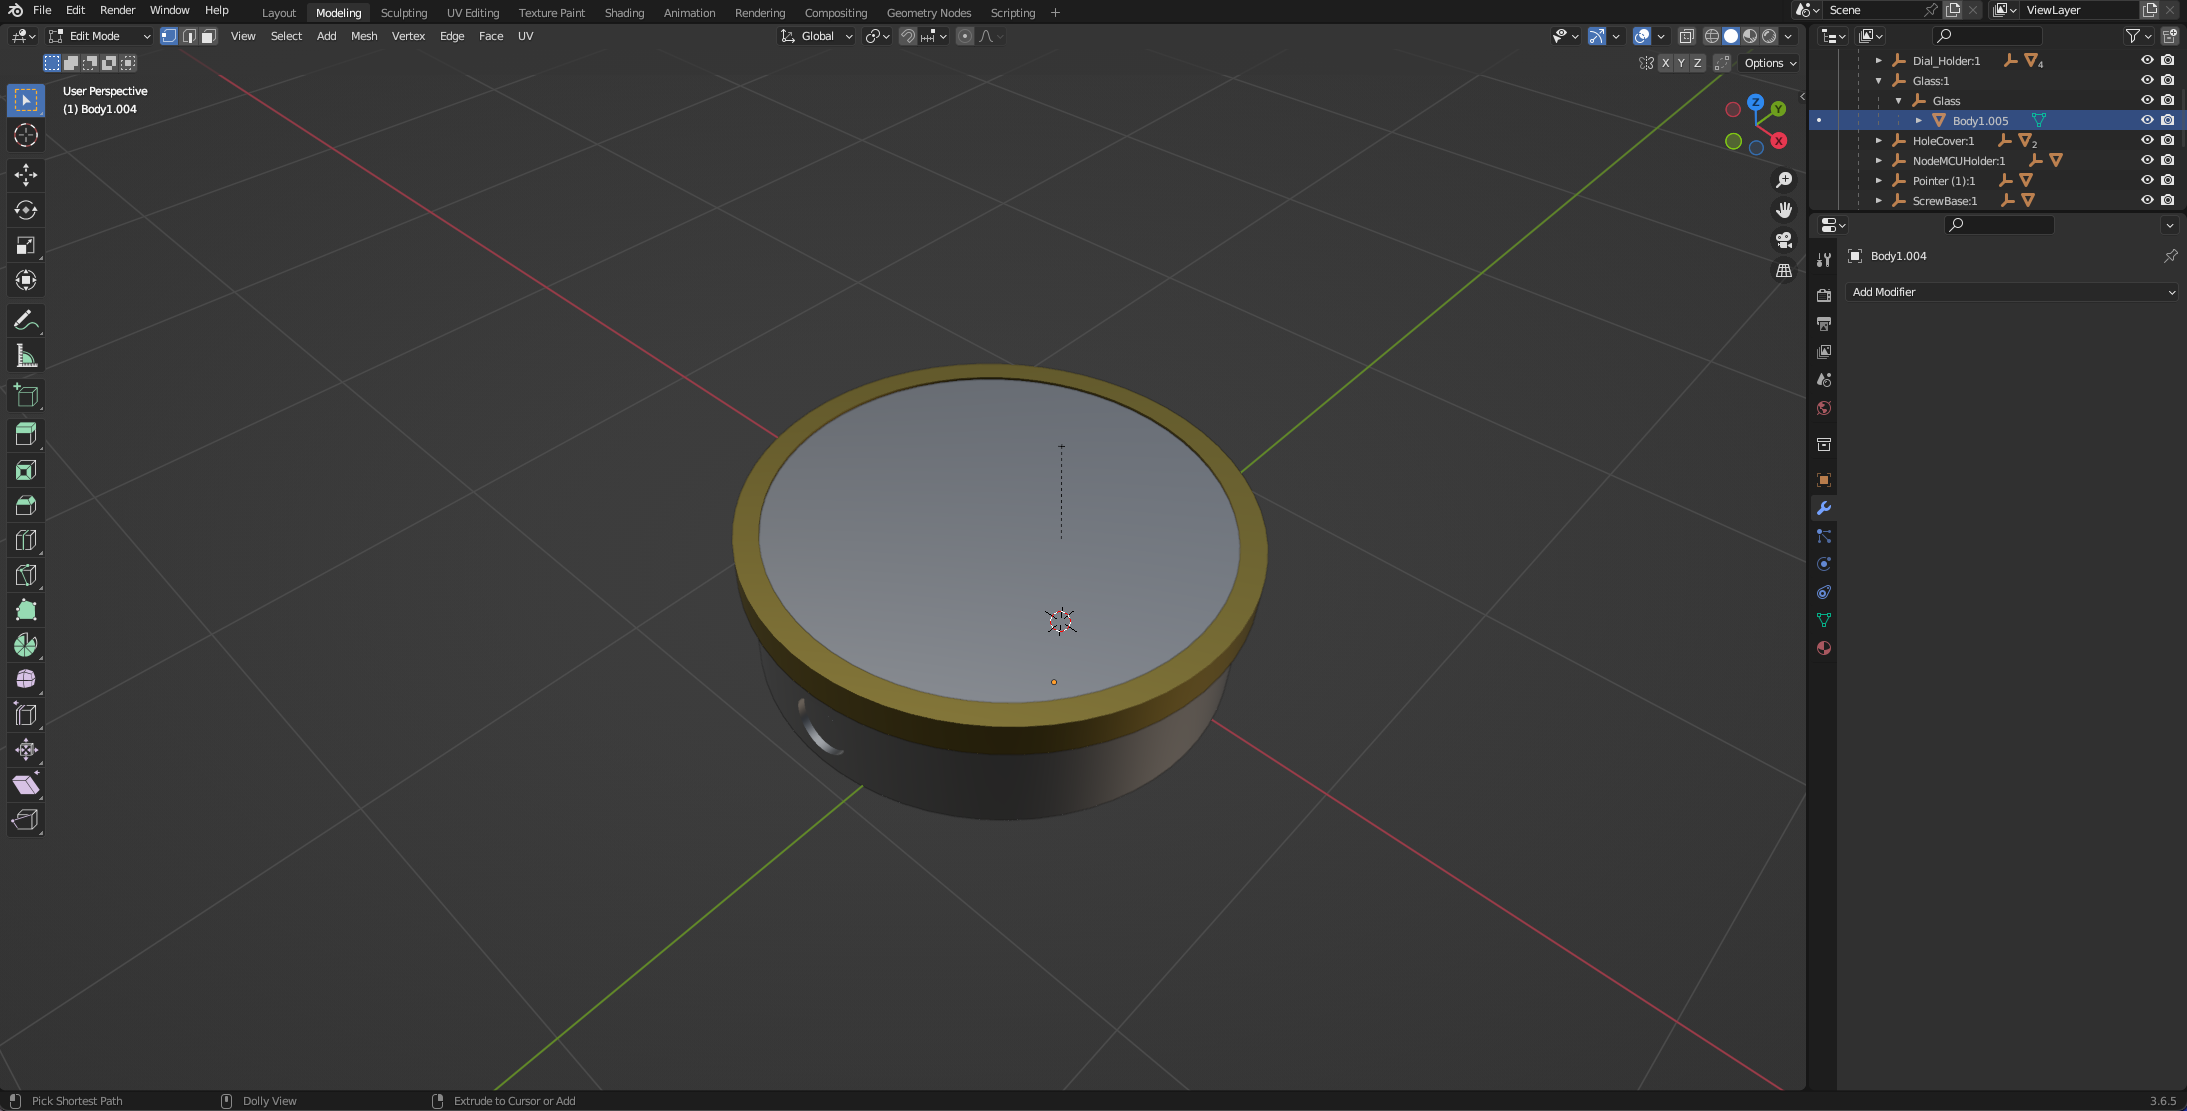
You will notice each time you switch views you need to reselect the viewpoint shader to see your textures. The Glass will still be grey.
Select the Texture icon (the Red Round Ball) - You will see that Glass(Clear) is assigned (this comes from Fusion - if you did not add a glass texture then simply click Add and New to assign a material). Your model may have two textures - Fusion can sometimes assign more than one material, if it has, simply click - and delete one of them.
There are many options - the only one we need to change it Alpha, set this to 0.1 (so the glass is almost transparent).
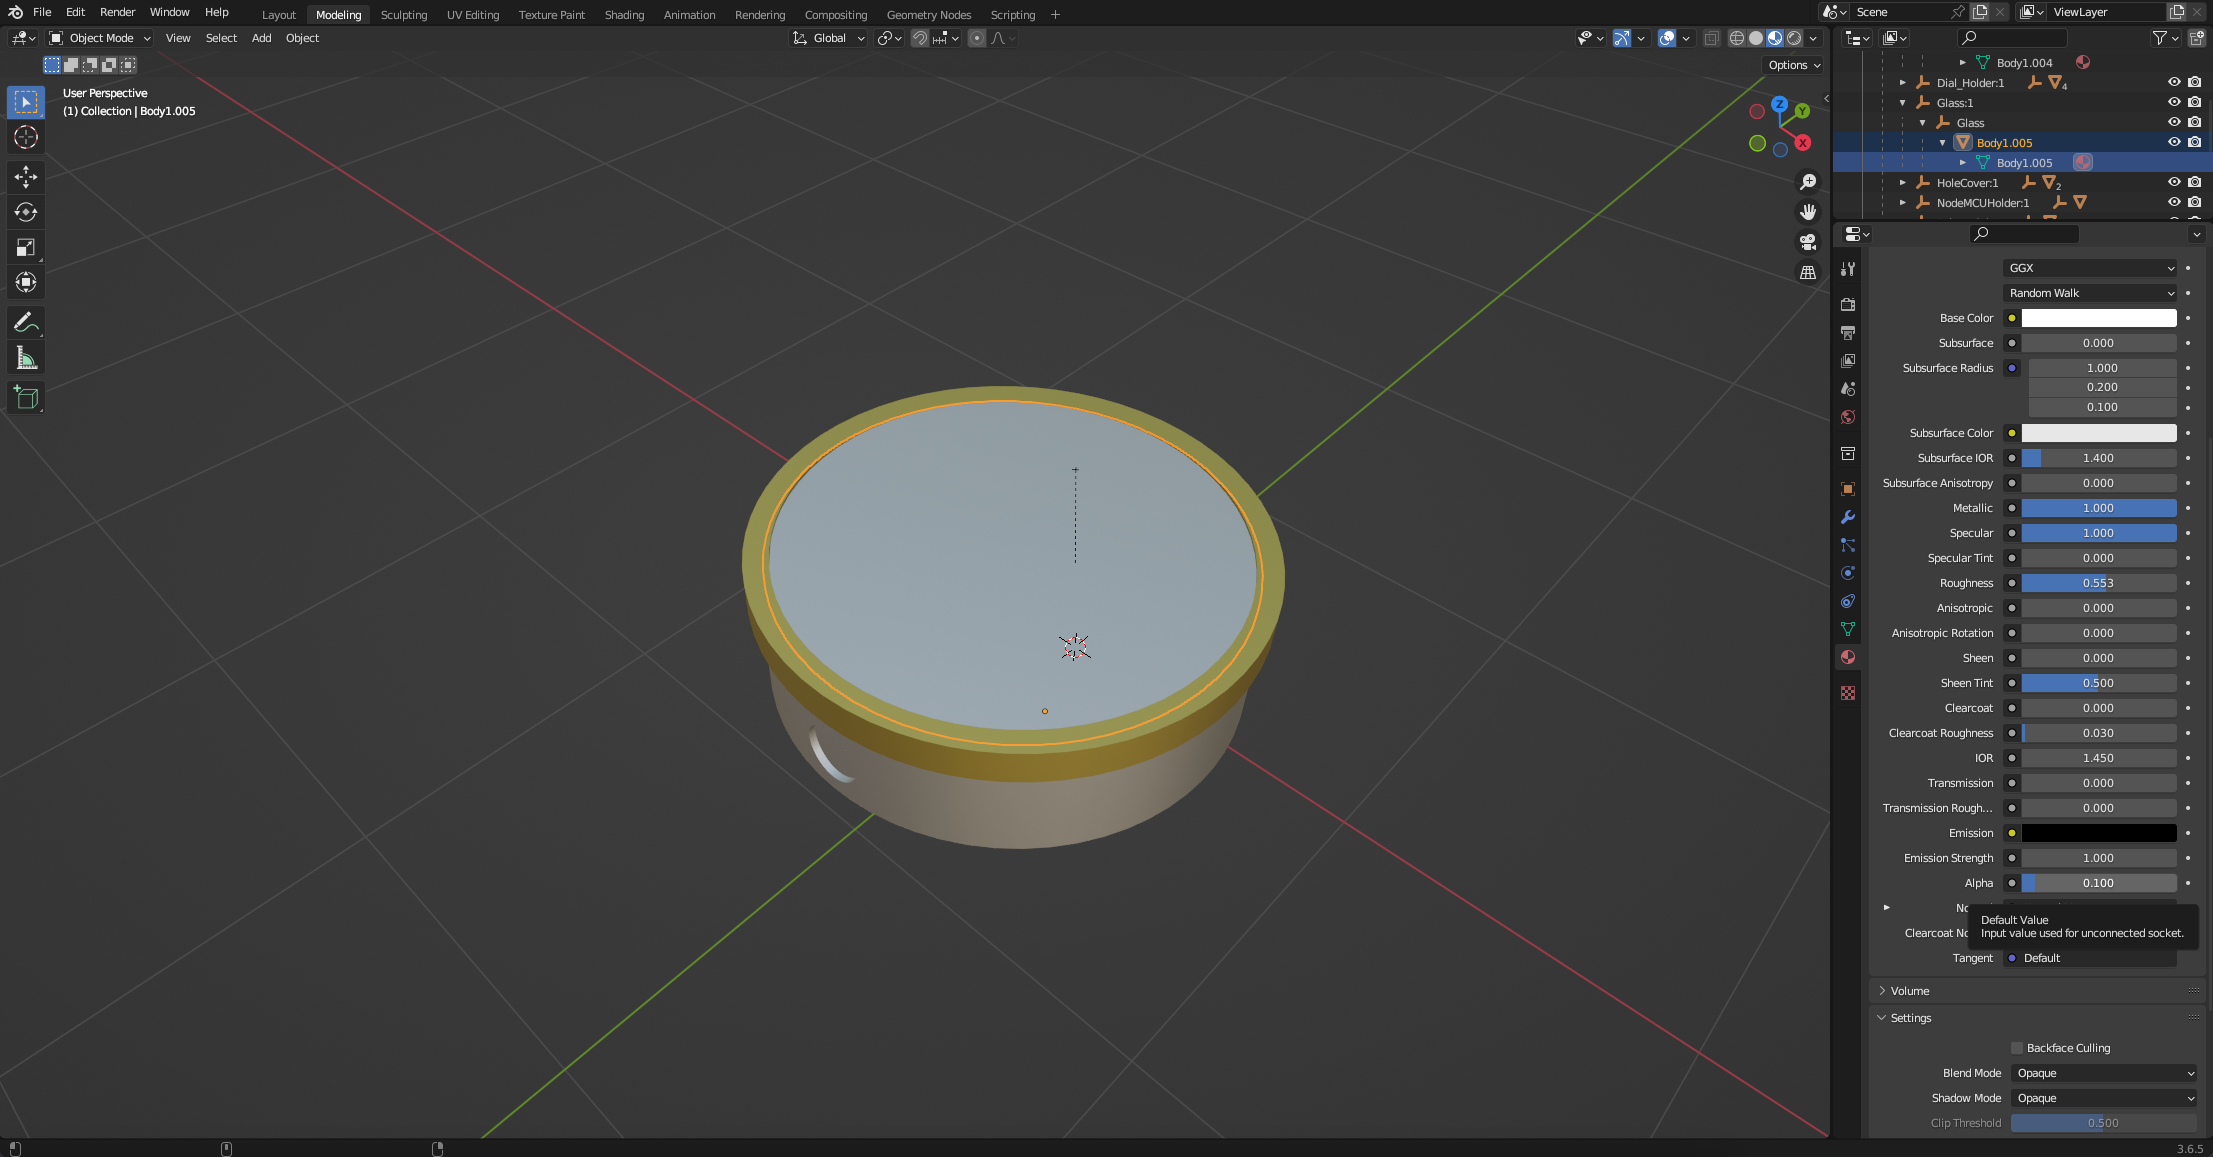
Amazingly - nothing will change, we need to change our Renderer first.
Select the Camera Icon on the side ribbon and change the Render Engine to Cycles - you also need Viewpoint Shading on (I know, its quirky - you are almost there!).
Your glass will now render - select denoise to clean up any artifacts.
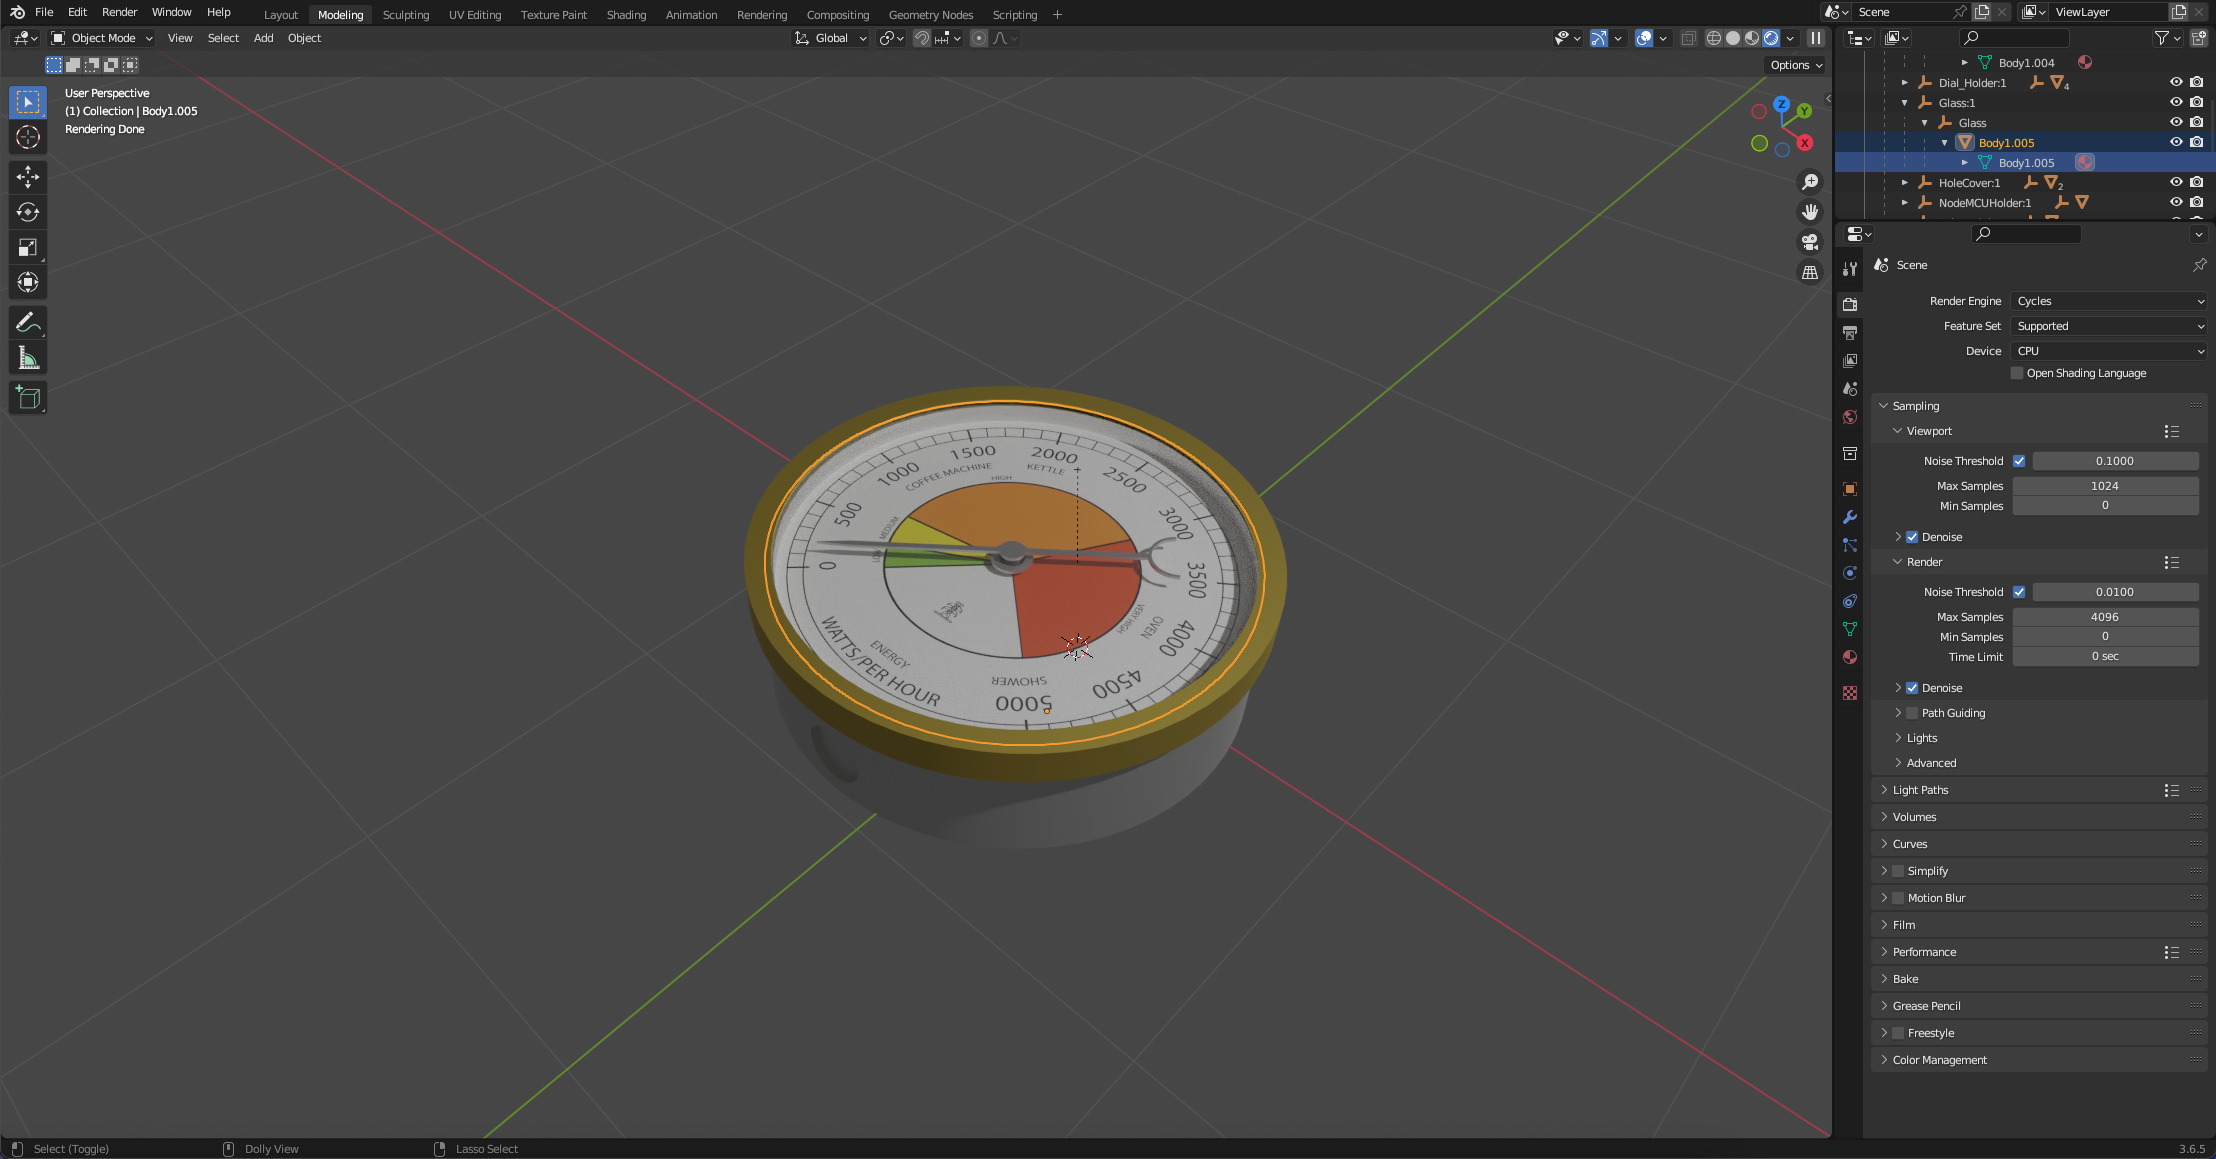
You can now take the chance to sort out any remaining textures that need fixing (you might not have any to fix). We can simply retexture any remaining objects by selecting them in object mode, going to the round red ball, adding a new texture and then changing the colour.
You now have a 3d model in Blender with the ability to render, animate and more importantly, export.
Save your model again.
Animation
Blender has a quick and easy to use (once you know how) system to animate objects. We are going to create an ‘exploded' view of the Gauge which will later be used to show the workings in Augmented Reality.
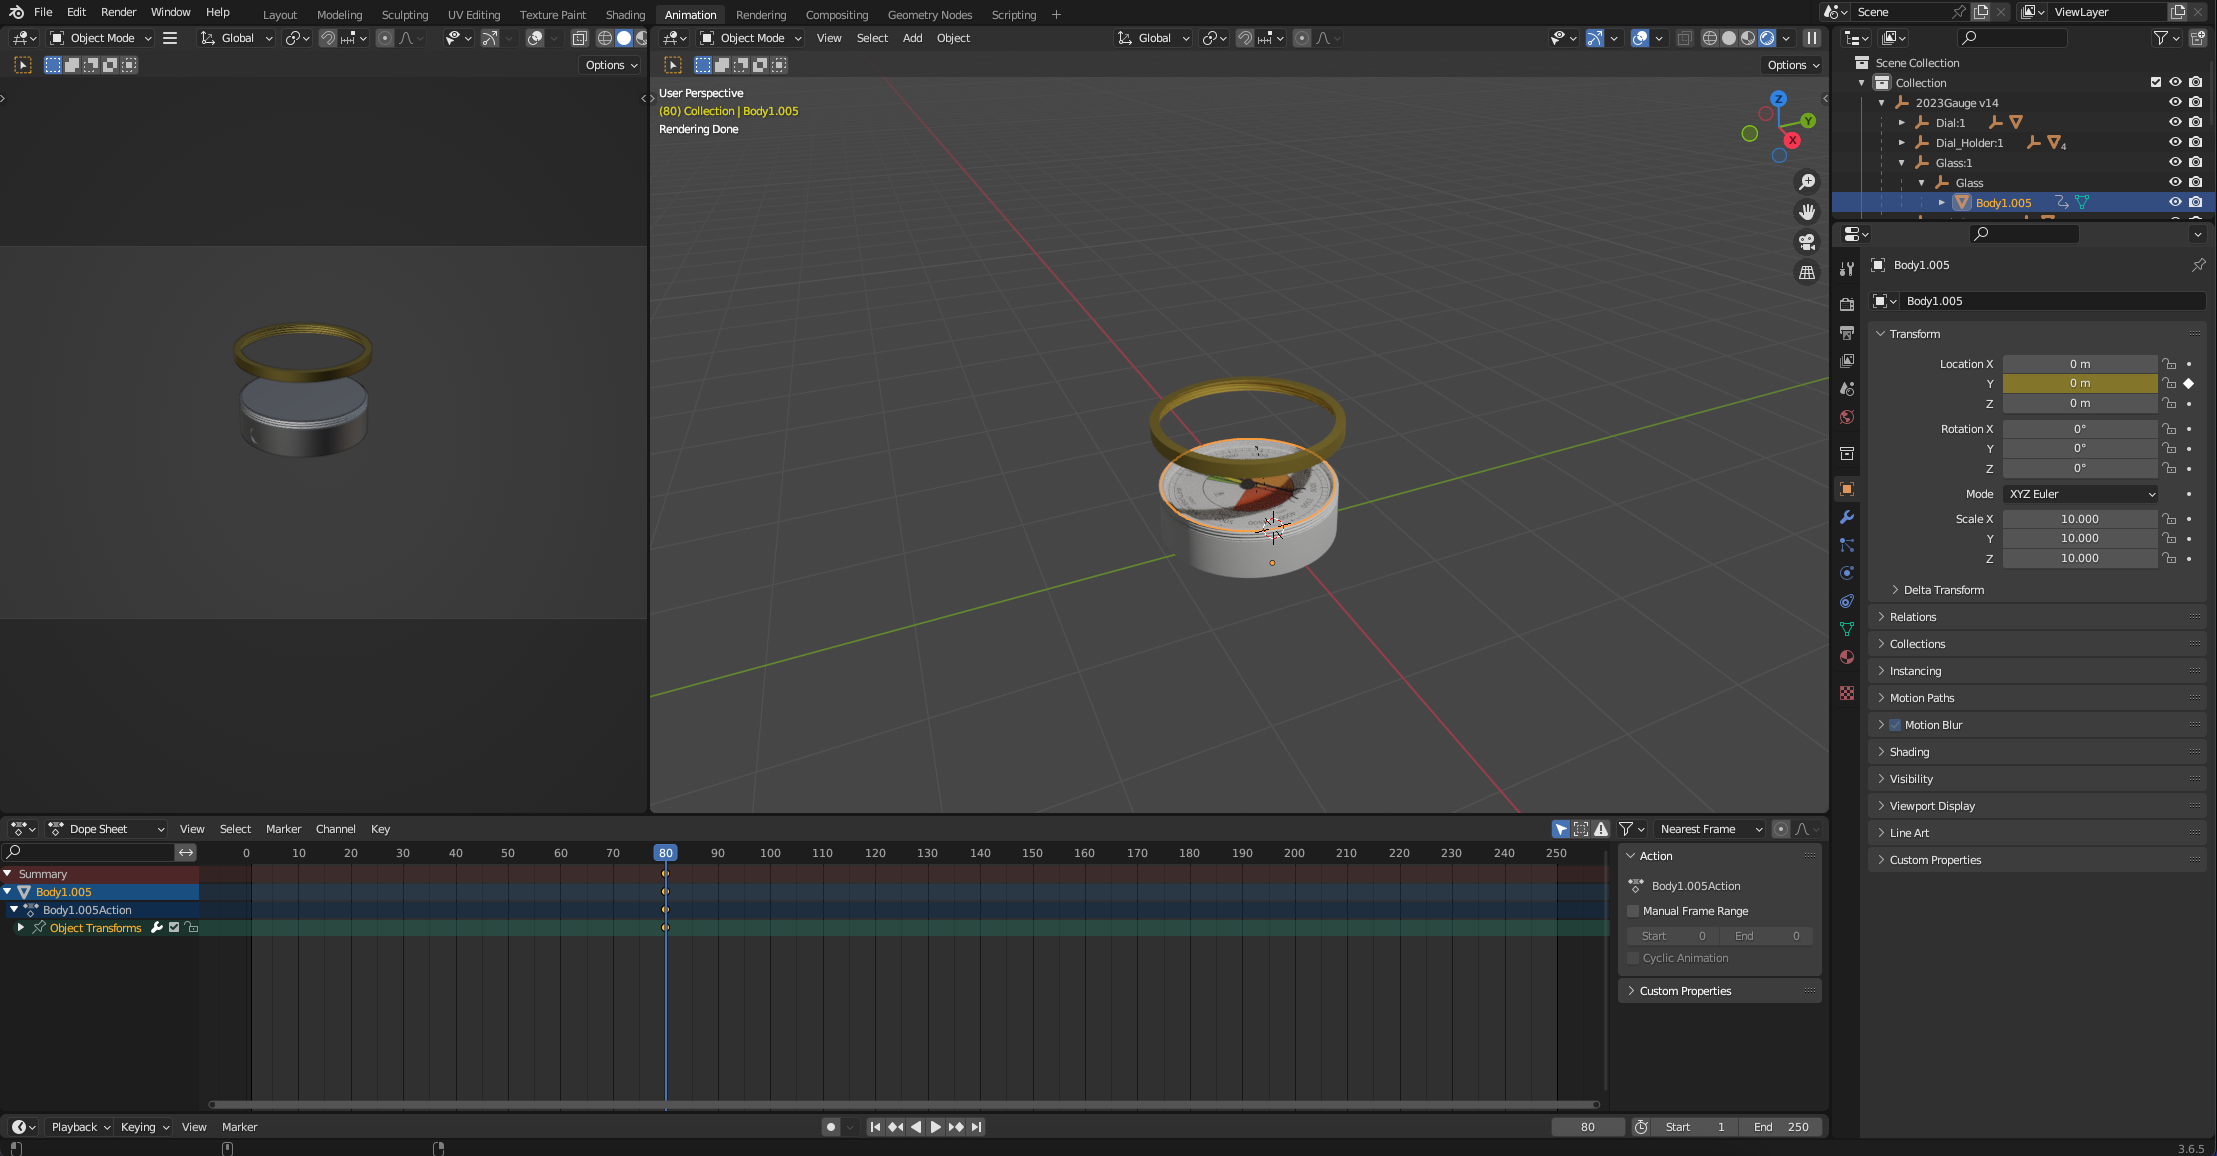
First off - select the Animation mode from the top ribbon.
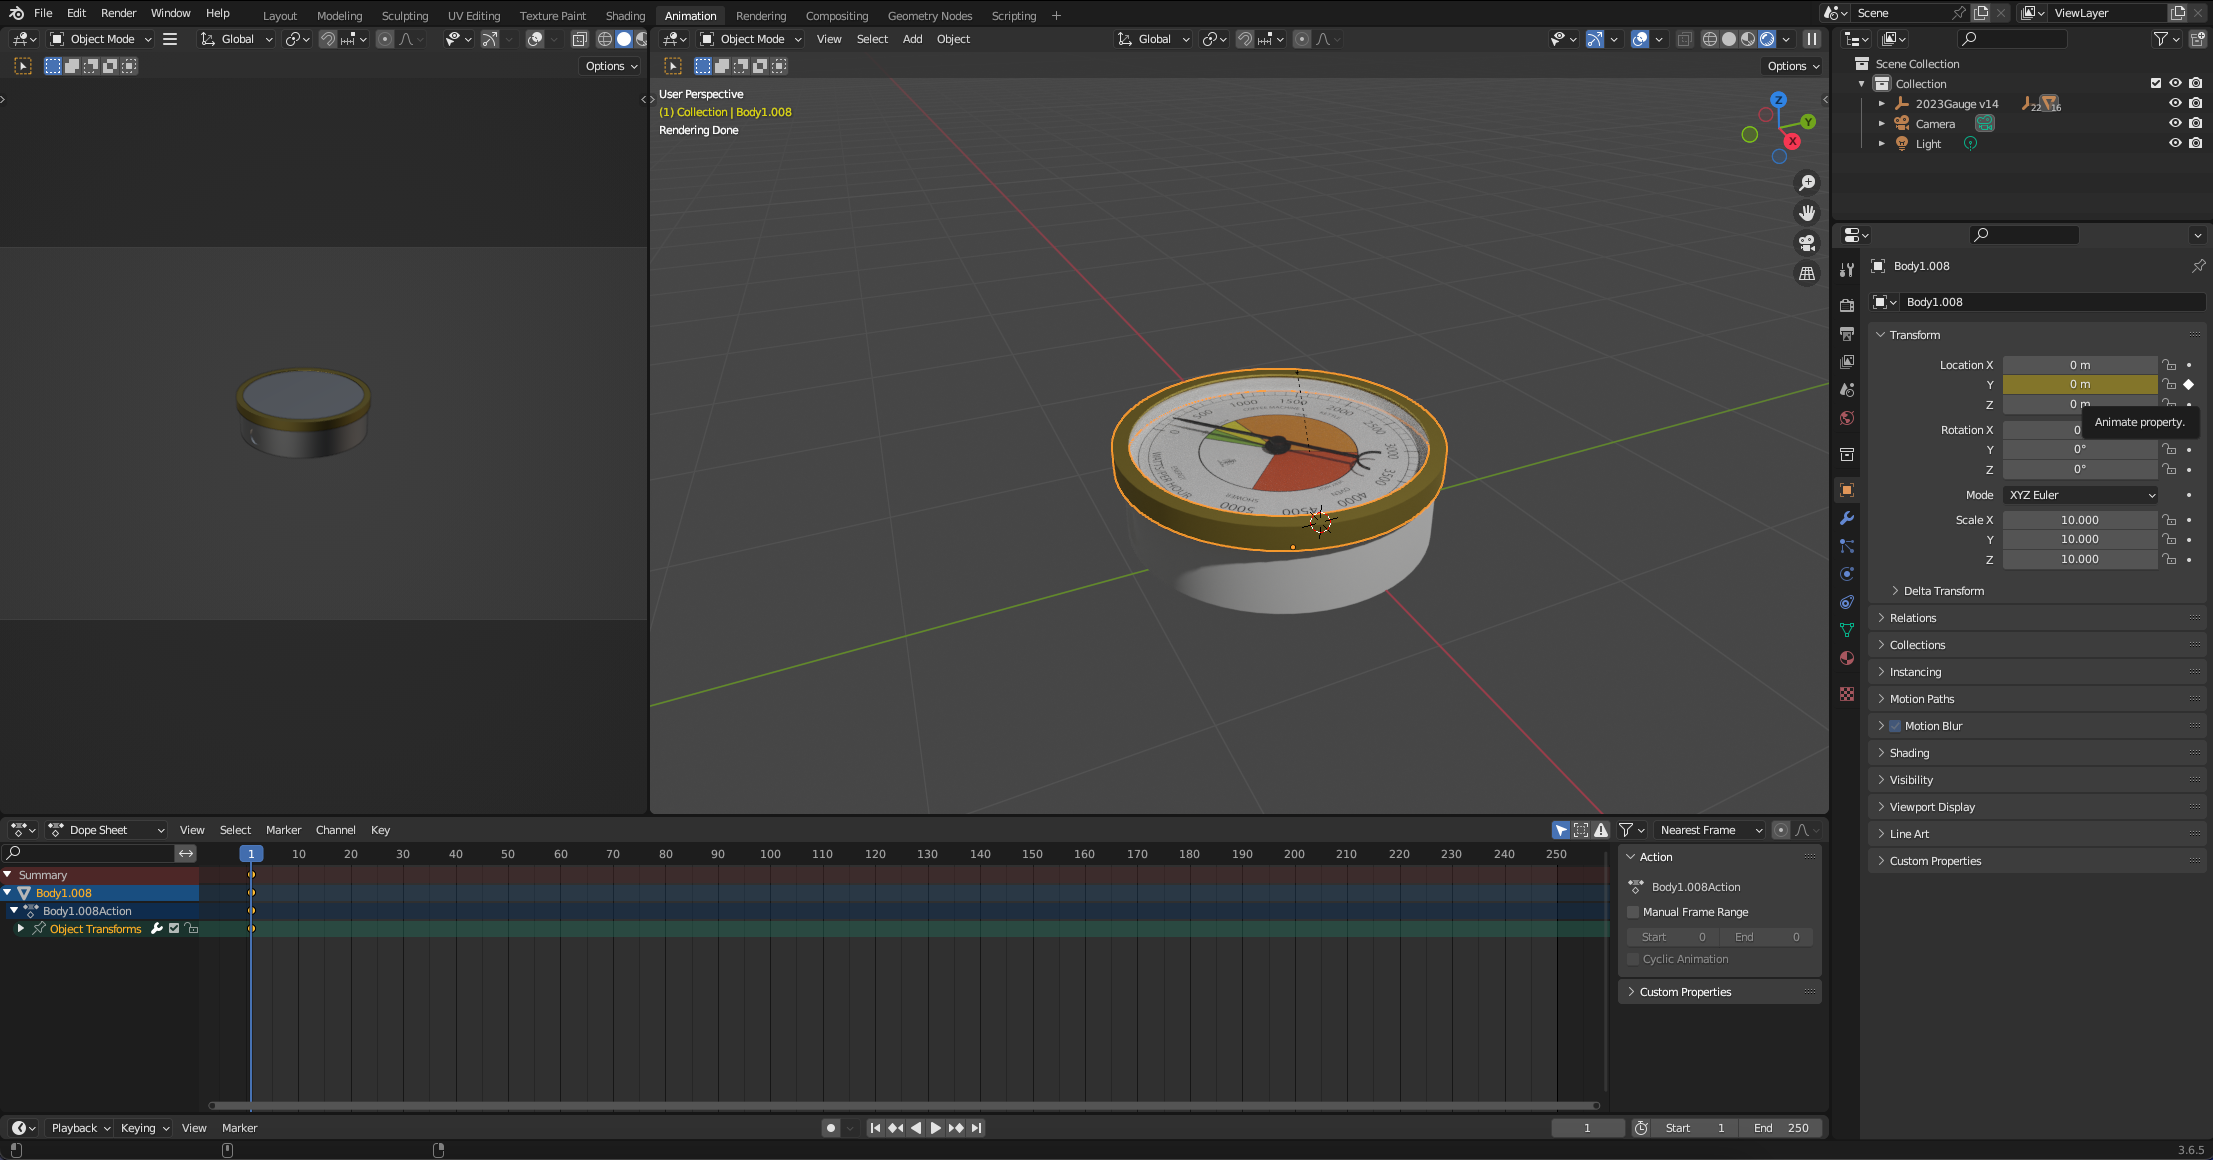
Our first object to move is the Screw Top Lid (or your Top Cover, depending how you have made your gauge). Select it and note the Object Properties box on the side view. This is where you move or transform objects and more importantly set the key frame. We want our starting point to be at Frame 0 (its preset) and we will be moving on the y axis (upwards).
Tick the small white dot next to the Y axis. This inserts a key frame. We use this when ever we move an object.
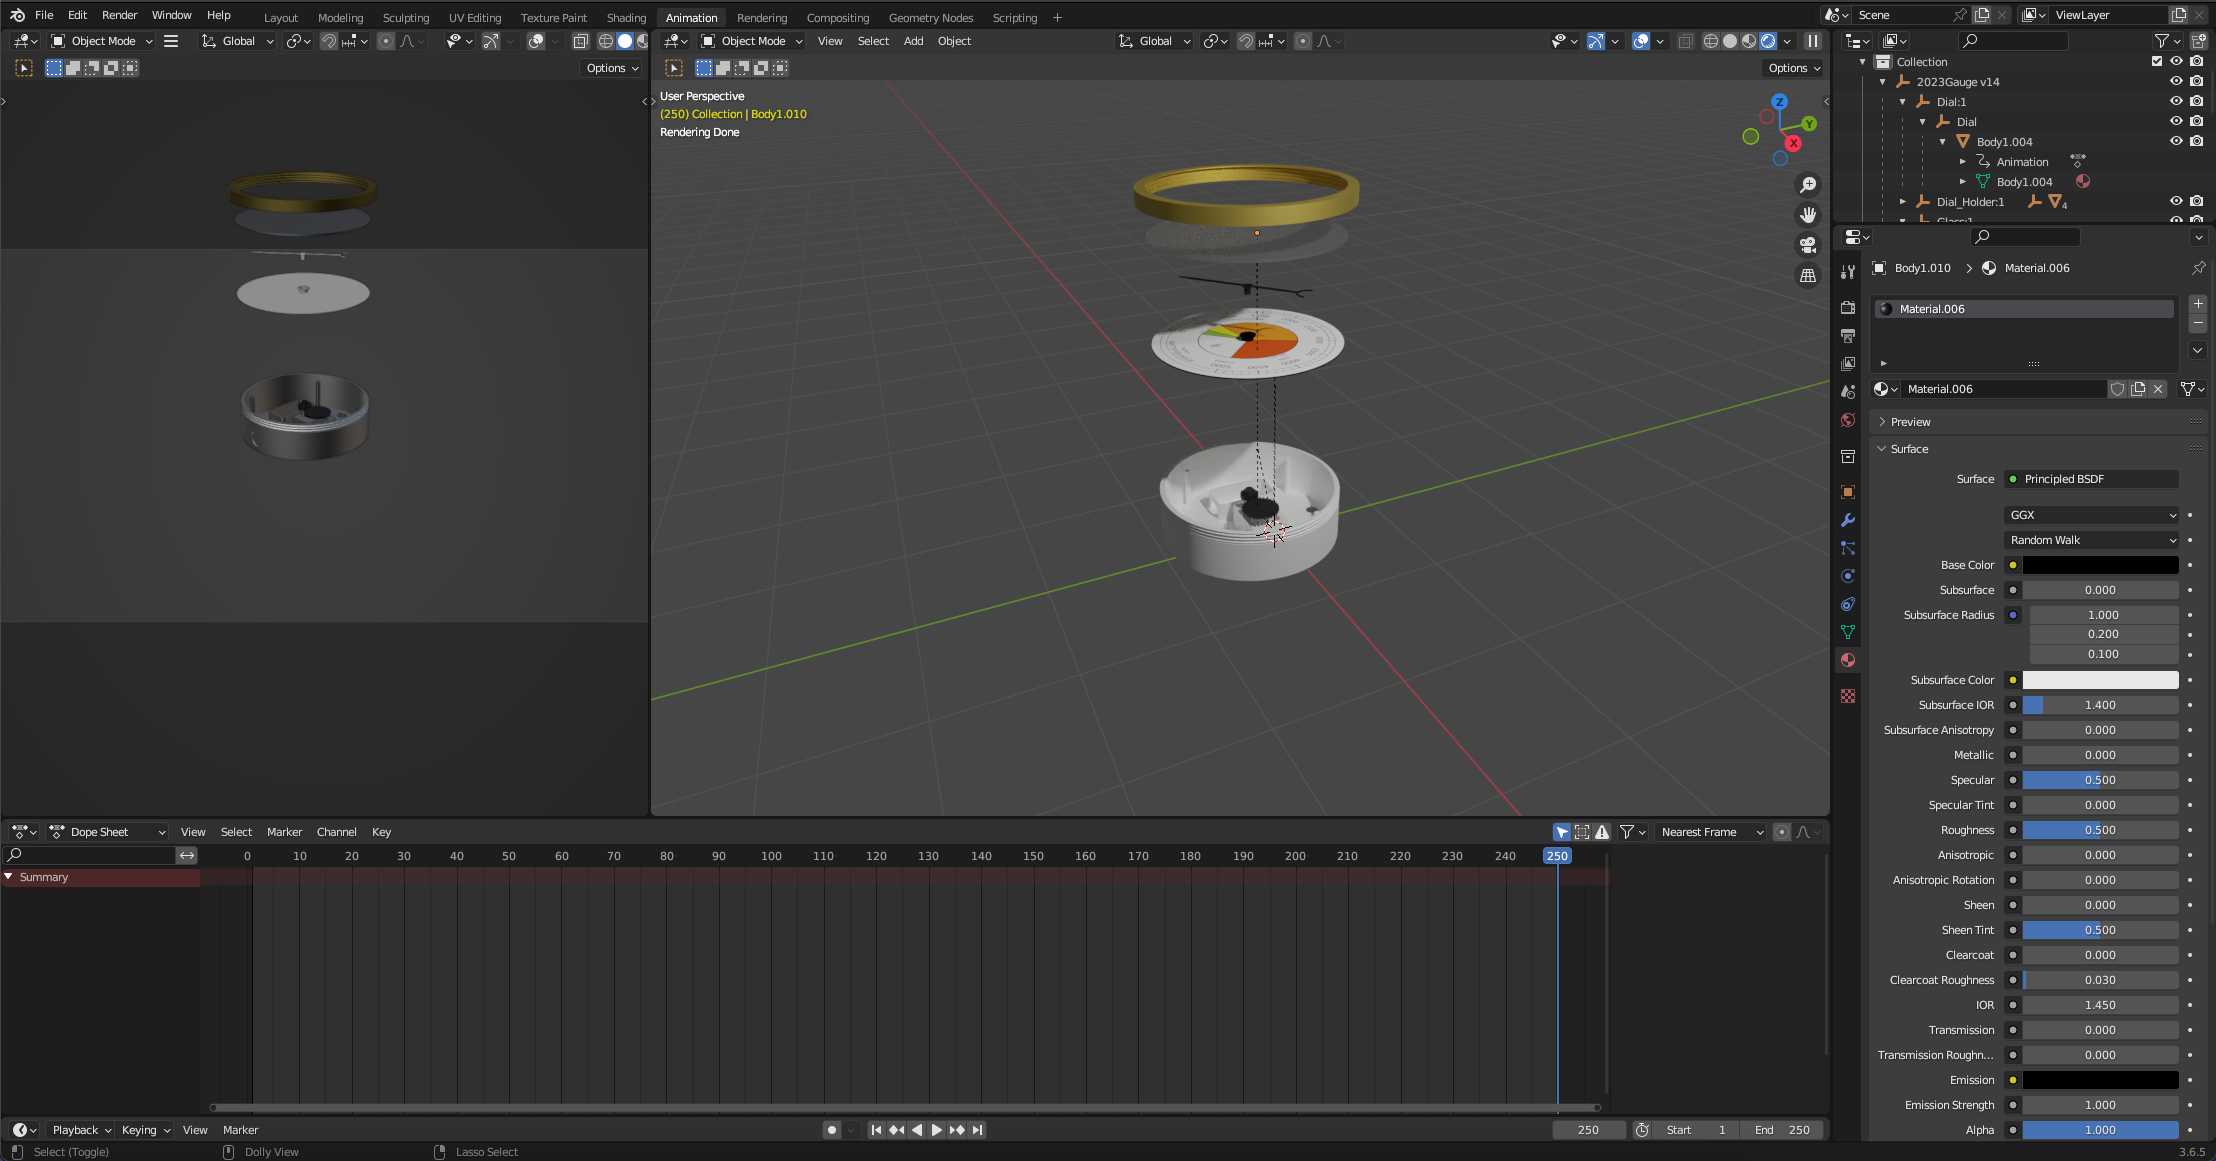
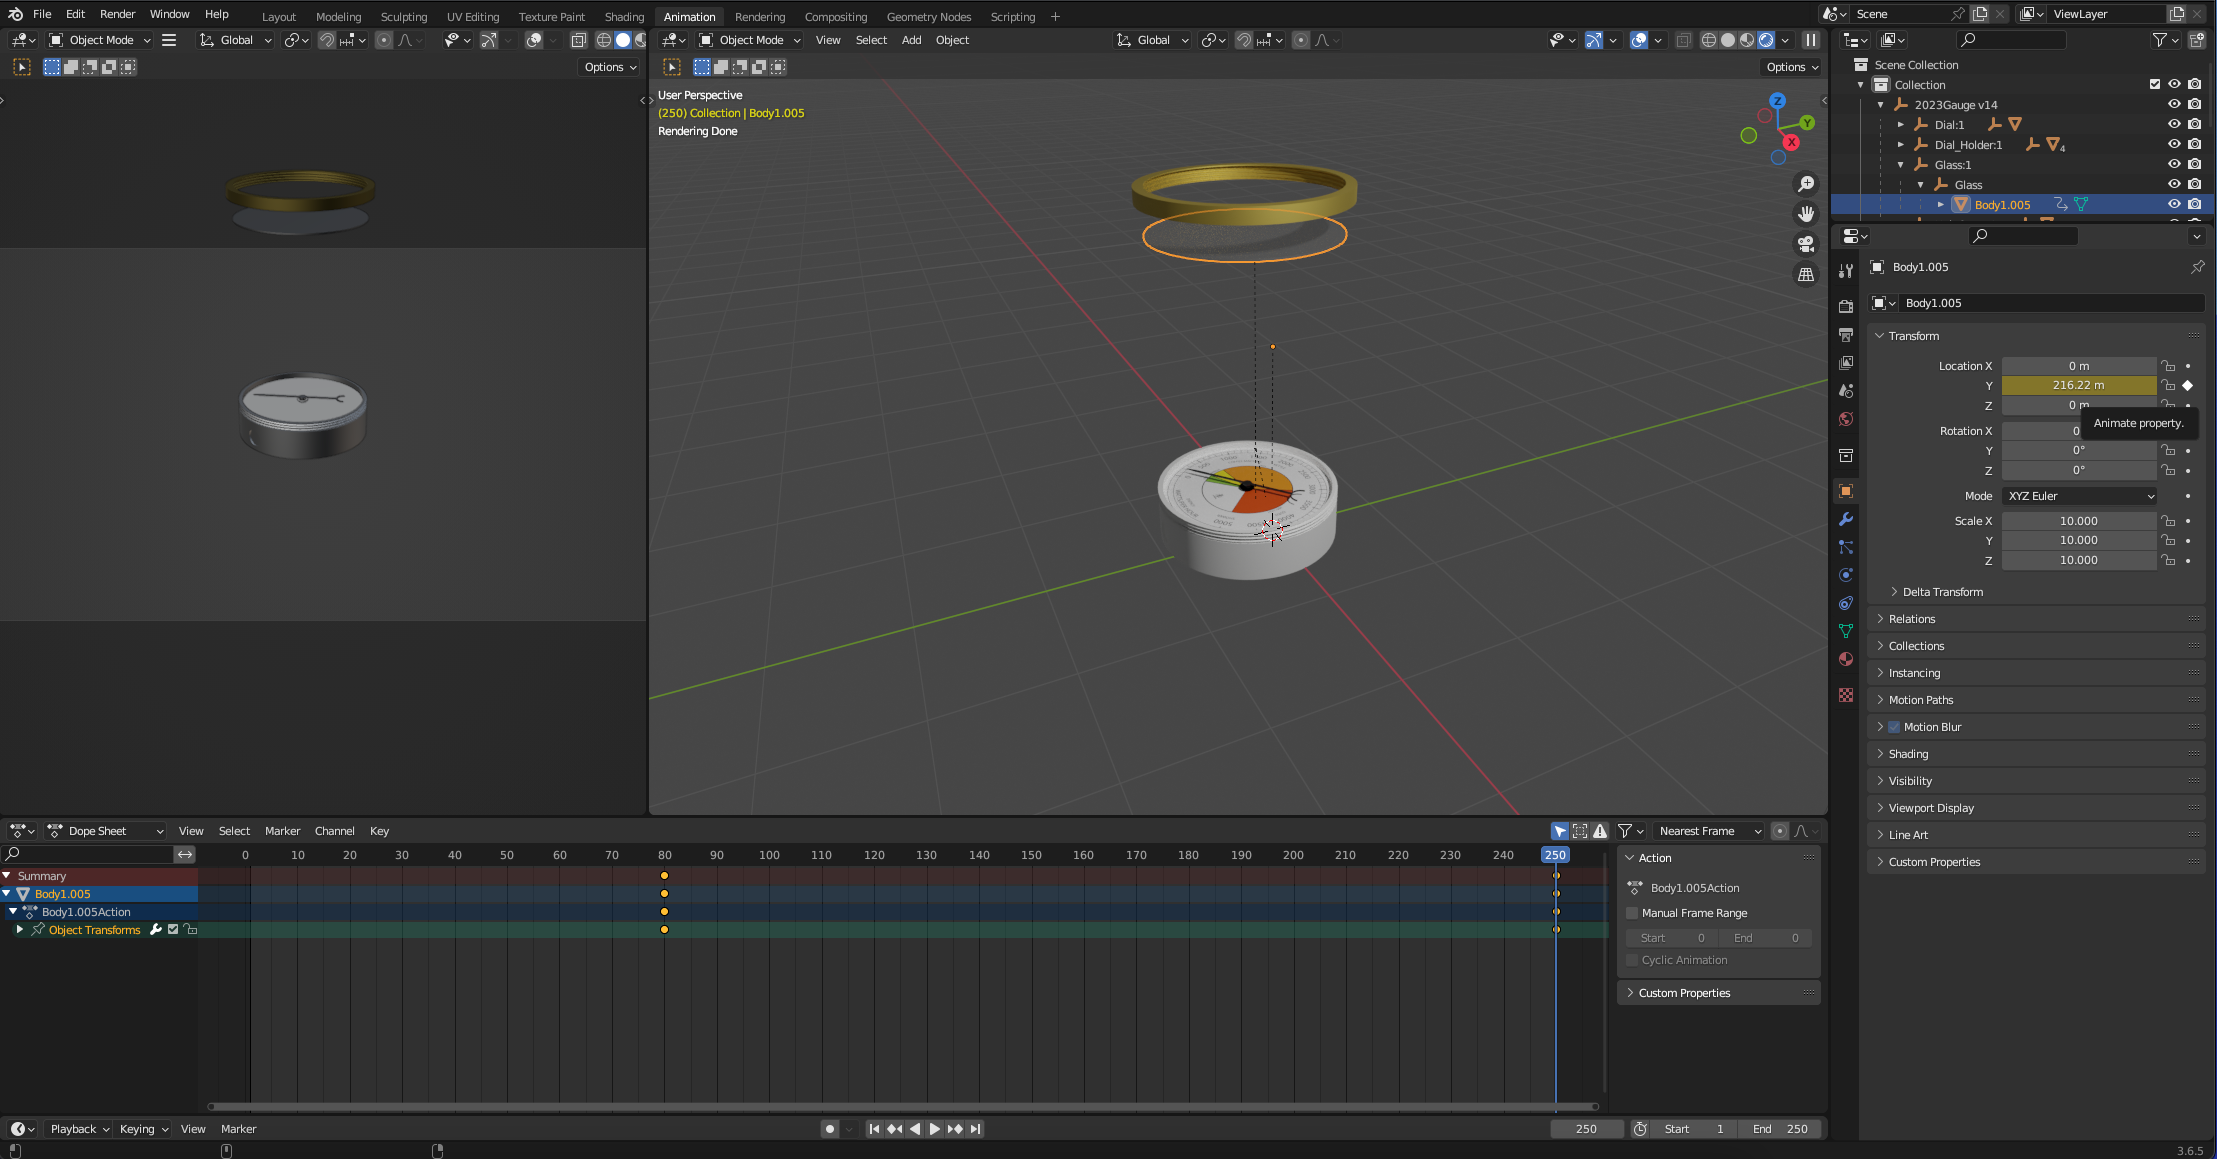
Move the timeline to 250 (the end time of the animation) and change the Y figure so it is floating above the gauge. Once its in place - add in a key frame by again ticking the dot next to the y axis. Note you can click and slide to move the axis.
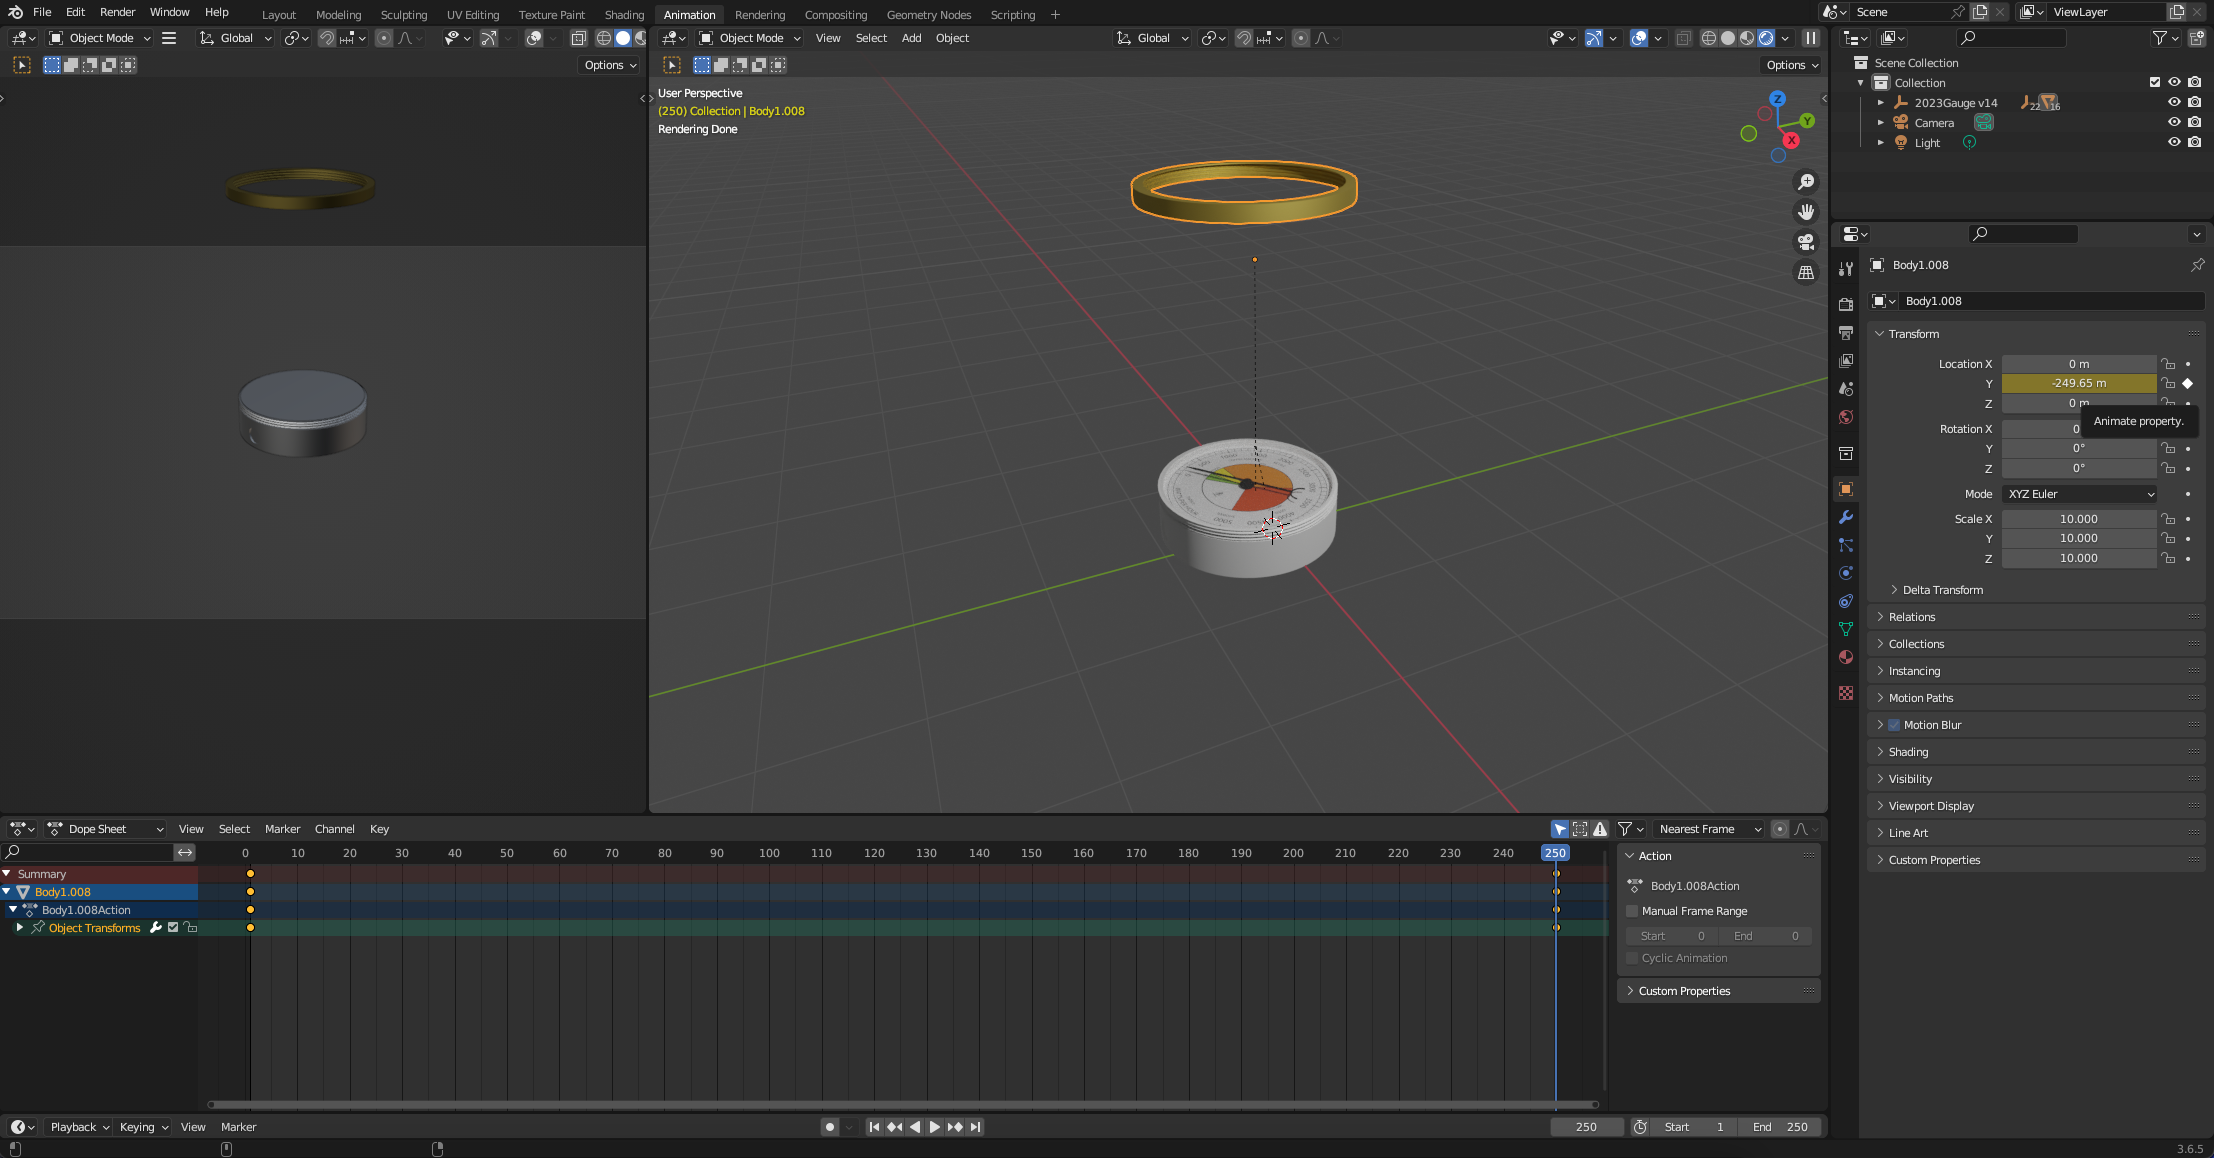
We want to stagger the other objects so they follow in the animation, as such they will each start slightly later in the timeline.
Lets move the Glass next - Select the Glass and move the time line to 80. Set a keyframe, you can see that this sets a base to move from once the outer frame is already above.
As before, go to the end of the timeline, move the object up and select the keyframe.
Repeat with the Pointer/Needle, Dial - again stagger the timeline for the start and press play (space bar) at anytime to check the animation.
Save your model...
Final Quirks - Fixing the Centre for Rotation of the Pointer
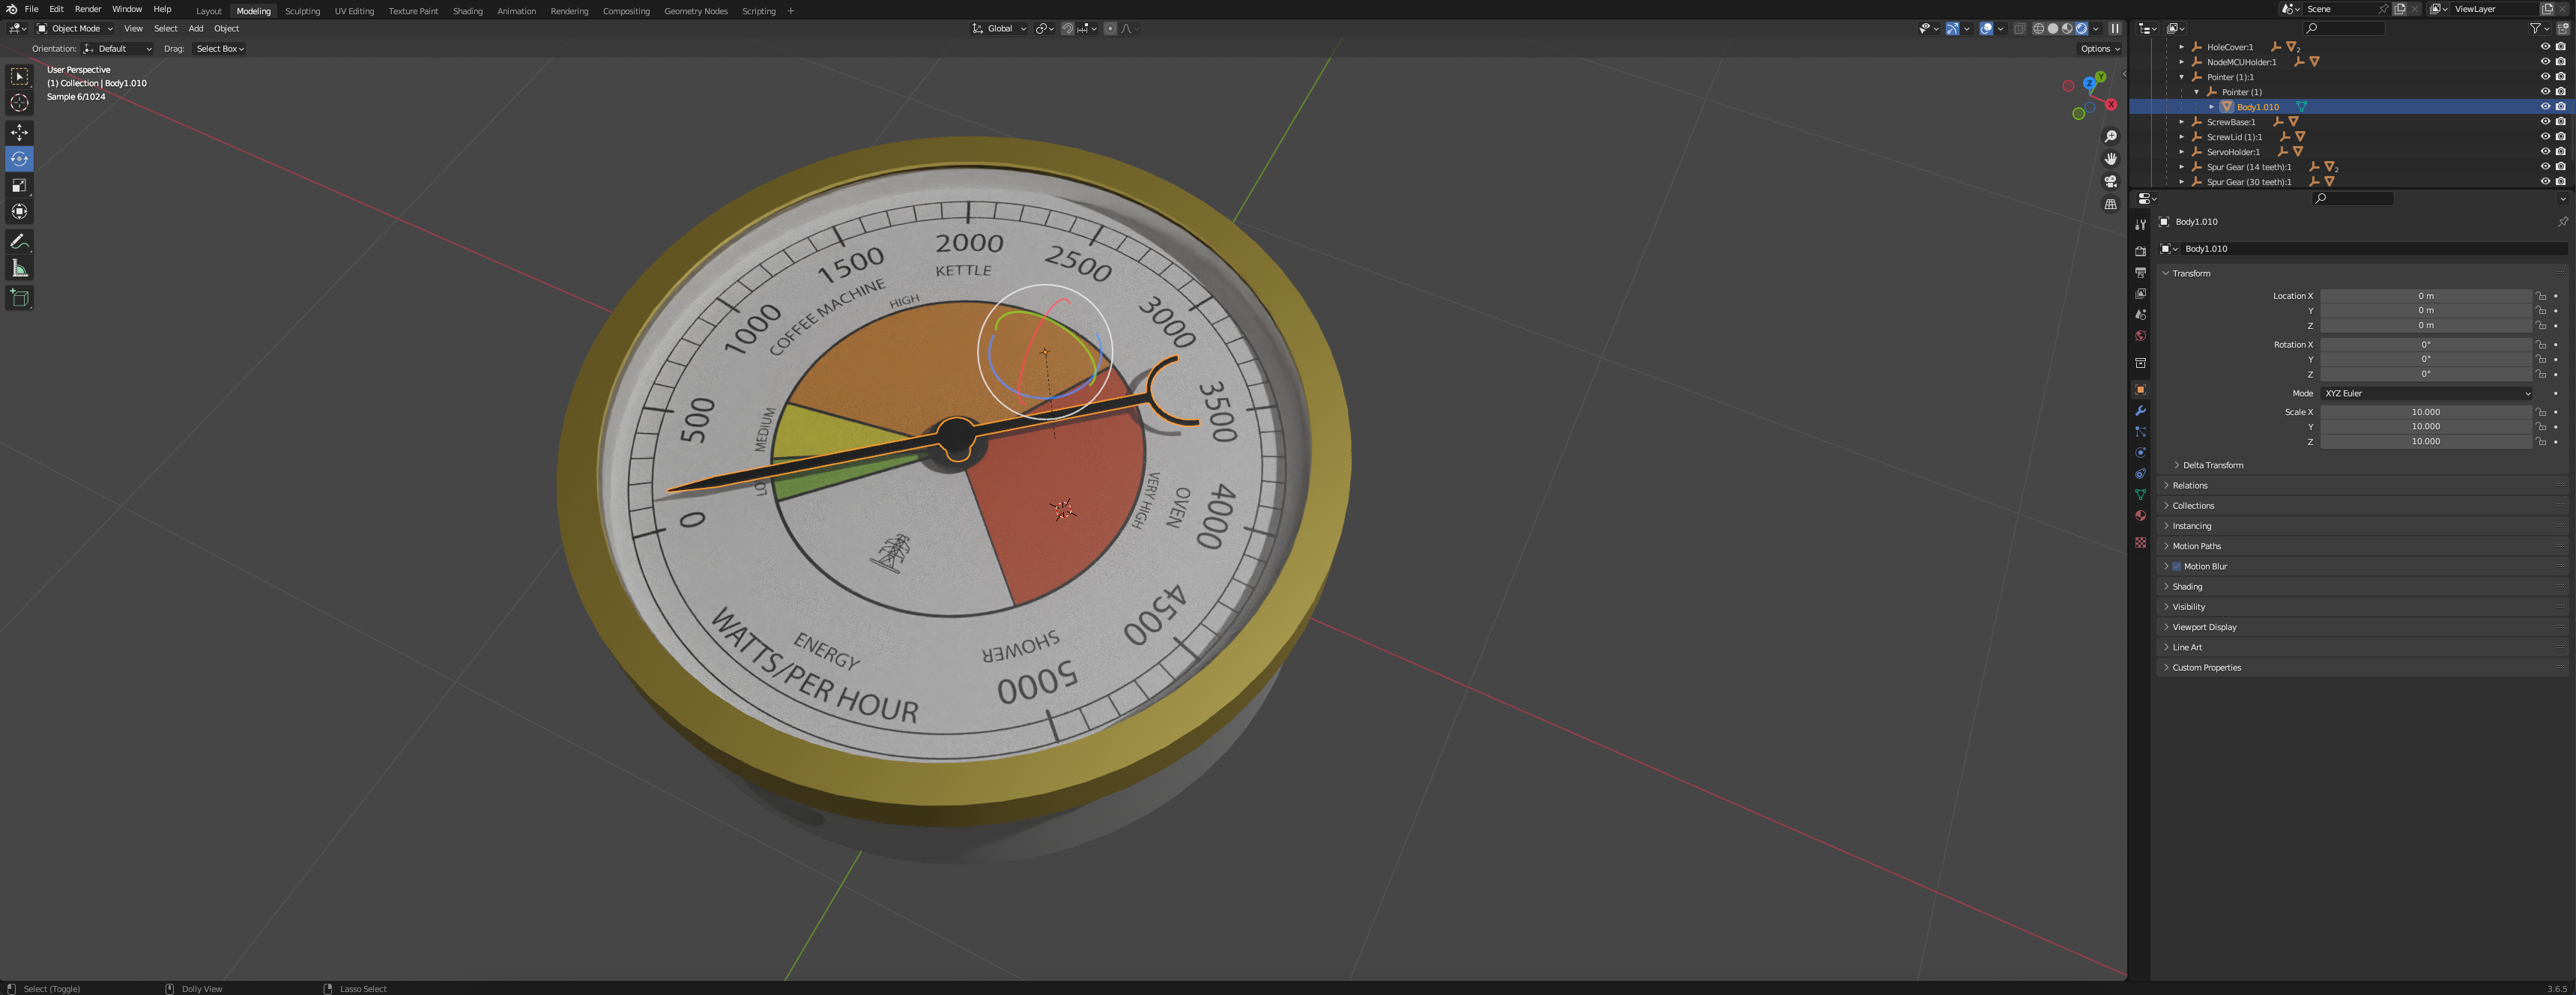
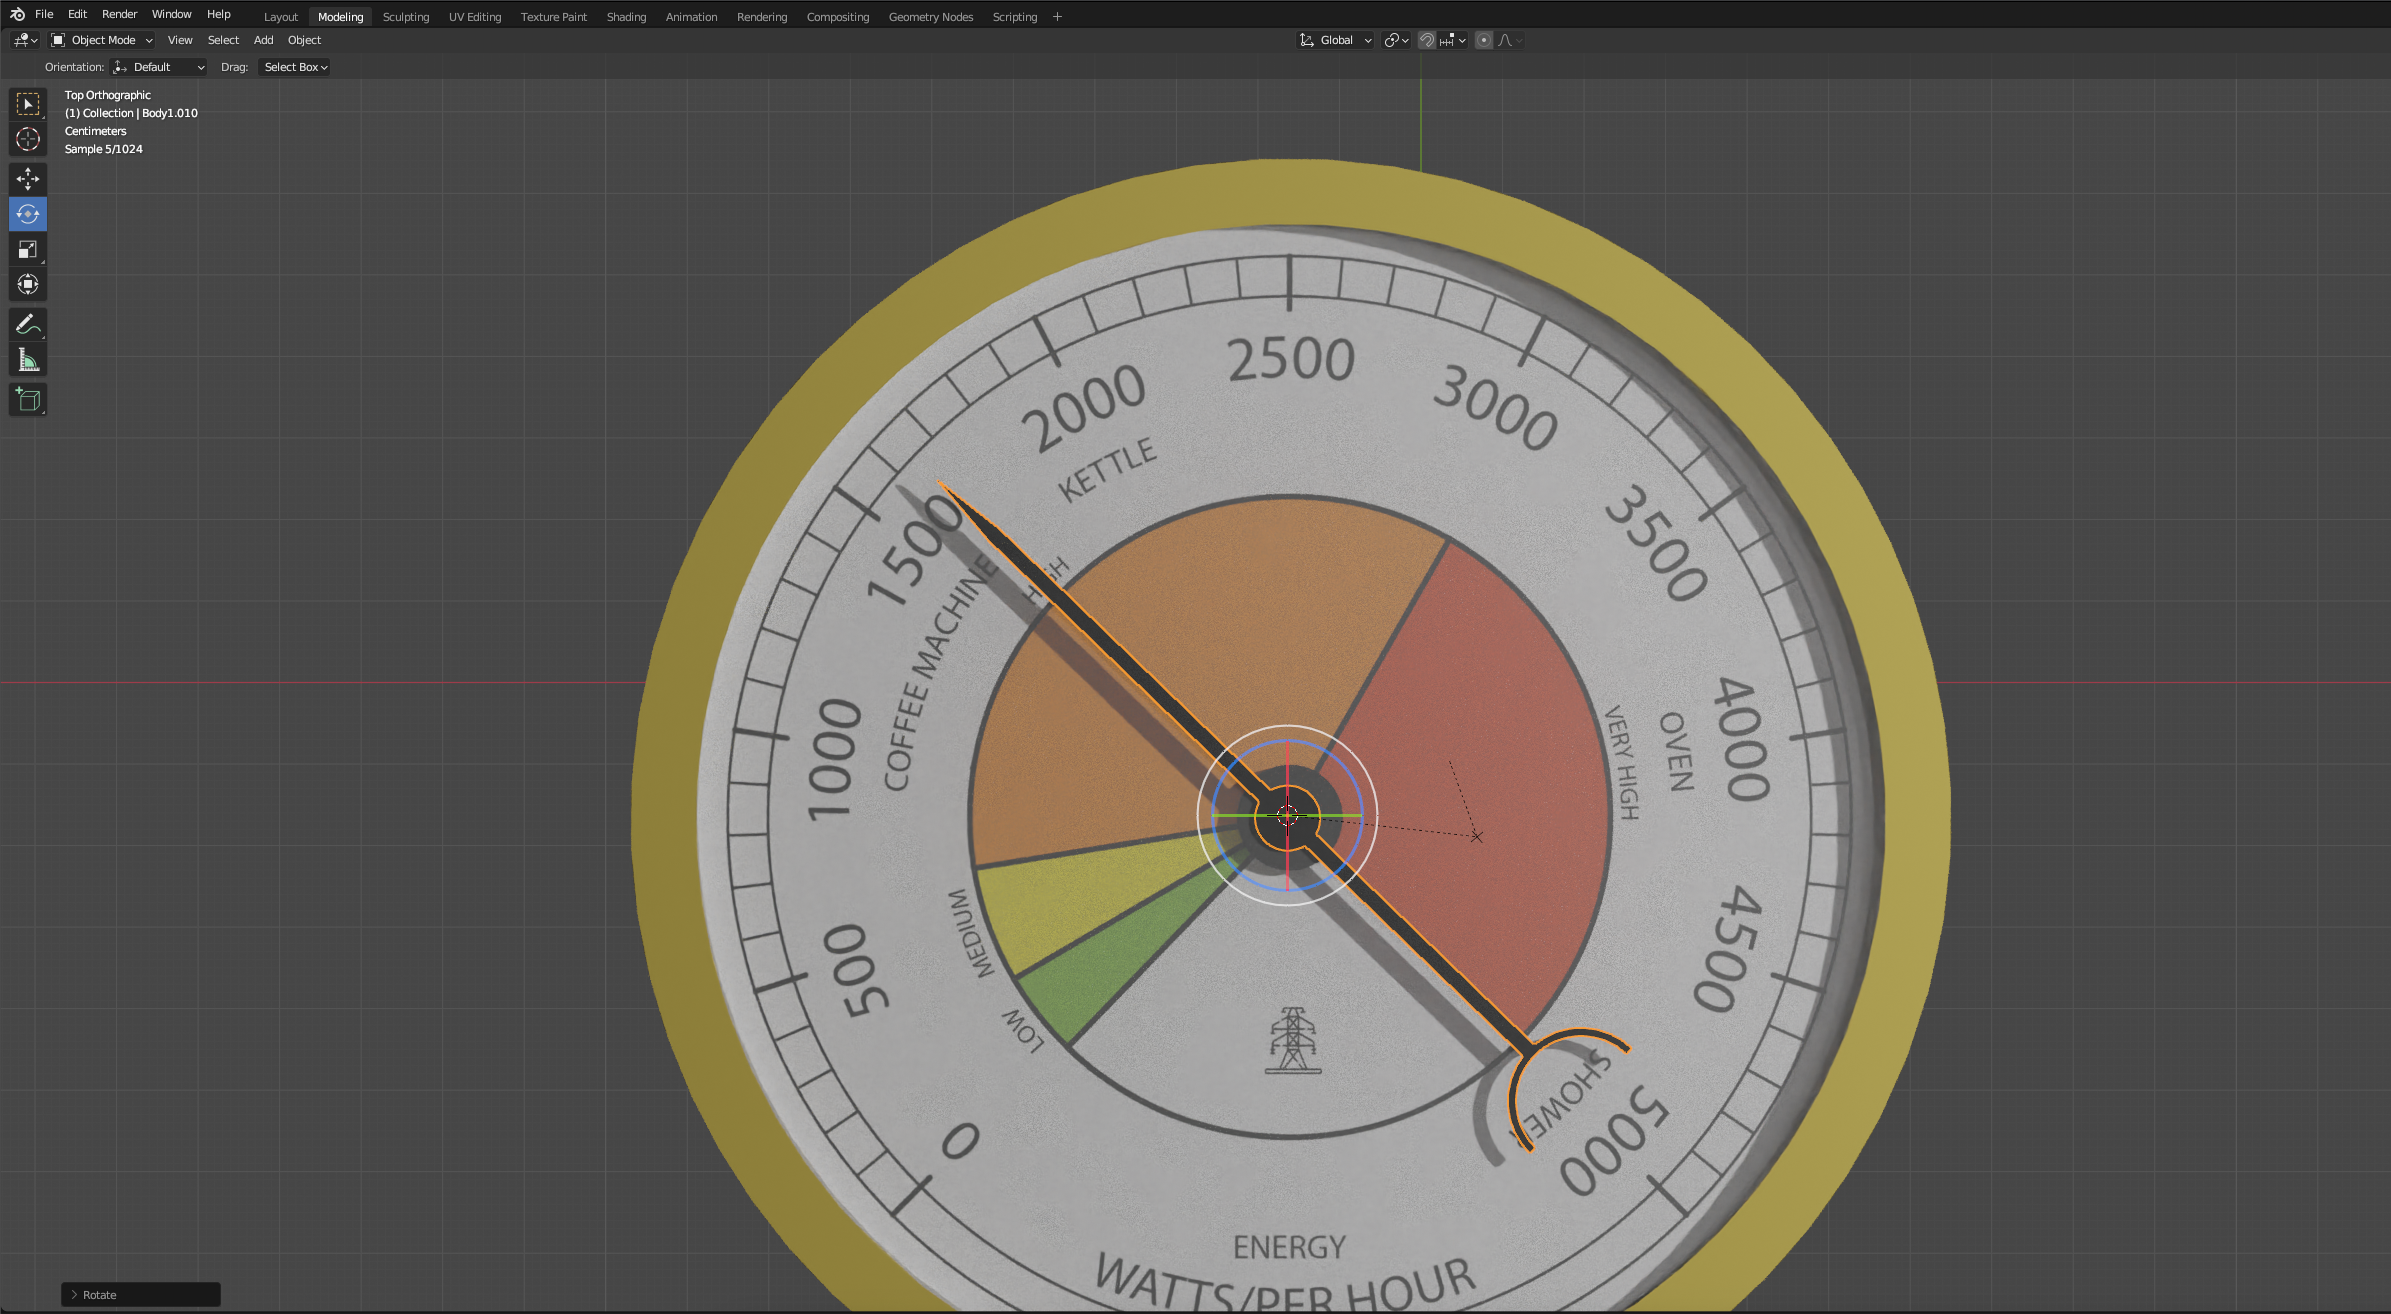
Go to Modelling viewport and be sure to be in Object Mode and select the pointer - if you select rotate you will see that the centre axis is off to the right. This is another quirk of Fusion - although its aligned in Fusion. In Unity we will be using the pointer to show realtime data so we need it to rotate on its central axis.
Thankfull this is easy to fix in Blender and its a useful skill to know.
Enter the Top View, by clicking on the Z Axis and then select the Round Red Cursor option on the left-side bar. This is the 3D cursor and it allows us to align an axis to any position.
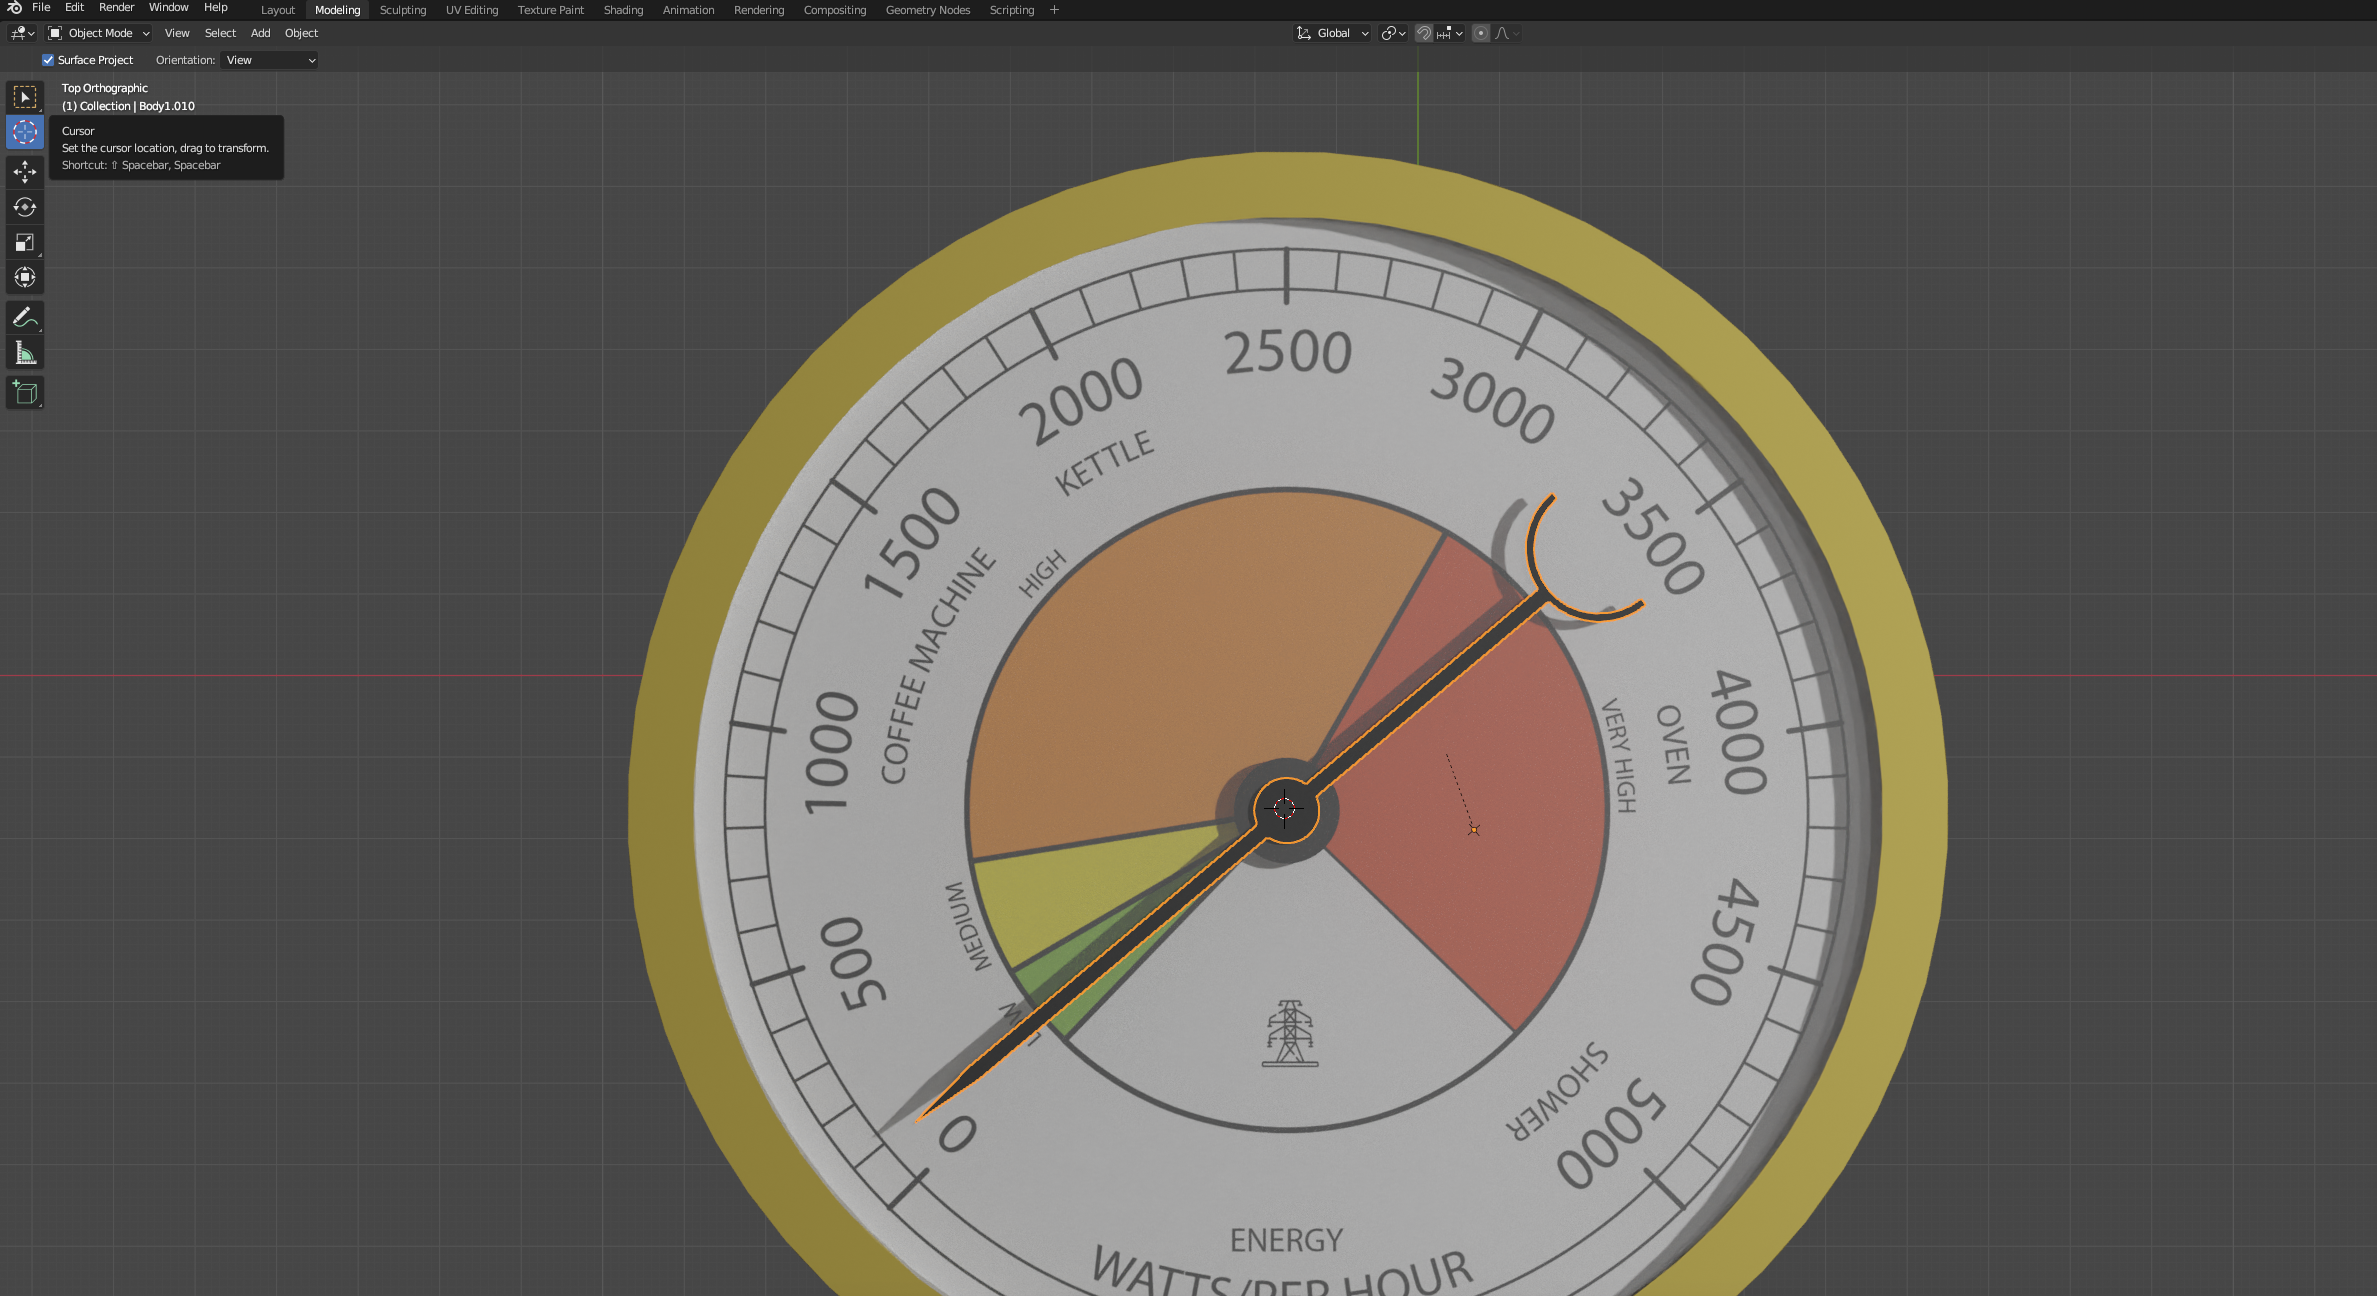
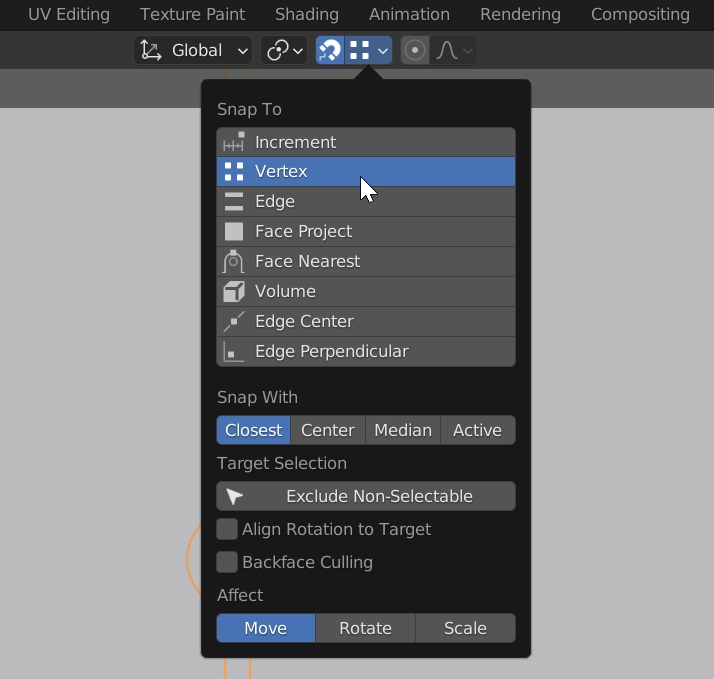
Once selected, click the small magnet icon on the top-centre bar (to activate the Snap Tool), and just to its right, select Vertex from the dropdown menu (instead of Increment). While pressing and holding the Left mouse button, you'll see the red cursor moving around and snapping to the closest vertex. Place it on the central vertex of the pointer.
With our Pointer selected, if not, remember to change the tool from the left-side bar from Red Cursor to Select (make you you select the Body) we can now Right Click and Select Set Origin -> Origin to 3D Cursor.
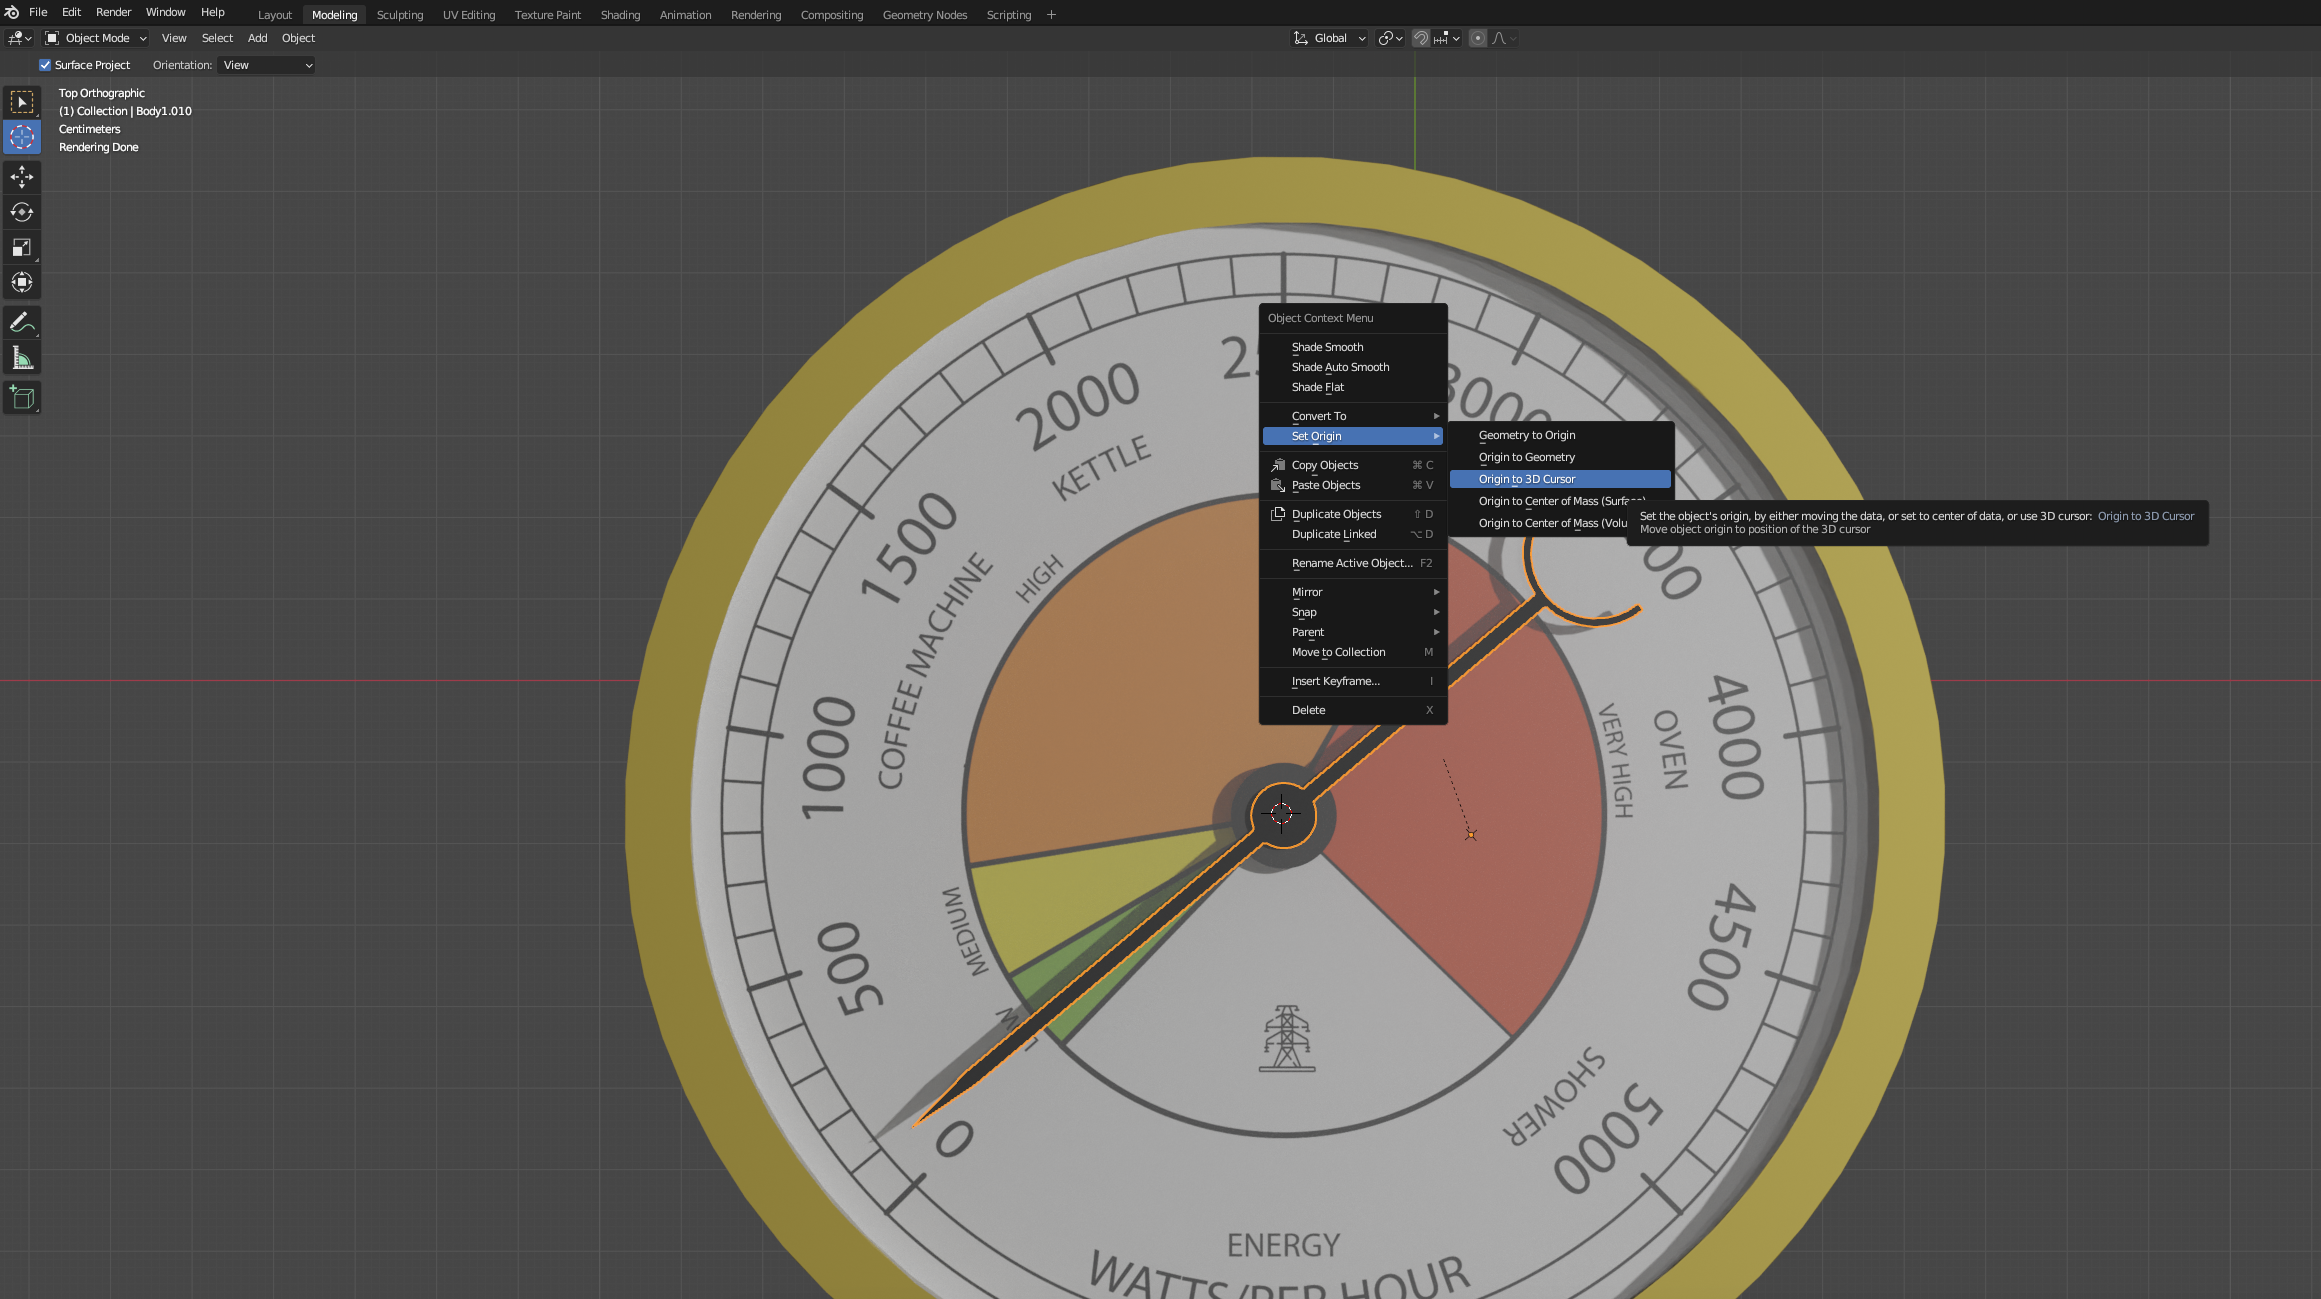
Your pointer can now rotate around the centre axis.
You could go back and edit your animation, so the pointer rotates... or you could skip direct to exporting..
Exporting
Blender exports to a variety of formats, making it a useful place to hold your models.
We are going to export in the fbx format for import into Unity (this also works for Sketchfab).
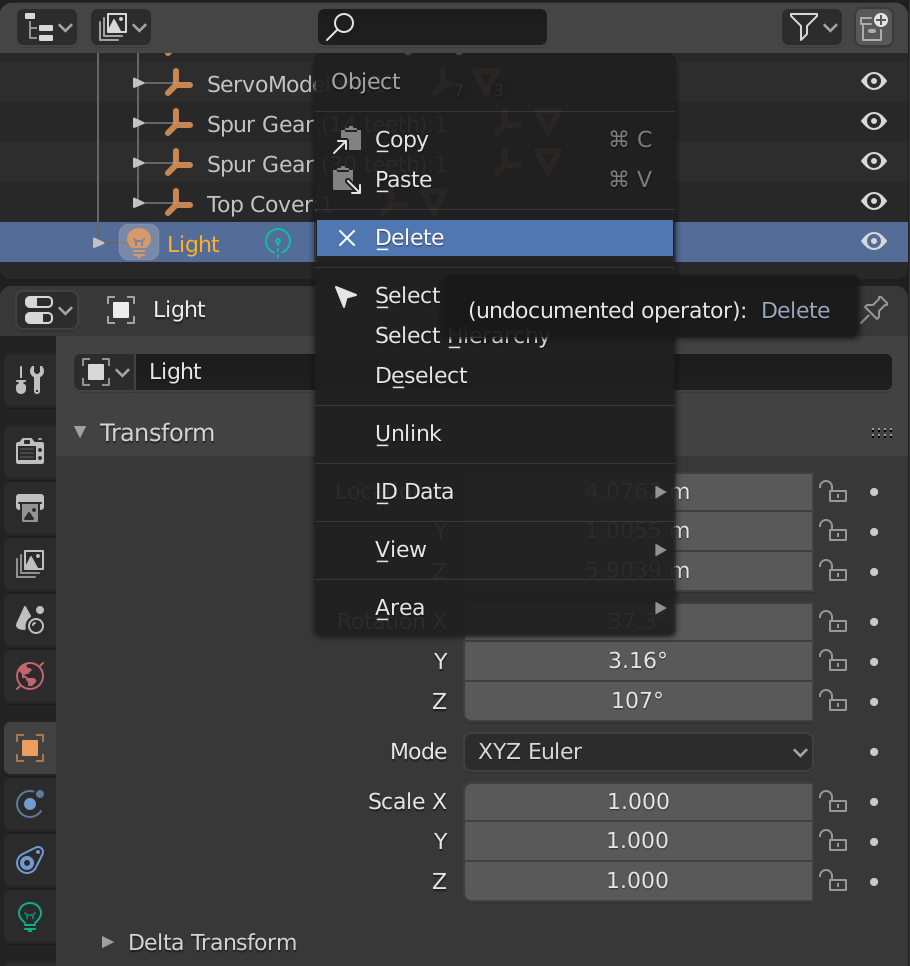
The format exports the entire hierarchy - Unity and many other software packages provide their own Lighting and Camera, so we need to delete them before export.
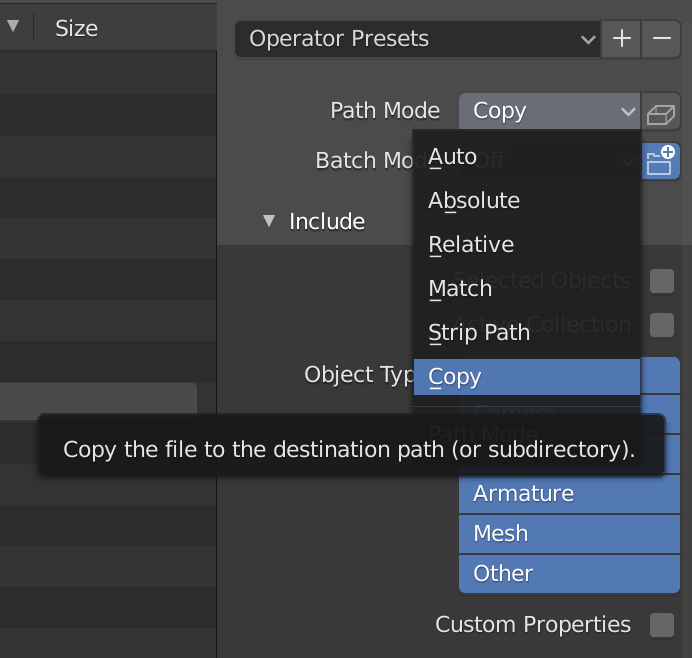
Go to File -> Export -> FBX There are two final settings to change -
Firstly - change the path mode to Copy, this will copy the textures (although some editing will still be required), and click the little empty box just next to it, it will show two little sheets in it, it means that the textures will be copied and embedded in the FBX file.
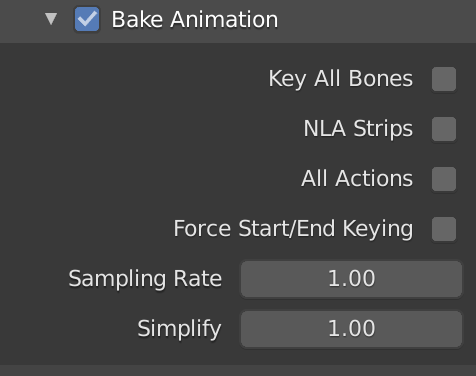
In the export dialog box scroll down to Animation and untick the four options.
You now have a model ready to import into Unity, Sketchfab or any other 3D modelling software.
Stretch Goal
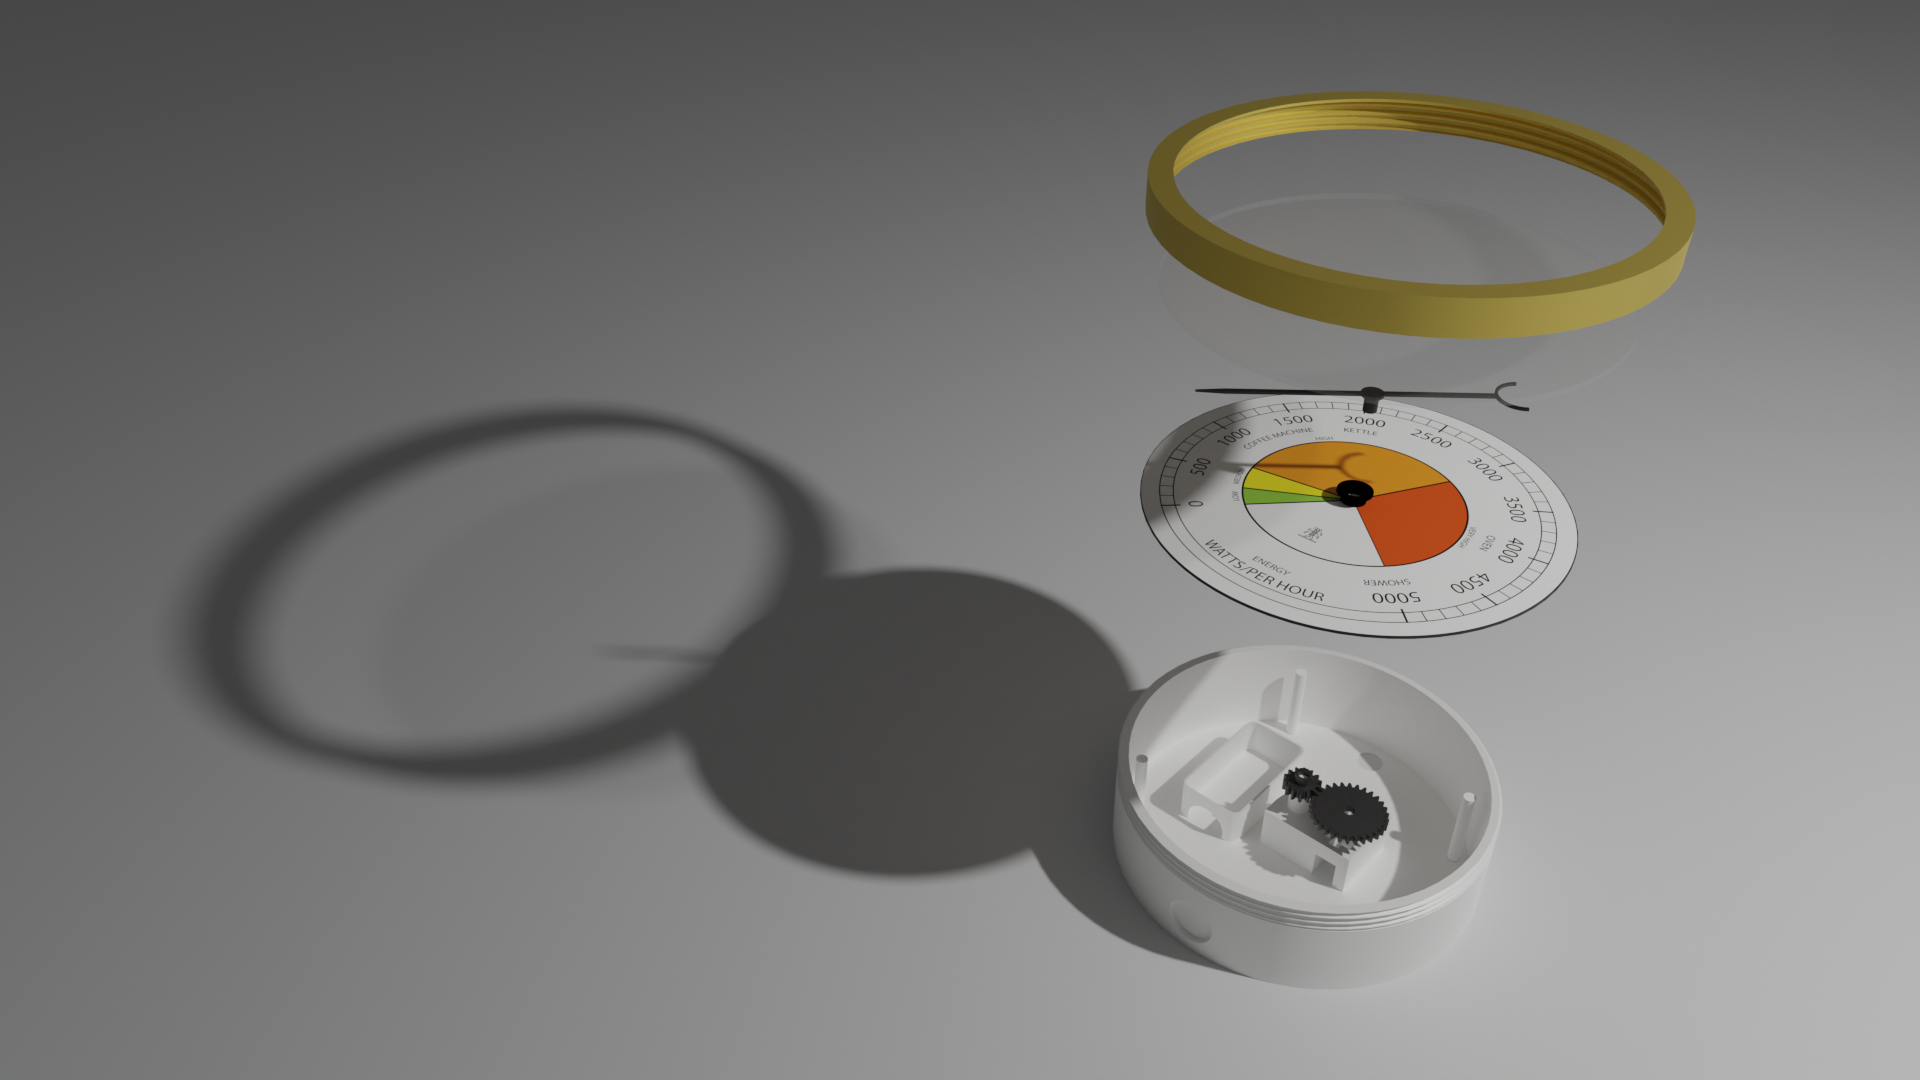
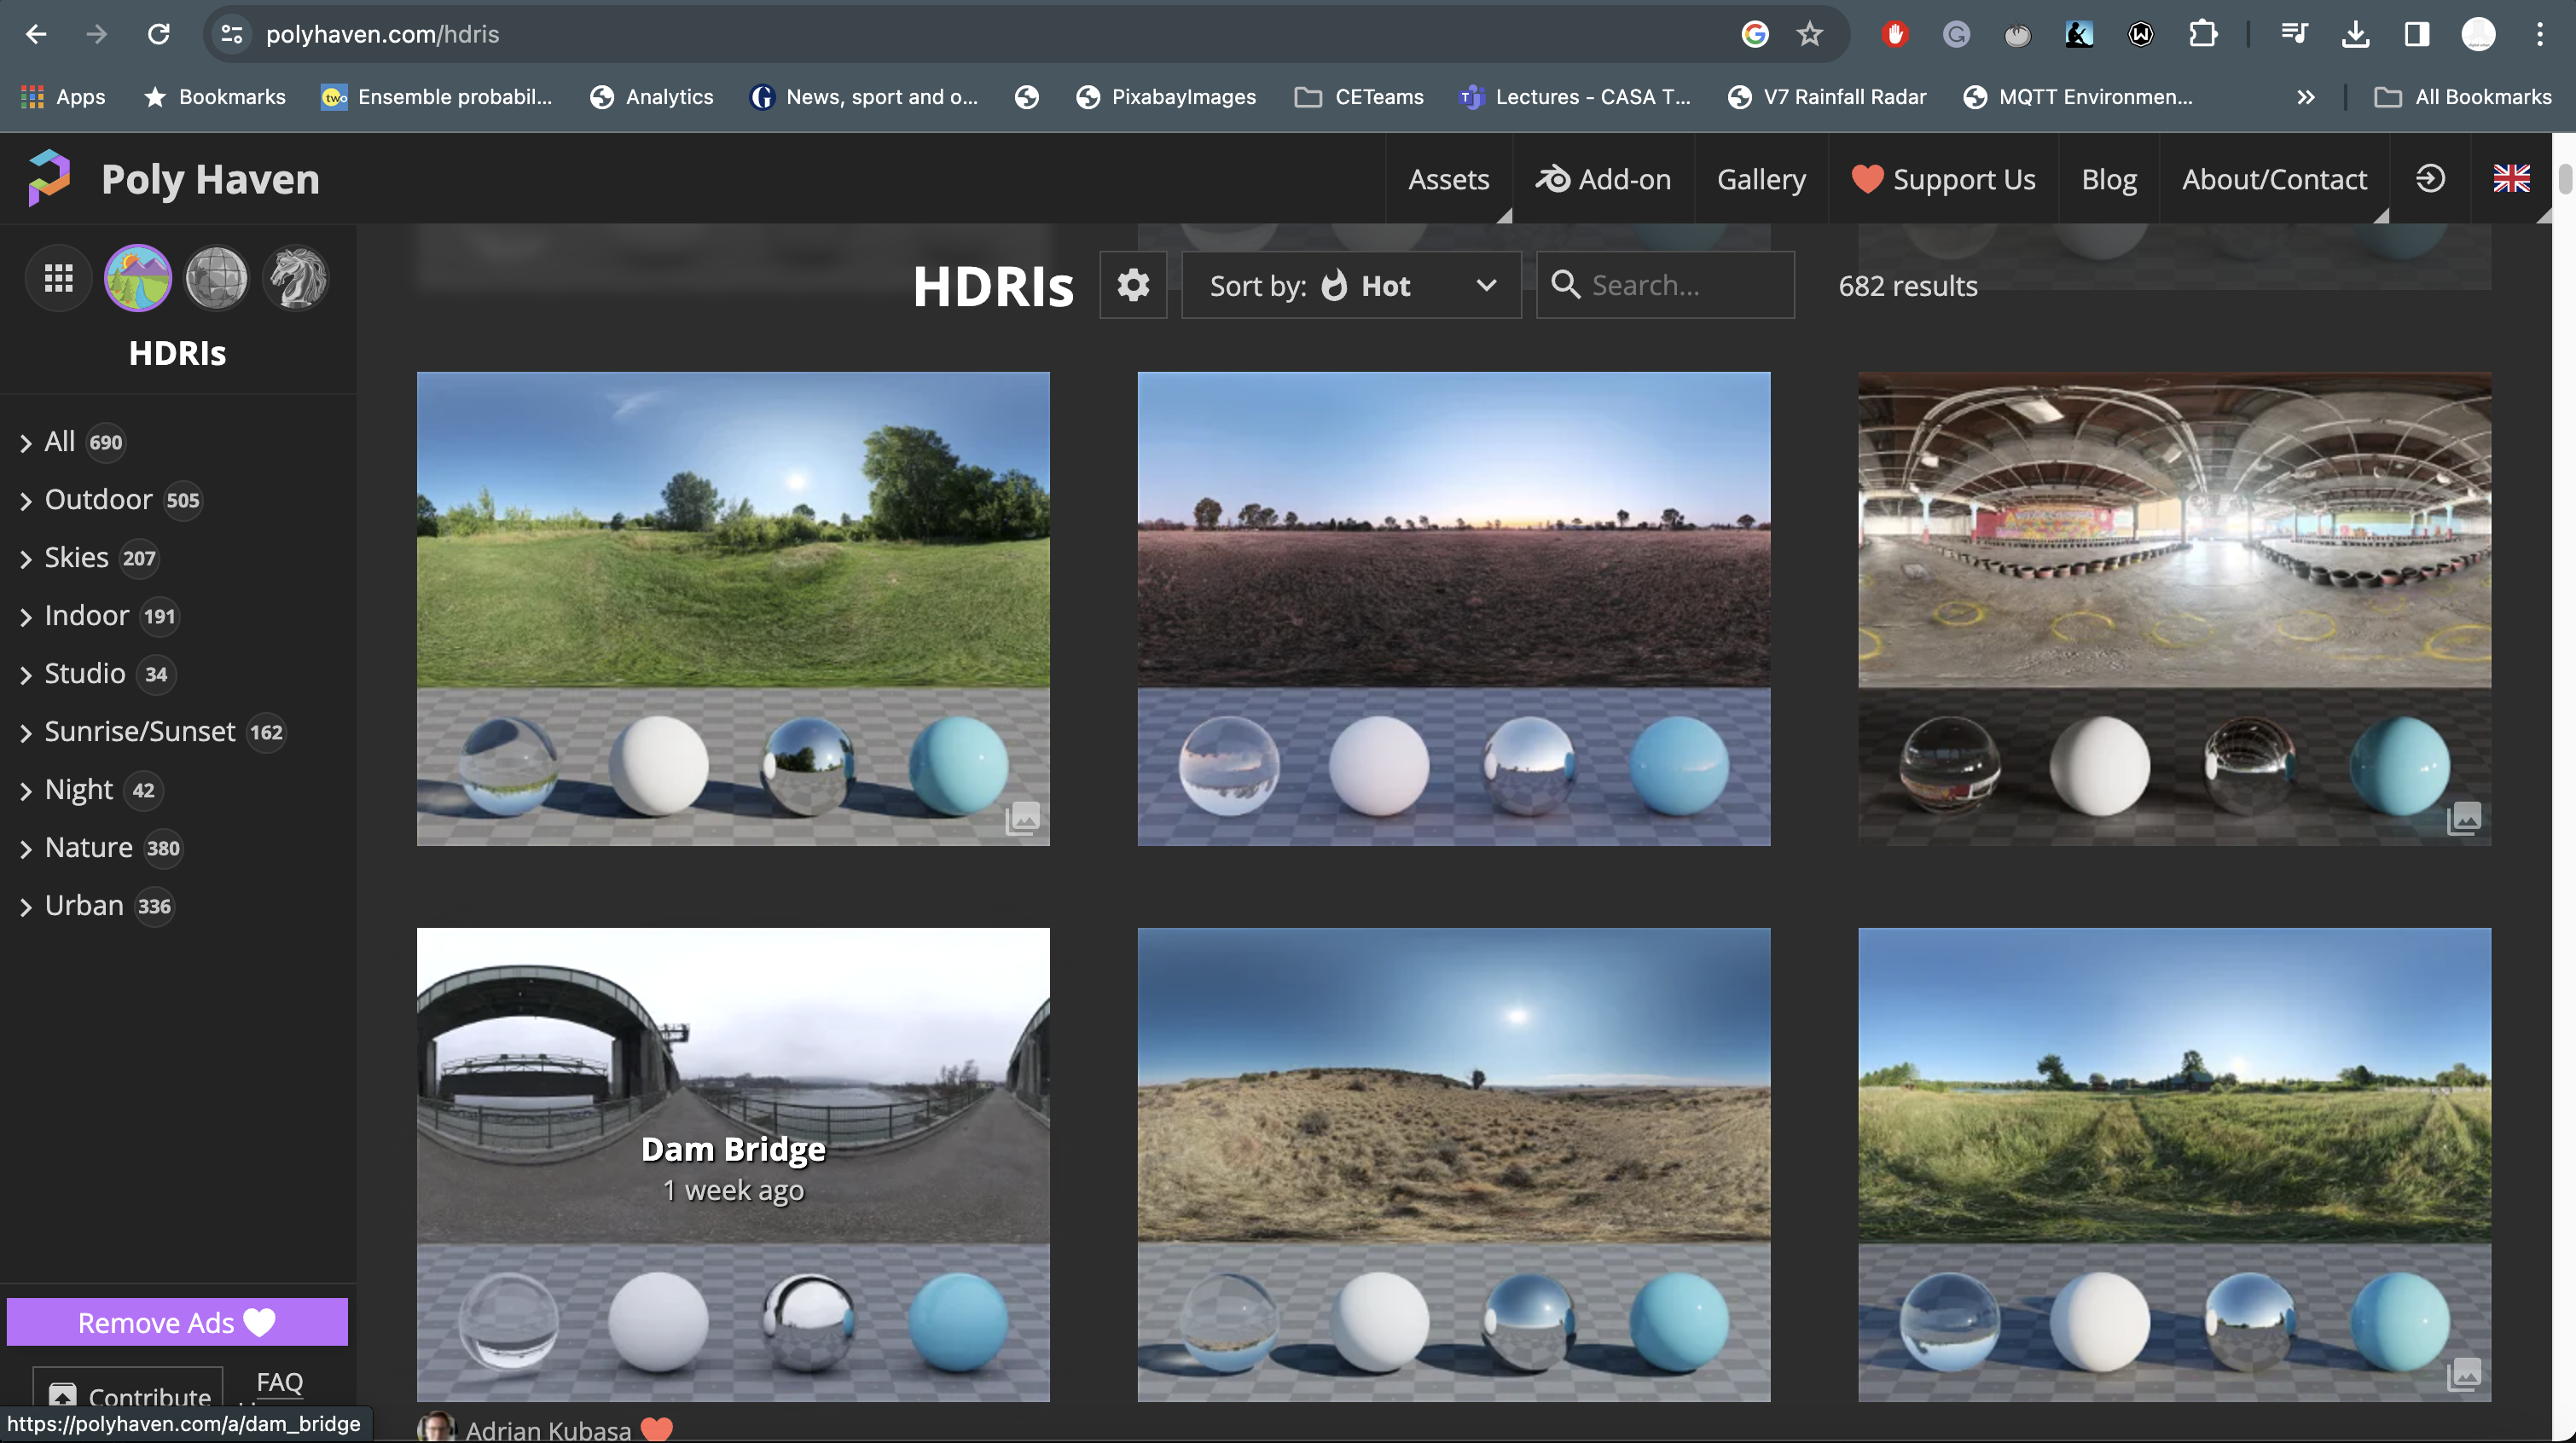
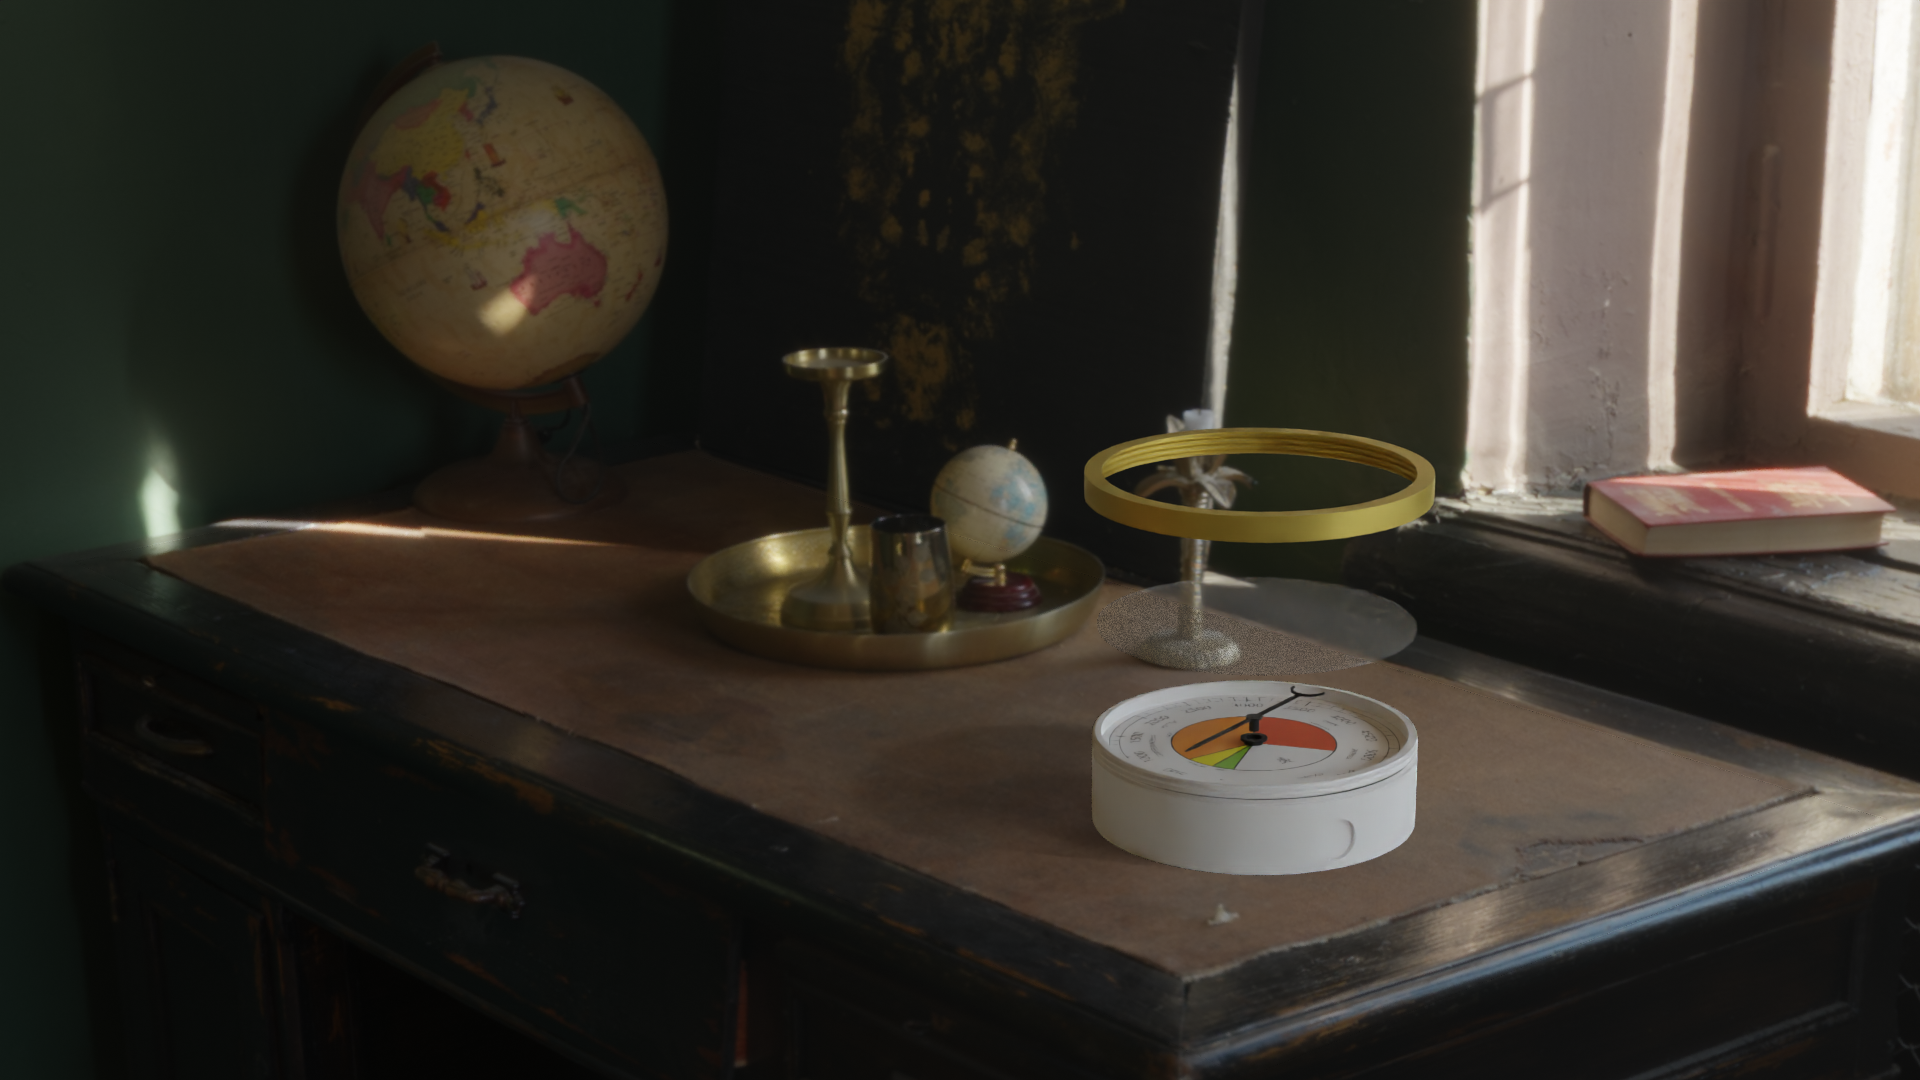
The movie shown during the workshops was rendered in blender using an HDRI background - this is a file that contains all the lighting information and its set up in the World Space of Blender.
Poly Haven is a great site to download free HDRI backgrounds -
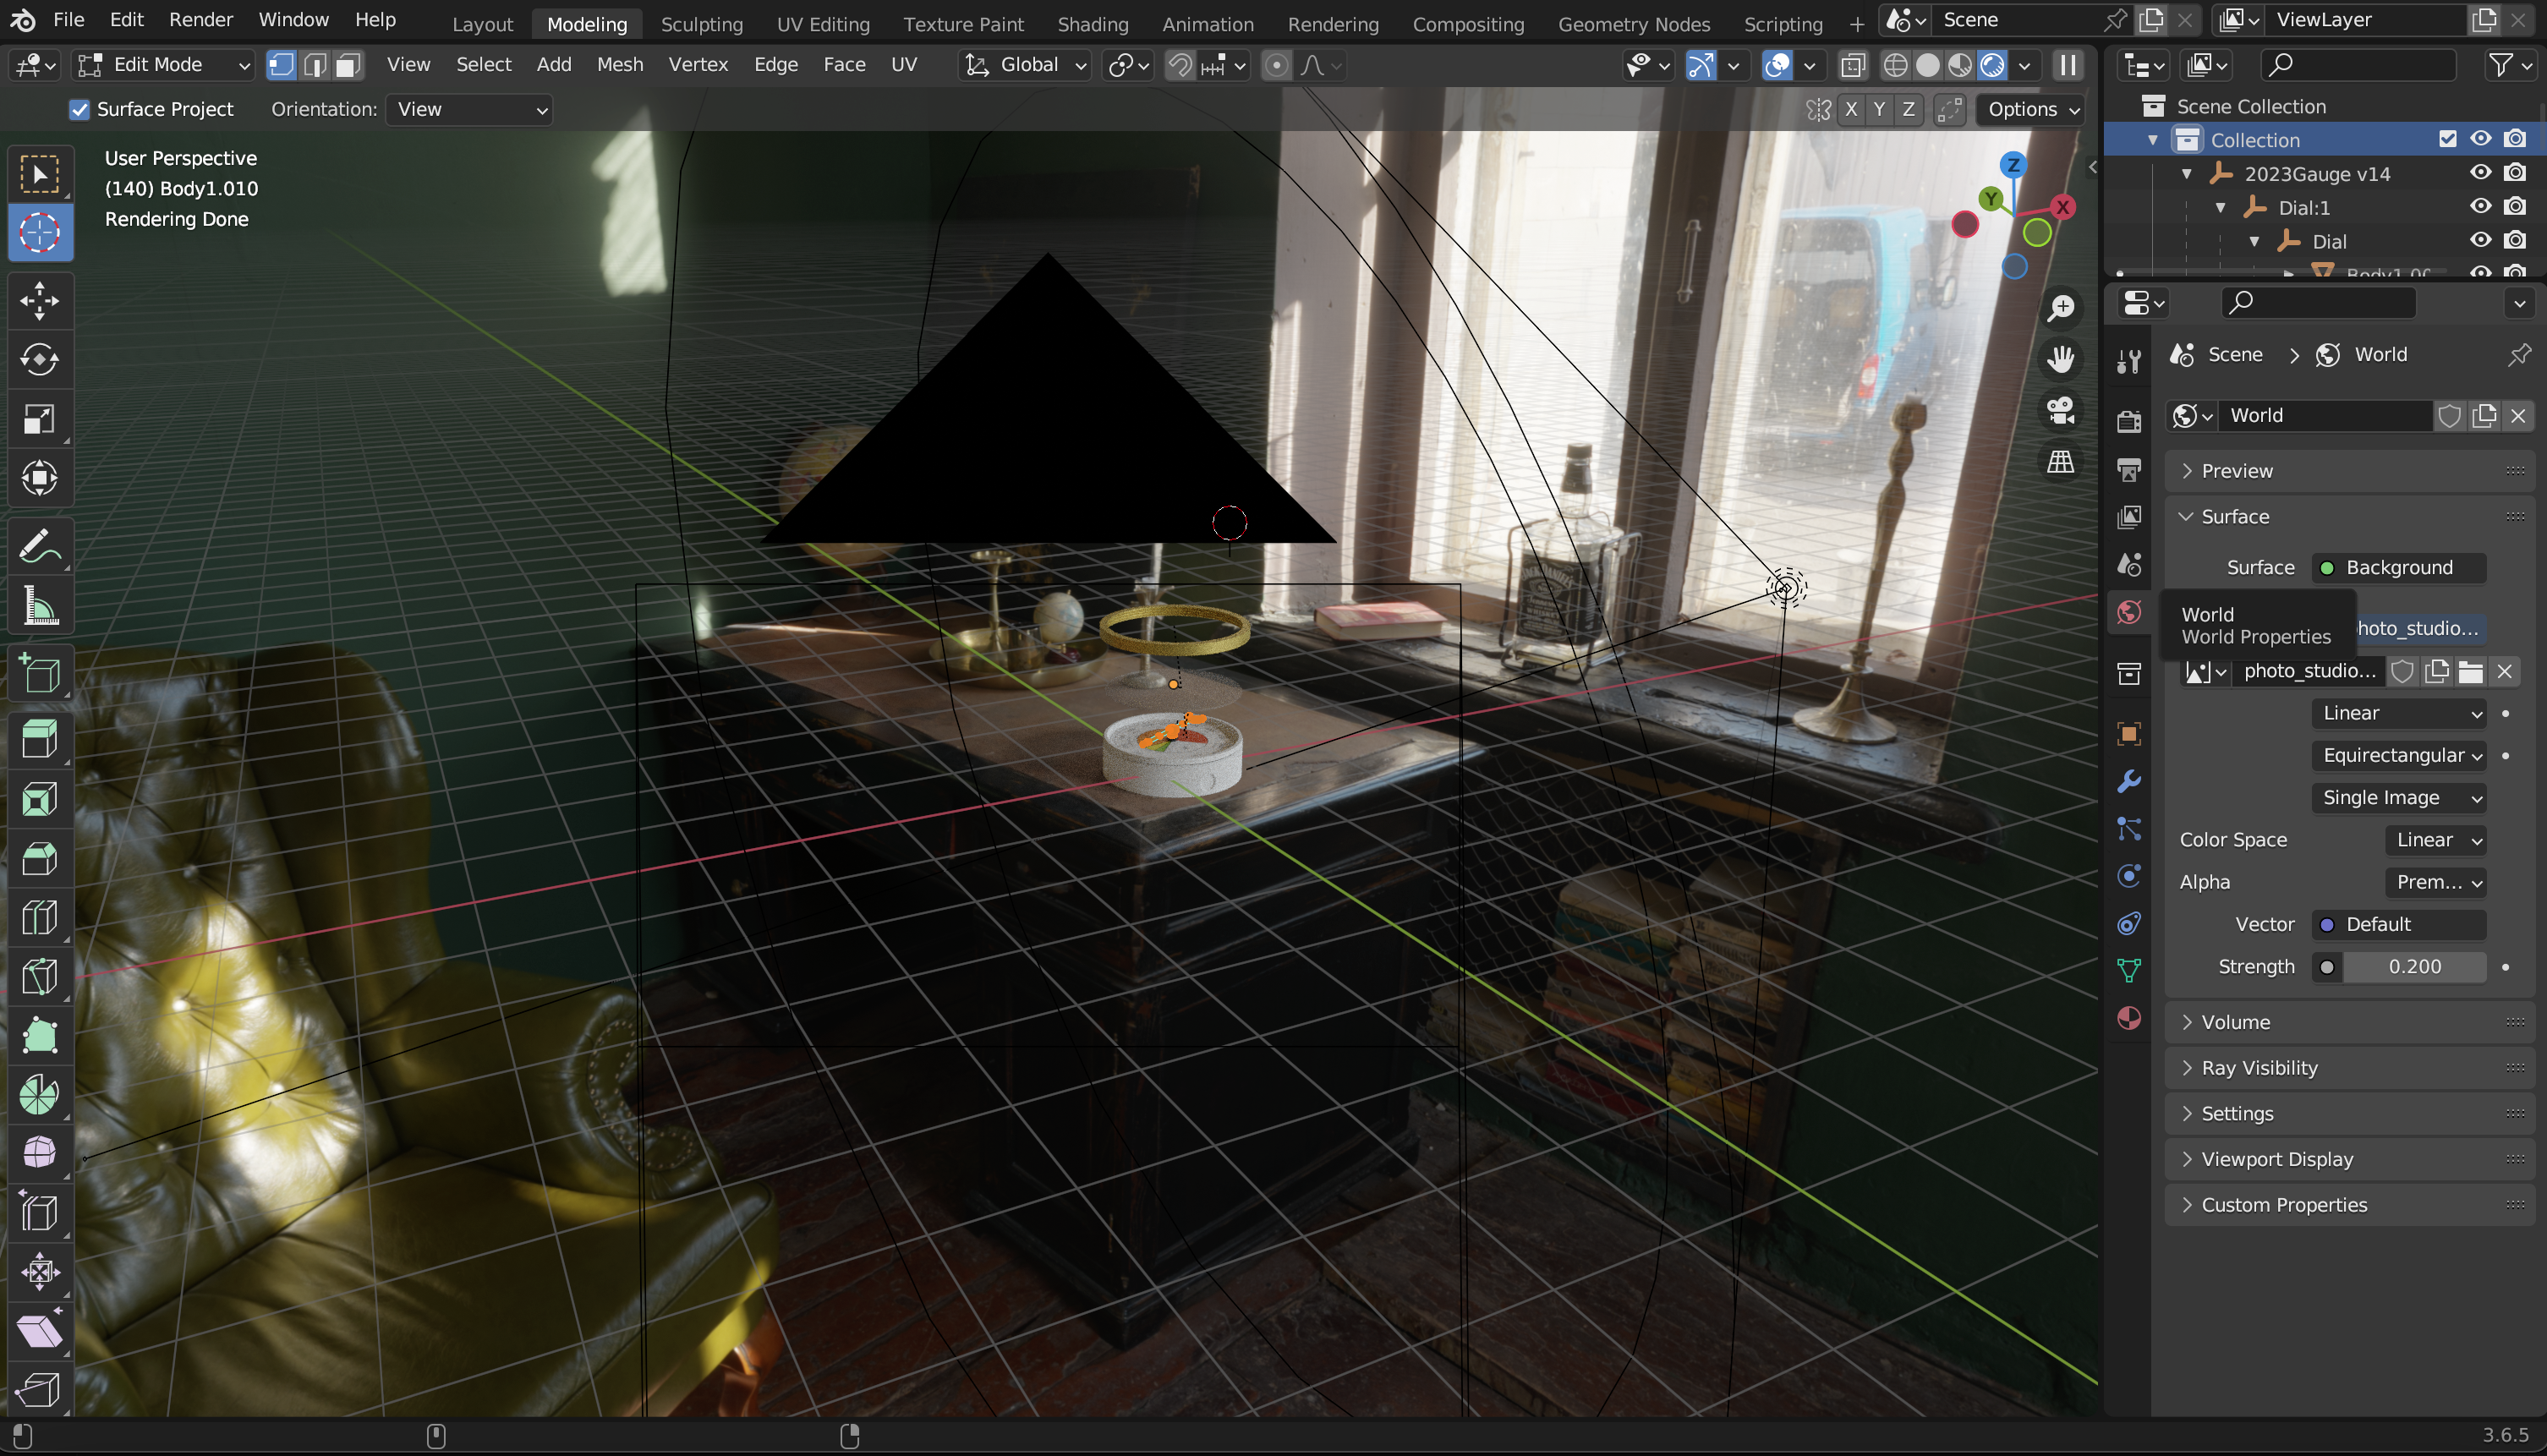
To add your file - simple navigate to the Word Space - the Red Icon on the Right and assign your HDR image (a .exr file) to the Colour Space texture. The background image will now appear with your Gauge floating in space.
You now need to align the Gauge with the background image and the set the Camera to render your viewpoint. This is a useful shortcut to know and Blender Renders from the Camera View.
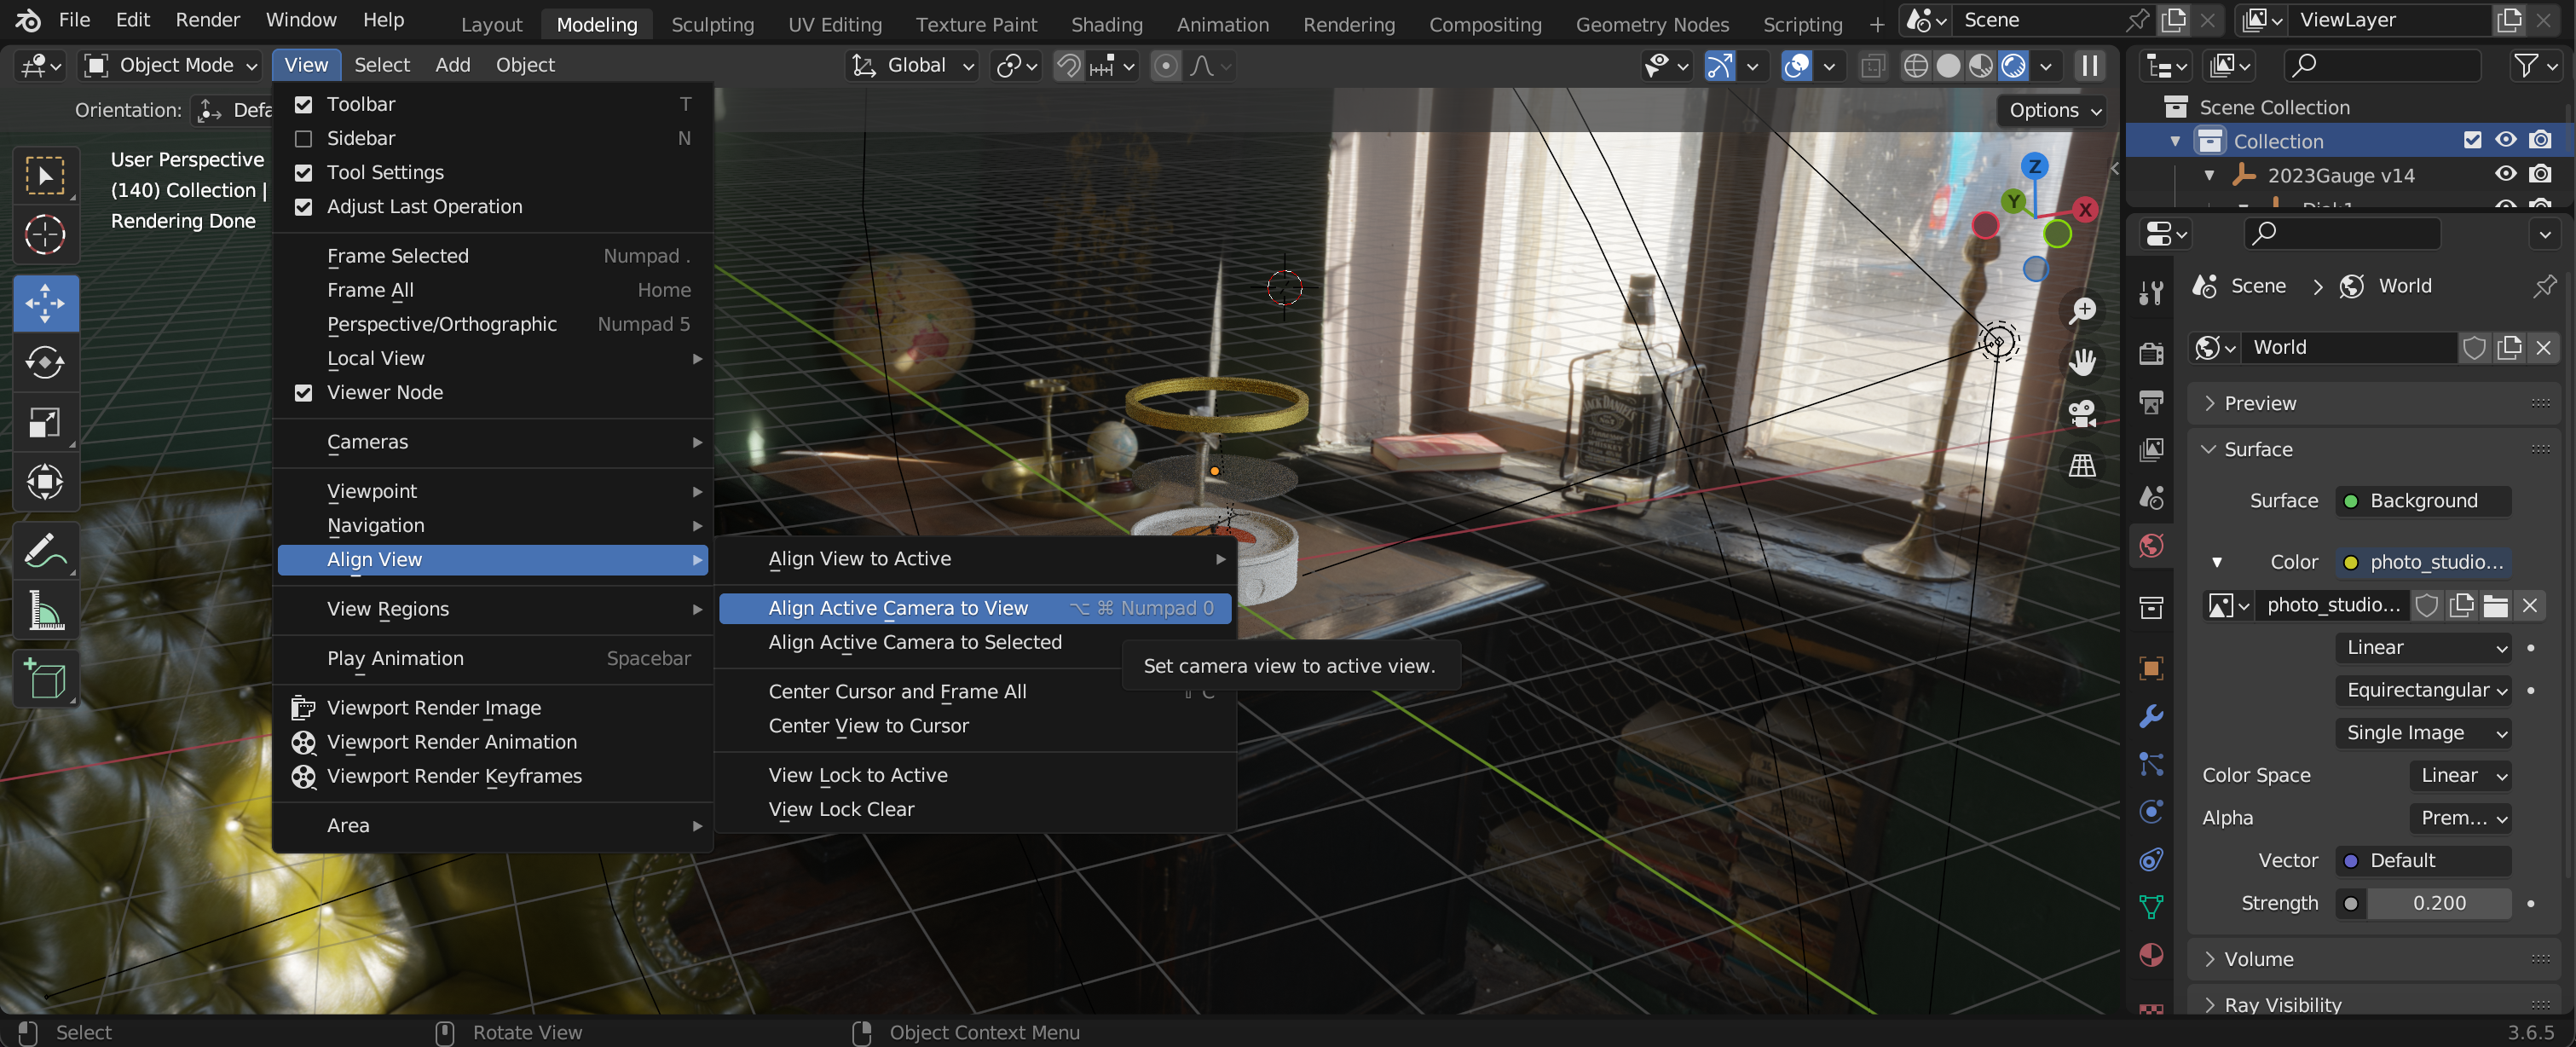
To do this - go to View, Align View, Align Active Camera to View.
You can now render the image or animation via the Render Panel - to speed it up reduce the number of Render Cycles under the Render Engine/Render - Max samples to 5. This should allow you to render an animation in a couple of hours.
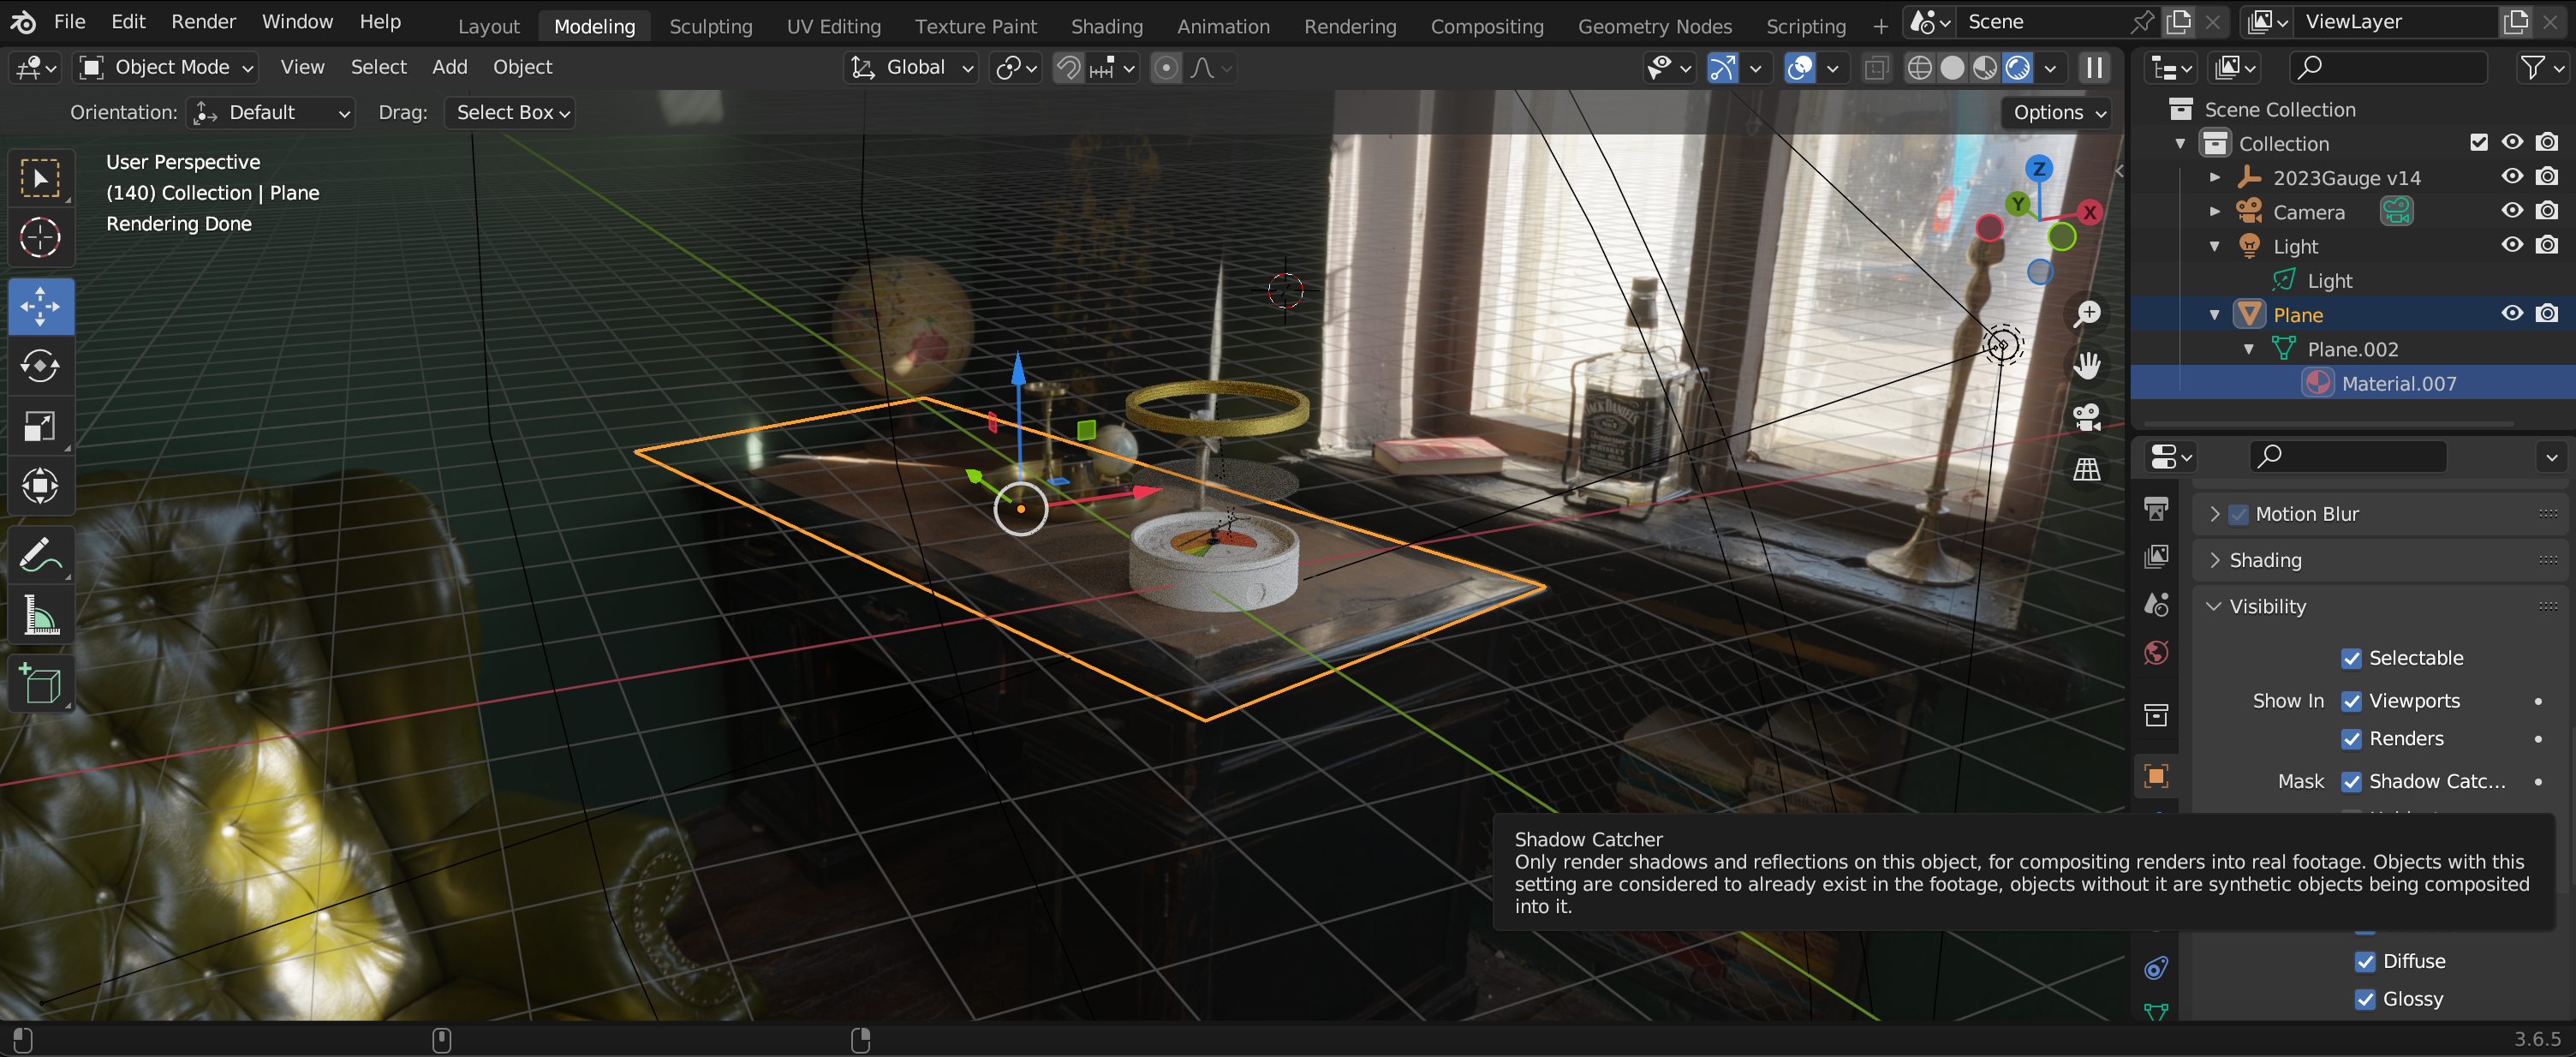
Finally - if you want shadows on the surface under the gauge - you add a Plane, add a texture and under Object Properties - select Mask - Shadow Catcher.
Well done...