This workshop will show you how to:
- Set up Babylon.js
- Import digital assets
- Create an interactive visualisation
- Build a Progressive Web App (PWA)
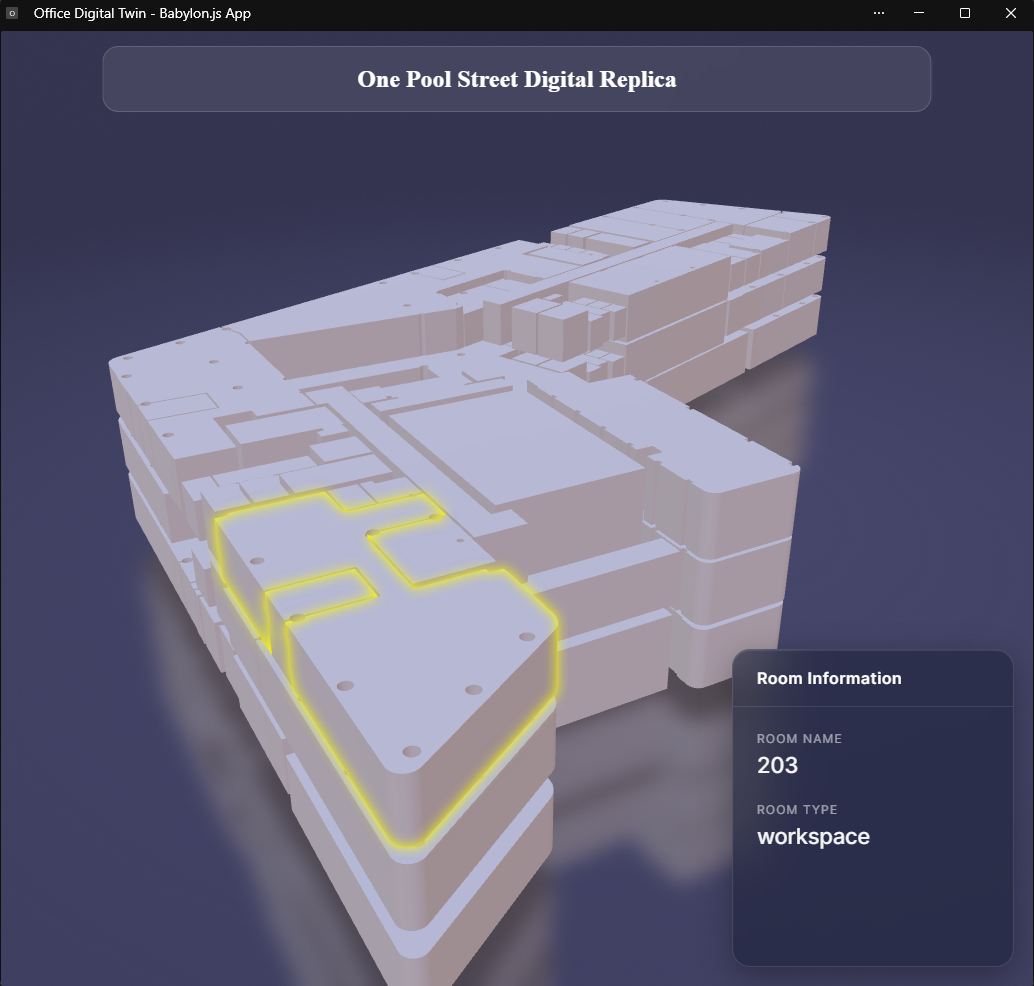
To complete this workshop you will need:
- Visual Studio Code
- Node.js LTS and NPM
- Digital model in GLB format
Languages used:
- HTML
- JavaScript
Additional Resources:
There are several approaches to developing and deploying web visualisations. These range from an immediate method using pure JavaScript and HTML, where entire libraries are loaded in the head of the page, to more contemporary methods employing frameworks like React, Angular, and Vue.js. In this workshop, we are not going to use any of the above frameworks, but we will explore the use of JavaScript modules that allow us import only the code (the module) we need, rather than entire libraries, helping in keeping a cleaner, more maintainable, and faster code.
To set up the project, we will use npm create babylonjs, the official
Babylon.js project scaffolding tool. Rather than manually configuring a development environment, this command generates a complete project structure and guides us through a series of setup options. In this workshop, we will select the ES6 modules, JavaScript (rather than TypeScript), and ViteJS as the build tool. This provides a modern development workflow based on native JavaScript modules, allowing us to import only the Babylon.js components we need while benefiting from a lightweight development server and optimised production builds.
Let's begin by creating a new folder on our system and opening it in VSCode.
- from the top menu, select
Terminal -> New Terminal - type:
npm create babylonjs
Provide a name for the project, a folder will be created with the same name
Select the module format ES6
Select the language JavaScript
Select the Bundler Vite
npm create babylonjs may not install the latest version of Babylon.js. To check whether any library updates are available:
- Navigate to the folder you just created, as instructed in the terminal
cd [name of your project]: - run
npx npm-check-updates -u - finally run
npm install.
NPM will download the most updated packages needed to run a basic version of Babylon.js. To see this in action,
- run the command
npm run devin the terminal.
This will launch ViteJS in developer mode with a local server accessible from the local network at the address indicated in the terminal (e.g. http://localhost:5173/).
- Open this address in any browser to see the webpage.
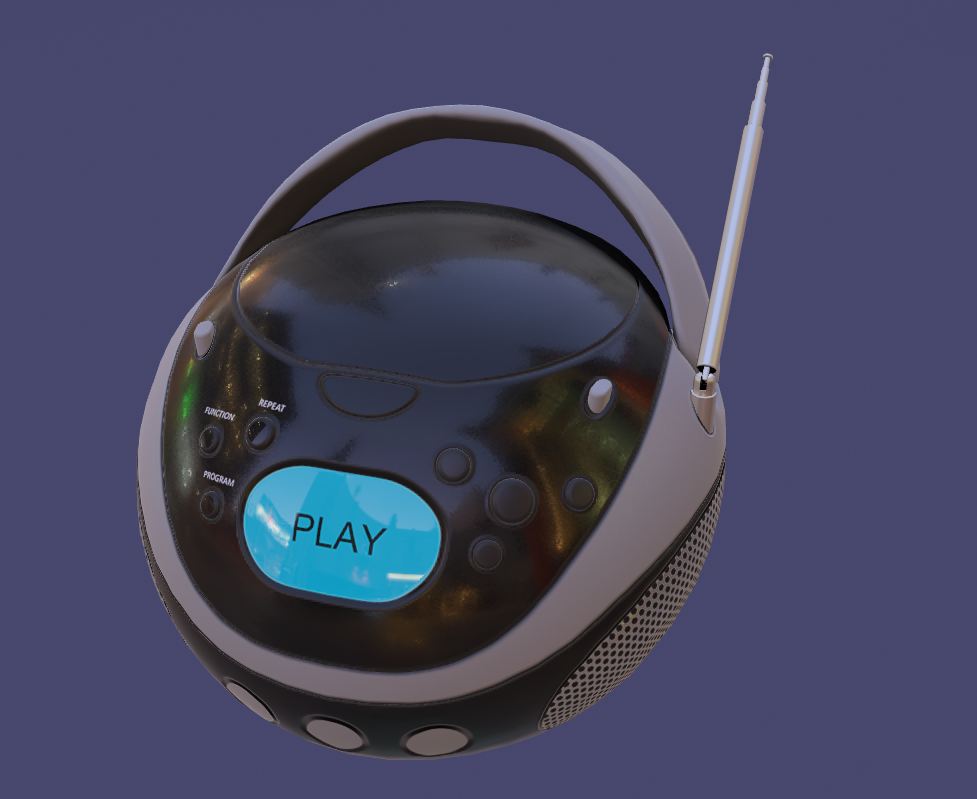
You should be able to see, after the animation of Babylon.js logo, the sample interactive 3D model
In addition to the standard packages, we also now need to install some additional libraries required to build the project:
@tweenjs/tween.jshandles animations and transitions between object states.@vitejs/plugin-basic-ssl, a lightweight plugin that creates a local HTTPS server, enabling secure access to device sensors, like the mobile camera, during development.
Exit the local server by pressing CTRL+C or Option+C with the Terminal on focus. We can download all of them in one go with the following command:
npm install @tweenjs/tween.js @vitejs/plugin-basic-ssl
We are now ready to develop our web visualization. We might need to install additional packages later on.
Looking at the structure of the generated project, we can easily recognise the main elements of the website, the index.html file and, in the src folder, the JavaScript code (i.e. index.js).
The HTML file is fairly simple. It includes some basic styling, a canvas element that serves as the rendering surface for the 3D scene, and a reference to index.js
<!DOCTYPE html>
<html lang="en">
<head>
    <meta charset="UTF-8" />
    <meta name="viewport" content="width=device-width, initial-scale=1.0" />
    <title>Babylon.js App</title>
    <style>
        body {
            margin: 0;
            padding: 0;}

        #renderCanvas {
            display: block;
            width: 100dvw;
            height: 100dvh;
            touch-action: none;}
    </style>
</head>
<body>
    <canvas id="renderCanvas"></canvas>
    <script type="module" src="/src/index.js"></script>
</body>
</html>
The index.jscontains the Babylon.js application logic.
The first section of the script imports only the Babylon.js modules required for the application, including the rendering engine, scene management, 3D geometry creation, model loading, and mathematical utilities, while the side-effect imports register additional features such as loading screens, scene helpers, materials, environment textures, and support for loading glTF 3D models.
import { Engine } from "@babylonjs/core/Engines/engine";
import { Scene } from "@babylonjs/core/scene";
import { AppendSceneAsync } from "@babylonjs/core/Loading/sceneLoader";
import { CreateBox } from "@babylonjs/core/Meshes/Builders/boxBuilder";
import { Vector3 } from "@babylonjs/core/Maths/math.vector";

// Side-effect imports: these register plugins and augment prototypes at load time
import "@babylonjs/core/Loading/loadingScreen";
import "@babylonjs/core/Helpers/sceneHelpers";
import "@babylonjs/core/Materials/standardMaterial";
import "@babylonjs/core/Materials/PBR/pbrMaterial";
import "@babylonjs/core/Materials/Textures/Loaders/envTextureLoader";
import "@babylonjs/loaders/glTF";
The next two lines connect Babylon.js to the web page. The first retrieves the HTML canvas element with the ID renderCanvas, while the second creates a Babylon.jsEngine attached to that canvas, enabling WebGL (or WebGPU) rendering and managing the application's render loop.
const canvas = document.getElementById("renderCanvas");
const engine = new Engine(canvas, true);
The createScene() function is responsible for building the 3D environment. It creates a new Babylon.js scene, attempts to load a glTF model, automatically generates a camera and environment, and provides a fallback scene containing a simple box and light if the model cannot be loaded.
The function is marked as async because loading external assets such as a .glb file is an asynchronous operation: the application must wait for the model to download before continuing with the scene setup.
The try...catch structure provides a fallback mechanism. If the model fails to load because of a missing file, network issue, or invalid URL, the application does not crash. Instead, it creates a default box, camera, and light so that the scene remains functional.
The call to scene.createDefaultEnvironment() automatically generates a ground plane, skybox, and environment lighting.
    const createScene = async () => {
        const scene = new Scene(engine);

        try {
            // Load a glTF model
            await AppendSceneAsync("https://assets.babylonjs.com/meshes/boombox.glb", scene);
            // Create a default camera, and event caught by the controls will call preventdefault(), such as wheel event
            scene.createDefaultCamera(true, true, true);
            // Rotate the camera to face the front of the model
            (scene.activeCamera).alpha += Math.PI;
        } catch {
            // Fallback: when loading fails
            // Create a default box mesh
            CreateBox("box", {}, scene);

            scene.createDefaultCamera(true, true, true);
            const camera = scene.activeCamera;
            camera.setPosition(new Vector3(3, 3, 3));
            camera.setTarget(new Vector3(0, 0, 0));

            // Create a default light for the scene
            scene.createDefaultLight(true);
        }

        // Create a default environment (skybox + ground + environment lighting)
        scene.createDefaultEnvironment({
            createGround: true,
            createSkybox: true,
        });

        return scene;
    };
The next section calls the createScene() function seen above, which creates and configures the Babylon.js scene. Because the function is asynchronous, the code waits until the scene has been fully created and any required assets have been loaded before continuing. Once the scene is available, engine.runRenderLoop() starts the render loop, repeatedly calling scene.render() to draw the scene on the canvas. The resize event listener ensures that the rendering engine automatically adapts whenever the browser window changes size.
createScene().then((scene) => {
    engine.runRenderLoop(() => {
        scene.render();
    });
});

window.addEventListener("resize", () => {
    engine.resize();
});
With this initial project in place, we can begin customising it and gaining a better understanding of how its different components work together. As always, it is worth exploring the Babylon.js Documentation to discover the engine's many features and capabilities, and to experiment with them through trial and error.
Testing can also be done in the online Babylon.js Playground, which offers real-time reloading and a large collection of community examples that can be explored, adapted, and reused within your own projects. Just make sure to use the same programming language as your project, either JavaScript or TypeScript, as examples are available in both and are not always directly interchangeable.
Camera
The camera acts as the user's viewpoint within the visualisation, providing the way to interact with and explore the scene. Babylon.js offers a variety of camera types, ranging from the Universal Camera, commonly used to provide a first-person perspective, to the ArcRotate Camera, which is currently used in this project. Other options include Geospatial Camera, designed for map-based and georeferenced applications, and Virtual Reality Camera, which support immersive XR experiences. Choosing the appropriate camera depends on the intended user experience and the type of environment being explored.
The approach used in the project relies on the createDefaultCamera method, which allows us to easily switch between a Universal Camera and an ArcRotate Camera. To use other camera types, they must be imported and configured individually.
The createDefaultCamera() method accepts three Boolean parameters:
createArcRotateCamera: when set to true, an Arc Rotate Camera is created; otherwise, a Universal Camera is created by default.replace: when set to true, the newly created camera replaces the current active camera.attachCameraControls: when set to true, camera controls are automatically attached to the canvas, enabling user interaction.
In addition, other parameters of the camera can be changed, as the position and the sensibility of the control.
- In the current code in the
src/index.js, find the firstscene.createDefaultCameraand change the first parameter tofalse:
scene.createDefaultCamera(false, true, true);
(scene.activeCamera).alpha += Math.PI;
Save the file and the camera is now set to a Universal Camera, where the mouse controls the user's gaze and the arrow keys can be used to move around the scene.
- Now, set the camera back to an Arc Rotate Camera (first parameter to
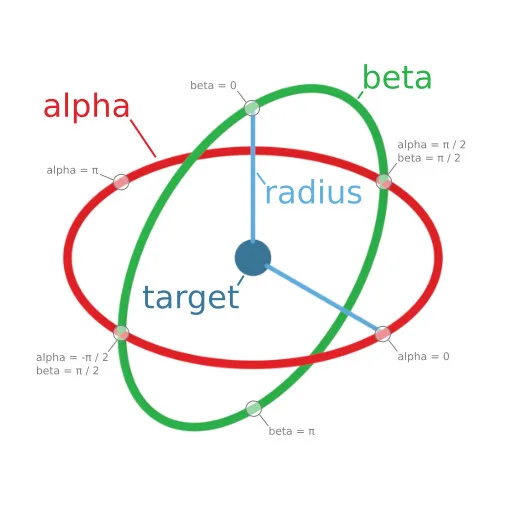
true) and change its starting position using the values shown in the image below as a reference, and also change thepanningSensibility.
scene.createDefaultCamera(false, true, true);
(scene.activeCamera).alpha += Math.PI;
(scene.activeCamera).beta = Math.PI/4 ; //45 degrees
(scene.activeCamera).panningSensibility = 30;
Add 3D models
Babylon.js supports various file formats (e.g. glTF/glb, OBJ, STL, PLY, Gaussian Splatting). One of the most widely used and flexible formats for web applications is glTF (GL Transmission Format) and its binary counterpart, glb, which packages all model data into a single file.
These models can be created using a variety of 3D modelling applications (e.g. Blender, Fusion360) or downloaded from online repositories and services such as Sketchfab, which provides access to many models released under Creative Commons licences.
- For this exercise, the model is provided in the Moodle resources.
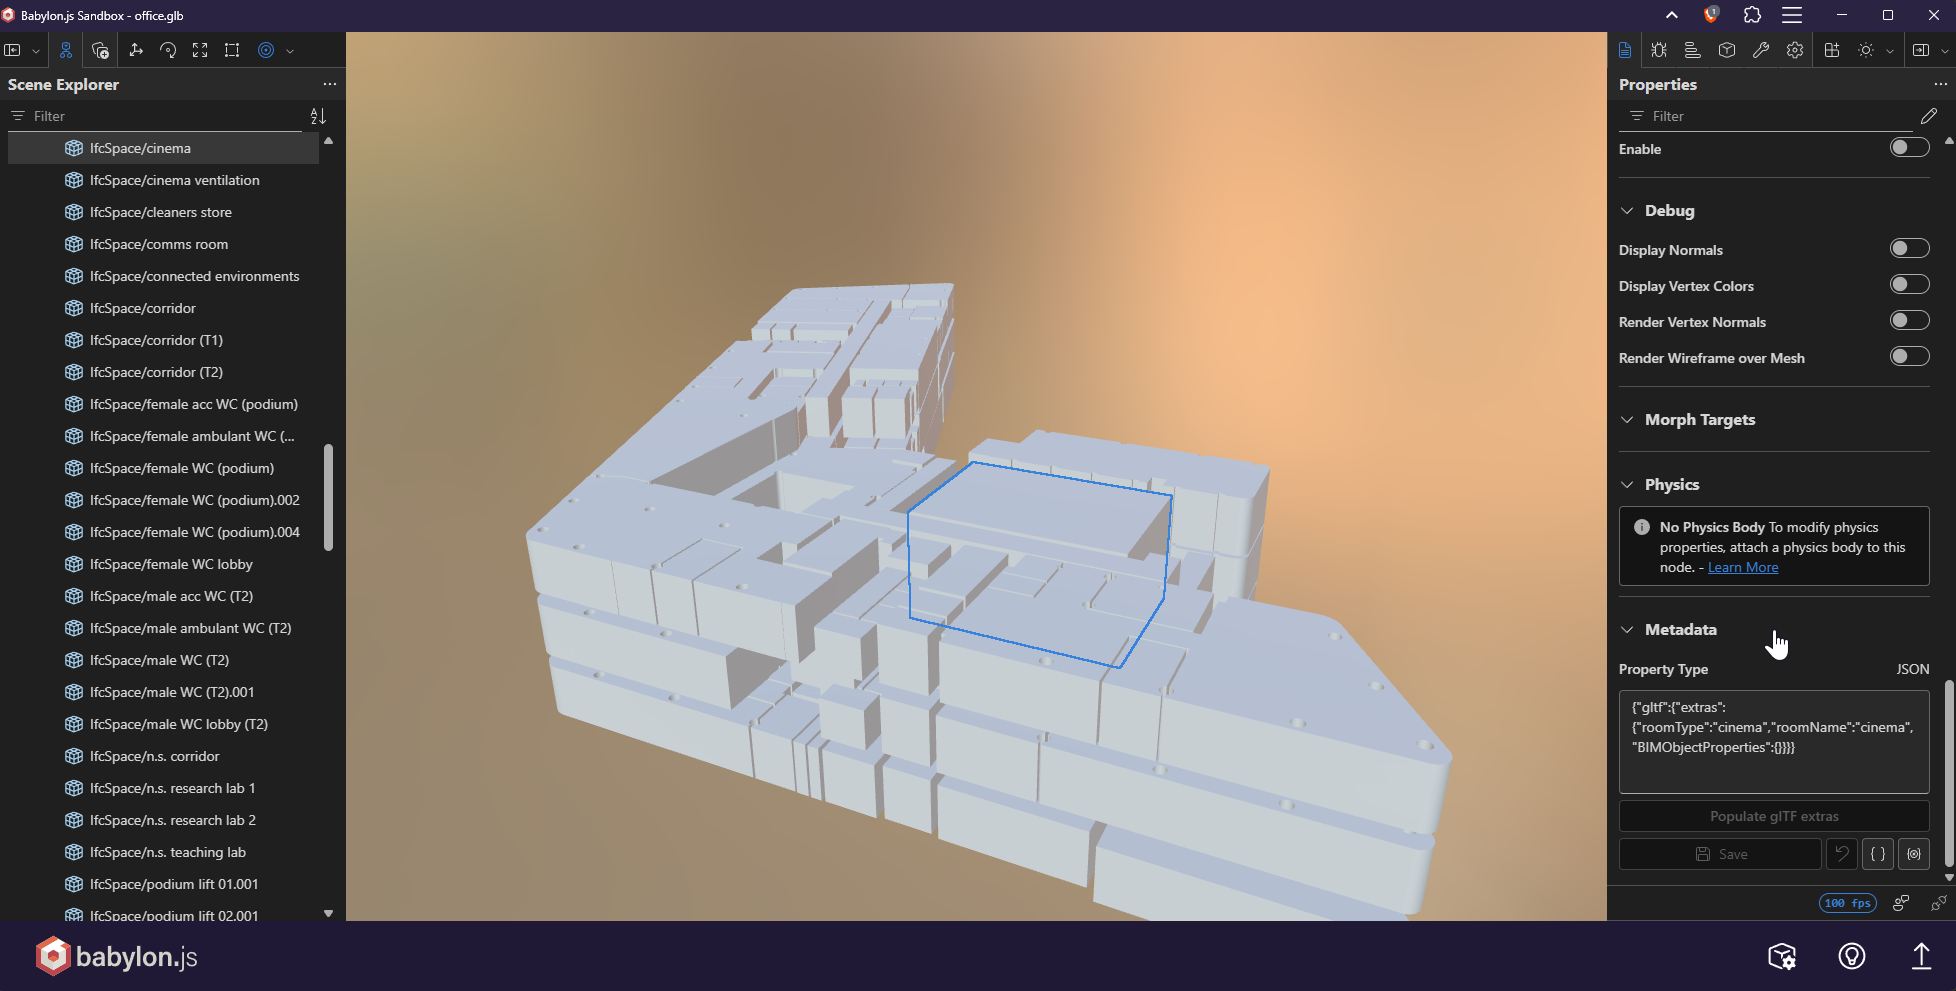
- Before loading the model into Babylon.js, we can inspect it using the Babylon.js Sandbox.
This powerful tool not only allows us to view and interact with the model and explore its structure, but also to modify certain properties, add metadata, and export the model in different formats.
It is also possible to install the Babylon.js Sandbox as a local application. This is not a traditional installation, but rather a web application that can be made available locally through browser technologies such as Progressive Web Apps (PWAs). The same techniques can be applied to any website, and we will explore later how to implement them in Babylon.js applications.
- Create a new folder in the current project root named
public. This folder will be used to store all static assets required by the website, such as 3D models, images, icons, and other resources. - Copy the glb model into the public folder.
- in the
index.js, locate the lines that load the current glb model. Comment out the existing line and replace it with the path to the new model:
//await AppendSceneAsync("https://assets.babylonjs.com/meshes/boombox.glb", scene);
await AppendSceneAsync("./NAME-OF-THE-MODEL.glb", scene);
- Save the file and reload the page. The new model should now be loaded and displayed instead of the default Babylon.js example model.
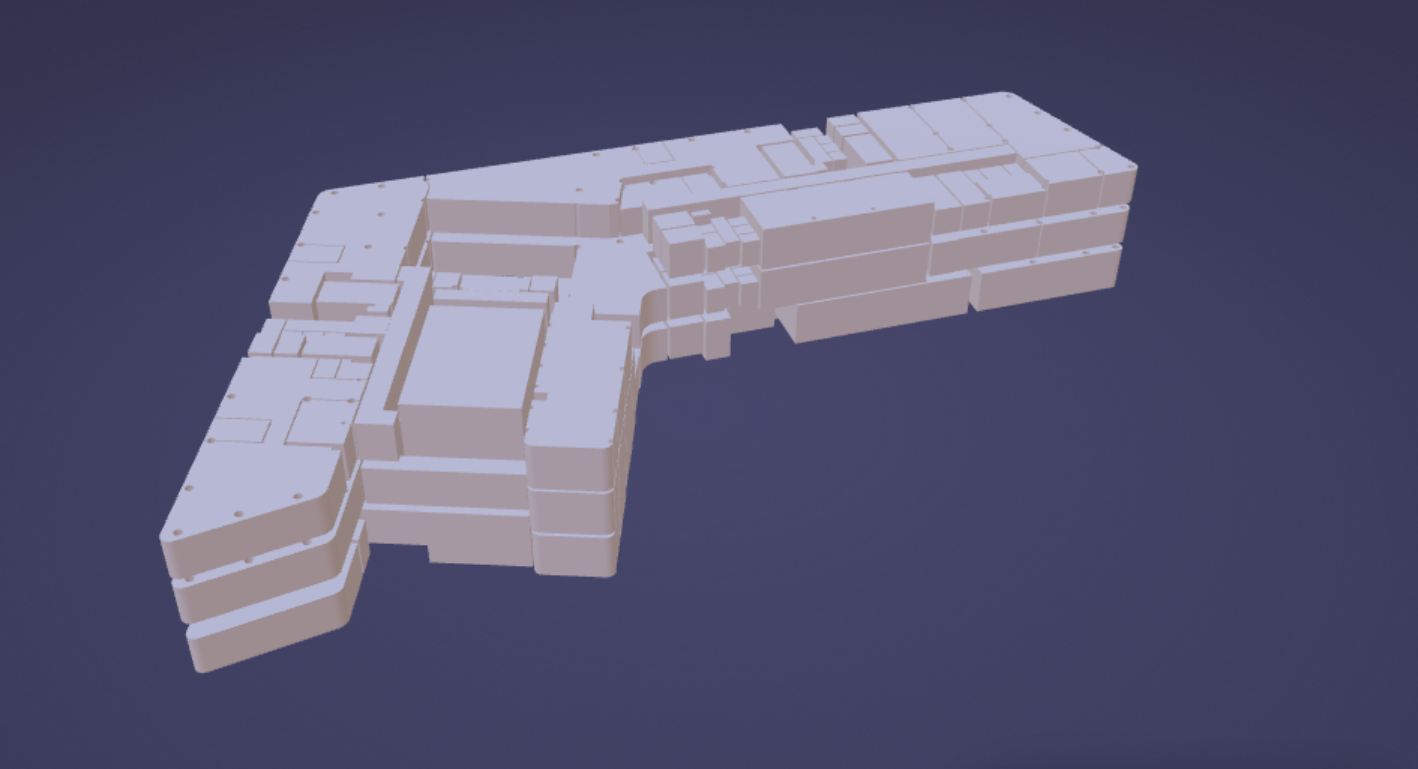
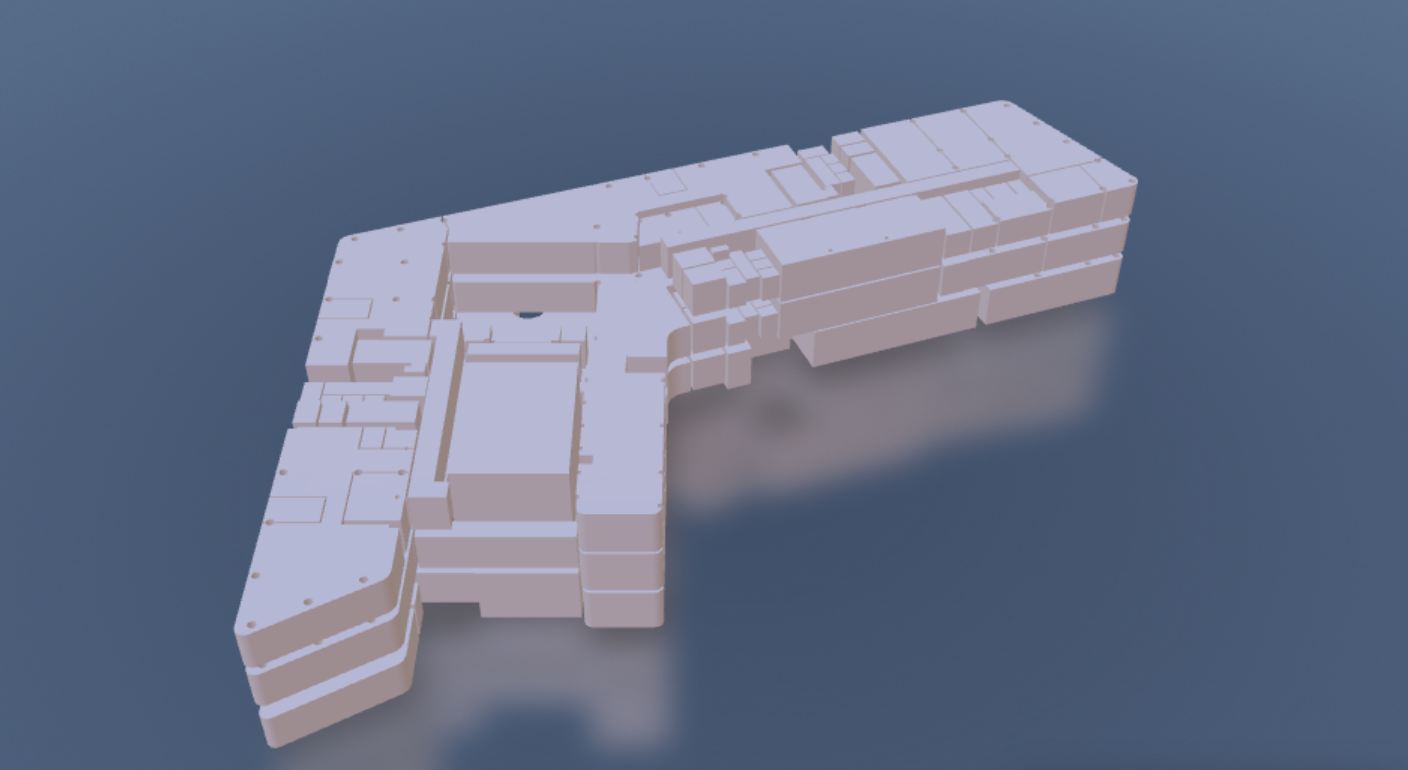
Another advantage of using these frameworks is that many visual effects and rendering features can be enabled with minimal configuration, as they are already built into the framework. For example, Babylon.js includes effects that can transform the ground surface into a reflective mirror, creating realistic reflections of the surrounding environment.
- find the
createDefaultEnvironmentmethod in theindex.js - add the property
enableGroundMirror: true, - change the colours of ground and skybox
 // Create a default environment (skybox + ground + environment lighting)
        scene.createDefaultEnvironment({
            createGround: true,
            createSkybox: true,
            enableGroundMirror: true,
            groundColor: new Color3(15/255, 23/255, 42/255),
            skyboxColor: new Color3(65/255, 105/255, 180/255),
        });
import { Color3 } from "@babylonjs/core/Maths/math.color";
So far, the interactivity of the model has been limited to camera controls and changing the viewpoint. However, imported models can also contain additional information that we may wish to access and display when interacting with them.
A common technique used to achieve this is raycasting. Raycasting works by projecting an invisible ray from the camera, through the mouse cursor or touch position, into the 3D scene. By checking which object the ray intersects, it is possible to determine which element has been selected.
Raycasting is widely used in 3D applications for object selection, information retrieval, navigation, highlighting elements, and triggering interactions. While Babylon.js provides built-in support for raycasting, it must be explicitly implemented before objects in the scene can respond to user input.
create a new folder utils in the src folder of the project
create a new file raycastManager.js
import { PointerEventTypes } from "@babylonjs/core";

/** This information is shown on the tooltip
 * Enable click/tap picking on a scene
 * @param {Scene} scene
 * @param {Function} callback Called with picked mesh
 */
export function enableRaycasting(scene, callback = defaultCallback) {
    scene.onPointerObservable.add((pointerInfo) => {
        if (
            pointerInfo.type !== PointerEventTypes.POINTERPICK
        ) {
            return;
        }
        const pickResult = pointerInfo.pickInfo;

        if (!pickResult?.hit || !pickResult.pickedMesh) {
            console.log("Nothing clicked");
            callback(pickResult); // Pass it through anyway, even when nothing was clicked
            return;
        }

        callback(pickResult);
    });
}
//if not defined, this is the default result printed in the browser console
function defaultCallback(pickResult) {
    const mesh = pickResult.pickedMesh;

    console.log("Clicked:", {
        object:mesh,
        name: mesh.name,
        id: mesh.id,
        position: mesh.position,
    });
}
- Save the file.
- In
index.js, import the function:
import { enableRaycasting } from "./utils/raycastManager.js";
- Locate the
createScene()call at the bottom of the file and add the raycasting functionality once the scene has been created:
createScene().then((scene) => {

    enableRaycasting(scene)

    engine.runRenderLoop(() => {
        scene.render();
    });
});
Save the file and reload the page.
Clicking or tapping on an object should now trigger the raycasting function. At this stage, the selected mesh information will be displayed in the browser console, confirming that the object has been successfully picked.
Object Selection
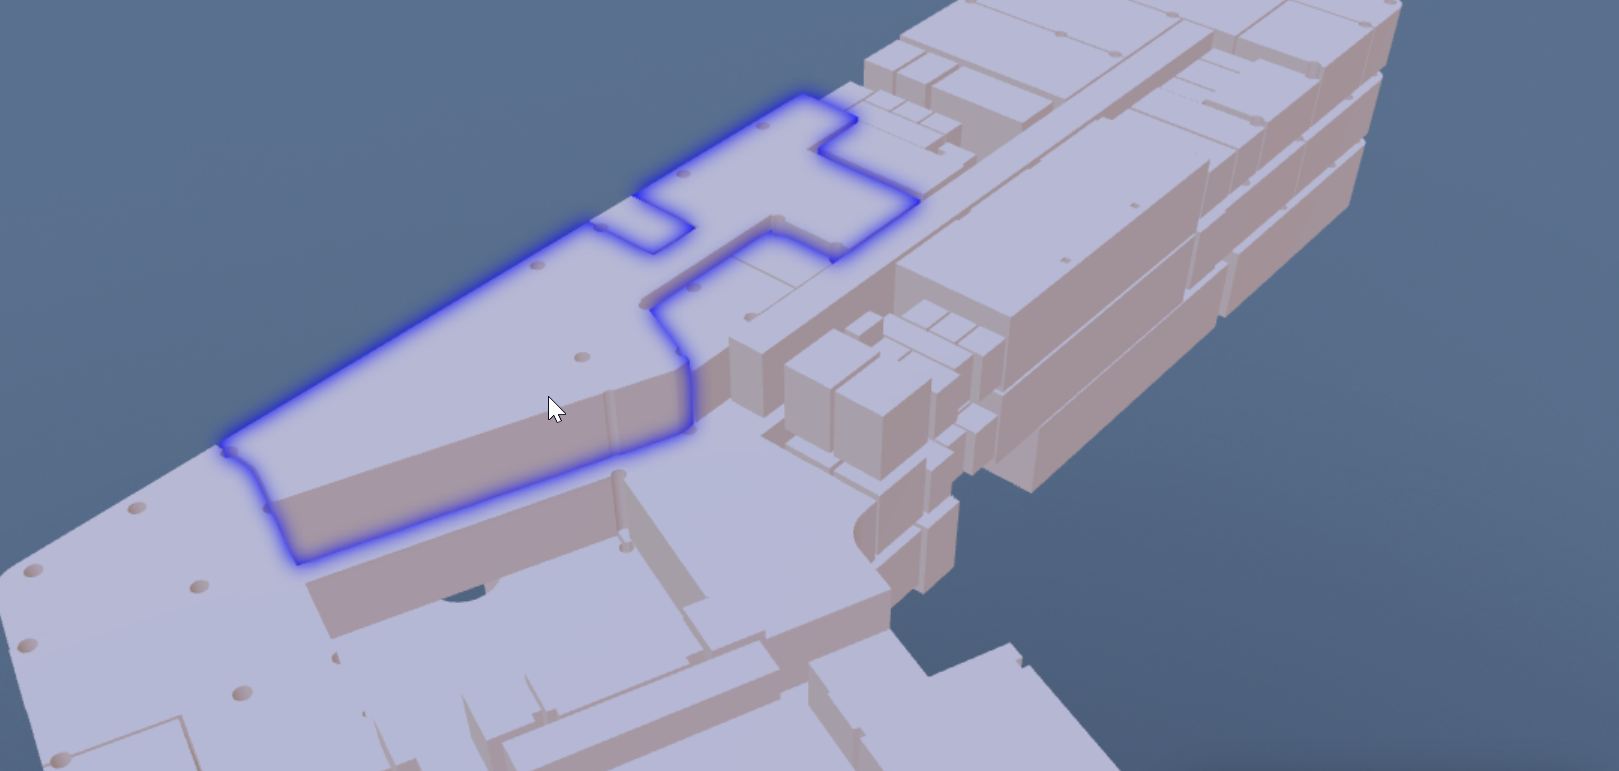
While the picking information is available in the console, users still lack a visual indication of which object has been selected within the scene.
We are going to add two additional features to the visualisation:
- A highlighting system that visually emphasises the selected object using Babylon.js built-in
HighlightLayer. - a panel that displays the metadata associated with the selected object.
- Create a new file named
focusManager.jsinside theutilsfolder. This module will be responsible for managing object selection, highlighting, and camera focus, keeping this logic separate from the main application code:
import { HighlightLayer } from "@babylonjs/core/Layers/highlightLayer";
import { Color3 } from "@babylonjs/core/Maths/math.color";
import { Animation } from "@babylonjs/core/Animations/animation";

let highlightLayer;
let selectedMesh = null;

/**
 * Initialise the highlighting system.
 * Called once when the scene is created.
 */
export function initFocusManager(scene) {
    highlightLayer = new HighlightLayer("highlightLayer", scene);
}

/**
 * Highlight a mesh and smoothly move the camera towards it.
 *
 * @param {Scene} scene
 * @param {AbstractMesh} mesh
 */
export function focusMesh(scene, mesh) {

    // Remove highlight from any previously selected mesh
    if (selectedMesh) {
        highlightLayer.removeMesh(selectedMesh);
        selectedMesh = null;
    }

    if (!mesh) return;

    selectedMesh = mesh;

    // Add a blue glow to the newly selected mesh
    highlightLayer.addMesh(mesh, Color3.Blue());

    // Move camera towards the selected object
    zoomToMesh(scene, mesh);
}

/**
 * Animate the camera to focus on a mesh.
 * The camera target and zoom level are animated together
 * to avoid sudden jumps.
 */
function zoomToMesh(scene, mesh) {

    const camera = scene.activeCamera;

    if (!camera) return;

    // Get mesh bounds in world coordinates
    const boundingInfo = mesh.getBoundingInfo();

    // Centre point of the object
    const center = boundingInfo.boundingBox.centerWorld;

    // Approximate size of the object
    const size = boundingInfo.boundingBox.maximumWorld
        .subtract(boundingInfo.boundingBox.minimumWorld)
        .length();

    // Calculate a suitable viewing distance
    const targetRadius = Math.max(size * 2, 3);

    // Smoothly move camera target towards the selected room
    Animation.CreateAndStartAnimation(
        "targetAnim",
        camera,
        "target",
        60,
        45,
        camera.target.clone(),
        center,
        Animation.ANIMATIONLOOPMODE_CONSTANT
    );

    // Smoothly zoom in/out to fit the selected room
    Animation.CreateAndStartAnimation(
        "radiusAnim",
        camera,
        "radius",
        60,
        45,
        camera.radius,
        targetRadius,
        Animation.ANIMATIONLOOPMODE_CONSTANT
    );

    // Keep current horizontal rotation
    Animation.CreateAndStartAnimation(
        "alphaAnim",
        camera,
        "alpha",
        60,
        45,
        camera.alpha,
        camera.alpha,
        Animation.ANIMATIONLOOPMODE_CONSTANT
    );

    // Slightly adjust vertical viewing angle
    // to get a more comfortable perspective
    Animation.CreateAndStartAnimation(
        "betaAnim",
        camera,
        "beta",
        60,
        45,
        camera.beta,
        1.1,
        Animation.ANIMATIONLOOPMODE_CONSTANT
    );
}
Two functions are exported from the module: the first, initFocusManager(), initialises the highlighting system and only needs to be called once when the scene is created. The second, focusMesh(), is responsible for highlighting the selected mesh and animating the camera towards it.
As with the raycasting system, initFocusManager() should be added to the scene initialisation section, where all scene-dependent systems are configured after the model has been loaded.
focusMesh(), on the other hand, should only be used when the user selects an object. For this reason, we need to replace the current default callback used by enableRaycasting() and invoke focusMesh() whenever a mesh is successfully picked.
- Add the import at the top of the
index.js
import { initFocusManager, focusMesh } from "./utils/focusManager.js";
- update the
createSceneat the bottom of theindex.js
createScene().then((scene) => {

initFocusManager(scene);

enableRaycasting(scene, (pickResult) => {
    focusMesh(
        scene,
        pickResult.pickedMesh
    );
    });

engine.runRenderLoop(() => {
        scene.render();
    });
});
To display the data on the application, we need to define a simple user interface. This is only one possible approach, the layout and complexity of the interface will depend on the type and amount of information that needs to be displayed.
In this example, we are adding a title bar at the top of the page and a small information panel in the bottom-right corner. This panel will display the metadata associated with the selected object.
- The
index.htmlfile needs to change by adding the above elements to the page structure:
<body>

<canvas id="renderCanvas"></canvas>

<header id="top-bar">
    Digital Replica
</header>

<div id="info-panel" class="glass">
    <div class="panel-header">
        Room Information
    </div>
    <div class="panel-content">
        <div class="info-row">
            <span class="label">Room Name</span>
            <span id="room-name" class="value">Select a room</span>
        </div>
        <div class="info-row">
            <span class="label">Room Type</span>
            <span id="room-type" class="pill">-</span>
        </div>
    </div>
</div>

<script type="module" src="/src/index.js"></script>

</body>
Instead of embedding the styles directly in index.html, it is often preferable to move them into a separate CSS file, especially as the amount of styling grows.
- Create a new file named
style.cssinside thesrcfolder and paste the following CSS rules into it:
html,
body {
    margin: 0;
    width: 100%;
    height: 100dvh;
    overflow: hidden;
}

body {
    position: relative;
}

#renderCanvas {
    width: 100%;
    height: 100%;
    display: block;
    touch-action: none;
}

/* ---------- TOP BAR ---------- */

#top-bar {
    position: absolute;
    top: 16px;
    left: 50%;
    transform: translateX(-50%);
    width: min(900px, 80vw);
    height: 64px;
    display: flex;
    align-items: center;
    justify-content: center;
    color: white;
    font-size: 1.5rem;
    font-weight: 600;
    background: rgba(255,255,255,0.08);
    backdrop-filter: blur(15px);
    -webkit-backdrop-filter: blur(15px);
    border: 1px solid rgba(255,255,255,0.15);
    border-radius: 16px;
    z-index: 10;
}

/* ---------- INFO PANEL ---------- */

#info-panel {
    position: absolute;
    right: 20px;
    bottom: 20px;
    width: 25vw;
    height: 33vh;
    min-width: 280px;
    min-height: 220px;
    z-index: 100;
    overflow: hidden;

    /* Glass effect */
    background: rgba(15, 23, 42, 0.45);
    backdrop-filter: blur(24px);
    -webkit-backdrop-filter: blur(24px);
    border: 1px solid rgba(255, 255, 255, 0.12);
    border-radius: 18px;
    box-shadow:
        0 8px 32px rgba(0, 0, 0, 0.30),
        inset 0 1px 1px rgba(255, 255, 255, 0.10);
    color: white;
    font-family:
        Inter,
        Segoe UI,
        Roboto,
        Arial,
        sans-serif;
}

.panel-header {
    padding: 18px 24px;
    font-size: 1rem;
    font-weight: 600;
    letter-spacing: 0.5px;
    border-bottom: 1px solid rgba(255, 255, 255, 0.10);
}

.panel-content {
    padding: 24px;
}

.info-row {
    margin-bottom: 24px;
}

.label {
    display: block;
    margin-bottom: 6px;
    font-size: 0.75rem;
    text-transform: uppercase;
    letter-spacing: 1.2px;
    color: rgba(255, 255, 255, 0.55);
}

.value {
    display: block;
    font-size: 1.35rem;
    font-weight: 500;
    color: rgba(255, 255, 255, 0.95);
}

.pill {
    display: inline-block;
    margin-top: 8px;
    padding: 6px 12px;
    font-size: 0.85rem;
    font-weight: 500;
    border-radius: 999px;
    background: rgba(255, 255, 255, 0.08);
    border: 1px solid rgba(255, 255, 255, 0.12);
}
- To load the stylesheet, import it at the top of
index.js:
import "./style.css";
Finally, we can connect the raycasting system to the user interface so that the information associated with a selected object is displayed directly on the page.
- At the bottom of
index.js, add the following constant and function definition. This function receives the result of the raycasting operation and updates the values shown in the information panel.
const infoPanel = document.getElementById("info-panel");
function updateInfoPanel(pickResult) {

    const mesh = pickResult.pickedMesh;
    const extras = mesh.metadata?.gltf?.extras ?? {};

    document.getElementById("room-name").textContent =
        extras.roomName || mesh.name;

    document.getElementById("room-type").textContent =
        extras.roomType || "Unknown";
}
- Add
updateInfoPanel(pickResult)function to the existingenableRaycasting()so that the information panel is updated whenever an object is selected.
enableRaycasting(scene, (pickResult) => {

    updateInfoPanel(pickResult);

    focusMesh(
        scene,
        pickResult.pickedMesh
    );});
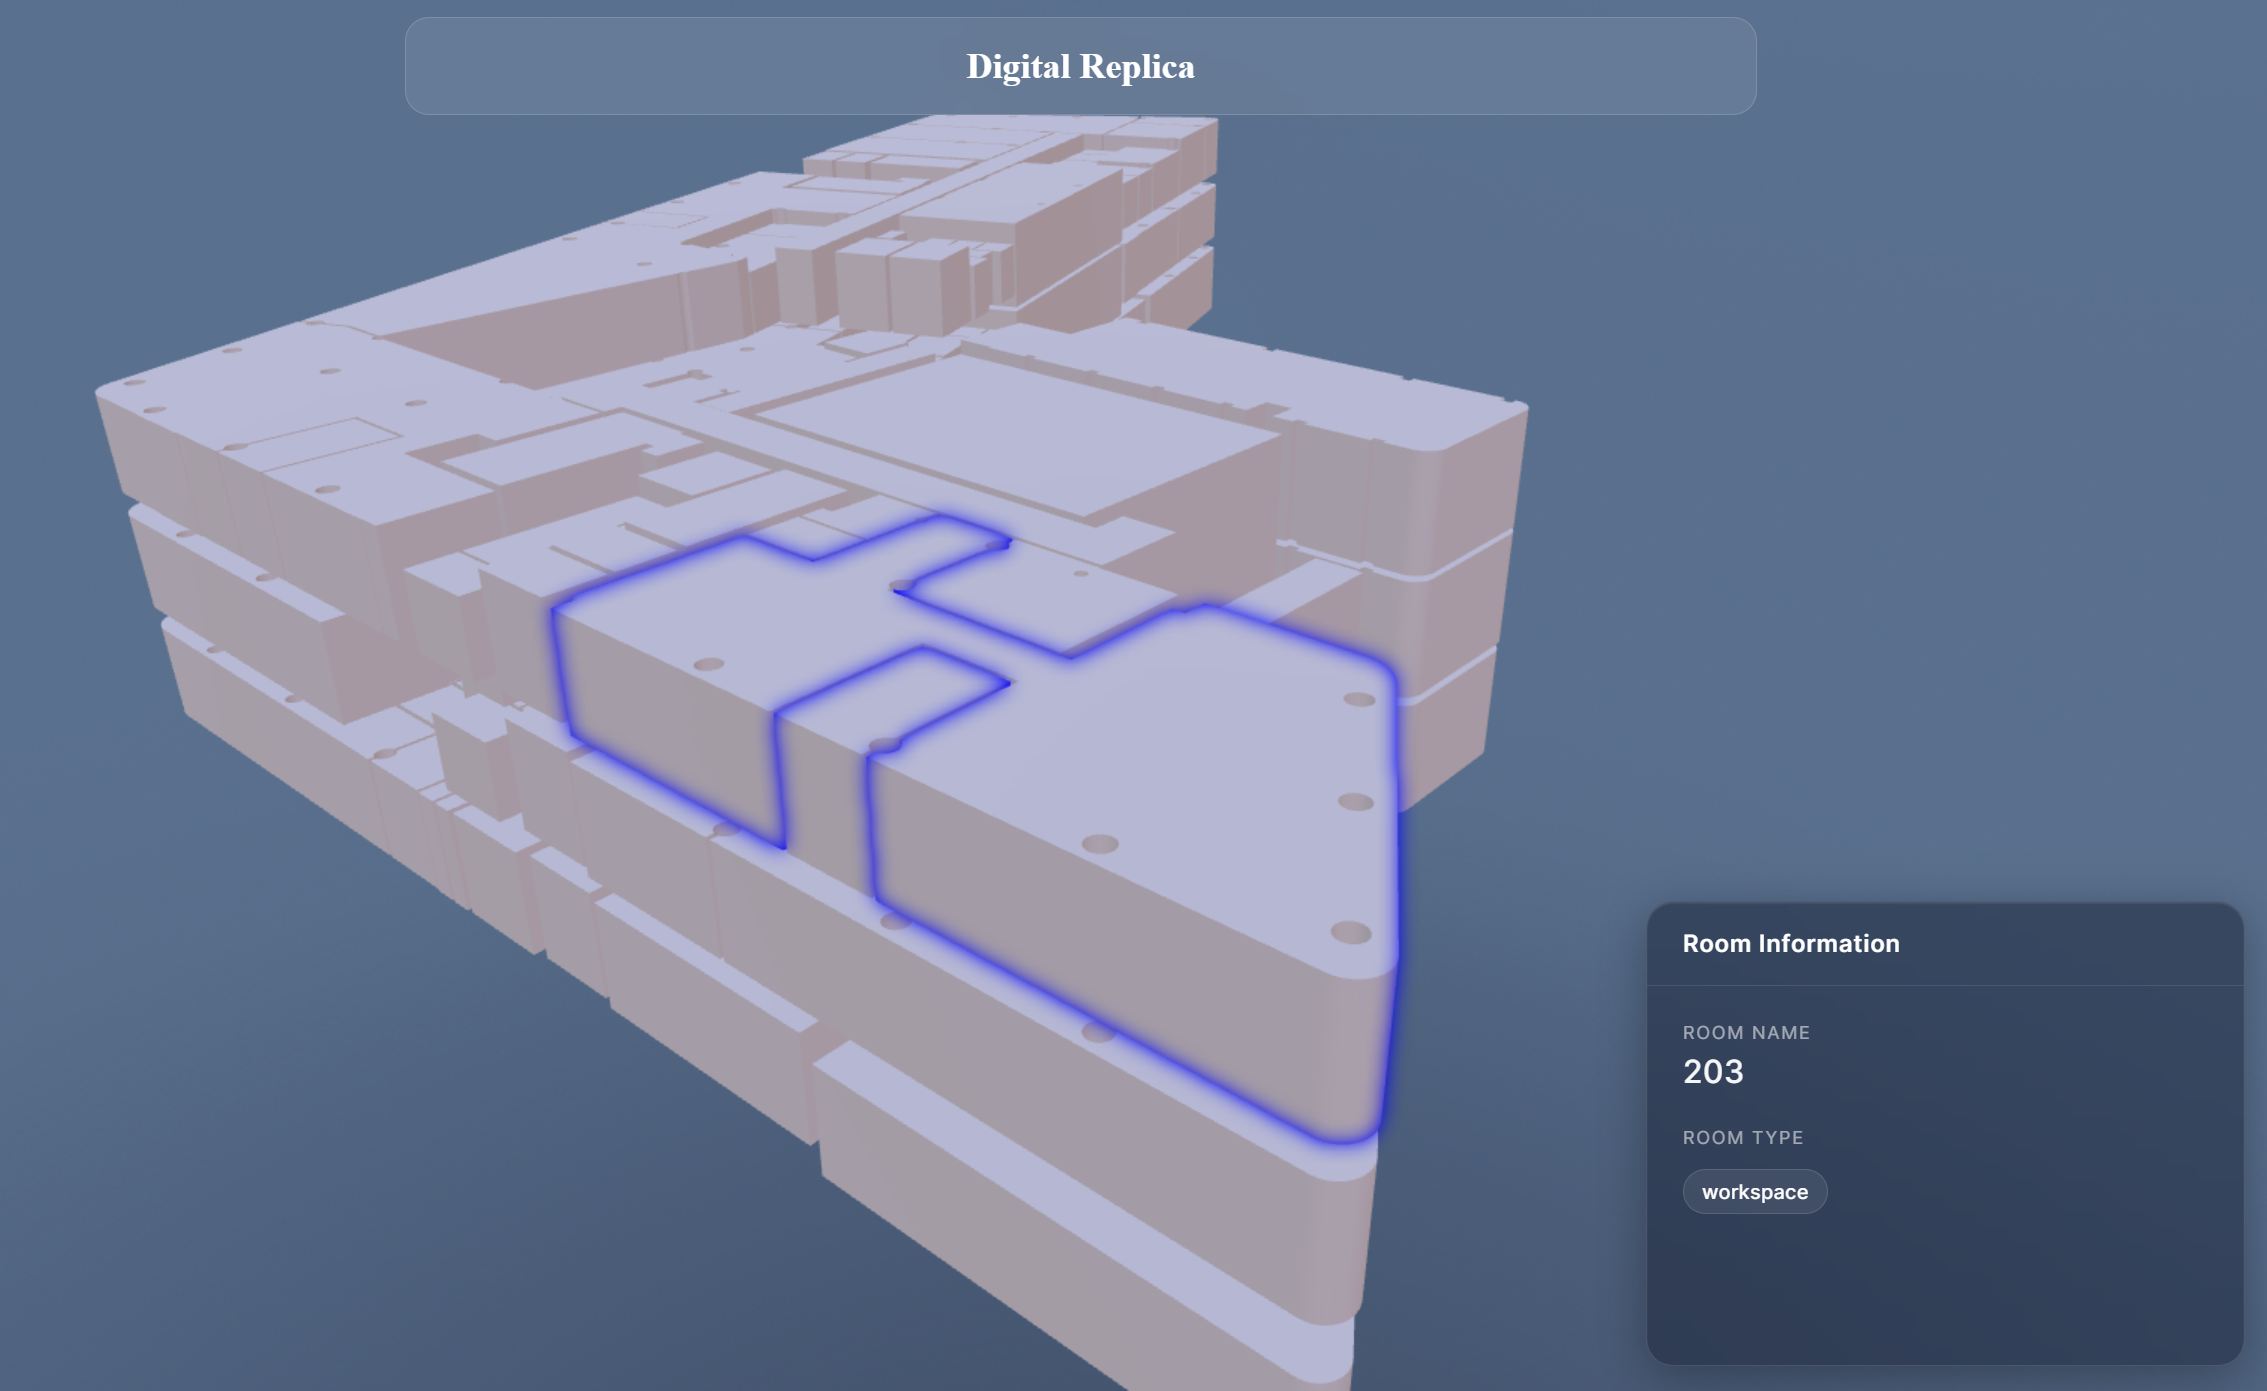
So far, the project has been tested in development mode. Before making it available on GitHub Pages or another web server, we need to create a production build.
The simplest option is to generate a standard deployment package.
- First, stop the local development server by pressing
Ctrl+Con Windows orOption+Con macOS, then run:
npm run build
Vite.js will create a new folder named dist containing all the files required by the application. During this process, dependencies are bundled, unused code is removed where possible, and assets are optimised to improve performance and reduce file size.
- to see the preview of the built app in the Terminal use
npm run previewor use any other local server pointing at thedistfolder.
PWA
An alternative is to package the project as a Progressive Web App (PWA). In addition to the standard website functionality, a PWA can be installed on desktop and mobile devices, work offline by caching assets locally, and provide a more application-like experience. This can be particularly useful for this case, where large assets such as models, textures, and supporting files can be stored locally and reused across sessions.
To function as a Progressive Web App (PWA), a website requires three main components:
- A Web App Manifest (
manifest.json), which describes the application, including its name, icons, theme colours, and how it should behave when installed. - A Service Worker (
sw.js), a background script that can cache files, enable offline access, and manage updates. - A secure deployment (HTTPS), which is required by modern browsers for service workers to operate.
The manifest defines how the application appears to users when installed on a desktop or mobile device.
The service worker runs separately from the main application and intercepts network requests. This allows assets such as JavaScript files, stylesheets, images, and 3D models to be stored locally and reused on subsequent visits, reducing loading times and enabling offline operation.
As we are using Vite.js, the easiest way to add PWA support is by using the Vite PWA Plugin.
- As usual, install the package using:
npm i vite-plugin-pwa
If it does not already exist, create a new file named vite.config.js in the root of the project. This file is used to configure Vite and add additional plugins such as PWA support.
import { defineConfig } from "vite";
import { VitePWA } from "vite-plugin-pwa";

export default defineConfig({
    build:{target:"esnext"},  //needed to address just moder browsers
    plugins: [
        VitePWA({
            registerType: "autoUpdate",

            manifest: {
                name: "NAME OF THE PROJECT",
                short_name: "SHORT NAME",
                description: "DESCRIPTION IN ONE SENTENCE",
                theme_color: "#121212",
                background_color: "#121212",
                display: "standalone",

                icons: [
                    {
                        src: "img/icon/ICON.png",
                        sizes: "192x192",
                        type: "image/png"
                    },
                    {
                        src: "img/icon/ICON.png",
                        sizes: "512x512",
                        type: "image/png"
                    }
                ]
            },

            workbox: {
                maximumFileSizeToCacheInBytes: 10 * 1024 * 1024, //for larger built
                globPatterns: [
                    "**/*.{js,css,html,png,svg,glb}" //the filetype to store in the cache
                ]
            }
        })
    ]
});
In index.js, add the following import at the very top of the file:
import { registerSW } from "virtual:pwa-register";
registerSW({
    immediate: true
});
- Finally, to build the WebApp, as before, run
npm run build
- and when ready, to view the result run
npm run preview
Vite.js will start a local server (note that the port number may be different from the one used during development).
If the PWA has been configured correctly, an Install App icon should appear next to the browser address bar. Alternatively, the installation option can usually be found under the browser menu (often under More Tools or Install App).

Extend the Model Metadata
Using the Babylon.js Sandbox, add data to the model metadata.
Add properties like
{
    "roomName": "Meeting Room A",
    "roomType": "Meeting Room",
    "capacity": 12,
    "floor": 2
}
Extend the Information Panel
Working on both index.html and style.css and on the updateInfoPanel(), add new fields to the information panel and display the new metadata values.
E.g.:
- Capacity
- Floor
- Department
- Occupancy
Dynamic Highlight Colours
Modify the highlighting logic in the FocusManager.js so that the glow colour (Color3) changes according to the type of space or other variables
Load Additional Models
Experiment with different 3D models and file formats to understand how they are loaded and rendered in the scene.