This workshop will show you how to:
- create a WebAR marker based experience using AFrame and AR.js
- import 3D models
- consume and visualise data from MQTT feed using WebSocket connection
To complete this workshop you will need:
- Visual Studio Code
- Live Server for VS Code
Remote or Local WebServer that support HTTPS connection (e.g. Node.js local-web-server or VSCode configured with a local OpenSSL certificate) - Low Poly Plant in a pot
- Low Poly Display
- two images to use as markers
- A-Frame Hello World introductory workshop
- MQTT broker (suggested the one built in the Plant-Monitor workshop)
Hardware:
- Any Android or iOS smartphone with camera and internet connection (recommended)
- Webcam
Languages used:
- HTML
- JavaScript
At the core of the WebAR experience is the library AR.Js. Based on the open source library ARToolkit, AR.Js can be used with Three.js or AFrame and, like the last one, its Hello World scene requires just few lines of HTML to run.
Since version 3.0.0, AR.js has two different sources: one using NFT Image tracking, and a second one using Marker Based Tracking. The latter one is used in this workshop.
- Create a new index.html in VSCode.
- Load AFrame and AR.js libraries
<!--AFrame version 1.2.0-->
  <script src="https://aframe.io/releases/1.2.0/aframe.min.js"></script>
<!--AR.js version 3.1.0-->
  <script src="https://raw.githack.com/AR-js-org/AR.js/3.1.0/aframe/build/aframe-ar.js">
Add in the body of the webpage the tag a-scene with the following components:
embeddedarjswith the properties:debugUIEnabled: false;sourceType: webcam;trackingMethod: best;
color-space="sRGB"vr-mode-ui="enabled: false;"to remove the VR buttonrendererof the scene, with the properties:logarithmicDepthBuffer: false;physicallyCorrectLights: true;colorManagement: true;
<a-scene
    embedded
    arjs="debugUIEnabled: false; sourceType: webcam; trackingMethod: best;"
    color-space="sRGB"
    vr-mode-ui="enabled: false"
    renderer="logarithmicDepthBuffer: false; physicallyCorrectLights: true; colorManagement: true; "
    >
Add a camera entity with a unique ID
<a-entity id='userCamera' camera> </a-entity>
and the a-marker tag with the attribute preset="hiro"
<a-marker preset="hiro"> </a-marker>
AR.js contains the pattern of two markers: Hiro, the image can be download here, and Kanji, the image can be download here.
When AR.js detects the marker, the entities within <a-marker> </a-marker> are set to visible.
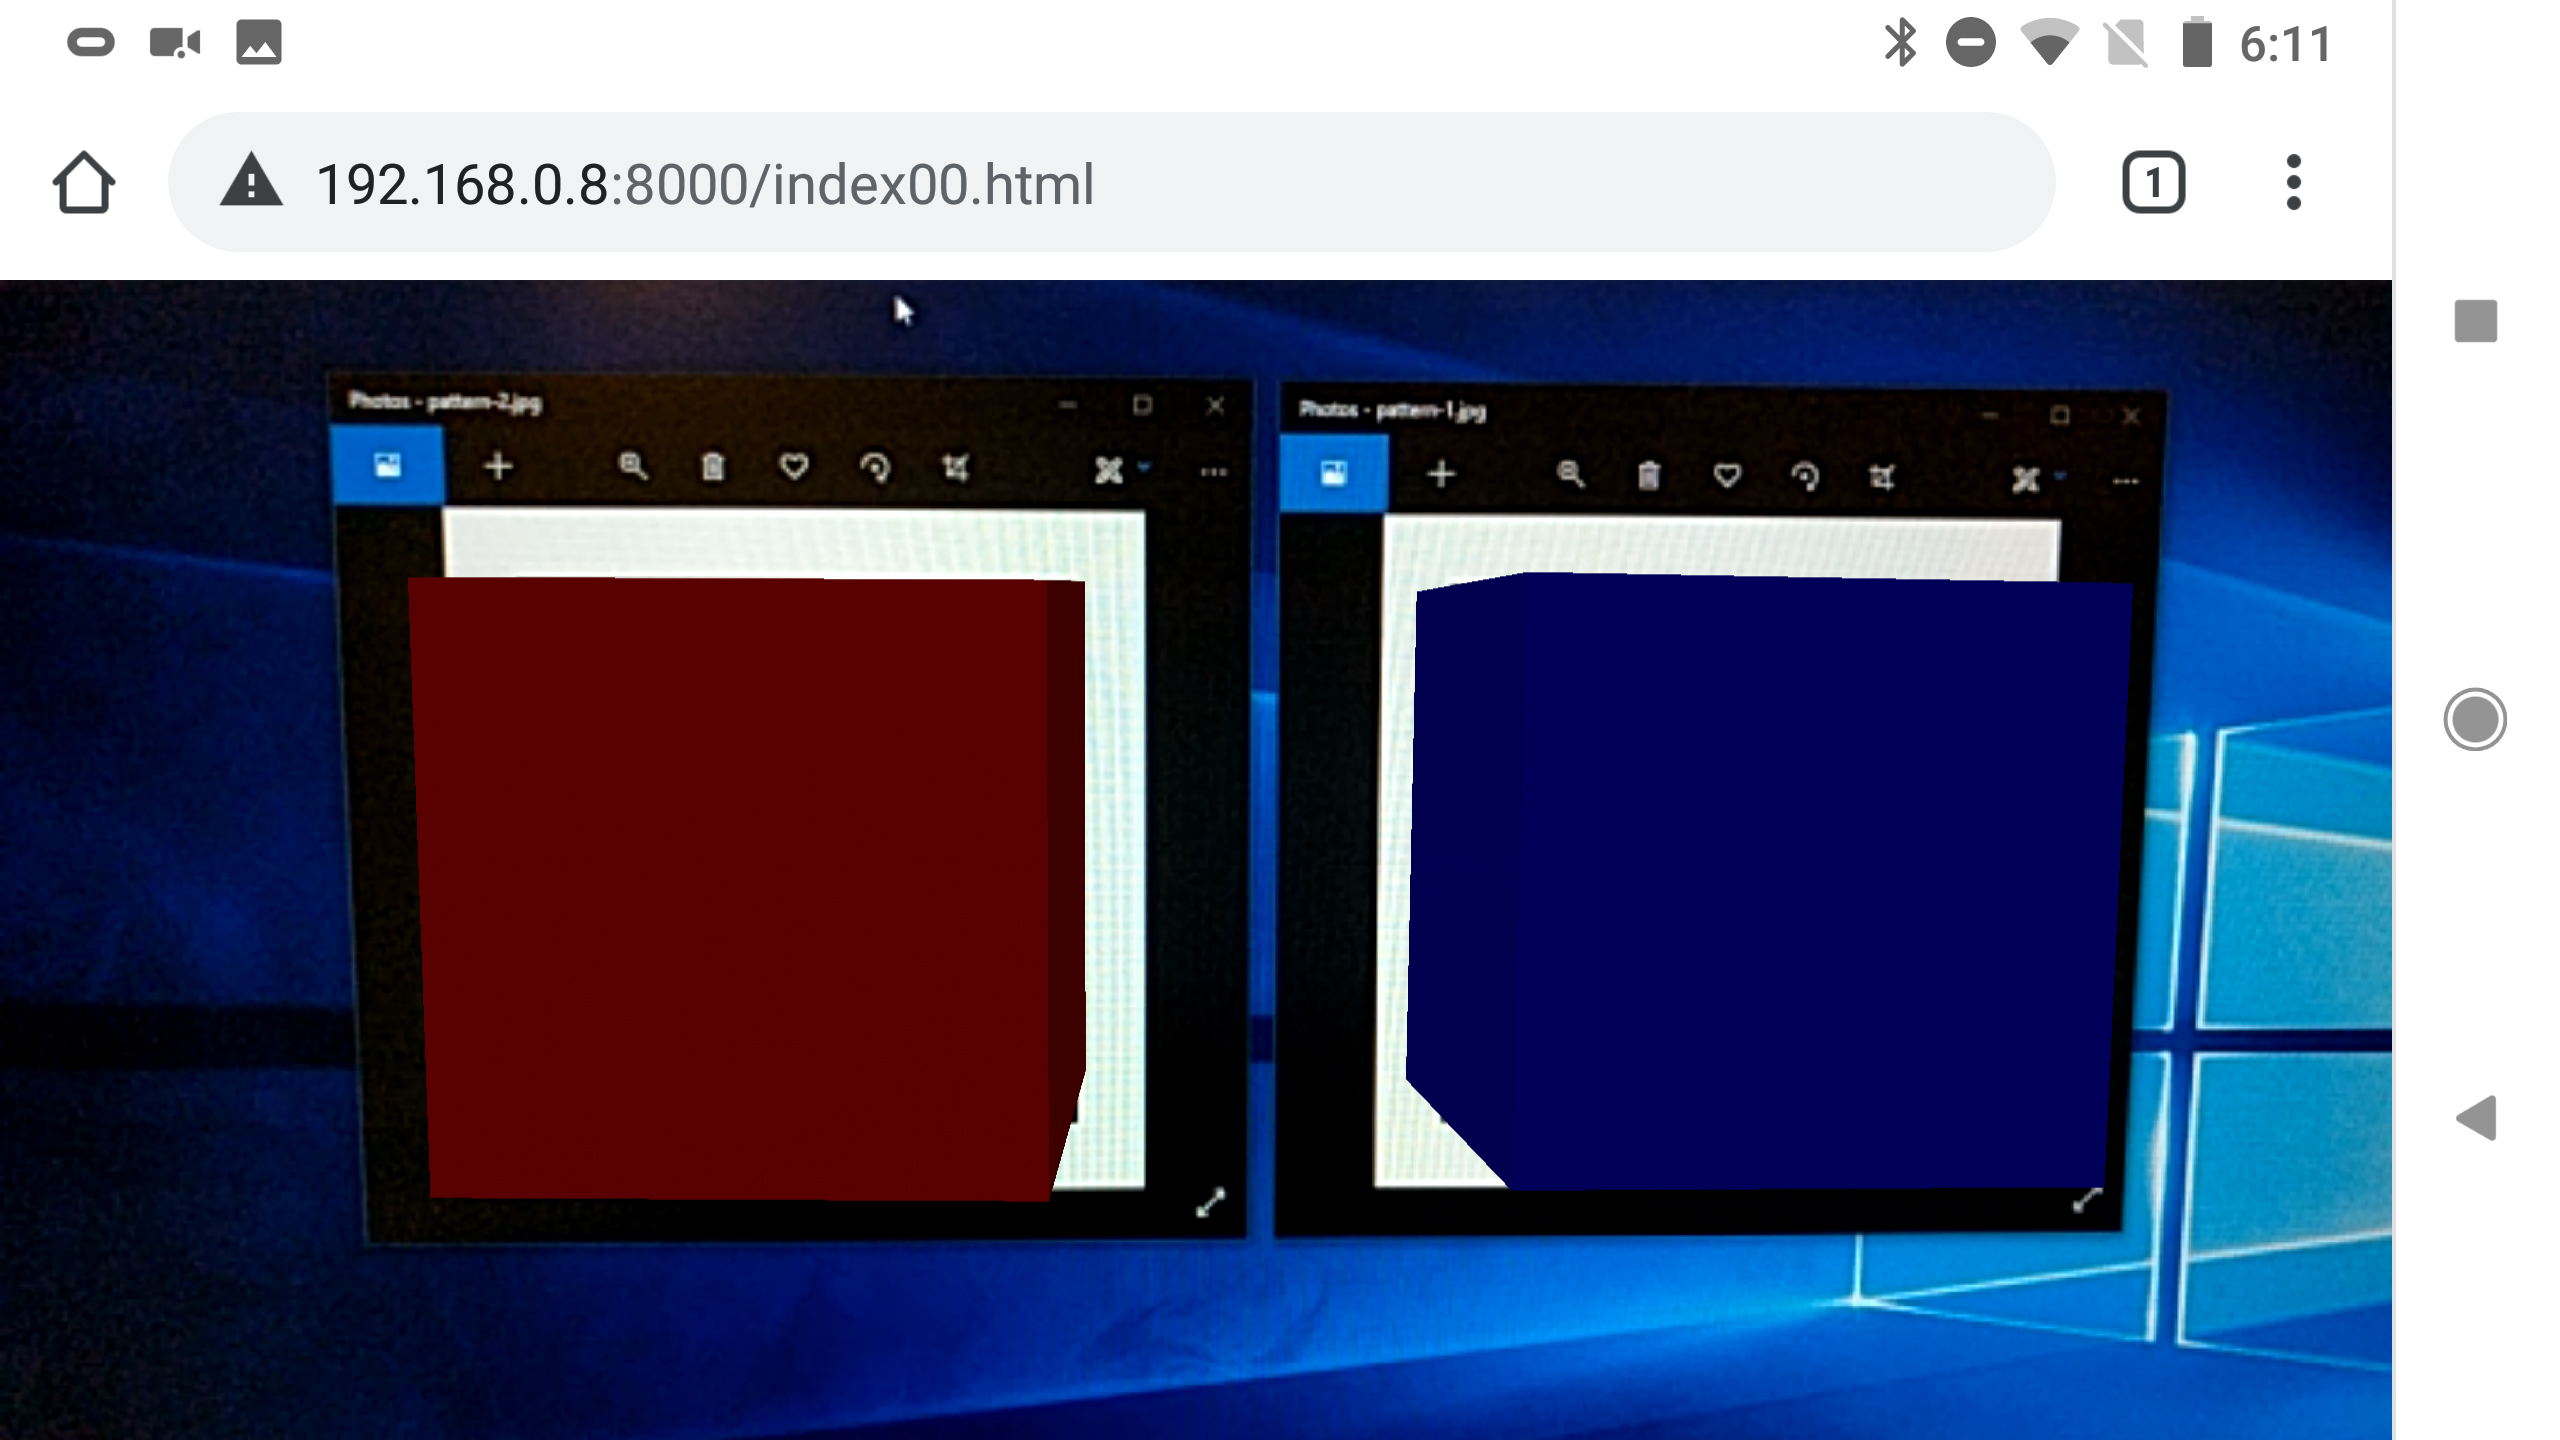
- Add a blue box at the centre of the Hiro marker
<a-marker preset="hiro">
          <a-box position='0 0 0' material='color: blue;'></a-box>
</a-marker>
Here the complete index.html for the Hello WebAR scene
<!DOCTYPE html>
<html lang="en">
<head>
  <title>WebAR</title>
  <!--AFrame version 1.2.0-->
    <script src="https://aframe.io/releases/1.2.0/aframe.min.js"></script>
  <!--AR.js version 3.1.0-->
    <script src="https://raw.githack.com/AR-js-org/AR.js/3.1.0/aframe/build/aframe-ar.js"></script>
</head>
 <body>
  <a-scene
    embedded
    arjs="debugUIEnabled: false; sourceType: webcam; trackingMethod: best;"
    color-space="sRGB"
    vr-mode-ui="enabled: false"
    renderer="logarithmicDepthBuffer: false; physicallyCorrectLights: true; colorManagement: true; "
    >

  <a-entity id='userCamera' camera> </a-entity>

  <a-marker preset="hiro">
    <a-box position='0 0 0' material='color: blue;'></a-box>
  </a-marker>

  </a-scene>
</body>
</html>
To test your code using the inbuilt webcam of your laptop, or an external webcam, in VSCode run the live server (restart VSCode if the live server is not available).
To test your code using a smartphone, run the Node.JS command ws --https in the folder of your project (you can open a terminal directly in VSCode from the top menu).
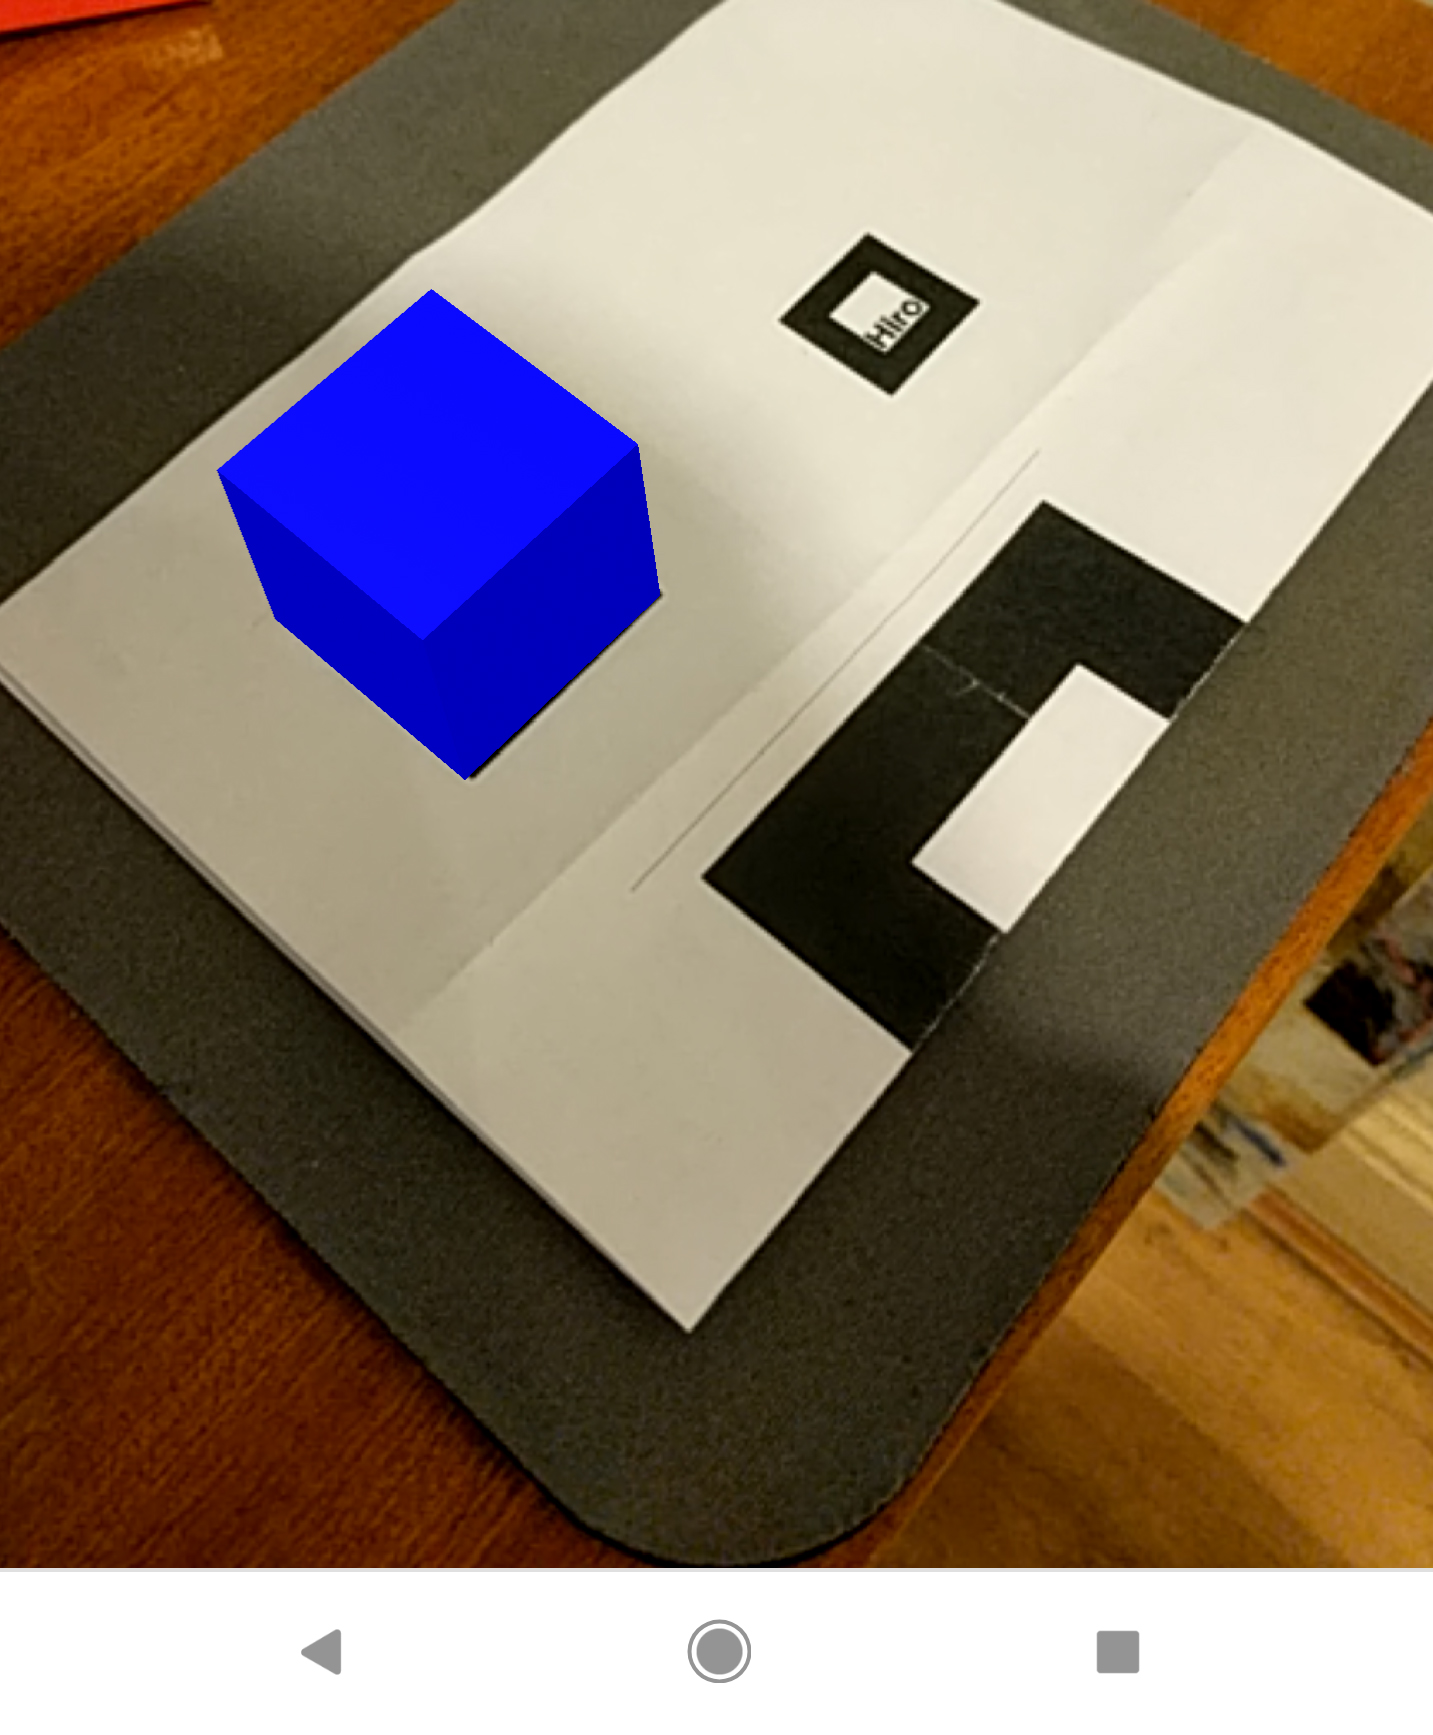
Point your camera or smartphone to the Hiro marker to display the blue cube
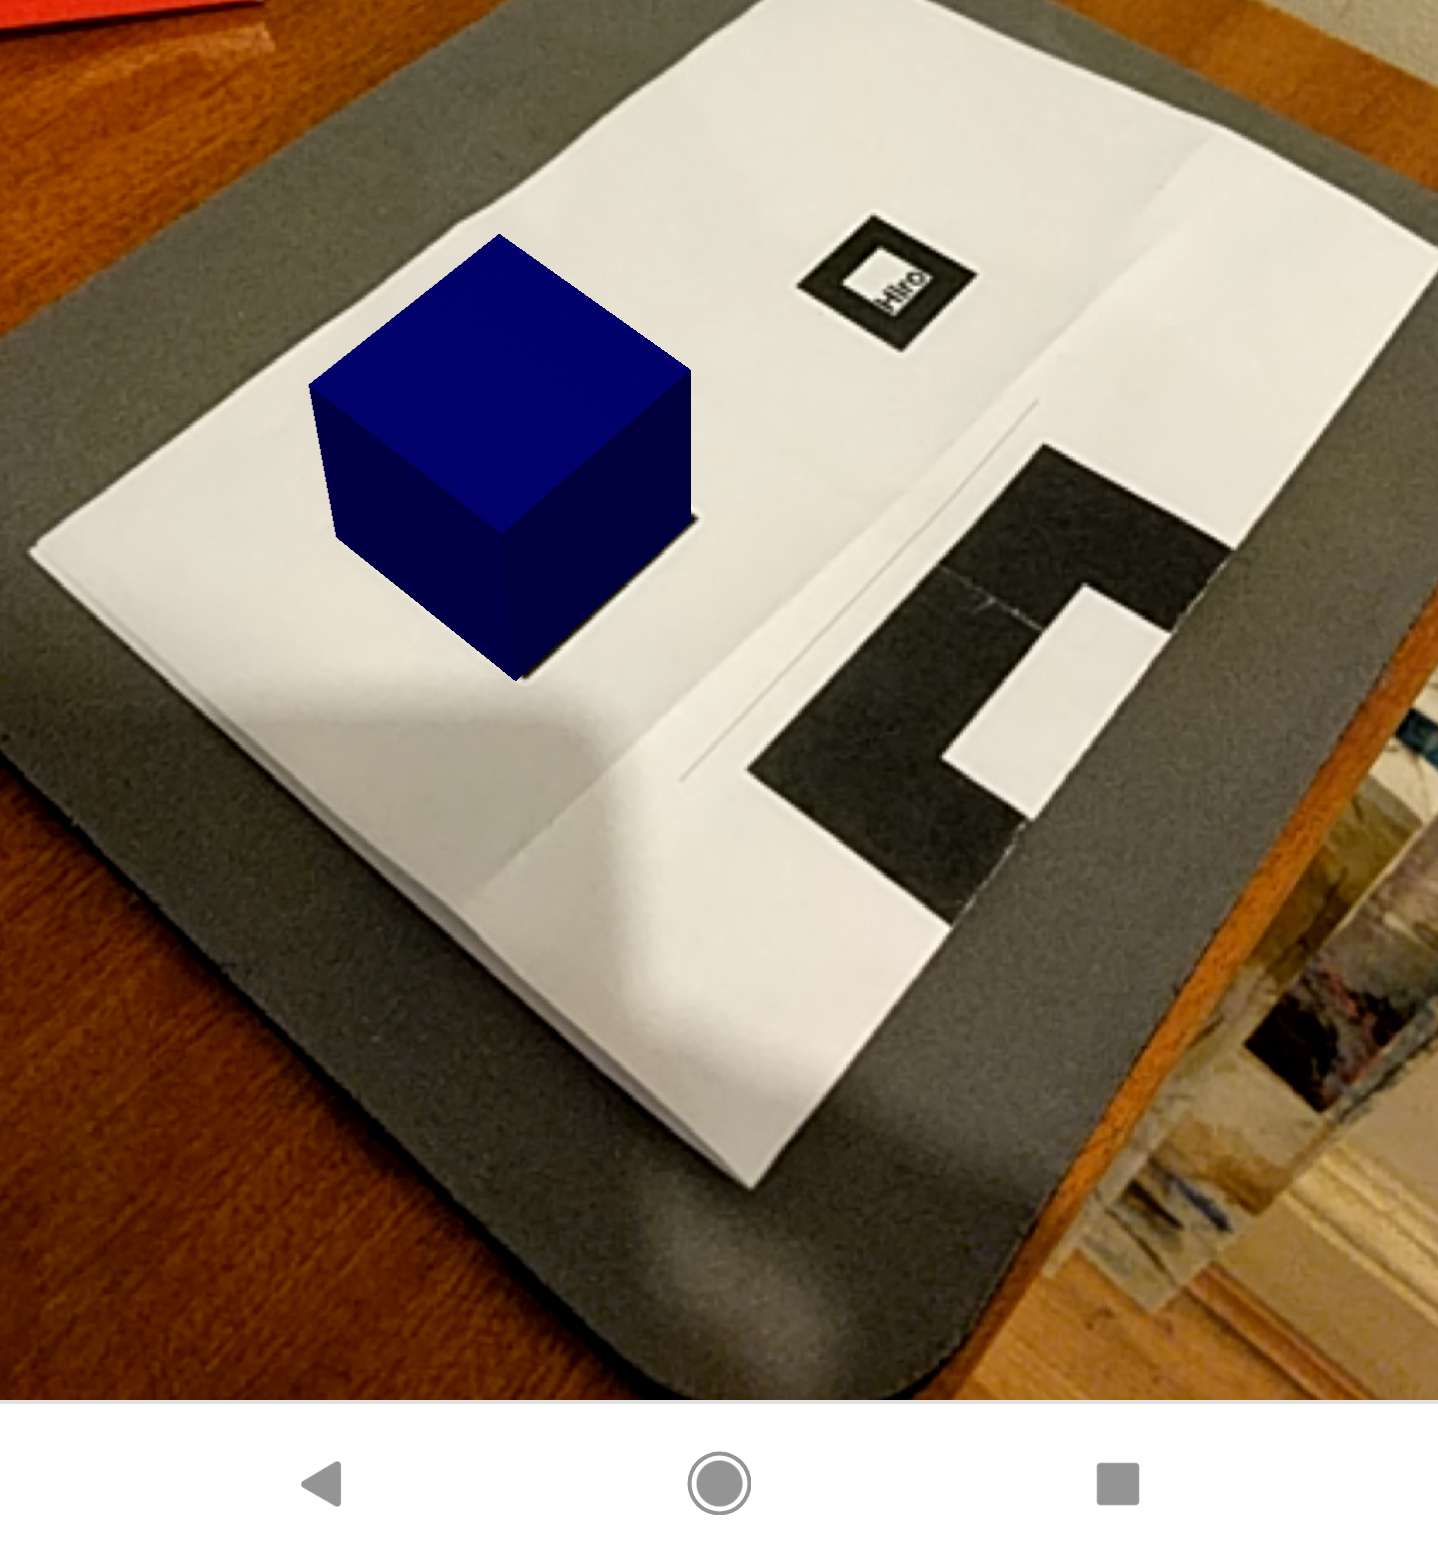
The renderer component in the a-scene tag is used to control the final appearance of the AR cube: e.g. without physically correct lighting...
...and with physically correct lighting
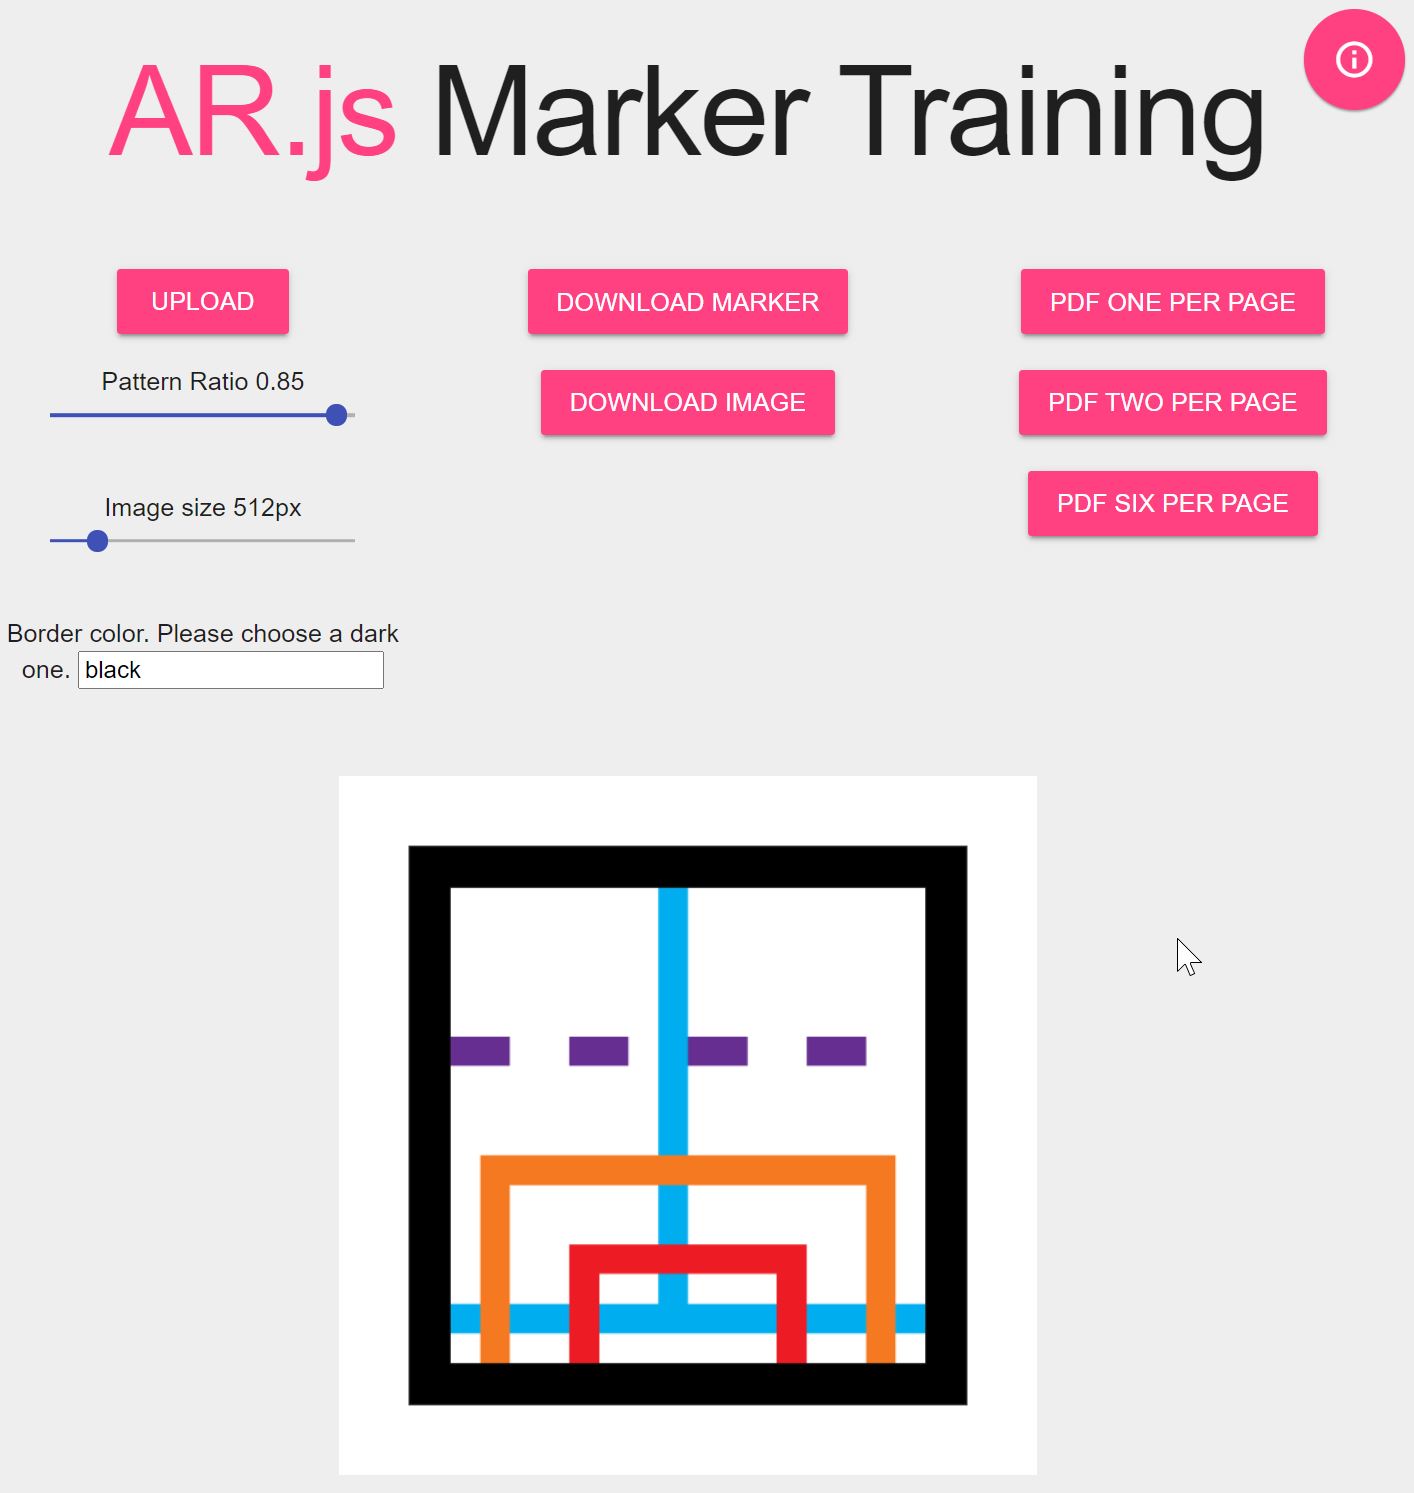
It is possible to create custom markers using theonline Marker Training tool.
Choose the right image is a process of trial and error, here some minimum requirements:
- the marker needs a continuous black border (since AR.js version 1.7.1 also coloured borders are accepted). A thick border makes recognition process easier and faster but reduces the area available for the image. 80% - 85% pattern ratio is generally a good threshold
- the pattern ratio needs to be set in the
ar.jscomponent of thea-scenetag, therefore, if multiple markers are used in the same AR experience, they will need to have the same pattern ratio to be correctly detected - an external white or high contrasted area is also essential for the recognition process. Image, border and surrounding area need to avoid overlapping and blending
- the source image and the marker need to be square
- the image should be rotationally asymmetric in order to detect the orientation of the marker
- the image can be black and white or coloured, but alpha channel is not supported
- JPG is the preferred file format
- the physical material used for the markers should not be too reflective and the colours as close as possible to the RGB values used on screen. Printed markers are easier to recognized, but they can be also projected or visualise on a screen
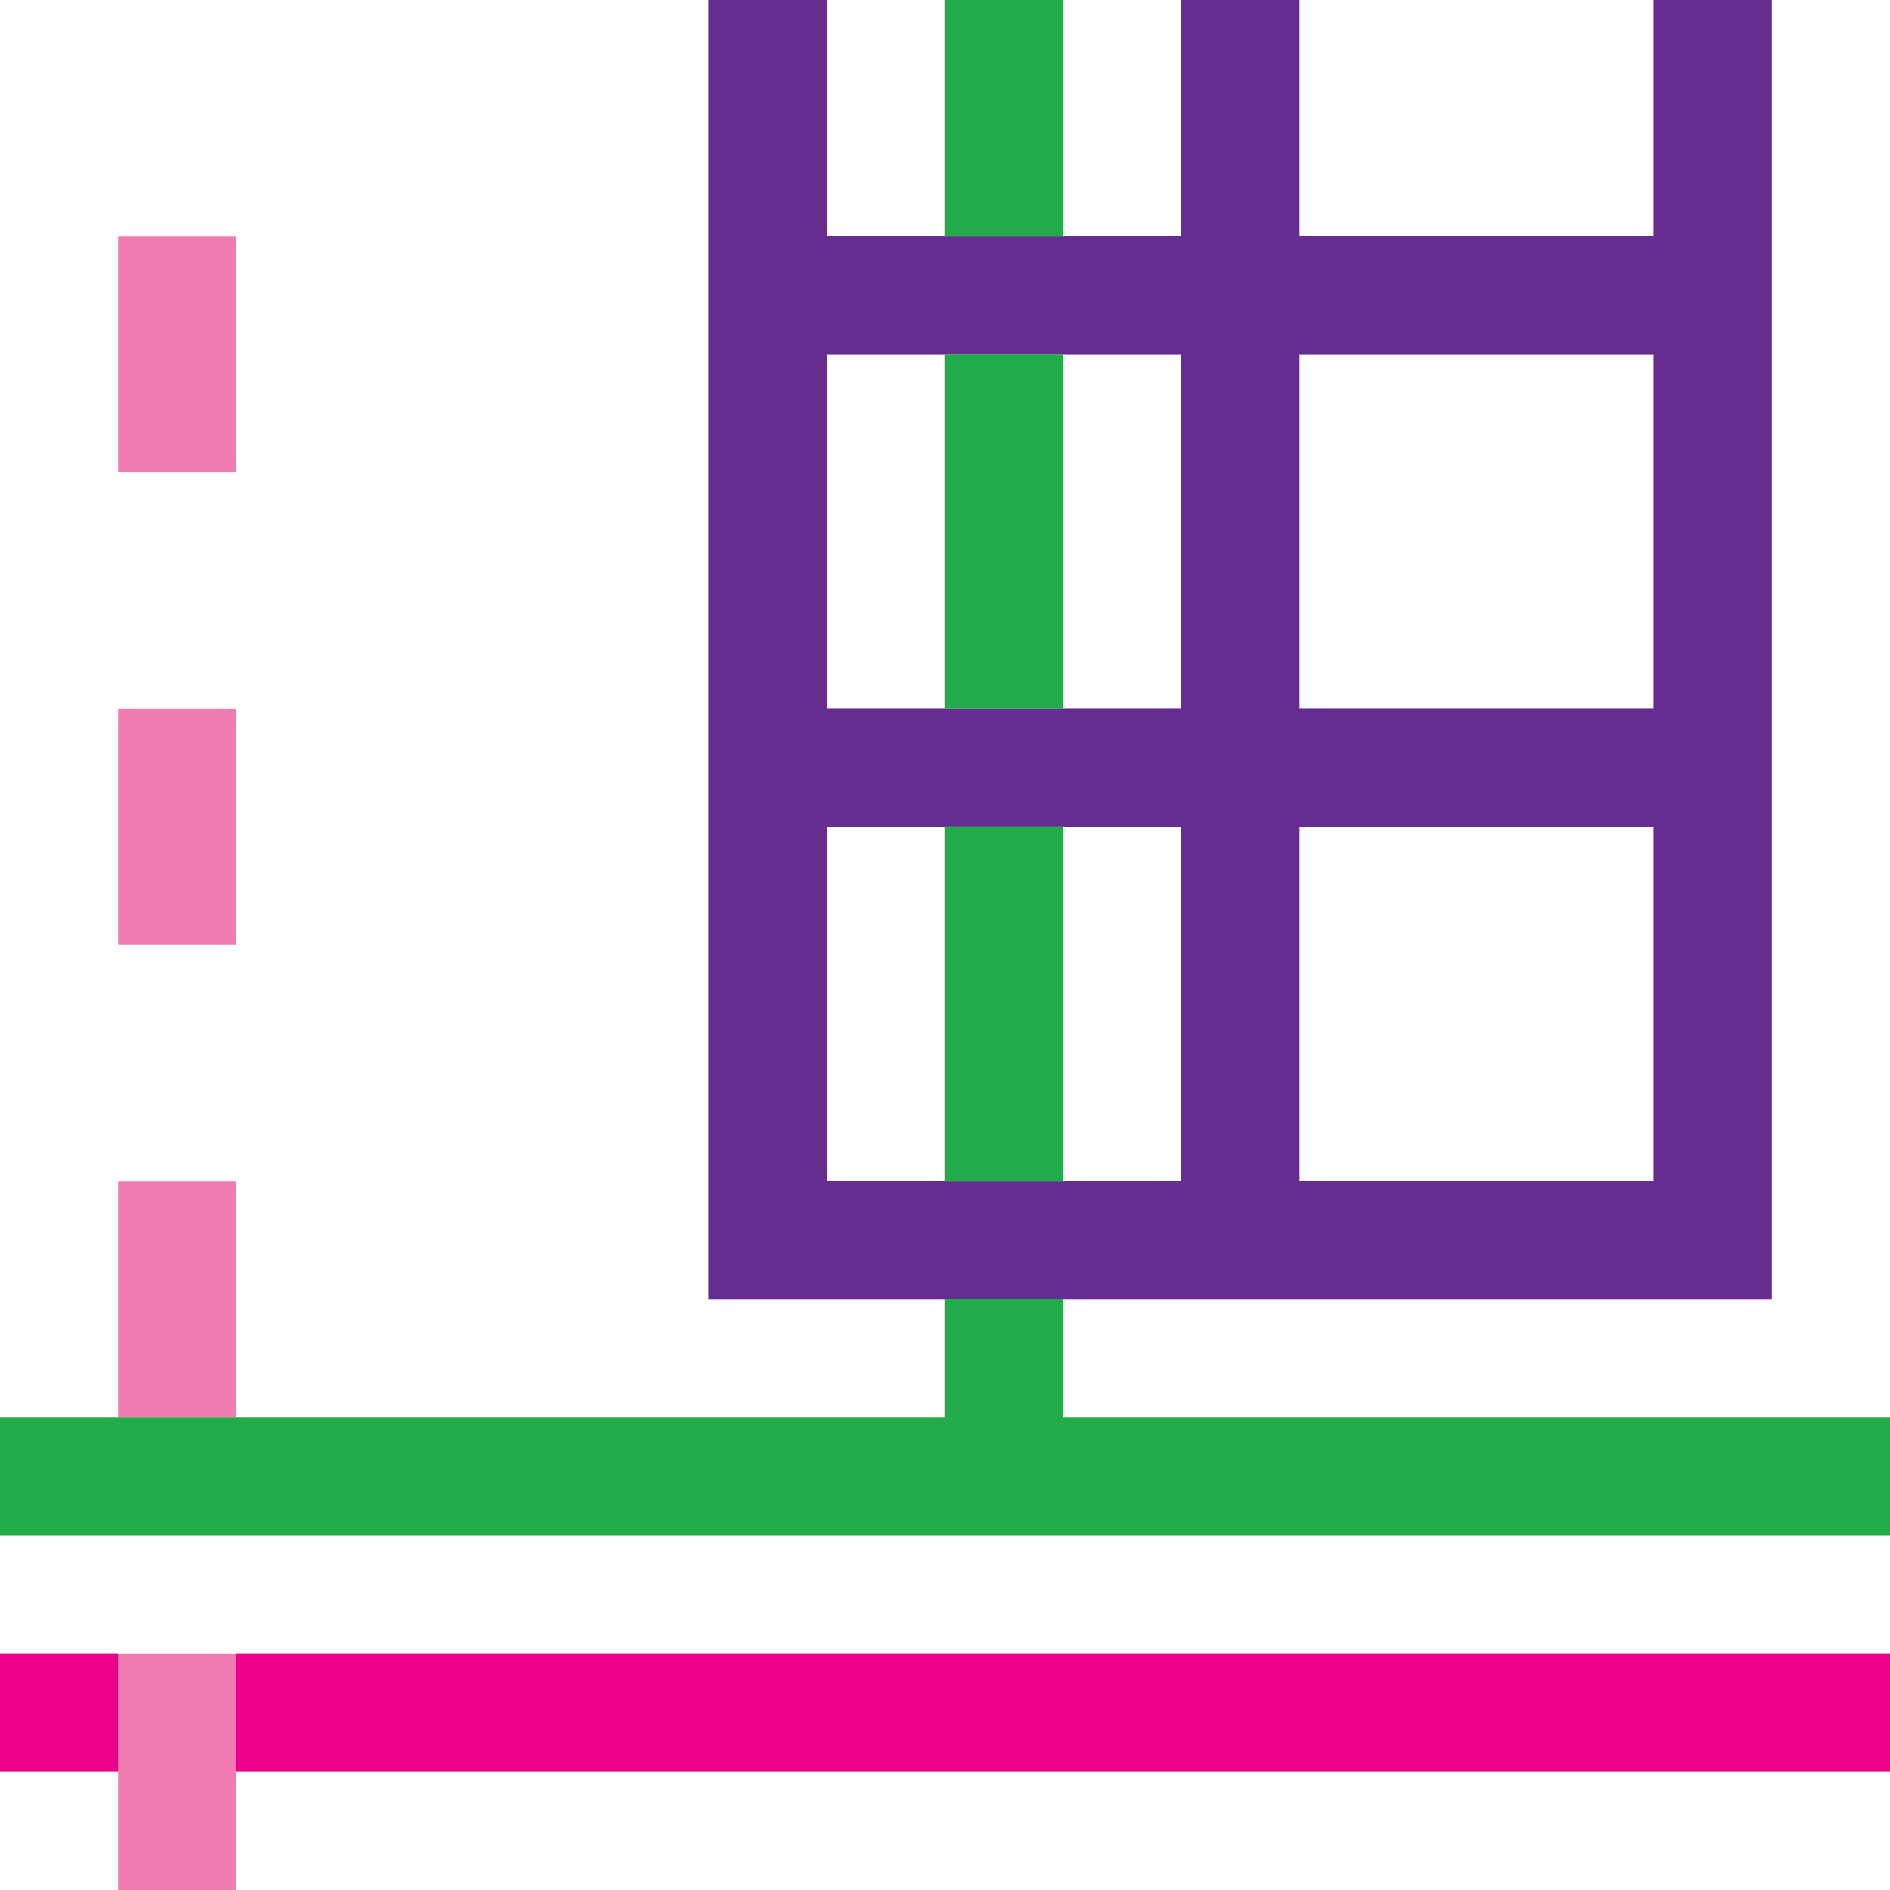
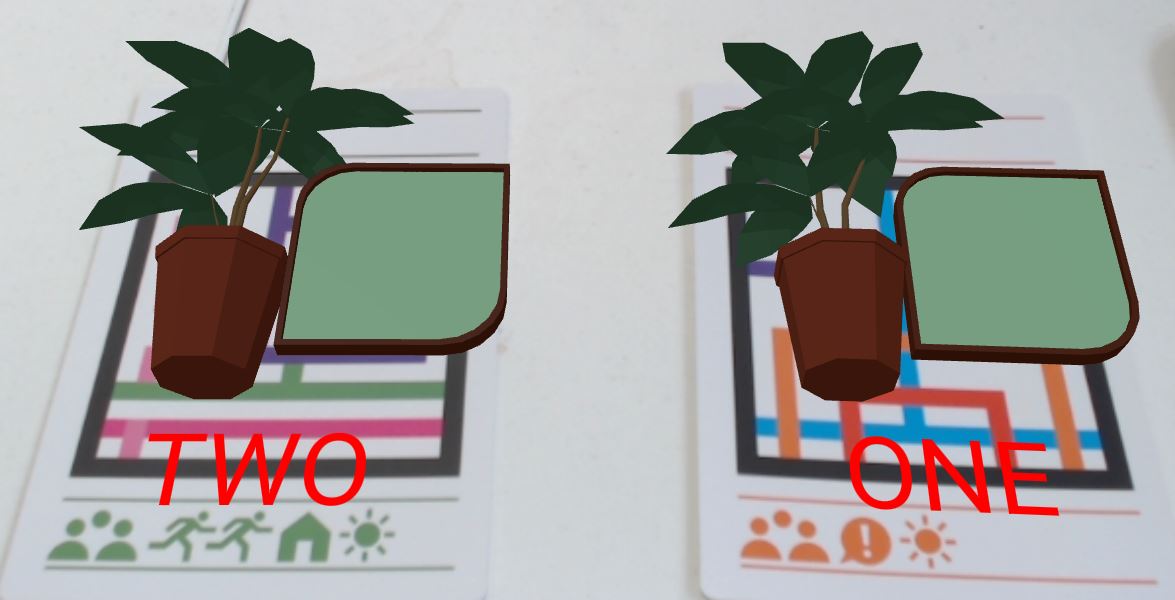
Prepare two images (below two samples) and upload them, one at the time, to online Marker Training tool. Set the pattern ratio to 85% and press Download Marker to download the PATT file (the pattern recognised by the source camera), Download Image to download the image with the added black border.
- change the component and property of the
a-markerfrompreset="hiro"totype="pattern"and add the location of the.pattfile just downloaded
From:
<a-marker preset="hiro">
  <a-box position='0 0.5 0' material='color: blue;'></a-box>
</a-marker>
To:
<a-marker id="marker1" type="pattern" url="resources/patt/pattern-imgage1.patt">
  <a-box position='0 0 0' material='color: blue;'></a-box>
</a-marker>

<a-marker id="marker2" type="pattern" url="./resources/patt/pattern-image2.patt">
  <a-box position='0 0 0' material='color: red;'></a-box>
</a-marker>
- Add as property of
arjsthepatternRatio(e.g. 85% pattern ratio, 15% black border => 0.85).
<a-scene
    embedded
    arjs="debugUIEnabled: false; sourceType: webcam; trackingMethod: best; patternRatio: 0.85"
    color-space="sRGB"
    vr-mode-ui="enabled: false"
    renderer="physicallyCorrectLights: true; colorManagement: true; "
    >
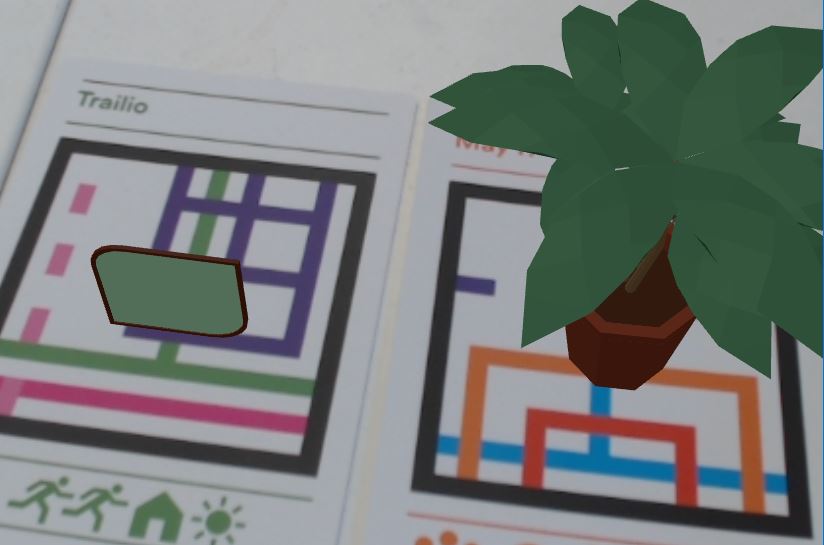
The markers can be used to display any kind of AFrame entity (e.g. primitive geometries) as well as external assets (e.g. images, videos, 3d models).
- preload the 3D models of the Low Poly Plant in a pot and Low Poly Display using the Asset Management System inside the a-scene, just after the
a-scenetag
<a-scene [...] >
 <assets>
  <a-asset-item
    id="plant_gltf"
    src="resources/models/plant/scene.gltf">
  </a-asset-item>

  <a-asset-item
    id="display_glb"
    src="resources/models/display.glb">
  </a-asset-item>
</assets>
replace the content of the two markers with the 3D models of the plant and of the display. The a-marker, as well as the other a-entity can have nested elements.
<a-marker id="marker1" type="pattern" url="./resources/patt/pattern-image1.patt">
    <!--<a-box position='0 0 0' material='color: blue;'></a-box>-->
    <a-entity
    id="platPot"
    gltf-model="#plant_gltf"
    scale="0.2 0.2 0.2"
    position="0 0 0"
    rotation="0 0 0">
</a-entity>
</a-marker>

<a-marker id="marker2" type="pattern" url="./resources/patt/pattern-image2.patt">
    <!--<a-box position='0 0 0' material='color: red;'></a-box>-->
    <a-entity
    id="plantDisplay"
    gltf-model="#display_glb"
    scale="0.2 0.2 0.2"
    position="0 0 0"
    rotation="0 0 0">
</a-entity>
</a-marker>
It is possible to create a complex AR experience just using HTML, however, each new marker needs to be added manually to the scene. It is possible to automate this process using custom Aframe components. Moreover, custom Aframe components allow us to provide additional features to the application.
We are going to use an external json file to store the information about our markers
- Create a new
marker.jsonfile in the resources folder
{
    "info": {
      "version": "1.0",
      "title": "WebAR-MultiMarkers",
      "markers":2
    },
    "content": [
      {
        "markerName": "pattern-image1",
        "topic": "1",
        "textContent": "ONE"

      },
      {
        "markerName": "pattern-image2",
        "topic": "2",
        "textContent": "TWO"
      }
    ]
}
The markerName field need to match the name of the patt file without file extension
- Create a new
markerManager.jsfile and create a componentregisterevents. This component will listen to themarkerFoundandmarkerLostevents
AFRAME.registerComponent('registerevents', {
    init: function () {

        const handler=this.el;

        handler.addEventListener("markerFound", (event) => {
            let markerId = event.target.id;
            console.log('Marker Found: ', markerId);
        });

        handler.addEventListener("markerLost", (event) => {
            let markerId = event.target.id;
            console.log('Marker Lost: ', markerId);
        });
    },
});
- add the component
registereventsto thea-scenetag. Once a marker is detected, theeventfired by the component will contain the name of the marker itself. - create, in the same
markerManager.jsfile, another componentmarkers_start_json
//component to create the marker a-entity from the content/json
AFRAME.registerComponent('markers_start_json', {
  init: function () {   }
})
- inside the
initfunction we are going to create a variable to reference thea-sceneand parse the.jsonfile using the fetch() function
init: function () {
  console.log('Add markers to the scene');

  let sceneEl = document.querySelector('a-scene');

  //index.json contains the list of markers and content
  fetch("./resources/markers.json")
      .then(response => response.json())
      .then(json => {
          console.log(json.content);
      })
- Save the file and, in the
index.htmladd a new script tag just after the libraries
<script src="./resources/js/markerManager.js"></script>
and attach also this component markers_start_jsonComponent to the a-scene
<a-scene
    embedded
    arjs="debugUIEnabled: false; sourceType: webcam; trackingMethod: best; patternRatio: 0.85"
    color-space="sRGB"
    vr-mode-ui="enabled: false"
    renderer="physicallyCorrectLights: true; colorManagement: true; "

    registerevents
    markers_start_json
    >
- test the current application. In the console you should see the content of the parsed json file
Array [ {...}, {...} ]
0: Object { markerName: "pattern-image1", topic: "1", textContent: "ONE", ... }
1: Object { markerName: "pattern-image1", topic: "2", textContent: "TWO", ... }
and a log every time a marker is detected
- Next step is too create a forEach loop and use the content of the json file to create the
a-entitytags we will need. The pseudo-structure of thea-markerwill be the following
<a-marker>
  <a-entity plantcontainer>
    <a-entity plant 3D model>
      <a-entity display 3Dmodel></a-entity>
    </a-entity>
    <a-entity text></a-entity>
  </a-entity>
</a-marker>
- add the
forEachloop after theconsole.log(json.content)
console.log(json.content);
 json.content.forEach(el => {  });
Inside the loop, for each element el (i.e. the two markers) the script needs to create and setup the following variables
//0. createa a string that contain the URL of the PATT file
let markerURL = './resources/patt/' + el.markerName + '.patt';

//1. Create and add a a-marker to scene
let markerEl = document.createElement('a-marker');
    markerEl.setAttribute('type', 'pattern');
    markerEl.setAttribute('url', markerURL);
    markerEl.setAttribute('id', el.topic); //the topic from the json file
sceneEl.appendChild(markerEl); //Add the marker to the scene, this was declare outside the loop

//2. Add a text entity to each marker
let textEl = document.createElement('a-entity');
  textEl.setAttribute('id', 'text' + el.textContent); //the text from the json file
  textEl.setAttribute('text', { color: 'red', align: 'center', value: el.textContent, width: '6' });
  textEl.object3D.position.set(-0.0, 0.1, 0.5);
  textEl.setAttribute('rotation', { x: -90, y: 0, z: 0 });
markerEl.appendChild(textEl); //add the text to the marker

//Create the Plant Model and Panel for the data
//3. The main container
let plantRT = document.createElement('a-entity');
  plantRT.setAttribute('id', 'planRT_' + el.topic);
  plantRT.setAttribute('rotation', { x: -90, y: 0, z: 0 });
  plantRT.object3D.position.set(0, 0, 0.2);
  plantRT.object3D.scale.set(1, 1, 1);
markerEl.appendChild(plantRT);


//4. the 3D model of the Display.glb
let screen = document.createElement('a-entity');
  screen.setAttribute('id', 'screen_' + el.topic);
  screen.setAttribute('gltf-model', '#display_glb');
  screen.object3D.position.set(0.3, 0.41, -0.01);
  screen.object3D.scale.set(0.3, 0.3, 1);
  screen.setAttribute('rotation', { x: 0, y: 0, z: 0 });
plantRT.appendChild(screen);

//5. the 3D model of the plant
let modelplant = document.createElement('a-entity');
  modelplant.setAttribute('id', 'modelplant_' + el.topic);
  modelplant.setAttribute('gltf-model', '#plant_gltf');
  modelplant.object3D.position.set(-0.2, 0, 0);
  modelplant.object3D.scale.set(0.2, 0.2, 0.2);
  modelplant.setAttribute('rotation', { x: 0, y: 180, z: 0 });
plantRT.appendChild(modelplant);
We can now add new plants just by adding the patter file to the patt folder and new entries in the json file
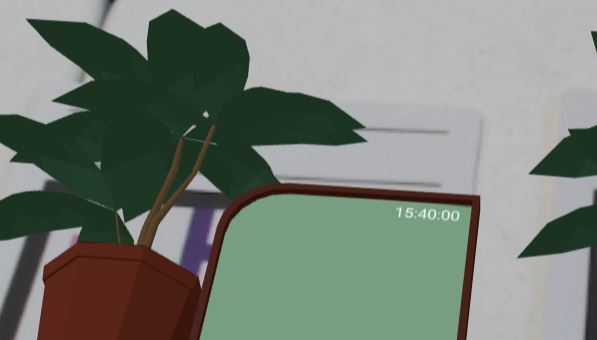
We can now add the text on the virtual display, first let's add a clock on the top right corner of the display.
- add a new Aframe Component named
timenow
//Component to visualise Time on a a-text entity
AFRAME.registerComponent('timenow',
    {
        init: function () {
            // Set up the tick throttling. Slow down to 500ms
            this.tick = AFRAME.utils.throttleTick(this.tick, 500, this);
        },
        tick: function () {
            this.el.setAttribute('value', this.getTime());
        },
        getTime: function () {
            var d = new Date();
            return d.toLocaleTimeString();
        }
    })
This component is going to be attached to a new a-entity text we are going to add to the markers_start_json component. After the model plant element
//5. the 3D model of the plant
let modelplant = document.createElement('a-entity');
modelplant.setAttribute('id', 'modelplant_' + el.topic);
modelplant.setAttribute('gltf-model', '#plant_gltf');
modelplant.object3D.position.set(-0.2, 0, 0);
modelplant.object3D.scale.set(0.2, 0.2, 0.2);
modelplant.setAttribute('rotation', { x: 0, y: 180, z: 0 });
plantRT.appendChild(modelplant);

//6. Date.time component
let timenowText = document.createElement('a-text');
timenowText.setAttribute('id', 'timenowText_' + el.topic);
timenowText.setAttribute('timenow', '');
timenowText.setAttribute('value', 't');
timenowText.setAttribute('width', '3.2');
timenowText.setAttribute('anchor', 'left');
timenowText.object3D.position.set(0.35, 0.85, 0.02);
screen.appendChild(timenowText); //add the text to the screen
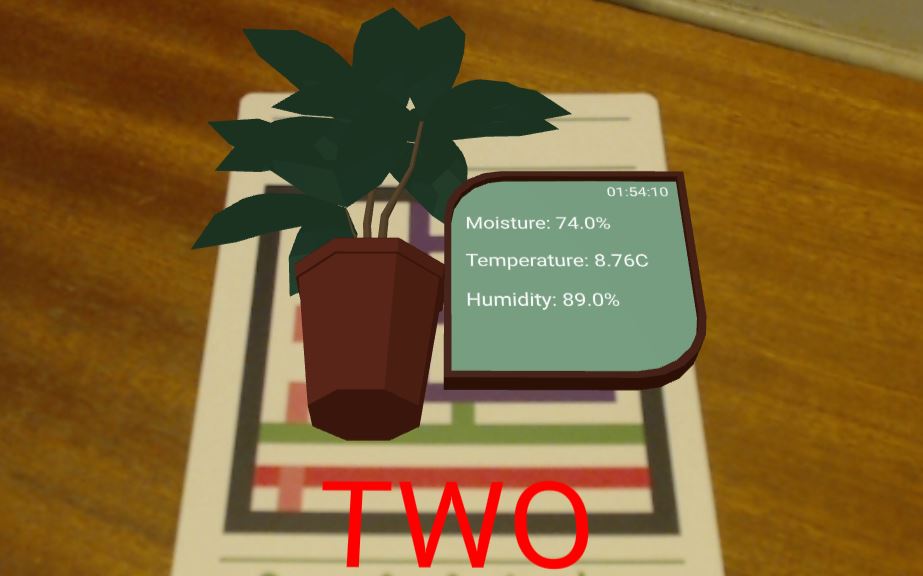
Let's now create the labels and placeholder texts use to visualise the MQTT plant sensor values. In the markers_start_json component add after the timenowText element
//7. Sensor Moisture
let moistureText = document.createElement('a-text');
moistureText.setAttribute('id', 'moisture-text_' + el.topic);
moistureText.setAttribute('value', 'Moisture:');
moistureText.setAttribute('width', '4');
moistureText.setAttribute('anchor', 'left');
moistureText.object3D.position.set(-0.9, 0.5, 0.02);
screen.appendChild(moistureText); //add the text to the screen

//8. Sensor Temperature
let temperatureText = document.createElement('a-text');
temperatureText.setAttribute('id', 'temperature-text_' + el.topic);
temperatureText.setAttribute('value', 'Temperature:');
temperatureText.setAttribute('width', '4');
temperatureText.setAttribute('anchor', 'left');
temperatureText.object3D.position.set(-0.9, 0.1, 0.02);
screen.appendChild(temperatureText); //add the text to the screen

//9. Sensor Humidity
let humidityText = document.createElement('a-text');
humidityText.setAttribute('id', 'humidity-text_' + el.topic);
humidityText.setAttribute('value', 'Humidity:');
humidityText.setAttribute('width', '4');
humidityText.setAttribute('anchor', 'left');
humidityText.object3D.position.set(-0.9, -0.3, 0.02);
screen.appendChild(humidityText); //add the text to the screen
Mqtt.js
Finally, we can add the MQTT.js library to connect the AR experience with the plant sensors
Add the mqtt.js library in the index.html, just after the Aframe and AR.js library
<!--MQTT.js-->
    <script type="text/javascript" src="https://unpkg.com/mqtt@2.18.3/dist/mqtt.min.js"></script>
We are going to update the registerevents by adding the MQTT client connection to the broker and two sub-function startMqtt (to subscribe to a specific topic) and stopMqtt (to disconnect from the broker) when the markers are detected or lost
//Listen to the markers
AFRAME.registerComponent('registerevents', {
init: function () {
  let clients=[]; //a list of all MQTT clients

  const handler=this.el;

  handler.addEventListener("markerFound", (event) => {
    var markerId = event.target.id;
    console.log('Marker Found: ', markerId);

    //Create a new client with ID of the marker
    let client = mqtt.connect('ws://BROKER.ADDRESS:8080',{clientId:event.target.id});

    clients.push(client); //add the client to the Array

    client.on('connect', function () {
      console.log('Connected');
    });
    client.on('error', function (error) {
      console.log(error);
    });

    this.startMqtt(event.target,client);
  });

  handler.addEventListener("markerLost", (event) => {
    var markerId = event.target.id;
    console.log('Marker Lost: ', markerId);
    //Find the client according to its ID
    let clientToStop = clients.find(client => client.options.clientId === event.target.id);
    //remove the client from the Array
    let index = clients.indexOf(clientToStop);
    clients.splice(index,1);

    //pass the client to stopMQTT to end the connection
    this.stopMqtt(clientToStop);
  });
},

startMqtt: function (marker,client) {
  if (!client.connected) {
    client.reconnect()}

  client.subscribe('TOPIC/TO/SUBSCRIBE/Moisture');
  client.subscribe('TOPIC/TO/SUBSCRIBE/Temperature');
  client.subscribe('TOPIC/TO/SUBSCRIBE/Humidity')

  client.on('message', function (topic, message) {
    //Called each time a message is received
    console.log('Received message:', topic, message.toString());

    if (topic.includes('inHumidity')) {
        marker.querySelector('#moisture-text_' + marker.id).setAttribute('value', 'Moisture: ' + message.toString() + '%');}

    if (topic.includes('appTemp_C')) { //temperature
        marker.querySelector('#temperature-text_' + marker.id).setAttribute('value', 'Temperature: ' + parseFloat(message.toString()).toFixed(2).toString() + '°C');}

    if (topic.includes('outHumidity')) { //humidity
        marker.querySelector('#humidity-text_' + marker.id).setAttribute('value', 'Humidity: ' + message.toString() + '%');}
  })
},

stopMqtt: function (client) {
  client.end(true);
  console.log('connection closed');
}
});