1. Welcome
Welcome to Workshop 10, the final workshop of Mobile Systems and Interaction. This workshop will guide you through setting up a GitHub Actions workflow to automatically build and upload an Android APK for your Flutter project. This workshop will be quite short as it will cover setting up your GitHub Action to build your app anytime you push the app to GitHub.
Introduction to GitHub Actions
As software developers, we are typically lazy and we want to automate as much of the boring work as possible. In software development, efficiency is key. GitHub Actions provide a powerful tool for automating tasks within your development workflow, specifically focusing on Continuous Integration and Delivery (CI/CD).
What are GitHub Actions?
GitHub Actions is a built-in automation engine within the GitHub platform. Actions allow us to define custom workflows that execute specific tasks in response to events within your repository. This could include anything from building and testing your code, to deploying it to a production environment. For Mobile Development this could include building an APK or iOS Application and publishing it to the App Stores or to a user base for testing.
What is Continuous Integration?
CI/CD is a software development practice that automates the process of building, testing, and deploying applications. Here's a breakdown:
- Continuous Integration (CI): With every code change, your code is automatically integrated with the main branch, tested, and built. This helps catch bugs early and prevents regressions (old bugs coming back later within our codebase).
- Continuous Delivery (CD): Once the code is built and tested successfully, it can be automatically deployed to a staging or production environment.
Benefits of using GitHub Actions for CI/CD
- Increased Efficiency: Automating repetitive tasks like building and testing frees up your time to focus on writing new features.
- Improved Quality: Automated testing helps catch bugs early in the development process, leading to higher quality software.
- Faster Releases: Automating deployment allows you to release new features more frequently.
- Collaboration: Workflows can be shared and reused across projects, promoting consistency and collaboration within a team.
This workshop will introduce you to setting up a basic GitHub Actions workflow for building an Android APK for your Flutter project. By leveraging this powerful tool, you can streamline your development process and ensure your app is built and tested consistently.
Creating a Workflow YML File
Within GitHub Actions, workflows are defined using YAML file (an acronym for "YAML ain't markup language"). YAML is a human-readable data serialization language, much like JSON but a different format, which is often used for configuration files. Think of it as a set of instructions written in a format that's easy for both humans and computers to understand. Make sure you watch for tabs and spaces as if you have the wrong indentation, your YAML file might not be valid.
YAML and its role in GitHub Actions workflows
YAML uses indentation and key-value pairs to represent data in a clear and organized way. This structure makes it easy to define the steps within your workflow and the specific actions each step should perform. The syntax of YAML is designed to be straightforward and intuitive. You don't need to be a programming expert to understand and write basic YAML code. YAML files can represent complex data structures, but for our purposes in this workshop, we'll focus on the fundamental concepts.
Example Flutter YAML File
Open the test application for this course MQTT Tool
You'll see a folder called .github click this folder and then open the workflows folder. Here you will find 2 YAML files called:
- build-android-apk.yml
- build-ios-ipa.yml
Within this workshop you will use the .github/workflows/flutter_build.yml within your own repository to automatically build your own app.
Copy the text from this file as you'll need it in the next step.
Next Steps
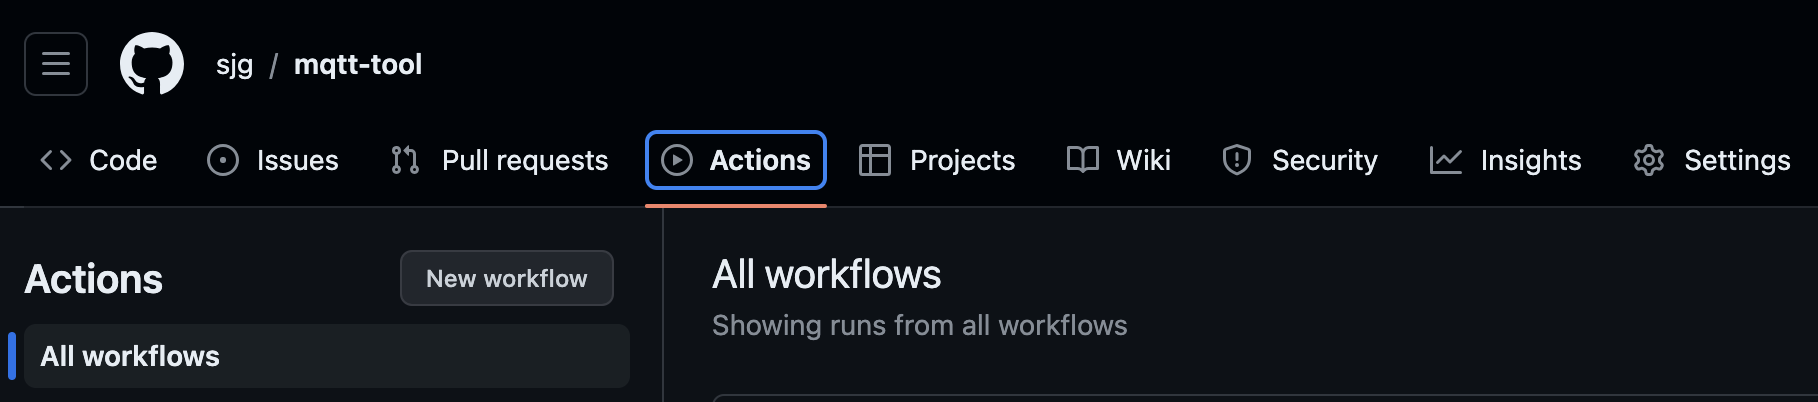
Open up your own Flutter repository and click the Actions Button in the top menubar and then click New workflow
Finally, click on the Skip this and set up a workflow yourself link to create our own workflow.
Breakdown of the Workflow File
The workflow action file acts as a blueprint using YAML syntax to define the steps involved in building your Flutter app's Android APK. Let's break it down into its key components:
Name Section:
name: Flutter Build and Upload Android APK
This line defines a human-readable name for your workflow, like "Flutter Build" in our example. It helps you easily identify the workflow's purpose within the Actions tab.
On Section:
on: workflow_dispatch
  #push:
  #  branches: [ main ]
This section specifies the events that trigger the workflow execution. In our example, we will trigger the action manually but later we show you how to run the workflow whenever you push code changes to your repository. You can configure it to listen for other events like creating pull requests or releasing new versions.
Job Section:
jobs:
  build:
    runs-on: ubuntu-latest
    permissions:
      contents: write
This section defines one or more jobs within your workflow. Each job represents a specific set of tasks to be executed. Our example has a single job named "build" that handles the entire build process.
The runs-on line specifies the virtual environment where the job's tasks will run. We'll use ubuntu-latest, indicating a latest version Ubuntu virtual machine provided by GitHub Actions.
Steps Section:
This is the most important section which defines a sequence of steps to be executed within the job. Each step is a specific action performed by the workflow. Here, you'll see steps for setting up the environment (installing Java, Flutter), fetching dependencies, building the APK, and uploading the apk to github as setting it up as a release in your GitHub repository.
steps:
      - name: Checkout repository
        uses: actions/checkout@v3

      - name: Set up JDK
        uses: actions/setup-java@v3
        with:
          java-version: '17'
          distribution: microsoft

      - name: Install yq
        uses: mikefarah/yq@v4.42.1

      - name: Get pubspec version
        id: get_flutter_app_version
        run: |
          VERSION=$(yq .version | grep -Eo '[0-9]+\.[0-9]+\.[0-9]+' pubspec.yaml | head -n 1)
          echo "TAG_VERSION=$VERSION" >> $GITHUB_OUTPUT

      - name: Create git tag
        run: |
          git tag "v${{ steps.get_flutter_app_version.outputs.TAG_VERSION }}"

      - name: Install Flutter
        uses: subosito/flutter-action@v2
        with:
          channel: 'main'

      - name: Get Flutter dependencies
        run: flutter pub get

      - name: Build APK Release
        run: flutter build apk --release

      - name: Build an AppBundle
        run: flutter build appbundle --release

      - name: Save APK to Artifacts
        uses: actions/upload-artifact@v4
        with:
          name: flutter-apk
          path: build/app/outputs/flutter-apk/*.apk

      - name: Save APPBUNDLE to Artifacts
        uses: actions/upload-artifact@v4
        with:
          name: flutter-appbundle
          path: build/app/outputs/bundle/release/*.aab

      - name: Create Github Release
        uses: ncipollo/release-action@v1
        with:
          artifacts: "build/app/outputs/bundle/release/*.aab,build/app/outputs/flutter-apk/*.apk"
          tag: "v${{ steps.get_flutter_app_version.outputs.TAG_VERSION }}"
          # token: ${{ secrets.PERSONAL_RELEASE_TOKEN }}
Keeping it Secret: Using Secrets with GitHub Actions
While our workshop focuses on building the Android APK for your Flutter app, there might be instances where you need to use sensitive information within your workflow, like API keys or access tokens. This is where GitHub Actions Secrets come in!
What are Secrets?
Secrets are a secure way to store sensitive data like passwords or API keys within your GitHub repository, organization, or environment. They are encrypted at rest and transit, ensuring they are never exposed in plain text within your workflow logs.
We won't be using secrets in this particular workshop for simplicity. However, you can reference secrets within your workflow steps using the syntax ${{ secrets.<SECRET_NAME> }}.
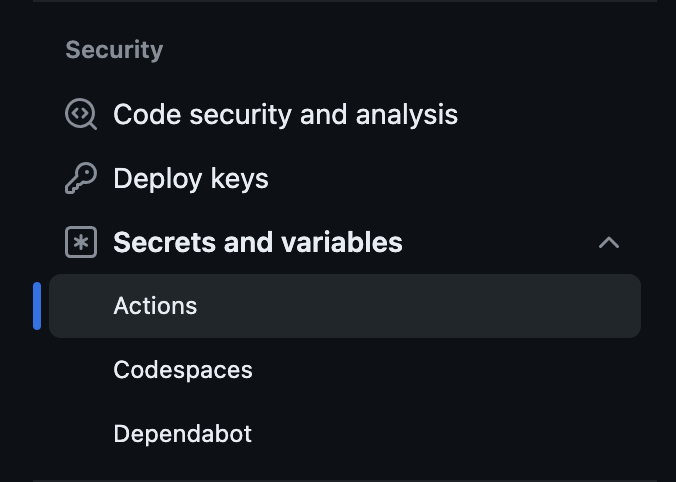
Secrets can be added from your repository's Setting menu under Secrets and Actions.
You'll see lots of secrets being used in the iOS Example if you need to use them in your own workflows.
Triggering the workflow
Let's now trigger the workflow:
- Go to your GitHub repository and click on the Actions tab.
- You'll see a list of all your workflows within the Actions tab. Locate the workflow named "Flutter Build and Upload Android APK" (or whatever name you assigned).
- Check for a "Run workflow" button. Press this button to manually start the workflow execution.
Your workflow should now be running and when finished you'll have an APK as a release in your repository which you can download and run on your phone.
This workflow won't run automatically every time. We want it to be helpful, not annoying!
Making the Workflow Trigger Automatically
We can configure it to trigger based on specific events in your repository. If we edit our workflow and replace the following lines:
on:
  push:
    branches: [ main ]
the workflow will start whenever you push code changes to the main branch. This ensures your app gets built and tested automatically after each update, keeping your development process smooth and efficient.
There are many other events you can use to trigger workflows, like opening a pull request or creating a new release tag. Explore these options further as you get more comfortable with GitHub Actions.
Cost Warning
Using GitHub Actions for your project won't cost you anything if your code is public. There's a free plan for private projects too, but it has a time limit. Think of it like free minutes on your a mobile phone plan. If you go over that limit, there are small fees based on how long your workflows take to run. To keep things affordable, you can use your own computer to run the actions (for free!), or just be mindful of how long your workflows take.
Conclusion
By setting up a GitHub Actions workflow, you can automate the build and deployment process for your Flutter app, saving you time and effort.
Now that you've setup your first action why not go and explore the library of available GitHub Actions to further enhance your CI/CD pipeline for your other GitHub projects.
The GitHub Marketplace has many more more workflow steps that will be useful for your software development journey in the future. These ones are handy for Mobile Development in the future
- Upload Android Release to Play Store: https://github.com/marketplace/actions/upload-android-release-to-play-store
- Upload Android App Bundle to Google Play Store: https://github.com/marketplace/actions/upload-android-app-bundle-to-google-play-store
- Publish iOS Application to Appled Appstore: https://github.com/marketplace/actions/publish-ios-application-to-appstore
- Firebase Test Lab Action: https://github.com/marketplace/actions/firebase-test-lab-action
- Firebase App Distribution: https://github.com/marketplace/actions/firebase-app-distribution
Also you can have a look at the official documentation for more advanced configuration options for GitHub Actions here: https://docs.github.com/en/actions/using-workflows/workflow-syntax-for-github-actions